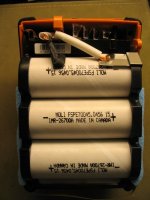
Hot off the charger, with the multimeter, all of my packs are reading 28v except for one, and it's only giving 27v, and that's with either testing on the cables I installed, or using the prongs in the battery. So is the battery bad? I'm ending the charging cycle as soon as the charger light is solid green.
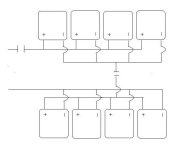
I put one of my series of batteries on the charger after my rided today, and it took them about 30 minutes to charge up. After that, I Put the second series on, and they charged up to solid green in less than 5 seconds, which is a solid indicator that they weren't being used. So I'm thinking about ripping the battery cases open again. Gonna have to remove the epoxy I put on the holes I made. Hope it's not too hard. Anyways, if I opt out of using andersons to connect the batteries together, can I permanently solder 3 in series, 6 in parallel, and still be able to charge them on the stock chargers? What I was thinking about doing was removing the cases, putting the batteries bottom to bottom, side to side, and only having Andersons at the lead cables that go to the Controller Andersons. I did up a quick picture. If I were to do this, would I be able to charge the batteries on the stock chargers, leaving them in series, or do they have to be removed from series before they can be charged? The idea is to charge one side or the packs, then flip and charge the other side. Viable? Here's the pic...

I put one of my series of batteries on the charger after my rided today, and it took them about 30 minutes to charge up. After that, I Put the second series on, and they charged up to solid green in less than 5 seconds, which is a solid indicator that they weren't being used. So I'm thinking about ripping the battery cases open again. Gonna have to remove the epoxy I put on the holes I made. Hope it's not too hard. Anyways, if I opt out of using andersons to connect the batteries together, can I permanently solder 3 in series, 6 in parallel, and still be able to charge them on the stock chargers? What I was thinking about doing was removing the cases, putting the batteries bottom to bottom, side to side, and only having Andersons at the lead cables that go to the Controller Andersons. I did up a quick picture. If I were to do this, would I be able to charge the batteries on the stock chargers, leaving them in series, or do they have to be removed from series before they can be charged? The idea is to charge one side or the packs, then flip and charge the other side. Viable? Here's the pic...
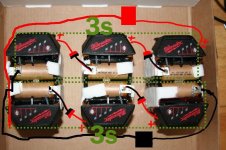
 How do I test each cell, since they're enclosed in foam and plastic?