Some Guidance on Building Lithium Packs

freskhy

1 µW
Joined
Jul 14, 2023
Messages
3
Location
Portugal
Hello,
Fantastic info in the forum but I am a little bit "off the road" and would need some guidance :)
I need to repair a small lithium pack from my son's mini e-scooter but soon I will have the same problem. I tried to find help locally but the price everyone asks it's crazy, at least 150€ just to see the battery problem; if some cell needs to be replaced it's an extra, if it's the BMS another extra, etc. Since I have some knowledge and access to some tools and machinery I decided to repair/make packs by myself and help other people as well. I found out that many people have their e-scooters at home just because they can't pay for the repair and in some cases, it's 1 burnt cell or 1 wire that went loose, I could help some of these people as well.
I am trying to figure out the best spot-welding machine for my case if I can get some suggestions... Those kits that look cheap won't be cheap because I don't have 3S Lipo cells or a balancer and a decent Lipo + Balancer is above 100€ locally. Maybe the solution could be a standalone welding machine?
Thank's in advance!
 
Kweld can use a 12V car battery as can the Malectrics spot welder. There are many battery powered spot welders That work with a 12V car battery. Kweld and Malectrics spot welders both work well. I own both. I also tried a couple other spot welders with so so results.
There is a clone of the malectrics on AliExpress.
later floyd
 
Go with the K-weld they work great and the guy that designed it is solid.
Got 2 of em.
I use the lipo battery for power and get about 200 welds before having to recharge.
Every weld is perfect.
 
So the best solution is to get the k-weld, a lipo and lipo charger? Or car battery and charger?
Wouldn’t be cheaper to buy those big units with all inclusive?
Chargers, battery’s, machine we are looking around 200$
 
For a one time battery repair, the cheap gear will work. If you're making batteries, you want uniform results. You can't have welds lifting off. You don't want to blow holes in your cells. You need the ability to lay down .20 mm nickel, That means a good welder. I've thrown away enough cheap welders that I could have bought a good one,

A 3S charger and battery gives better welds with my cheap welders than a 12V car battery, so I would suggest the 3S option and a Kweld. I've read that the 110-240VAC standalones don't have enough power to go above .10-13 mm nickel,.

I would get a good 1S-6S hobby charger to recharge the 3S. The 3S instructions tell you to discharge to 50% for storage, so you need the charger to do that,. LEave them at higher charge and they will puff up. You will find it useful for charging groups in your packs.

You'll also want a multi-charger that can handle 18650 and 21700 cells. Another tool is a meter for measuring IR, like the YR-1035. which you can use to assess if new cells are new, or if the old ones are worth re-using (not often), A load tester, like the DL-24 will tell you how many ah your finished battery really has, and is also useful for bring you pack down to 30% charge for storage, Pick up a clamp-on DC ammeter too. I've had one for 30 year and it's quite useful,

Finally, a liability waiver that your customers must sign,
Thanks for your complete answer, can you suggest a multi-charger? My e-scooter has 21700 cells so I will need that as well soon.
Maybe if you could suggest the list with aliexpress links for example would be amazing.
Right now i need to repair the pack from my vacuum robot, vertical vacuum, son's e-scooter, some power banks and 2 friends with problems with the e-scooter as well.
Thank you again
 
For a one time battery repair, the cheap gear will work. If you're making batteries, you want uniform results. You can't have welds lifting off. You don't want to blow holes in your cells. You need the ability to lay down .20 mm nickel, That means a good welder.
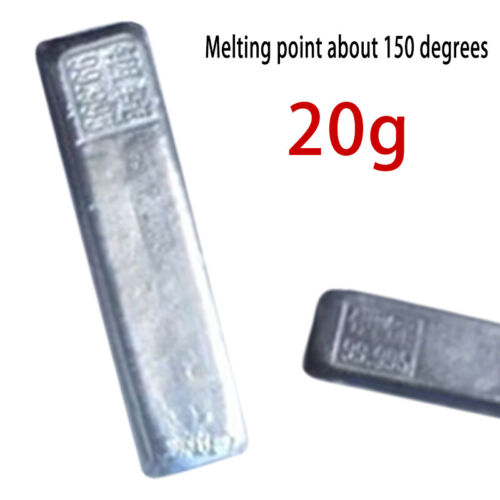
For one-off repairs or cell replacements, I think low melting point solder is a good option. I use pure indium (MP 300F) and indium-bismuth alloy (MP 165F) for stuff like this.


For occassional repair or build i think it's OK to just solder - you can get more reliable connections this way than when using cheap / random spot welder. But same as with any other technique - when soldering it's important what materials and tools you use.
What works great for me as a connector is flat copper ribbon (solder wick), 4 or 5mm wide, and a soldering iron with tip big enough to melt the tin instantly. The copper ribbon is easy to solder quickly and makes flat and smooth connections. You start with tinning the battery at both poles where the ribbon will attach, then place the ribbon on top and heat - the ribbon soaks up the tin and attaches very reliably.
One warning here: when soldering, never use nickel strips for connections. Trying to solder a nickel strip to a positive cell terminal can short the battery and cause fire.
 
What works great for me as a connector is flat copper ribbon (solder wick)

Interesting... I make packs by soldering because it's infrequent. I've always added an extra insulating ring around the positive anode before soldering. Never thought about copper solder wicking instead of the nickle lattice. I may give that a try. Thanks for another option.

...and yes soldering can work well. Spot welding isn't mandatory. But, procedure is everything when soldering. Cleaning, tinning, heat settings, etc.
 
yep, i'm using these insulation rings too. And plastic holders. And in case of some cells it's helpful to wipe the contact area with soldering acid so the solder sticks immediately without too much heating.
But nickel strips - no no, i had two battery accidents because the solder did not wet the strip and flowed between battery terminals instead. Instant fire.
 
the solder did not wet the strip
FWIW - I lightly polish both sides of the soldering area on the nickel strip with a scotch brite wheel, then clean it with acetone or lacquer thinner then wipe with soldering flux using a Q-tip. Haven't had any issues since adopting this procedure. Works for me anyway.... I do the same on the battery ends before tinning, let fully cool then solder on the strip. The plastic holders are a huge help.
 
Back
Top