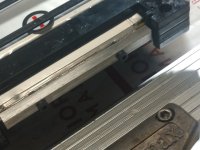
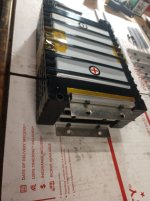
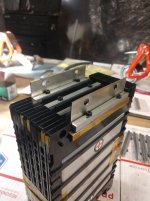
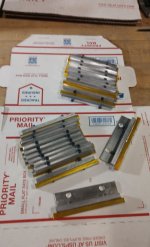
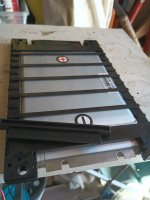
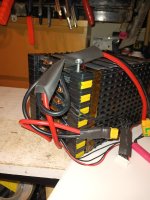
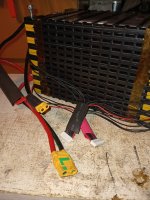
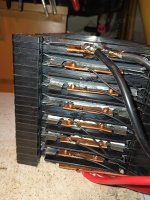
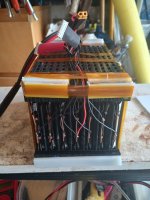
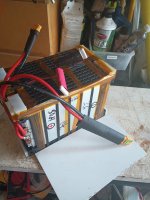
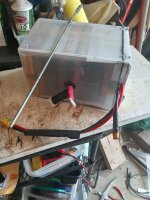
Spim08hp 3.7v 8ah 200amp cell build

AltLiving said:
Has anyone else had an issue with these cells failing (seemingly random)? I think my issue may have come from not having all of my 22s pack in the holders, as I have not had issues with any other packs I have made with these cells. I am using a 200 amp ANT bms so I know they are not getting overcharged or over discharged(I never charge them past 4.1 volts per cell or discharge the below 2.6 volts). And I live in the states in the southeast, so they haven't ever been cold and the bms keeps them from getting hot. I have had 6 cells fail in the last 3 weeks. No visible damage to the cells(like punctures or crushed cells or tabs blown apart lol). Cells are kapton taped for compression, and to keep the tabs from shorting. They are then surrounded by a layer of foam to prevent any impact or shorting inside my bomber frame. Any ideas, because I am running out of spare cells and ideas myself? Any help would be greatly appreciated. Gonna remove all the cells holders today and somehow install the pack to a secure position in the frame....somehow. still coming up with that plan.


No. I have never had a cell fail or drop below .1V balance. I've bult 3 12S packs and one 3S4P pack.
Your cells are failing because you discharge too low. Is your BMS set for 3.2V LiFePo4 (Lithium Iron Phosphate) discharge cutoff??
FYI 2.6V IS WAY TOO LOW and will damage cells. Never go below 3.0V. I try not to discharge below 3.3V. And like you, I charge to 4.1V.
 
Thank you guys for the speedy replies. I will double check my BMS and reset the parameters to the suggested settings, I did not realize that 2.6 volts was way to low as the datasheet for these cells says 2.55 volts as the cutoff. Thank you for this info. :bigthumb:
 
Here are mine.

I am selling them too. If anyone is interested. 1-100, just pm me.

As many as you may need.

On another note, what do you guys think these are worth? 1$ ea.?

2$ea?

1.50$ ea.?

Regardless,, Made in the USA.

They stack, tessellate, in module, and or can be used in a parallel application, or series, ( holes correct diameter for that.. ) and are.. strong.
 

Attachments

  • SPIMclamp4.jpg
    SPIMclamp4.jpg
    244.8 KB · Views: 480
  • SPIMclamp3.jpg
    SPIMclamp3.jpg
    141.2 KB · Views: 481
  • SPIMclamp2.jpg
    SPIMclamp2.jpg
    168 KB · Views: 481
  • SPIMclamp1.jpg
    SPIMclamp1.jpg
    126.6 KB · Views: 481
Starting using my 20s1p and get 7.45ah then it goes off the hill @ 40amp or less. No BMS just 4-5s balance wires . Only use the 18.00 8s balance meter. I do have a una9 plus + thru the balance wire charger but haven't used it yet. This battery is bolted together with plexiglass in between. Don't use plexiglass too brittle. Big heavy able to produce many amps a weird size for a bicycle frame at 20s. But for $125. I got a new box of cells 36 and 4 used for 186.00 usd.
Those cells are worth at least $2 each dog.
A fully charge 3s pack should start most small cars.
 
AltLiving said:
I did not realize that 2.6 volts was way to low as the datasheet for these cells says 2.55 volts as the cutoff

Same as at the top end, the maker data sheet definitions of 100% SoC is harmful to longevity.

Most of the specifications as laid out by cell manufacturer in the cells' data sheets are "Do Not Approach" absolute maximum / minimum limits of acceptable ranges only, not recommendations intended for normal functioning, operating conditions for day-to-day cycling.

These are "stress ratings", to which the cells can only be subjected for short times, without causing irreparable damage.

Frequent exposure to such stressful conditions, or for extended periods, can adversely affect cell reliability and will greatly reduce lifespan.

Same with all electronic components, controllers, chargers, fuses etc.

In daily usage stay far from "the edge of the cliff" and you'll get much better reliability and value from your purchases.

_____
And, as a separate issue, the causal relationship between keeping your average DoD% lower in order to double / triple cycle lifespan is widely known, extremely well documented, for every chemistry I've ever looked at.

Only getting a few hundred cycles when you could get well over a thousand

may not count as "abuse" or "damage" to some, but there isn't a sharp black and white line there. . .


I finally got the balance charger on this 20s 1p pack and found another .06 ah of power.. I'm going to use pullin-gs copper rivet method as drilling all those holes in the plexiglass and aluminum blocks and cells and match them all up for the through rod.
And I will use a wide piece a copper to fold over the cell tabs for ez assembly.. it's just a weird battery size at 20s I'm thinking 14s will be more manageable for a bike.
Going to go down and make the copper clips for the rivets to hold onto I just don't want to buy too short or too long of rivets.
 
I'm going to build another battery 14s and use copper rivets can I just use copper rivets or should I make cooper folded tabs and rivett through the copper clip . I'm only going to use it at 60 amps or less.
 
999zip999 said:
I'm going to build another battery 14s and use copper rivets can I just use copper rivets or should I make cooper folded tabs and rivett through the copper clip . I'm only going to use it at 60 amps or less.

I would not use the rivet alone: Fail point ( creation) and cheaper than ( a better) construction. Just the tab offers bvery little mechanical support and teh bus may fuse under high load ( even though you say just 60A)

I got a CNC machine to cut the bars in situ. I have a jig that holds 10 sets of bars to drill... Zero the head, hit "run" and the machine drills 40 holes in 20 pieces of metal exactly where I want. Lol. Its cool. I aint ever fooling with a drill press again. I band saw the bars, set in jig, clamp, hit Run. Done.

I did hate that drilling symetrical holes by hand.

have a ton of demand. I could make and sell, more than I could make in a day, alone. Probally sell more than I could make in a week, @ 2$ ea.
 
I have some thin copper and think to make folding tabs over a cardboard and drill four rivet holes as the tabs are wide and have two u shape cuts or just two rivets and cut the access ears off the tabs so they don't flup around and two least rivets.
 
I'm doing it with homemade folded copper and copper rivets and because I got them new they gave me that bar that fits between the tabs when you're putting them in series or you want to separate them I'm just going to glue them in as I go. They've been sitting for over a year and they're still at 3.6 volts. Making holes with a three hole paper punch but I have to take the black plastic retainers off and get to the bare cells they're not actually glued to any extent.
 
Ok I got it together rivets oversized silicone wire is the only one I had the xt90 has that resistor in it you could tell with that green stripe it's for my cyc pro 2 gen 2 with that s***** Bluetooth asi 855 controller.
 

Attachments

  • IMG_20230520_194301107.jpg
    IMG_20230520_194301107.jpg
    2.4 MB · Views: 1
  • IMG_20230520_194238594.jpg
    IMG_20230520_194238594.jpg
    1.6 MB · Views: 1
  • IMG_20230520_194413423.jpg
    IMG_20230520_194413423.jpg
    2 MB · Views: 1
I'm sorry for the battery p*** she had to take her clothes off but I will wrap her I will do it dog man style I have an old storage container using the flat plastic to wrap it around.
 
This is going to be his new home I was trying to use a lid off a container but I couldn't find a big enough lid and it was too hard to bend that stuff. So I'm going to use this plastic container cut both corners out and flip it over and then duct tape it for a strong battery.
 
I want a hot glue for production a piece of plastic can I put hot glue directly onto the tabs that are connected in series ? Do I have to watch out for hot glue ?
As you see the tabs are slightly recessed from the top and I want to put a piece of plastic on top to separate the rest and add stability to the tabs separation.
 

Attachments

  • IMG_20230520_194301107.jpg
    IMG_20230520_194301107.jpg
    2.4 MB · Views: 0
All taped up and ready to go into a container I found
 

Attachments

  • IMG_20230522_135555712_HDR.jpg
    IMG_20230522_135555712_HDR.jpg
    1.3 MB · Views: 0
  • IMG_20230522_135540598.jpg
    IMG_20230522_135540598.jpg
    1.6 MB · Views: 1
  • IMG_20230522_135531540.jpg
    IMG_20230522_135531540.jpg
    1.6 MB · Views: 1
Here's the box I made I want to have to cut the white one down but I couldn't find a dog man lid loan up to bend it up. Plus it didn't like my first heat gun the second heat gun was a torture test and then I found my regular heat gun I haven't got to use that one yet.
I got a boxed up I was going to run those rods through with washers on it leave a little long so I can bolt it to my top tube and then I'm going to duct tape it yes duct tape all over
 

Attachments

  • IMG_20230522_140002933.jpg
    IMG_20230522_140002933.jpg
    1.3 MB · Views: 1
  • IMG_20230522_153143069_HDR.jpg
    IMG_20230522_153143069_HDR.jpg
    1.5 MB · Views: 1
Last edited:
Back
Top