
You are using an out of date browser. It may not display this or other websites correctly.
You should upgrade or use an alternative browser.
You should upgrade or use an alternative browser.
Suzuki GSX-R e899 K2
- Thread starter Rovi
- Start date
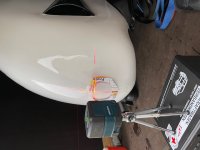

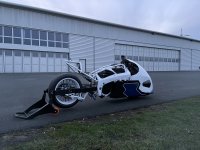
A little bit of bad news …
First contact with the concrete!
It happened yesterday evening at Bamberg start/landing field.
I was still standing and looking for the sports mode switch but regarding the deep darkness and no lighting I couldn´t see him.
So, it came to the situation that I touched the acceleration switch and the bike pushed forward. Spinning wheel gave him a left direction for short.
I tried to hold it, but the bike felt on the left side.
After first check everything looks ok, but it wasn´t at the end.
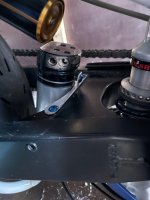
I continue with the start. Another problem was that I the chain was to lose.
Therefore, I knew that an aggressive start was not possible.
I decided to start smooth and continue with acceleration.
But also, in this situation I got spinning wheel and drifted a little bit to left side.
The drive was to test the new headlight, but I was not able to switch the light brighter via Bluetooth switch.
I think the converter frequency will block the Bluetooth frequency.
After several meters I felt a hit to my left breast side and first I thought it was something like a small bird (there were several on this field).
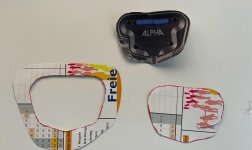
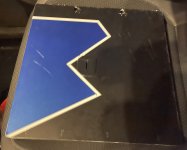
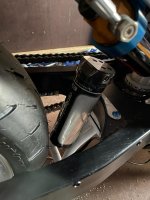
But when I came back to the starting point, I figured out that I lost my battery cover plate ☹,
Which we can´t found in the night with our small torch lights. Story continues regarding the cover plate and other stuff. Have to check now the left battery box itself …
Btw. the controller do not switch off during acceleration

First contact with the concrete!
It happened yesterday evening at Bamberg start/landing field.
I was still standing and looking for the sports mode switch but regarding the deep darkness and no lighting I couldn´t see him.
So, it came to the situation that I touched the acceleration switch and the bike pushed forward. Spinning wheel gave him a left direction for short.
I tried to hold it, but the bike felt on the left side.
After first check everything looks ok, but it wasn´t at the end.
I continue with the start. Another problem was that I the chain was to lose.
Therefore, I knew that an aggressive start was not possible.
I decided to start smooth and continue with acceleration.
But also, in this situation I got spinning wheel and drifted a little bit to left side.
The drive was to test the new headlight, but I was not able to switch the light brighter via Bluetooth switch.
I think the converter frequency will block the Bluetooth frequency.
After several meters I felt a hit to my left breast side and first I thought it was something like a small bird (there were several on this field).
But when I came back to the starting point, I figured out that I lost my battery cover plate ☹,
Which we can´t found in the night with our small torch lights. Story continues regarding the cover plate and other stuff. Have to check now the left battery box itself …
Btw. the controller do not switch off during acceleration
Attachments
liveforphysics
100 TW
Glad that you're not injured my friend!!
Sounds like the bike is going to rip super hard when you get a clean pass in!
Sounds like the bike is going to rip super hard when you get a clean pass in!
Thanks Luke!
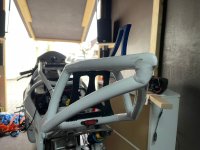
Well I already shorten the wheelbase (-4 inch) and do not higher the amps (still at 425A). Could be now the combination of to much air in the brand new wheel (2bar) and the reason of +10 teeth on the rear sprocket. Next step will be to lower the pressure and for sure to adjust the chain correctly and see what will happen.
So they found the battery cover next day on the landing field. That was not so good and I will block now for a while to drive and test there. So maybe in half a year I can continue there again!
In the meanwhile I can only test on the events I will join.
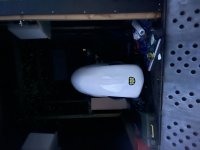
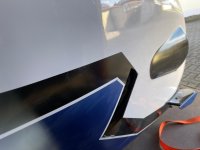
Ok, there are some scratches now on the cover plate and some cracks but Nothing was really splitted!
I will try to repair it
Well I already shorten the wheelbase (-4 inch) and do not higher the amps (still at 425A). Could be now the combination of to much air in the brand new wheel (2bar) and the reason of +10 teeth on the rear sprocket. Next step will be to lower the pressure and for sure to adjust the chain correctly and see what will happen.
So they found the battery cover next day on the landing field. That was not so good and I will block now for a while to drive and test there. So maybe in half a year I can continue there again!
In the meanwhile I can only test on the events I will join.
Ok, there are some scratches now on the cover plate and some cracks but Nothing was really splitted!
I will try to repair it
Attachments
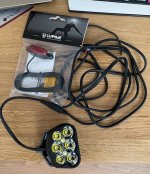
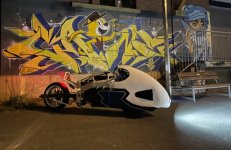
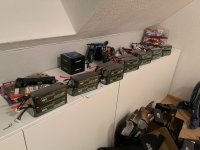
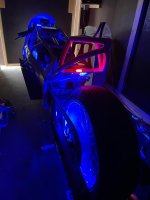
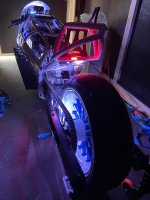
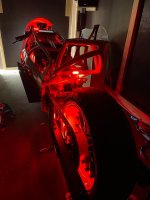
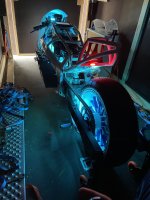
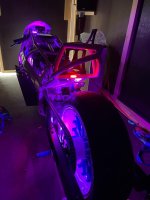
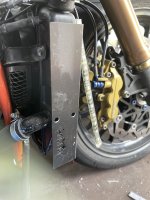
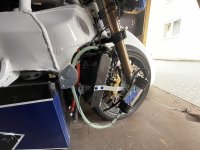
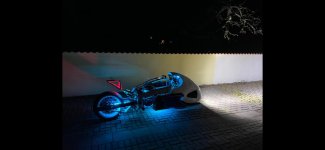
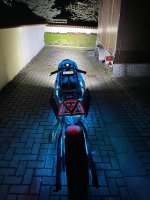
Add now some additional lights
Attachments
-
 3AFACF27-1453-4904-BB07-1F400A8860E1.jpeg64.5 KB · Views: 6
 -
 547E3E27-E758-432D-A6E5-2F7C22BE0F34.jpeg94.3 KB · Views: 7
 -
 E035C32F-F910-4BB9-AD1D-0E96F3E16089.jpeg73.2 KB · Views: 3
 -
 BBCFFD62-4921-4996-A8E3-05B70C4C39F7.jpeg88.7 KB · Views: 4
 -
 C5EB8C9F-97F4-4210-9D2A-EF7990B37518.jpeg1.5 MB · Views: 3
 -
 FB053D56-A00D-412C-8FA6-9116CF31BF5D.jpeg70 KB · Views: 7
Grautuefel
100 W
- Joined
- May 11, 2016
- Messages
- 104
Some? That things has so many lights I'm surprised you have enough battery to make it to the end of the strip! (just kidding, might be a litte envious, wife wants some glow on her bike)
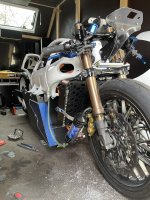
Despite the bits falling, there is some pretty neat fabrication on this thing, I've seen some team builds that aren't as neat. Impressive if you're soloing this
Despite the bits falling, there is some pretty neat fabrication on this thing, I've seen some team builds that aren't as neat. Impressive if you're soloing this


SlowCo
1 MW
Looking good!Ready for take off
When is the next event you'll be able to test it at?
Thanks, in two weeks I will continue
I already lower the pressure to 0,75 bar in the rear wheel to get hopefully more grip. So maybe I will rise up the voltage to 600V to try to compensate the greater rear sprocket (45 teeth) to reach 200 kph for sure
I already lower the pressure to 0,75 bar in the rear wheel to get hopefully more grip. So maybe I will rise up the voltage to 600V to try to compensate the greater rear sprocket (45 teeth) to reach 200 kph for sure
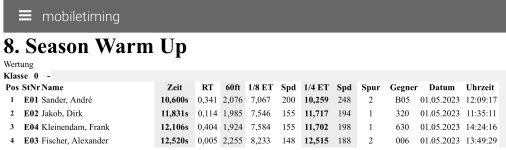
what shall I say … It’s getting faster and faster!
I only made two runs. 1st one on last Sunday and 2nd on on last Monday.
1st: 521V DC, 450A
I started slowly, because I changed to many things at once: 45er rear sprocket, shorter wheelbase (-4“).
So the 60 feet was very slow with 2,2 seconds.
In normal case I calculated 40-50kph less topspeed regarding the change of rear sprocket (-10 teeth) but maybe 40% of field weakening helped!
At 500V (last year autumn) I reached 225kph (425A). And now I reached 217kph at finish line. With a time of 11,68 seconds.
After the run I decided to recharge the batteries and implement another 8 6S packs. So in the evening I reached 630V DC and I also increase the current to 500A, the critical one the controller switched off last year.
I was a little bit excited before the run that I switched off the cam and before I started I thought that I switched the cam on again. But that’s another story
Again my competitor was my brother with my old GSRX 1000 K2/K3.
I did a burnout and lost a lot of rear wheel rubber . The point is that I can change between two driving modes (Normal/Sport: 150A/500A) and I will drive in torque mode. With 150A it’s not possible to get the wheel spinning and at 500A it will increase his speed very, very fast!
Ok but let’s come back now to the run.
Again I started carefully, to avoid spinning wheel or backflip). So my brother came out very good and made some meters …
Regarding his switching problems from 2nd to 3rd I think and the point that I fully open the acceleration switch after few seconds I buzz at him and it was the first time I feel the acceleration like with my old combustion bike and maybe a little bit more!
And there was no feeling that the acceleration will stop after a while.
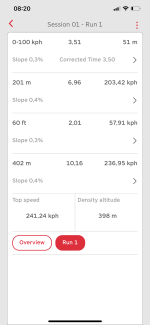
The complete time (reaction and driving) was stoped by 10,600 seconds. And the real track time was given with 10,2 seconds by 248kph!
But I also counter checked it with my measured values.
Time seems to be equal but topspeed was lower (236 kph).
Nevertheless I am very, very happy with this result. I am pretty sure that it is possible now with this setup to go below 10 seconds but I need time and a bit more practice to get it solved!
And the most important thing is that I did not lost anything (battery, motor, controller etc.)
Btw. I made the first place in the category (electric vehicles) But it was an unfair comparison (regarding weight/power ratio) but the cars have electrical helpers which I don’t have!
I only made two runs. 1st one on last Sunday and 2nd on on last Monday.
1st: 521V DC, 450A
I started slowly, because I changed to many things at once: 45er rear sprocket, shorter wheelbase (-4“).
So the 60 feet was very slow with 2,2 seconds.
In normal case I calculated 40-50kph less topspeed regarding the change of rear sprocket (-10 teeth) but maybe 40% of field weakening helped!
At 500V (last year autumn) I reached 225kph (425A). And now I reached 217kph at finish line. With a time of 11,68 seconds.
After the run I decided to recharge the batteries and implement another 8 6S packs. So in the evening I reached 630V DC and I also increase the current to 500A, the critical one the controller switched off last year.
I was a little bit excited before the run that I switched off the cam and before I started I thought that I switched the cam on again. But that’s another story
Again my competitor was my brother with my old GSRX 1000 K2/K3.
I did a burnout and lost a lot of rear wheel rubber
. The point is that I can change between two driving modes (Normal/Sport: 150A/500A) and I will drive in torque mode. With 150A it’s not possible to get the wheel spinning and at 500A it will increase his speed very, very fast!Ok but let’s come back now to the run.
Again I started carefully, to avoid spinning wheel or backflip
). So my brother came out very good and made some meters …Regarding his switching problems from 2nd to 3rd I think and the point that I fully open the acceleration switch after few seconds I buzz at him and it was the first time I feel the acceleration like with my old combustion bike and maybe a little bit more!
And there was no feeling that the acceleration will stop after a while.
The complete time (reaction and driving) was stoped by 10,600 seconds. And the real track time was given with 10,2 seconds by 248kph!
But I also counter checked it with my measured values.
Time seems to be equal but topspeed was lower (236 kph).
Nevertheless I am very, very happy with this result. I am pretty sure that it is possible now with this setup to go below 10 seconds but I need time and a bit more practice to get it solved!
And the most important thing is that I did not lost anything (battery, motor, controller etc.)
Btw. I made the first place in the category (electric vehicles
) But it was an unfair comparison (regarding weight/power ratio) but the cars have electrical helpers which I don’t have!Attachments
Last edited:
SlowCo
1 MW
Congratulation!
Great result. Must feel good to finally have a very good run with nothing breaking down. Hope you'll be able to post some videos of future runs.
Great result. Must feel good to finally have a very good run with nothing breaking down. Hope you'll be able to post some videos of future runs.
SlowCo
1 MW
Yes, working for money takes away too much time from the EV-hobby! 
Similar threads
- Replies
- 2
- Views
- 2,114