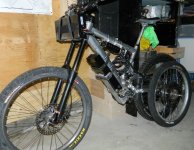
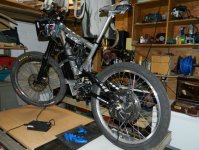
----WAYNE'S GIANT DH----video now on page 4

waynebergman said:
Not sure if I am just chicken or if its out of respect for the person that made the frame. The more I look at this frame I feel it is a piece of metal art, Giant has done there homework on the design and building of this frame for sure...
You're just chicken. :D

Come on, this is an old frame and it is not hand made piece of art. It was a good design for a single pivot, but it is the Faith that was Giant's winner design that year.
Don't be afraid to mod it to suit your build, for it has the potential to make a wonderfull E-ride, and you will never go back to riding it as a DH bicycle.
 
Wayne, I agree with you about not wanting to cut the dropouts. These frames are a piece of art! I also like the choice of going back to complete stock for actual DH use/selling etc
 
crusoe said:
Wayne, I agree with you about not wanting to cut the dropouts. These frames are a piece of art! I also like the choice of going back to complete stock for actual DH use/selling etc
I have cut in those frames to build Ebikes.


p4pb3131167.jpg


cd1e301253d1c1a602543aa96a852faf.png


You can cry to Art destruction, but even if those frames are true multi World Cup winners, a manufactured object is NOT art.
Then, it would not be of any interest to return them to their original state of DH racers, for there are better and faster frames available now, 2 years after their production. To a DH rider, a Giant 2003 frame is only worth the metal in which it was made, and the only potential Art here is the Ebike that Wayne is building from it. That is why I say that he should not be afraid to cut and mod, to build the Ebike of his dream.
 
Totally disagree, this bike IS art and I commend anybody that manages to keep the original frame intact while at the same time converting it into a structurally and aesthetically pleasing ebike. You're doing a great job Wayne, why ha k the frame if you don't have to, right? Having said that, I do recommend committing a frame fully to ebike status whenever possible, bit it's always nice to be able to tear down an ebike, and put it back into service as a pedal only bike.
 
MadRhino said:
That is why I say that he should not be afraid to cut and mod, to build the Ebike of his dream.

Couldn't agree more... Sure they might be ex-champion downhill mtb frames, in their original
form it doesn't make them champion electric bike frames...cut and mod at will to improve them i say!
They are just pieces of metal...

KiM
 
td2.JPGtd1.JPG

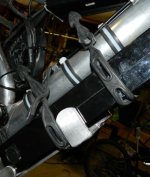
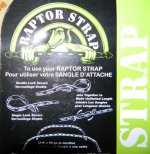
Twist grip throttle and all zip ties and bungie cords now in place. Just the hub motor and rear wheel to go now and I am ready for a test run.The "Raptor Straps" I picked up from Canadian Tire today are really nice. You can link them together to make a real long one or cut them in half for shorter ones and no nasty hooks to clip you in the eye should something go wrong when taking them off. I would like to highly recommend these rubber straps for anyone needing some new bungie straps.
 
ldo2.JPGldo1.JPG

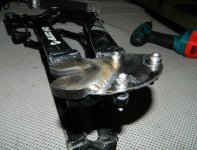
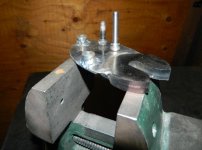
Shown in the pictures above I am installing the DrBass drop outs on the extra swing arm assembly that came with my bike. I plan to use the KIWI set when there are in production as I would like the axle to sit a bit lower in the frame because of my 24" wheel. In the mean time while waiting for the Kiwi set I would like to get my extra swing arm outfitted with the drop outs I have. I have welded on some 1/8th mild steel plate to the left drop out shown to act as a lever to attach to my rear disc mounts. I have also welded some steel bushings to the inside of the 1/8" piece so I can clamp this assembly tightly to the frame. The machine screws shown with the two different lengths are the stock one that is short and a longer one is what is needed to reach in far enough to secure the brake mounts. I also have the nordlock washers to add to the fastening of these units which look like they will help keep things tight. As far as the drive side goes I am still scratching my head a bit on that one but I have a few ideas.

Can't wait to ride the bike under electric power. Not much left to do now!
 
waynebergman said:
View attachment 1

Shown in the pictures above I am installing the DrBass drop outs on the extra swing arm assembly that came with my bike. I plan to use the KIWI set when there are in production as I would like the axle to sit a bit lower in the frame because of my 24" wheel. In the mean time while waiting for the Kiwi set I would like to get my extra swing arm outfitted with the drop outs I have. I have welded on some 1/8th mild steel plate to the left drop out shown to act as a lever to attach to my rear disc mounts. I have also welded some steel bushings to the inside of the 1/8" piece so I can clamp this assembly tightly to the frame. The machine screws shown with the two different lengths are the stock one that is short and a longer one is what is needed to reach in far enough to secure the brake mounts. I also have the nordlock washers to add to the fastening of these units which look like they will help keep things tight. As far as the drive side goes I am still scratching my head a bit on that one but I have a few ideas.

Can't wait to ride the bike under electric power. Not much left to do now!

:shock: :shock: :D Nice welding job on the torque arm :wink:

Doc
 
Hi Wayne,

good for you for getting in and building some t-arms. You would be killing your self to wait for mine!
I have had an unexpected family event that has basically taken me off line for the week and left me pretty exhausted.
Familys are much harder to fix than torque arms, if only I could whip out the welder and fix the family like I fix bikes all would be good.
Never the less, the adapters are looking good and I got the battery for the bike sorted today, man I need a ride.

Enjoy your bike. I'll get you some sweet adapters in January.
Kiwi.
 
dsdo1.JPGView attachment 1

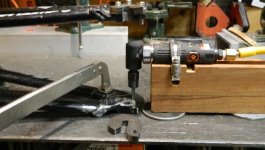
Kind of making this up as I go here on the drive side drop out install. I took a chance on this super cheapo low profile right angle air unit. You can use 1/4" shank bits in it & it was on sale for 25 bucks at Princess Auto (kind of the Canadian version of Harbor Freight). Fastened my new tool to a block of wood to keep the cutter running flat to the table and then I just manually slide it along the table to chip away at the machining needed. Rear swingarm is of course fastened to my work surface. I will take spacers out from the bottom of the block after each pass so I can sneak up on the depth needed. I will take away about 1/16" of material at a time. As shown in the second photo the new shinny aluminum showing through from the first test makes me think this will work OK. Handy mans work around here if it works!
 
I like the diy CNC :wink:

Doc
 
Sorry Crusoe, I am not sure what you mean by losing wheel clearance?
 
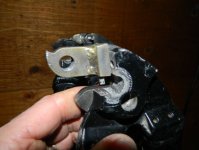
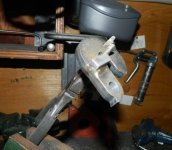
12.JPG11.JPGChipping away at the drive side drop out still. My friend milled about 3/32" off of the thickness of the dropout for me as it will help for fitting inside the chain stays for my method of instal. The way I figure it I am light and my power output on the bike is no where near what some are doing with these drop outs so if I loose this much thickness I should still be ok. I also welded a piece of 1/4" thick stock to the out bound side of the drop out (shown in pic) to ride on the underside of the frames original aluminum drop out area. I also drilled an extra hole in the new drop out, in the location of the frames original drop out hole faster as I plan to bolt this new drop out to the frame through this hole,plus the axle bolts of course and then I hope the added 1/4" piece of steel will help the whole thing from wanting to turn or twist around the axle. Not sure if this makes any sense but I will post more pictures as things progress.
 
do & wheel.JPG
Looks like this for now. Running into a few alignment issues with the wheel cocked a bit to one side, I am seeing I may have under estimated the difficulty of making this all line up like I would want. I guess I could if I really wanted at this point switch out this swing arm assembly with the one that is on the bike and take it for a test ride as its not rubbing the frame or anything like that but its not right. Its tempting to slap it on and go for a ride but I will take a break here at this point for Christmas and think things over. If Kiwi comes to my rescue in the new year I may want to wait for the bolt on units to arrive and leave my polished swing arm in place for there arrival.

No problem with Doc's units, they are nicely made, its more my fault with my choice in trying to make Doc's drop outs a bolt on solution instead of following his instructions with the epoxy.

One thing that will help but only slightly with my alignment is correcting the dishing of the wheel. I have only built and trued regular bike wheels with standard hubs and what I am guessing is with my very narrow hub it may not be such a good idea to dish the wheel at all with spoke tension. It may be best to go with even tension on both drive and non drive sides and just kind of center the rim with in the spoke hole placements.

Am I correct in thinking this way regarding spoke tension for a narrow hub like I have here?
 
waynebergman said:
Am I correct in thinking this way regarding spoke tension for a narrow hub like I have here?
When you dish a wheel, the spoke tension is still even on both sides, it is the effective spoke lenght that is not the same on the dished side.
 
I am finding designing the 135 adapters, a fine alliance between getting everything to fit and line up and strength.
Its snug all around, but can be done.
 
Sorry, I'll be more specific Wayne: By mounting your controller on the rear of your seat post, did you find that you lost around 2-3 inches of rear wheel clearance when the rear suspension is fully compressed?
 
Hi Crusoe...............It is actually a battery pack on the seat post, and yes with a 26 rear wheel it would rub under compression. As I am going to use a 24 inch wheel and the new drop outs will sit the axle lower in the frame I hope I will be ok. I hope we can both get our bikes on the road soon............good luck with your bike.
 
Ya I can't wait to get mine running too! We're in about 1ft of snow right now in The Great White North so I'm taking my time. I'm in the process of rebuilding the rear hydraulic brake and doing other general maintenance. I want the bike to be back to 100% stock working order before I pump 110volts through the frame :twisted:
 
fm2.JPGfm1.JPG

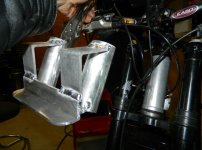
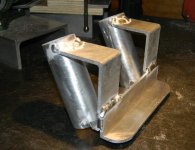
Chipping away at a front fork mount for the second battery pack that was originally planned for the seat post area. The seat post mount will only work if my smaller 24" rear wheel and new drop out placements give me extra room for rear wheel travel. I have decided to try this position for mounting this battery pack after reading the thread from Kiwi's build and also Oatnet's build in progress. My samsung LiMn packs are a bit thin and long in shape to work as well as the more rectangular packs in Oatnets and Kiwis build but I will give it a try.
 
fm3.JPGfm4.JPG
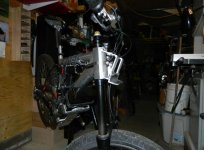
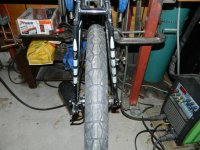
Battery now in place. I have not test ridden the bike with the weight up high like this as its pouring rain. The battery mount seems to be real solid with no slop or wiggle. One stainless hose clamp on each side with some 1 1/4" soft rubber hose to absorb the vibration and cushion the aluminum battery rack to the fork tubes. I will give it a go first sign of sunshine.
 
doone.JPGdotwo.JPGdothree.JPG

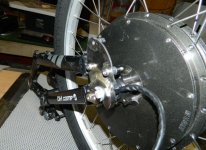
Thinned down the drive side drop out and got things to work as a bolt on. My instal is not pretty and I think I would have been better off to follow Doc's instructions but wanted to try it this way. Last pic shows how things are not running in the center of the swing arm assembly but should be ok for getting the bike up and going. As I have mentioned before this black swing arm is an extra and I will bolt on the units from Kiwi onto my nicer brushed swing arm when the torque arms arrive. So at this point I am not going to sweat the allignment issues, just need to swap out the swing arms and charge up the batteries and go for my first ebike ride.
 
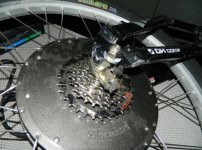
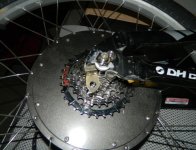
motor on.JPGHub motor is on the spare swing arm now and things look like they all fit OK. Just a few details to finish off and I should be ready to roll.
 
Back
Top