Winter Project... Design and Build an eScooter

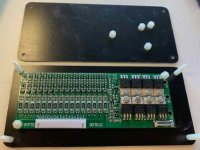
So, I started wiring up the lights and hubmotor today. The hubmotor was pretty straightforward :wink: The lights, on the other hand were a bit of a challenge. As you recall I have the ground effects, LED headlights and LED tail/brake lights. They all operate off a 15 amp DC converter that will be powered off my 60V battery....

Did I mention that I don't have a 60V battery??? Was thinking of hooking up to one of my golf carts, but at 72V and 84V I was afraid I'd blow something up. Then I remembered the laboratory power supply I bought on ebay a few years back. Fiddled with it and finally figured out how to output 60V... Perfect :)

Then, things begin to go awry... Lots of wires everywhere... a couple questionable connections and the next thing you know, a blown relay on my optoisolator and an apparently shorted light switch. Well, apart comes the dashboard. Verified that the relay was a goner, and temporarily replaced it with a less than optimal spare. The switch fixed itself..I'll never figure out how :shock:

Well, back to the lighting. For my combination brake/tail light, I initially planned to run the 12V through a PWM dimmer for the taillight. This was to be routed through the NO portion of an automotive relay. The brake light would be the full 12V and would run directly to the tail/brake light. A secondary line from the brake was to run to the coil of the relay, so when the brake was triggered, the output from the taillight would be cut off........

I had already ordered everything I needed (Thanks Amazon Prime) and just decided to use the KISS rule.
A couple of diodes and a 270 ohm resister and I was done....So much for planning ahead :oops:

Just gotta wire in a SS relay so I can bring the 60V to the CA. And have to figure out how to hook up the CA to my Kelly controller. The end is in sight... Hopefully have it done before the summer!!!
 
So I dove into the wiring aspect :shock:

Shoulda been a piece of cake. However couldn't get things to work the way I thought they should. So I took a step back and sat down and created a little wiring diagram. Before I jump back in, does anyone have any comments, corrections, or advice on this wiring scheme??? Thanks in advanceScooter electrics.jpg
 
Nice scooter Roncat
That qs hub should be more than enough torque , what is the magnet width 35/40mm ?
If so cant see any reason why you couldnt give it 8kw burst :D .
Look forward to your first ride impressions
 
Life has a way of interfering with the best laid plans...

Unfortunately, one of those misguided events caused me to shelve my scooter project for a couple of months, but I'm back now :wink:

When I last left off, I was trying to figure out my wiring scheme. I ended up pretty much wiring the way I planned with a couple of changes. I removed the precharge resister from the switch. That marine grade switch can handle a whole bunch of amps, and if it happens to burn up, I'll just replace it. :) I also omitted the SS relay to the DC converter and instead ran pack voltage from the keyswitch directly to the DC converter. With the gauge of wiring that I used, and the low amp draw from the LED headlights, Ground effect LEDs and the tail/brake light, there was plenty of headroom.

Anyhow, got everything wired up and tested. Swapped out the hydraulic brake lines to the discs (the originals were too short) and then I was ready for a test run. Only problem is the motor WOULD NOT SPIN... :( I am using a Kelly KLS 7212S controller running to a QS205 1000 watt 10" hub motor. I think the magnets are 35mm :D (@ Emoto) Turns out the Kelly needs to go through an identification angle procedure before it will run properly. Unfortunately this requires an Android device with Bluetooth, or a PC with the required cabling. I only had the Bluetooth. Being an Apple guy, I didn't have any idea about Androids. Well... that is what family is for. My sister-in-law gave me one of her old Samsung Galaxy Tablets. Then I scoured the internet to figure out how to download an app to it, then download another app so the first app could work and so on and so on... :roll:

Finally got it all loaded up and connected to the controller. Couple of minutes and it was all done!!! Success :thumb: Now the motor spun up. Been playing with the configurations of both the Cycle Analyst and the Kelly KLS. Have it where I think it will be okay for the time being. Hooked up a series of RC lipo batteries to create 60 odd volts or so and away I went. Briefly saw 36 mph before I got off the throttle out of sheer fear. Seems to be more left... and that's with tiny little 5000 mAh batteries.

So my next project is to build the battery. I have 200 18650s from a vender on this site. Checked them yesterday and every one sits at 3.50 or 3.51 volts. I am configuring them as 16S12P, so I should be close to 60 volts and 35aH. It's too bad I had to come up with this contingency plan, but for my first try, I paid a guy in San Diego $750 to build me a battery. He has since disappeared from the map with my money and I have no battery :cry: I hope he gets what he has coming to him...
 
Today was B Day... time to build the battery for my "Winter Project" I have all but abandoned hope that the person in San Diego is gonna come through. Hope the %$*&@# is enjoying my money :evil:

Anyhow, my contingency plan kicked in today. I have been amassing everything I need to build a battery, so I now officially embark on my next project....

First I laid out the Panny 18650 cells in a 16S12P layout. Then pulled out my new K-Weld and it was off to the races.. 1100+ welds later, this is what I had...

IMG_7006 (1).jpg

I must add that the K-Weld is awesome. Easy to assemble and use. Not one hiccup :D

Then I soldered the nickle strip to my busbars...
IMG_2759.jpg

Trimmed, drilled, and tapped the busbars to accept the bolted on battery wires. Then spot welded them to the pack.
IMG_9401.jpg

Voltage is what I expected from the 16S at 3.5 volts...
IMG_0987 (1).jpg

Enough for today. I'll solder on the BMS, cover the battery, run wires and my project will be mostly finished!!!!
 
Today was a great day. FINALLY FINISHED MY SCOOTER!!! :mrgreen: :mrgreen: :mrgreen:

Started by completing my battery build. First I quickly milled out a little protective cage for my bms.
IMG_0815.jpgView attachment 1IMG_0816.jpg


Next, I cut out some end panels and double side taped them to the endsIMG_0819.jpgIMG_0820.jpg

Then in my effort to prevent any catastrophic shorts, I Kapton taped everything up.
IMG_0821 (1).jpg
Soldered on the bms leads
IMG_0822.jpg

and the wiringIMG_0824.jpg

and finally shrink wrap and double sided tape for the bms
IMG_0827.jpg

Set it in the battery box and away I wentIMG_0825 (2).jpg

A couple of little details remain. I need to create a way to secure the battery in place, and I may need to add some fenders. My butt got a little muddy riding through the grass :roll:
 

Attachments

  • IMG_0818 (2).jpg
    IMG_0818 (2).jpg
    55.3 KB · Views: 1,988
Sweeet!

Great build, and I bet it should run very well.
The only little remark I would make is the size of the main connector attached to the copper busbar, it seems a little undersized compared to the rest.
But I don't know how many amps you plan on pulling through it, so that might be ok.

Anyways, kudos! Time to get it a nice paint job.
 
Thanks Dui,

What you are looking at in the picture is the crimp on connector for the charging wire (12 Gauge). The main power wire is an 8 Gauge wire that I hydraulically crimped to one of those hi amperage gold plated stereo rings and then bolted to the busbar. Should hopefully have the current carrying capacity that is required :wink:
 
When I started this project back in November, I had no idea what I was gonna do with a scooter once I finished building one :?
All I knew was that I wanted to build one :D

Well, during this time, the powers to be at my country club decided to allow golf scooters to be used.... So, back to the garage... Bent up a few tubes, pulled out the welder, a couple coats of paint and this is what I came up with :D IMG_0890.jpg

Now, not only do I have the fastest golf carts on the course, but also the fastest scooter :wink: Albeit, there are only two other earlier adopters in the club to this point... Haven't yet played a round using the scooter, but I took it out for a test run with a full bag of clubs and am happy to report that all went well. Quiet, fast, and can pretty much go anywhere. On the course it feels like I'm riding one of my stand up jet skis from back in the day...I LOVE IT!!!!!
 
Summertime in Sacramento is quite warm. Consequently, the greenskeeper keeps the course well watered. It only took a couple of rounds with my scooter before it became apparent that I needed to make some changes.

First, any puddle or muddy spot on the course immediately earned me a badge of honor in the form of a muddy stripe on my frontside, backside and on my golf bag.

And secondly, those soft spots on the course couldn't support the kickstand. The kickstand would sink into the mud, tossing the scooter and my clubs to the ground with a resounding crash :(

So I milled out a kickstand foot extension and sourced a set of fenders.Then I set aside this weekend to do the install.

A bit of welding and fabrication and ... there we have it. Just as bit of cleanup and a coat of paint and I should be done :D IMG_1131.jpgIMG_1129.jpgIMG_1126.jpg
 
ronncat said:
Thanks fechter...

It's a QS Motor 48V 1000W V3 motor. I will be slightly overvolting it at 60 Volts, but I'm thinking it should be able to handle it :)

Do you have a link on where yo buy the motor and tires?
 
Here you go:

http://www.qs-motor.com/product/new-design-10inch-1000w-4000w-hub-motor-for-electric scooter
https://www.amazon.com/gp/product/B00MXJ5OQQ/ref=ppx_yo_dt_b_search_asin_title?ie=UTF8&psc=1
https://www.amazon.com/gp/product/B007RURNOW/ref=ppx_yo_dt_b_search_asin_title?ie=UTF8&psc=1
 
Just when I thought I was finished....

Took my scooter out on the course this weekend with my brand spanking new fenders!!! Problem was , the fenders turned out to be a little bit short to be totally effective. Well, after washing off all the mud off my bag and golf clubs I made a modification to the fenders. Added rubber skirts on the ends of the fenders. Word to the wise... If you ever add fenders to your scooter, MAKE SURE that the tires are covered enough to prevent water and dirt being slung at you :?
IMG_1156.jpgIMG_1157.jpgIMG_1158.jpg
 
Sick Project Man!

This is what forums are made of. Thanks for contributing. Reminds me of back in the day. . .

-methods
 
Back
Top