So...I picked up the bolts and nuts, drilled the holes, and put it together, while waiting for the excitement to die down out in the apartment parking lots from the stabbings that I guess happened shortly after I got back from yesterday's outings. (see my house fire updates post from today for details of that).
Road testing had to wait till my ride to work this morning, and the results were better than I expected. It's actually improved how it feels to hit bigger bumps, or taking the wide speedbumps at >15MPH, and even smaller potholes. (I don't want to test it on a bigger pothole on purpose; the wheel doesn't need any abuse it doens't *have* to take). Just two little bars of tubing, and four bolts and nuts....I'd thought about doing htis for ages, and never got around to it. Now I wish I had done it when I built the bike.
It'll probably be even better once I can triangulate stuff, or add an X brace across the back of the boxes themselves. There is almost a 1" difference between the two for how far they stick out the back, or I would have just done that already. When i do add the rear X brace, if I still am not able to do the welding, I will add one brace on the outside rear faces of the pods, and the other brace will go on the inside rear faces, thru a hole I'll have to drill and file in the inner faces of each pod. That way it'll be easy to run a single bolt thru the center of the X shape to stiffen the structure by making it into two fixed triangles.
But first I have some work I need to do on keeping the frame from twisting, so I'm trying to think of an easy way to make bolt-on triangulators for the battery section of the frame between the seat and the pedals. So far, every idea I've come up with requires some welding either on the bike or on the add-on tubing, to make it stiff enough to make a difference.
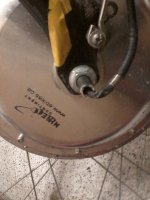
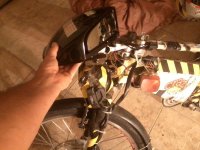
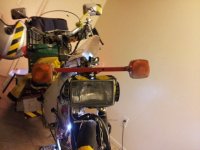
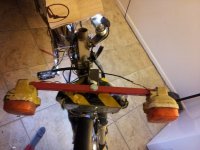
Pics of the new braces, and then some of the lighting when it's not running, so you can actually see it. :lol: First is a couple pics of the brace screwed badly into place:

View attachment 21
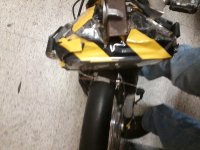
Next a couple pics of the corectly installed braces:
View attachment 20

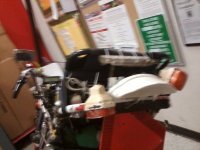
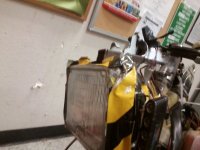
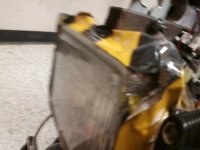
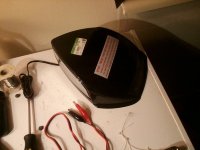
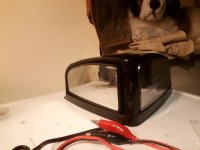
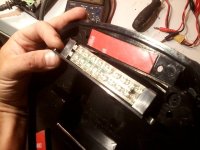
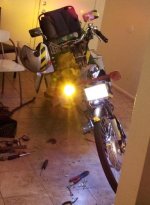
Next the lighting:


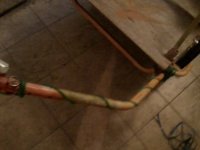
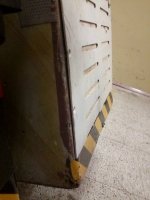
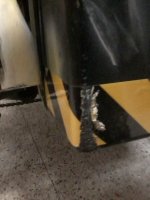
Next up, I also fixed an issue with the trailer hitch and mount. Under heavy loads, like the other night's dogfood, when the trailer hits big bumps or potholes it tries to drag it's hitch off the mount tube on the bike--you can see how far it went in the 10-mile trip, despite repeatedly stopping and tightening the clamp, by the torn reflective tape:
View attachment 14
So since I have these pins with retaining ball bearing (spring loaded) from a quick-assemble jogging stroller originally acquired to become a trailer from a few years ago (never happened, naturally), I drilled a hole thru the clamp and the ex-handlebar mounting tube on the bike, just big enough for hte pin to go thru easily, but small enough that the ball will keep it from vibrating out. Then i screwed the metal "cable" on the ring in the pin to the trailer so I won't lose it when it's not being used.
View attachment 13


The other problem is hte torn elastic in the "pivot" spring. I already use a steel "dog tie out" cable as a backup to keep the trailer attached to the bike should hte hitch fail, but it's got lots of slack cuz I used to run it to hte right side of the bike while it's hitched on the left. So I redid it to make it just long enough to work as a support for the spring/pivot to help prevent the sag it's got under heavy loads, until i can come up with a new pivot and hitch (actually, until I can mount the automotive ball hitch I bought for the purpose on the day of hte house fire...once I find it and hte ball I had found on the roadside months ago....).
Before:

After:


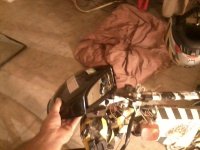
I also bought some el-cheapo cargo strapdowns for $5 each at ACE while I was there for the bolts, cuz someitmes these would just be better/easier than the recycled pallet straps I normally use:

Finally, it was back to Tiny, who was very bored with all this bike stuff, and took over my spot on the bed since I wasnt' using it.

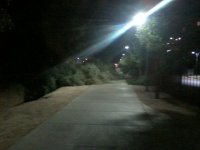
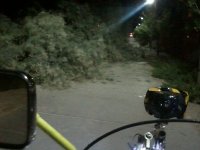
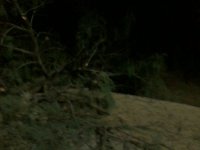
Then we went out for walkies, where this pretty sky awaited us just after sunset, though Tiny wasn't interested in it at all, and preferred to watch the police and stuff:
View attachment 1

.
Road testing had to wait till my ride to work this morning, and the results were better than I expected. It's actually improved how it feels to hit bigger bumps, or taking the wide speedbumps at >15MPH, and even smaller potholes. (I don't want to test it on a bigger pothole on purpose; the wheel doesn't need any abuse it doens't *have* to take). Just two little bars of tubing, and four bolts and nuts....I'd thought about doing htis for ages, and never got around to it. Now I wish I had done it when I built the bike.
It'll probably be even better once I can triangulate stuff, or add an X brace across the back of the boxes themselves. There is almost a 1" difference between the two for how far they stick out the back, or I would have just done that already. When i do add the rear X brace, if I still am not able to do the welding, I will add one brace on the outside rear faces of the pods, and the other brace will go on the inside rear faces, thru a hole I'll have to drill and file in the inner faces of each pod. That way it'll be easy to run a single bolt thru the center of the X shape to stiffen the structure by making it into two fixed triangles.
But first I have some work I need to do on keeping the frame from twisting, so I'm trying to think of an easy way to make bolt-on triangulators for the battery section of the frame between the seat and the pedals. So far, every idea I've come up with requires some welding either on the bike or on the add-on tubing, to make it stiff enough to make a difference.
Pics of the new braces, and then some of the lighting when it's not running, so you can actually see it. :lol: First is a couple pics of the brace screwed badly into place:
View attachment 21
Next a couple pics of the corectly installed braces:
View attachment 20
Next the lighting:
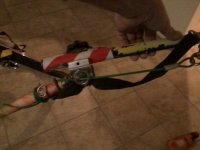
Next up, I also fixed an issue with the trailer hitch and mount. Under heavy loads, like the other night's dogfood, when the trailer hits big bumps or potholes it tries to drag it's hitch off the mount tube on the bike--you can see how far it went in the 10-mile trip, despite repeatedly stopping and tightening the clamp, by the torn reflective tape:
View attachment 14
So since I have these pins with retaining ball bearing (spring loaded) from a quick-assemble jogging stroller originally acquired to become a trailer from a few years ago (never happened, naturally), I drilled a hole thru the clamp and the ex-handlebar mounting tube on the bike, just big enough for hte pin to go thru easily, but small enough that the ball will keep it from vibrating out. Then i screwed the metal "cable" on the ring in the pin to the trailer so I won't lose it when it's not being used.
View attachment 13
The other problem is hte torn elastic in the "pivot" spring. I already use a steel "dog tie out" cable as a backup to keep the trailer attached to the bike should hte hitch fail, but it's got lots of slack cuz I used to run it to hte right side of the bike while it's hitched on the left. So I redid it to make it just long enough to work as a support for the spring/pivot to help prevent the sag it's got under heavy loads, until i can come up with a new pivot and hitch (actually, until I can mount the automotive ball hitch I bought for the purpose on the day of hte house fire...once I find it and hte ball I had found on the roadside months ago....).
Before:
After:
I also bought some el-cheapo cargo strapdowns for $5 each at ACE while I was there for the bolts, cuz someitmes these would just be better/easier than the recycled pallet straps I normally use:
Finally, it was back to Tiny, who was very bored with all this bike stuff, and took over my spot on the bed since I wasnt' using it.
Then we went out for walkies, where this pretty sky awaited us just after sunset, though Tiny wasn't interested in it at all, and preferred to watch the police and stuff:
View attachment 1
.