RC Greyborg build thread

Hi Matt

Investments are something one intends to see a return on, ebikes definately do not fit that description.

By the time I am finished and happy with it, I could have probably bought a second hand Optibike in good condition for similar money....

The fun in putting it together and the skills and lessons learnt along the way is well worth the money spent, in one sense it is just like paying for a little further education. I still have lots more to learn about eletrickery and things......

The fact that my frame #10, is one of such a small run of bikes makes it all the more special, not quite unique but definately it affords membership to a small exclusive club of ebike lunatics :mrgreen:
 
I totally agree.

I have no problem over investing (if I can use that word) in my projects because of the knowledge gained. I have a hard time just buying something I do not need to put together, though. :)

But, then again, I know some people have no ability to build things and must buy them turn-key. That is cool. They have other gifts and leanings. For me, however, the build is half the fun.

Matt
 
Managed to drop the bike frame at the LBS yesterday, whilst I do not speak Italian and he did not speak any English he understood that I needed bushings for the shock and he pointed and nodded to the lathe sat covered in aluminium shavings in the corner of the room. Frame gets picked up tonight hopefully one small step closer to being a rolling chassis.

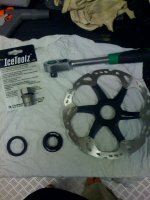
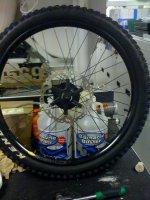
I also mangaed to buy a Shimano lockring from him to install the 203mm rotor on the rear wheel, all I need now is the new Gates Carbon Drive cog. I found out from Gates that the new 11 speed uses a new cog that they made that overcomes clearence issues with the previous Alfine model cog. That would explain why I spent nearly 2 hours trying to get a square peg in a round hole, unsucessfully, new one ordered :oops:

The IceToolz website has some useful bike mechanic specialist tools for affordable prices (Chinese) for those that enjoy bike tinkering and want to own there own specialist tools without breaking the bank, worldwide distribution network too.

http://www.icetoolz.com/icetoolz/news.php?id=9
 

Attachments

  • Disc Before Instalation.jpg
    Disc Before Instalation.jpg
    67.8 KB · Views: 3,787
  • Rear Rotor Installed.jpg
    Rear Rotor Installed.jpg
    90.2 KB · Views: 3,791
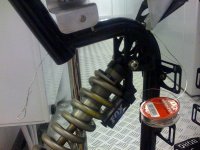
Installed the rear shock, which is a little larger than the ideal length, I bought it originally with the idea to build a carbon fiber frame for 9" rear travel. This got shelved when the much more realistic Greyborg came along.

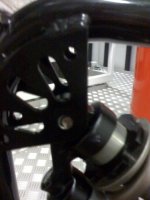
Problems started with not having the bushings for the shock, these took 2 weeks for the LBS to get. Then I install it to find the holes on the frame are slightly out of allignment, this puts the shock on the piss..... I filed the holes to correct this but it is less than ideal to elongate the holes which are load bearing. To correct this I will try to file the holes round at 9mm, drill them, then drill them at 10mm, drill the bushings and step up to 10mm bolts.

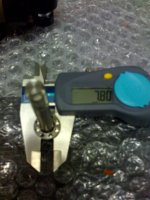
The fancy Ti bolts I bought are also slightly slack fitting for the bushings, I always wrongly assumed that an 8mm bolt would have a 8mm shaft diameter, this is not always the case. The bushing were also really tight to install so they do not turn in the shock, this makes the bolts the pivot point which does not seem right to be wearing the part that carries the load?
 

Attachments

  • Shock Bolt.jpg
    Shock Bolt.jpg
    66.6 KB · Views: 3,698
  • Shock Mount.jpg
    Shock Mount.jpg
    66.3 KB · Views: 3,698
Bit more progress albeit slower than ideal...

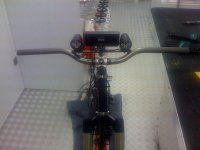
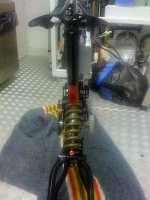
Rear light secured to frame, I ran the cable through the frame to the inside of the canopy, I just could not think of any other way to avoid having the cable visible. Chopped the seat tube down so that it did not cut the light cable in the tube.

Finished installing the Rivnuts for the canopy which is a huge relief. A huge "Thank you" to Jim at Make Ends Meet, Memfast. After I broke the M4 Mandrel, he sent me 4 free replacements, which was just as well as I now have 2 spares! The following lessons have been learnt the hard way and shared to help those that follow. Do not spare the grease when installing Rivnuts. When tightening them up and they start to sing, stop tightening them, take out the tool, add some more grease and then do that last turn. Keep the tool dead straight when tightening things up, the mandrel will snap easily due to side loading. Resist the temptation for that last tweak, it is always the one that gets a ping. The bigest advice though would be to save a whole lot of ball ache and just get the aluminium Rivnuts and not the stainless ones, the conopy weighs next to nothing and has heaps of fixings.

http://www.memfast.co.uk/

Dry fitted the motor and will tinkering with that next, try to secure it, I think I ordered the wrong size frame mounts!

LBS also managed to strip the threads of the new bottom bracket during instalation by cross threading it, had to send of to TartyBikes in the UK for a new Aluminium cup, also bought the instalation tool from them. If someone is going to stuff installing it up next time, it might as well be me
 

Attachments

  • Shortened seat tube.jpg
    Shortened seat tube.jpg
    63.1 KB · Views: 3,693
  • Bar Installed.jpg
    Bar Installed.jpg
    60.9 KB · Views: 3,690
  • Light Installed.jpg
    Light Installed.jpg
    99.7 KB · Views: 3,689
  • Mousing for tail light.jpg
    Mousing for tail light.jpg
    91.7 KB · Views: 3,690
  • Rear Light mod.jpg
    Rear Light mod.jpg
    76 KB · Views: 3,689
Top shelf bits there, Comrade. Much respekt!!

Try loosening all the swing arm fasteners before fitting the shock. There is a bit of useful flex needed for getting all the threads started that way. Worked for me :)
 
Gerry,

I just noticed, something, if you are driving the right side of the wheel with the reduction in that location, you will need to rotate the stage two idler wheel around the unit so the idler is on the slack side of the chain. Right now, the idler is on the tension side of the chain.

Matt
 
Hi Matt

Good eye, I will be sure to swap it around. This was just a dry fit to see if I could get the canopy on over the motor and reduction, I seem to be about an inch out.... I can see the freewheel drive being outside of the canopy and offsetting things to get her up and running. I am also looking at widening the canopy by 10mm each side to accomodate the batteries, either that or get a little bit ghetto, abandon the cell lego blocks and break out the duct tape. I am still conflicted as to which is the better option. one will work for sure, the other will be a prettier engineered solution... New rear cog for the wheel has been shipped, 97 euro with shipping and taxes, Gates certainly know how to make money and stop the wide spread adoption of belt drives in there tracks, the pricing makes no sense! Should have a rolling non powered bike in about 10days time. :mrgreen:

Other issue is lack of space for the second 10ah 48v pack in the frame, might have to drop to 36v just to fit 20ah unless I have a bright :idea:

Thanks Matt for all the assistance so far, cool parts, R & D, hard work and your comitment to the forum, I am indebted.

Gerard
 
Whoa! Just saw this build for the first time! Beautiful bike! I'm excitedly awaiting to see more progress!

-Luke
 
Progress was halted due to work being the priority, weekend off saw some progress but not all forwards...

Made a little titanium torque plate for the rear axle, bolted it to the frame with 2 x 5mm bolts tapped into the frame, that was the progress part.

I stuck the Carbon Drive belt on to see how things line up, it pretty much will need to run parralell to the outside face of the freewheel. I had want originally to have a belt from the motor to the cranks but the second belt is too wide so I am going to do it with chain. The chain will have to run outside of the belt drive just for allignment, I had wanted to have it on the inside to avoid the jeans getting shreaded but it does not seem possible. The other problem I ran into is the 60 tooth Gates cog I have is too big and I have already got the largest belt they do, so I now need a smaller front cog. I also need to buy a front chain ring for the motor drive and an adapter to mate them together. New small suspension unit is in the post with some disc brake adapters so next week should see some more movement forwards.
 
New 46 and 39 tooth front Gate cogs ordered and the next belt size down just so I have a few sizing options, should be a week or so for delivery. This baby should be a bicycle next week, ready for motorising, finally.

Ordered a new Surly 36T 104BCD chain ring and bashguard for the chain/motor drive side of things too. Bashguard to hopefully save shreading my leg off whilst motoring....

New rear shock arrived, Manitou Swinger 200mm X 57mm, two coils 500lb and a 350lb from Ebay about $100. I think the 190mm length is probably the ideal shock but I am willing to see how it works at 200mm for the extra bit of travel. My other Fox shock was way too long and threw the geometry out.

Also adapters for the brakes arrived.
 
Hi Matt

The forks seem really well made and good quality, I am itching to take them for a test drive..

Need to order new bushings for the shock as it came with a 40 and a 20, I need 2 x 30mm bushings, I think.

Do you have any of those cool freewheel adapters that you had machined still for sale? A 104 BCD, 4 hole will save me a whole heap of time with a hacksaw and drill press, especially as I do not have a great choice of material to work from...... It will get there eventually Matt :D Just needs more time and mo' money!!!
 
Sorry, the only adapter like that I machined was a one-off for my BMX bike a couple years back........

I have not had anyone else ask for one, so it never went intor production.

Matt
 
Hi Matt

I thought it would be too good to be true to be able to buy an adapter off the shelf so to speak......
I will break out the new hacksaw blades and the cobalt drill bits and see how many filings I can get on the floor, this might take a little while...
 
Weekend spent on the tools and small progress made....

Took a 5mm sheet of Titanium, purchased off of ebay and marked out the dimensions for an adapter plate.

Took a a 31mm hole saw in the drill press and working from both sides of the sheet, using a ton of cutting fluid mad the hole for the freewheel. This had to be filed out another couple of mm, then drill the holes for the securing bolts.

Marked out the 5 bolt 130m BCD for the Gates carbon drive front ring and drilled them out 1 by 1 to 10mm. What I found was that even when I marked the center of the holes accurately, they would still wander off true. To fix this, I drilled the holes out to 5mm, then did a dry fit, if they were off of alighnment I filed the hole in the direction i wished it to go, went up another few sizes, then dry fit at 8.5mm and file again if needed. The plate is just the comercially pure Ti and not hardened, but stilleach hole started with a 2mm pilot, then up through the sizes, .5mm at a time to the desired size, using plenty of cutting oil, I only bust 2 bits.

Roughed out the outer circle and took the grinder to get the rough product.....

Still to do on the adapter is a 110mm 4 bolt BCD, possibly replicated as a weight saving pattern and option for future chain ring, replicate the 130mm 5 Bolt BCD for the motor chain drive and weight saving pattern. Clean, polish and probably do some more go fast holes just for the fans of the swiss cheese look :D

View attachment 4View attachment 3View attachment 2View attachment 1
 
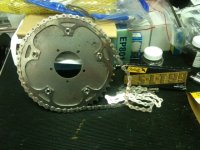
After an hour on the grinding wheel the adapter is starting to become round, needs a bit more but close enough for a dry fit just to see what I am up against. Mounted the adapter and freewheel, had to trim a few bolts down to size. I found that using 3 washers behind a standard nut gave a good cutting guide for the hacksaw to get the right lengh for the Nyloc nuts and only marred the one nut. The chain ring bolts that I was hoping to use are not consistant size, 2 of them are fractionally over 10mm and just do not fit the Gates front cog, going to have to file or polish them down a hair. Installed the unit onto the bottom bracket spindle but the belt is too close to the frame and that was with it not pressed all the way on. I need to relocate the cog to the outside of the adapter plate and give it a try like that. The one ray of sunshine is I might have the belt tension spot on without an idler, more by good fortune than design. Downside being that the entire drive unit will have to be popped of the isis splined bottom bracket to remove the rear wheel for punctures etc, but I can live with that. If it works it should look really clean.

View attachment 5View attachment 4View attachment 3View attachment 2View attachment 1
 
Awesome progress ComradeGerry, can't wait to see this all come together. You are doing the Gborg frame proud. Love all the custom work you are doing.
 
I have been too busy working to really get thing nudged along much further and my new parts are still in transit...

I do find when i finish my head is always racing with ideas for the bike, it is an obsession, my Mrs is not too happy with it.

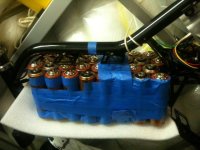
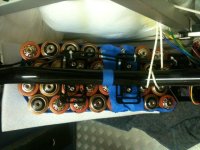
I think I have decided how to configure the batteries, making a decision is a good step in the right direction. After reading the "Headway builders thread", big thank you to all that have helped post great information in it. I have decided that i will be hot glueing my pack together 48v 20 ah to squeeze it into the forward compartment. It seems like if done vertically I can keep the width down to 145mm. I read Hals thread on his Albino where he reckoned 160mm wide in the horizontal configuration was a tad wide for comfort. All things are a compromise and to shoehorn in the power I need, weight and bulk is added. I looked at splitting the pack into the 2 battery bays 3 cells wide, which would work but I cannot get the ah I need. This configuration allows the top half of the lower section above the Astro to fit another 10ah at 48v at a later date. I will need 30ah to even have a chance at Pikes Peak, I am already thinking of the "long range " booster pack and it's integration.

I will have to stretch the canopy a tad but that will be fun and a learning curve too!! Does carbon fiber stick to plastic without a primer? :)

48v 20 ah duct tape config.jpg48v 20 ah top view.jpg
 
Front chain ring arrived in the post, stainless steel Surly 46t 130BCD, I hope that does the trick. I took the freewheel adapter disc to a local metal shop here in Pula, the idea was to rebate 2mm off the edge to allow the Gates cog to sit a little further fro the frame as it just rubs. My idea was lost a little in the translation process and the entire assembly was reduced to 3mm thick. great weight saving but I now need to pack out the disc to move the Gates cog 2 mm away from the frame to stop the rub. New bushings arrived for the shock so that will be mounted next. So close to being a rolling chassis... Once she peddles I can start working on the chain alignment for the RC drive and motor mounting solution.

Crankset Outside.jpg
 
Looking good ComradeGerry, definately going to be the most interesting greyborg on here sofar. Looking forward to seeing it going.

I have been getting awesome service out of mine. Apart from blowing up my 9C 8x8 (my fault) and then also adding extra torque arms, I haven't had a single issue since the build, and I ride it every day.
 
I think the next version of the frame should have the dimensions changed a bit.

I've found that it is very easy to make the bike seat too high with a good suspension unit, but when I put in a smaller one the pedals hit the ground a bit to easily.

I really need to finish off my build, have the covers held on with duct tape at the moment and does not look pretty. But it does soak up the miles far better than a normal bike... I kind of like the weight of it.

After the Lipo's fail I will probably try to fit some A123 pouches in there, love the fact that the batteries are hidden from sight.... love my Greyborg :D
 
but when I put in a smaller one the pedals hit the ground a bit to easily.

That's dead true spacey. Because I run a Rock Shox rear which is small, if you go into the slightest corner with a peddle down on the inside, it slams into the ground and I have nearly had a few prangs from it. It's the first thing I warn people about when they first ride it. The other issue/problem I have found with the canopy, is that if you have triple clamp forks like the Boxxers, they hit the front part of the canopy when you turn the handle bars all one way, restricting the potential turning circle by about 1-2 inches. I see no way to account for that with triple clamps, unless you cut out that very front part of the canopy or something. It's a shame because I don't even use that space at the very front of the canopy as my battery box stops before that point. Those are my only gripes.
 
Back
Top