2WD Semi-Recumbent Recycled-Parts Cargo eBike: "CrazyBike2"

Lots of rain the last two days: ~830-930pm heavy rain on Friday night, slowing to a sprinkle just as I started home from work, but leaving all of the roads for ~1/2 my ride home covered in inches of water except a lane's worth in the center where the crown is, but thankfully little enough traffic that I didn't have to ride thru that for any but a few feet here and there.

Saturday evening it started heavy again for a half hour or so, and had stopped completely for a couple of hours (most streets were completely dry again by the time we closed the store) but restarted sprinkling just before I left for home.

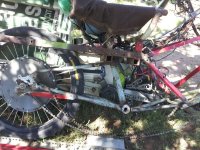
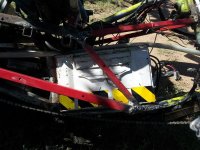
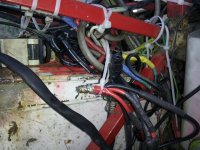
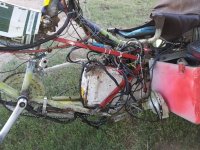
On Friday, splashing thru some of the water, some of the bike wiring must've gotten wet despite previous preparations, and the front controller's throttle signal was partly stuck on, so everytime I had to stop I had to hold the ebrake (normally I don't) till I started up again. Durign charging at home I had to put a loop around the ebrake handle to keep the motor off, until the cabling dried out.

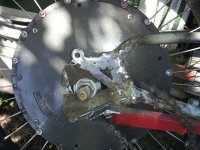
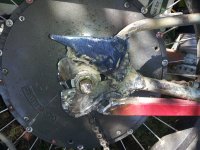
Saturday on the way to work, things were normal again. But on the way home, the front stopped responding to ebrake signal, and I didn't get anywhere near the regen braking I normally would (the rear controller doesnt' really do a lot of regen, probably because of voltage programming or something; I investigated that a long time back but I can't remember what came of it or what I was going to do about it). Thankfully I iddn't have the throttle problem again, but even this morning, the front still doesn't respond to ebraking, so I will have to check out it's wiring and see if the connector or something along the way has partially oxidized or something due to the water.


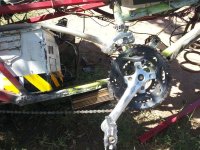
Good news is that the imitation-kool-stop-salmon brake pads I installed a little bit back work GREAT in the wet, though they squeal like crazy after everything dried out. I gotta clean all the stuff from the puddles off the wheel and pads, and see if that makes a difference (should). Ammonia (window cleaner/etc) usually works pretty well for this--just spray it on, let it soak a minute, and hose it down, usually. Sometimes gotta scrub with a brush or a sponge.


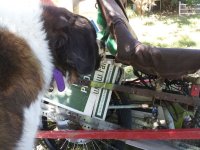
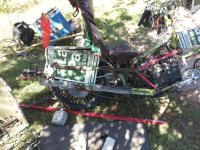
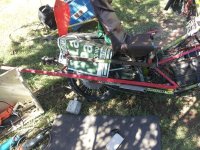
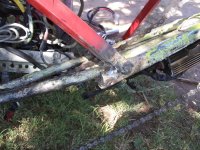
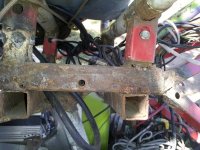
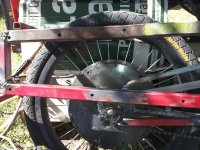
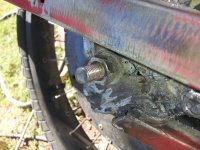
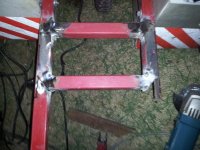
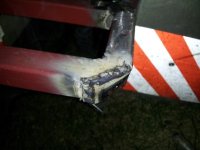
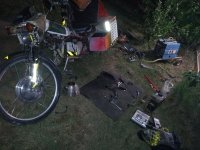
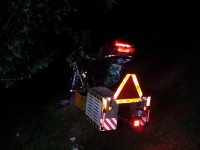
Last night while doing a perfunctory check on the ebrake wiring, I found the rear light assembly on the back of the seat was very loose again, so before it falls off during a ride despite tightening down, I figured I better go ahead and replace the machine screws holding it in with actual bolts and nuts all the way thru that rear crossbar, which are much less likely to come loose from the bumps and whatnot than the original mounting method.

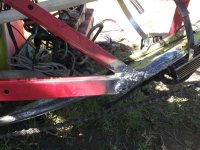
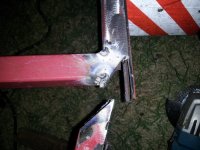
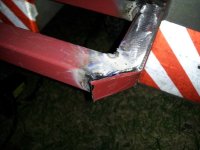
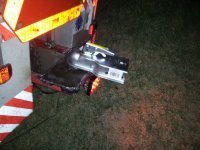
Only hard part was trying to drill thru the round-cross-section tubing from underneath without any pilot mark or hole, cuz I can't do it from the top where the original hole is, since the seat's top tube is almost directly over that crossbar and way too close to get the drill in there. Eventually had to file a little mark to catch the drill bit in, and use stages of drill bit sizes, cuz any other method tried just kept slipping off one side or the other of the tube.

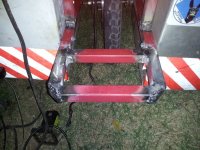
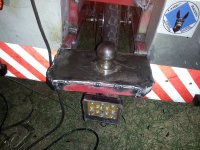
I chose to use some beveled-head philips screws and wingnuts to do the mounting with, becuase I can tighten them easily without any tools if I have to out on the road. The beveled heads (for countersinking) should hold better against hte tubing's bottom hole than a flat base screw would, and the wingnuts are secured with a splitwasher and flatwasher against the top of the actual lighting bar's mounting plate.

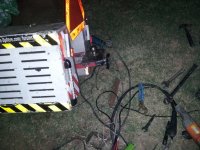
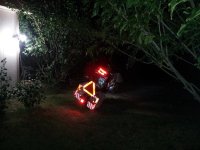
I still have to remount the rear downlighting bar on the bottom of that tube, but before I do I want to resolder some of the LEDs and/or SMT resistors that are causing intermittent lighting.


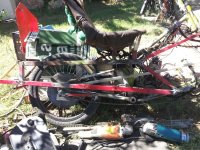
Oh, and the front tire has very very poor traction on any even slightly wet surface, at any angle. :( I almost lost it a couple of times on turns both Friday and Saturday nights, but I already knew it had the problem and was ready for it to happen, so I just let off the power on the front, lightly squeezed the front mechanical brake for an instant, and used rear power and a little countersteering to push me back into traction for steering thru the turns.

I also have noted that many times when I am starting up from a stop on a completely dry surface that if it is dusty or sandy (very common here) or has loose surface asphalt (also very common, perhaps even more than the dust or sand) then the front tire always spins just a little bit before it catches, if I throttle both wheels up together. If I do it by itself it isn't as bad and sometimes I might not notice it if I didn't alreayd know it happens, but with the rear wheel power that has no such traction problems, it must be very slightly lifting the front and increasing the front traction issue.


Am definitely gonna have to replace that front tire (infinity armadillo something or other) with something much stickier (softer) ASAP, but nothign I have already will work. I should make a trip down to the BuildABike store where I got the General tire I had before and see if they have more of them--it was a good tire for traction, even if it did wear thru fairly quickly.


Alternately, if I can find a sticky moped tire that would work on a 26" x 1.25" type bike rim, I could order that along with one of those Pirelli or Shinko moped tires for the 20" x 2" (or 2.5") rear, and not have to worry about wearing it out.
 
I've managed to find most of my controllers, including the ones I'd been having trouble with right before the fire, but dind't yet really know if it was caused by them or the motor(s). Unfortunatley I don't remember for sure which ones I'd been using, which worked, which didn't, or what problems they had, because all of the notes that might ahve been with them or on them aren't anymore. :(

So now I'm in the process of testing them as I have time. The first one I tested was a Crystalyte 72V40A 12FET sensorless with a "learn" wire. It has a sticker on it in someone else's writing (presumably from the ES member that donated it), that says something like: "severe shuddering, then POP" (there was more but I forgot what it was).

I hooked it up to the rear motor on CB2 because it's the simplest one to test off the ground with and then still easily just ride it to test with a load--all I have to do is tilt the bike up a little bit on one of it's pods and stick something under the other to hold the wheel off-ground to do those tests. This is the Crystalyte HSR3548 motor, in 20" wheel.


Well, it does run hte motor, but it also does sound "grindy". Almost like a motor with the wrong hall combo would, except this is a sensorless controller. I retried the learn wire many times, but the only thing that ever changed was the direction of rotation. The sound remained the same.

Then I took it out front and tried it riding--there is not enough power even with full throttle to start on it's own, even a little bit. If I get going to a few MPH with the front motor, then I can use it at low throttle, but it sounds like it's going to explode from the vibrations (which shake the whole bike). If I wait to use it's throttle at near-20MPH then it's not nearly so bad, but it is still loud and grindy sounding. I retried the learning wire many more times to no avail.


So I got back to the house and opened it up, and see nothing inside visually that looks problematic. I'll have to actually scope out the signals and see what it looks like, and then measure FETs and whatnot to see where the problem lies. With the "POP" sound reported I'd expected it to not work at all, but since it did, I'm thinking a FET may have failed in a phase, but not *all* the ones in that phase.... The waveforms should show where the problem is, though, when I scope it out.
 
With work and stuff like hte solar waterheater thing, plus the new additional dog (Yogi-bear) I haven't gotten time to do more with the controllers.

Last night I got home form work and saw my ex-Fusin-kit-taillight that I took the red lens off of to make a white headlight/front marker light out of has begun siezure-blinking. The whole thing is flashing on and off at rapid but random intervals, not vibration-induced. Haven't found any loose connection anywhere, so it must either be solder on the PCB or a component failure. :( Gotta take it off and open it up (forgot to do it last night).

Lke most things, I only remembe I need to do them when I'm out and about where I cna't. :roll:
 
Well, I can't find any connection or solder issue, so most likely one or more of the LEDs is actually failing.

When I first put this thing on the bike, it already had an LED that dind't light up, so I'd changed it out for one of the still-working ones out of those hat-brim lights I'd used on the sides of the headlight while at the apartment. Those things had begun failing a lot like this, excpe that since those LEDs were powered individually by the chip in the light, each one failed separately. Some didn't fail, and those were what I picked this one from.

I'm guessing that now that one is failing, and shorting across the LED power now (I *think* these are all wired in parallel, but I don't remember even though it hasn't been more than a few hours. it might be series, in which case the LED would be going open instead. )

Whatever it is, its' annoying and I didn't have the concentration to fix it after I'd troubleshot it partially (I love the rain but it makes me hurt more than usual on stormy days). So for now it's just disconnected.


Also, this morning since it was still raining and very veyr wet on the roads, I went over the bike and water-resistanted some things that hadn't been, and redid some others. I also put some tape around the hall connectors on the motors, but then when i started out I was reminded by the jerky grinding sound on both that the reason they weren't already done was cuz of that--they have some sor to fconnection problem unless contacts are left to float inside shell, and I keep forgetting to do anything about it cuz it isn't a problem at all while riding unless I tie them down or tape them up.

What I probably need to do is just straight-solder them, but I wanna leave the ability to swithc to a backup contorller easy enough on the road. So far that hsn't been necessary, but the minute I can't do it is the time it will need to be done. :lol:


From the housefire thread, a pic and info on a "rain tarp" for the bike when parked:
file.php

I ran across a "parka" sort of thing called "Aquasheen" in some of the stuff in the sheds, presumably something my mom had packed away in a bag or box that I hadn't investigated before the fire. It's a little impractical for my riding position on the bike, but it makes a decent bike cover when parked, using hte drawstring on the hood's neck to secure it over the left mirror, and just draped over the bike without snapping it shut along it's side edges as it would be if I were wearing it.

It wouldnt' stay in place if it was evne a little windy, but it's usually just drizzling rain when we get it, once past the initial hour or two of most storms (last night's was an exception in that the wind lasted for 6-8 hours, at least, though gentler after the first couple was still pretty strong and gusty).

I figure I could use the HF tarp-reinforcement-ring kit to install some loop ring holes in it's corners, and then tie that to the frame for breezy rain days to hold it down, but it wouldn't handle real winds, I think (probably tear apart). It also wouldn't keep any of the rain off the bike from the side/front/back, either, only works basically for straight down drizzling. It does work for that, though.


But it is better than nothing to at least keep my seat drier than otherwise, and keep drizzle off the controls/etc while it's parked. And it folds up pretty small and thin, so goes in a cargo pod easy enough for days like this week's that are probably gonna have at least some rain.


Oh, and speaking of rain: I've probably already said it, but this armadillo "infinity" tire pretty well sucks for grip when wet (and under some dry conditions too). I've *almost* lost it in corners and turns qutie a few times in rainy or wet conditions; if I didn't also have hte rear motor I probalby would have at least once or twice, but bieng able to push thru with the rear while letting hte front slide let me recover. If I could pedal that hard I could've also done it via pedalling, but I can't anymore, really, especially when it's rainy weather it hurts more.

I'm still looking at options for what ot replace it with, but am still leaning towards replacing the 26" with a 20" like the back, and relacing the 2806 in the other ex-Zero rim (but I'd have to make my own spokes or buy some new ones as I don't htink I have any short enough--I don't remember the situatoin with the spokes on the 20" rotor/rim I used to have on the back way before the housefire, or even know if I still have that wheel/motor). Then I could get a pair of those Pirelli tires. (I'd of course have to either change forks or more likely just add brake bosses/studs to it down lower to reach the shorter rim height).


Also, some pics I forgot before of the lighting parts on the back of the bike, unlit so you can see what they are (sorry they'r edark, I need to get better ones)
0803141146-02.jpg
0803141146-00.jpg


and the downlighting strip on the back, which I need to resolder some of the LEDs / resistors (the ones with crud around them in the pic)

0803141147-00.jpg
 
Found an LED (the one I'd swapped out) in the headlight was what was causing the flickering. I don't have another handy except more from the same source, so I'm just leaving it disconnected until I can find the others, or I will probably pull one out of a HF flashlight, as I have a couple that have other issues and don't work reliably as flashlights anyway.


Another issue started up though: When using hte left turn signal, sometimes it suddenly chatters instead of blinking, and if I touch some of the wiring harness in the front frame of the biek it goes bakc to normal. So somewhere in there is either an open or a short that I have to troubleshoot. :( Eaiser to find since it's only on the left signal, so it has to be in that particular wire branch. It's probably in the resistor/diode stuff I added when upgrading to the higher voltage lighting DC-DC.
 
So fixing the chattering in the turn signal was easy; it was a bit of insulation not done up right so it kept touching the frame a little bit sometimes, making a not-quite-short of the turn signal voltage on that side when engaged.


The LED thing...well, I replaced it with one from a HF flashlight, and it iddn't work at all, at first. Then suddenly as I am prying myself off the floor where I was on my knees while soldering the LED stuff, to go get the multimeter I'd left across the room, it lights up normally wihtout me touching anything. Ooookaaaay. :?

So then I just left it on, and it started doing the same flickering thing all over again. It almost can't be the LEDs, but that's really weird because it was definitely the LEDs in the ohter light units, and it was definitely the transplanted LED this time. (it does the same thing if I use just a separate dropping resistor and the Sorenson as a PSU for it). So, either the problem with the LED is "contagious" :roll: or else there's *also* an intermittent connection problem with identical symptoms. This could take a while....


In the meantime, since it's been raining heavily every few nights (including the night before last, and very early this morning around first light), I've been digging thru my existing 26" tires to see if any of them are "stickier" when wet than the Infinity armadillo that's on the front now, but unfortunatley the only ones that are are also the worn-out ones, usually to the point of already having holes in the tread. :( I'm sorely tempted to just cut the bead off of a smaller one (like the old CSTs off the Kensington) and stick it inside a bigger one (like the General CST), with the existing holes rotated 180 degrees away from each other. I just don't want to spend money on a tire size and type I don't really wanna use anyway, so I don't wanna go buy another one.

But I need to make a decision, and do something, cuz this Infinity tire simply has no grip on wet surfaces....and I guess I'll make up my mind tonight and deal with it when I get home, after I feed Tiny and Yogi.
 
I didn't get the tire stuff done last night; I was just wiped out. All the rainy days and changing humidity/pressure/temperature/etc are leaving me very hurty, and make it harder to hold onto things and such, as well as harder to sleep (though having Yogi *and* Tiny around has made it easier to sleep than normal, so it's better than it could be).

But I did decide that I will indeed swap over to the old CST inside the General CST, cuz at least that will give me some road grip the Infinity simply doesn't have. (and I don't want ot cut the bead off the Infinity to use it inside the General CST, cuz it is still a good tire for the Delta Tripper's rear, for instance).


My bike-raincoat idea got tested thoroughly yesterday at work, and even with some side-winds it didnt' come off, surprisingly. I expected the grommets I finally remembered to put in to tear out, cuz it's soft rubbery plastic when it gets warm. But they didn't, and it stayed in place, and kept the seat mostly dry and all the handlebar controls and the CA and wiring, so that was the important part. Absolutely no electrical issues on the way home last night. Just squealy brakes (but still very strong). :)

Unfortunately *I* got completely soaked, because all the clouds were going away when I left for work, and so I left behind most of my rain gear, stupidly, with just the thin orange plastic raincoat and my big floppy hat to keep me dry.

That woudl've worked great, but since yesterday morning (like most of the ones the last couple weeks or so) I've been going to wherever food is really cheap ($2 or less for breakfast and something to take with me for lunch) that also has wifi. Usually it's McD's, but there's no awnings there, and I figured if it *did* storm then with the winds still around at the time I was leaving home, and the ones we'd had that morning, the bike-raincoat wouldn't help. So I went ot BK across the street from work, cuz they have a deep awning that's always unoccupied by anything else, right outside the front windows by their "bistro bar" table. Its' deep enough to completley shelter CrazyBIke2 from most of the rain, even with winds, cuz they're diverted around the building, mostly.

Anyway, it didn't really rain at all until just before I was going to leave to go to work, and it started to sprinkle a little. No big deal, I jus tput my raincoat on, and my hat, and headed across the street. The sprinkling got lighter and seemed about to go away, clouds peeling off. But to get across from the BK parking lot, one must cross Peoria Ave via a left-turn cutout in the median, and just as I got into the median lane (where I can no longer change my mind about which way I'm going because of traffic), the sprinkle became a downpour, and wind increased, clouds darkened, visibility got shortened way way down, and all drivers suddenly became morons (water rots people's brains here in the desert).

Almost everyone coming up the hill from the freeway underpass, just as they became the traffic I'd have to cross 3 lanes of, sped way up, many of them to 60+ MPH, and some slowed way down, to less than 20MPH (which in those conditons on that road is a good idea). The ones going really fast would swerve around the ones going slow, because they coudln't even see them until they were nearly on top of them, most likely, and then they'd lose traction and skid or slide around, some of them fishtailing, though nobody actually crashed some of htem did scrape each other and some banged into the sides of others, but nobody stopped, though lots of honking ensued. But this went on without letup for several minutes, at least 5 or 6 minutes with cars going too fast and unpredictably for me to be able to safely cross (especially since I can't rely on the Infinity front tire for traction or braking).

So by the time I was able to get across Peoria, I was totally soaked belwo the waist. My shoes were only wet on the outside, thankfully, and my socks were dry below the ankles. Fortunatley I had left myself lots of time before having to clock in, and was able to use the doggie dryer in the grooming salon to at least partially dry off my jeans.

But I was still shivering, and even with a little heater up at the cash register with me it took a while to dry off while cashiering for the day. I'd guess a couple hours later I was dry enough and warm enough to be less uncomfortable, but I hurt pretty much all day long and thru the night after that, worse than I think I would have otherwise.

Anyhow, maybe tonite will be better, and eithe rtonite or tomorrow I'll get the tire stuff done, at least.
 
I went to dig out the old CST and got distracted, last night. :oops:

After feeding and playtime wiht Yogi and Tiny this morning while it was cooler, I started looking again but didn't find it. :( I thought I'd put all my tires in the closet in the computer/music room, but maybe this one either didn't make it to a shed after the rebuild, or was not with all the other tires? I'll have to take a look later. It was already too hot in the sheds by the time I went to look, though clouds were rolling in to start the rainstorm that's been going on and off a little while after that...then I needed to go the store and stopped for food/wifi whle out so I'll try again when I get back, it ought to be cool enough then if the rain keeps up.


In the meantime, a pic of the biek with the modified raincoat "tarp" on it:
file.php
 
As far as I can tell, unless it is buried in the back of a shed where I still can't get ot some stuff yet, I no longer have *any* of the smooth-tread type 26" tires I used to, just piles of knobbies in various conditions and types, most of which are not usable for much of anything due to dryrot.

So I tried to fit the General CST tire over the uninflated Infinity, which worked ok, but as soon as I air it up the INfinity's bead forces the CST's bead off the rim on one side or the other somewhere. I finally gave up on it, since I'd have to cut off the bead on the inner tire to make this work, and the Infinity is still very usable tire, just not as my front on this bike. :( So for now it'll just have to stay on there anyway, and the General is bakc in teh closet waiting for a re-use scenario again.

(I did consider cutting the knobbies off one of the other tires, or at least a portion of one and using just a section of tire inside the General but it's not worth the work for the return, plus the risk it won't actually stay in place and/or will damage the tube due to edges of the tire section, etc).


Went to HarborFreight with Bill yesterday, looking for something he was after, and I found they have a new flashlight/worklight:
http://www.harborfreight.com/emergency-39-led-triangle-worklight-62158.html

image_24966.jpg


I forgot to take pics of the ones I actually have, so that one off their site will have to do for now.

The outer triangle row of LEDs is red, and the inner group trangle is white. Press button once and outer row red comes on solid. Second press turns that off and turns on inner group white. Third press turns that off and flashes outer red row.


They had them for $3 each on their sidewalk sale, so I splurged and bought two, because I am thinking about ditching the built-in circuit and using these for the back of the trailer as brake lights and turn signals.

The white is bright enough that I think I can use some amber plastic over it to make them "legal color" turn signals in back. Then the red triangles could also be made to blink with them at hte same time, or just light up steady for braking.

I already have a MC tail/brake light on the trailer, but no turn signals, so these would greatly simplify building the physical part of them.


If they work out on the trailer I might use them for other things, too.
 
I have a feeling I'm going to be doing some welding tonight when I get home. On the way up here, I felt/heard something that sounded very much like a spoke breaking, but AFAICT none of the spokes on front or rear are broken or loose, and neither have any of the cover screws in the HSR3548 come loose or off.

I don't *see* anything wrong with the frame itself anywhere, but *something* made the noise, and while it could just have been a rock thrown up by the wheel hitting the cargo pods, it didn't sound like it. :(


The good news is that the SR3548 cover screws *aren't* loose and hte spokes *aren't* broken, both problems I expected to crop up again by now (well before now, actually).

Hmmm....
 
Couldn't find a thing wrong anywhere, guess it musta been a rock...I hope.


But while I was working on the bike I did a few things I meant to do for a really long time.

First, I added the cargo-strap tiedown "handles" to the lower outer sides of the cargo pods. There will eventually be some up near the top, too, and maybe on the rear and/or inner sides (wheel well area), but I wanna make sure the idea works first. ;)
0829140846-01.jpg

0829140846-00.jpg

0829140845-00.jpg

0829140857-00.jpg


These are basically just drawer-pulls from Goodwill (a whole bag of the same kind, chromed and don't appear to be pot-metal, but they're probably not brass), of a style that should keep me from catching them on edges of things if I skim too close to something going in or out of a doorway (like at home), or parking close to something that it could hang up on, or riding near a row of bushes or whatever that it could stick out. The *straps* may well still catch on things, but they'd do that anyway in the same situation, regardless of the style of tie-down-point.
View attachment 6


They came with screws way too long to use for this, so part of why it took so long (since last year sometime, I think, while at the temporary apartment) to get this done is that I only found my short screws that fit them a couple weeks or so ago.

So far, they work well, but have only been tested for a couple of miles.


The next thing I did was change out my work-stuff/etc carry-bag. I had been using the Paranoia Agent bag I was given shortly after the fire, zip-tied thru it's back to a light collapsible dolly from an oxygen generator Mark gave me out of some scrapped stuff. Oriignally I'd just used the bag itself, and carried it around, but being tireder and tireder and in winter more and more hurty in the joints, I put it on the dolly cuz the whole thing collapses easy into the lefthand cargo pod (without any insulation in it; the insulation in the righthand pod takes ~1.5" out of it's capacity all the way around it).

The problem with that bag is that it's all floppy and is *just* big enough to carry the things I really need most places I go, and not big enough for things I *sometimes* need, just often enough to want space for them in there when I do carry them (instead of hanging them on the extended pull-handle). It also looks pretty "trashy" when I go in fastfood and other places, and there are enough people at some of those places that are there to steal things (drinks, usually, sometimes other stuff) that I'd rather not get the kind of attention that those people do from the employees. (At places I am a semi-regular at it's not a problem, but at new places I'd rather not deal with it; some of them are quite confrontational after a long day of trying to stop thieves and shoplifters!).

So, I pulled out the "OGIO SuperSport Locker Bag" I'd gotten at Goodwill some time back, and had used on Delta Tripper as a carry bag during some of the remodels, and moutned that on the dolly instead. It looks a lot better, is a "hardcase" sort of thing, (well, "firmcase", really), and fits all the stuff I always need and sometimes need.

But it doesn't fit in the cargo pod *on the dolly*. :( Off the dolly, sure. Or if I put it in there upside down, but then the stuff in the little pockets inside it will fall out and be loose in teh bag (none of htem have closures). And I don't see an easy way to make it quickly removable from the dolly, yet. I can make some plates that will interlock, one set mounted on the dolly and one on the bag, but that's going to take a lot more work than I had time for, so for now I just ziptied it to the dolly like the other bag, and will have to live with carrying it across the top of the cargo pods. :/
0829141037-01.jpg

Thankfully, with the tie-down-points in place, that is easier than it would've been otherwise. I thought I took more pictures of it but I guess not. :(


Then I thought about it, and realized that if I'm always carrying this thing (till I fix the issue) on top of the pods, it's gonna always block the SMV sign, so I did what I meant to do ages ago on that, too: move it to the top edge of the rear of the cargo pods. Had to use standoffs, so the lids of the pods will fit behind it without pushing on it, and had to drill new holes in the pods to fit the bolts.
0829141038-00.jpg

I'd like to use bigger washers on it on either side of the sign itself, to spread the load since it's gonna wiggle with vibration, and add a Y-brace or T-brace to the back of it to minimize that wiggle, but for now it'll do like it is. (I have the perfect T-brace for it somewhere in the barn-shed under the big mulberry tree, once I have time to dig it out and cut it to size).
0829141038-01.jpg

But now the sign is much more visible day or night, though it isn't front-lit by the back-of-seat downlighting anymore (it will still be backlit by it a little, though, at night). And that's the important thing.


One other thing I got started but still need to make proper mounts for, is to setup the old Fusin tailights as headlight accents (since they're white LEDs with red covers; I just left the covers off), where I previously had those quickly-failed hat-clip-lights. These are a lot brighter and for a slow bicycle and rider with good vision and/or no oncoming traffic or signage to blind them, would actually be decent headlights in and of themselves. But for me, they're not useful to see by, only to be seen. So that's what they're for, when I am not using hte car headlight to see with (on the very few well-lit bike paths aorund here, for instance, and as a kind of daytime-running-light).


Something else I need to do soon is replace this plastic box:
View attachment 1
with a differnet one. The most likely candidate is the big metal one I have on Delta Tripper right now (since it's unlikely I will fixup and recommission that trike anytime soon, unless I have no choice--it needs a complete rebuild into something a lot lower to the ground for my purposes). This plastic one is beginning to fail around the inner corners like the other one did, despite reinforcements to prevent that.
 
Pics of the bags. Old bag on the left int he first pic. Other pics show new bag empty, with "shelf" in place, and hten with laptop in it and shelf folded back, and with laptop and jacket and ice/water container in it, and the pocket for the lighting battery (which previously just "rattled around" inside the other bag, and now has it's own padded zipper pocket), and the trackball in it's pocket. (which also had just rattled around with everything else in the othe rbag, more or less).
 

Attachments

  • 0830140942-00.jpg
    0830140942-00.jpg
    30.6 KB · Views: 4,473
  • 0830140943-00.jpg
    0830140943-00.jpg
    27.9 KB · Views: 4,473
  • 0830140943-01.jpg
    0830140943-01.jpg
    19.4 KB · Views: 4,473
  • 0830140944-00.jpg
    0830140944-00.jpg
    16.3 KB · Views: 4,473
  • 0830140946-00.jpg
    0830140946-00.jpg
    27.5 KB · Views: 4,473
I tried a few things to make a bracket for easy attach/detach of the bag to the dolly, but none of them worked out. Some were just not reliable and the bag would come off too easy while I was going up a step tilting it, or over bumpy parking lot/yard surfaces, sidewalk "score" lines, etc. Others were way too hard to detach the bag with stuff in it, or too hard to get aligned to snap in place when putting the bag on.

I have ideas for others but they are more complex and I found an easier solution, albeit not as good a bag for the purpose.

For now, I'll use an existing "giant" laptop bag I already had that has it's own built-in dolly handle and wheels (albeit much smaller, less than half the diameter so its' harder to roll on anything but a perfectly smooth surface). It has some advantages over the other bag/dolly, too, including that all the compartment openings face upward, and zipper-close, so it is a lot easier to get stuff in and out of than the lockerbag. Inside the compartments some have opentop pockets, but that's ok cuz there's enough big compartments to separate things without using those if I have to.

Another advantage is that it's short enough with handle retracted to fit completely under the seat's lighting bar, and still be upright (since a disadvantage of it is that it can never fit into the cargo pods; it's way too thick even empty).

But because it does fit uprigth behind the seat, it's very easy to strap in: I just put the cargo strap around it and hte seat and cinch it down, with the hooks of the strap hooked to each other behind the bag. Also, I found by accident that a nice stowage for the cargo strap itself is down in the gap between seat back material and seat shoulder pad; I hadn't realized it wasn't connected except at the edges before, so now I have a quick-stow place for small stuff that doesnt' need to be secure. :)

When i eventualy make a new seat for this bike, or for the next one, I'll have to remember to build it like that on purpose. :lol:


Disadvantages are that it has no large compartments, so the biggets one it has just barely fits my jacket stuffed in there, and sort of fits my big "cup" for ice and liquid. but at least I *can* fit the cup in there upright, which I can't do with the lockerbag in it's stowed position. It does stick way out of the bag, but I can live iwth that as long as it's not raining to let water into the bag itself. ;) (if it rains I would have to put the cup into a pod, so I could close the bag's compartment zipper).

it's also not waterproof, but it's mostly leather, so it would be reasonably resistant to the drizzle we get around here for the mostly-shortish rides I do normally. It might shed water bette rthan the lockerbag, but I'm not sure there'd be a lot of difference.

Because it's leather, it's also a LOT heavier, empty, than the entire dolly + lockerbag combo. :( I'd guess that it weighs around 10lbs by itself. I probably don't have 10lbs of stuff in it, except for the lighting battery (also used for powering the laptop when out for wifi like now, since most places seem to have started turning off all their publicly accessible outlets to discourage people from plugging in and sticking around longer than their devices' batteries will last. thankfully I don't ahve to depend on taht for my laptop nor for charging the bike!).


it doesn't have any compartment that would neatly and easily hold just the lighting battery, unlike the lockerbag, though. The only one that would be pretty good for that is also the only one the drink cup can possibly fit in and be held upright by, so the battery goes right in front of the dolly-handle instead.


(the lockerbag has a single big compartment, whcih opens to the side and has upward-pointing open-ended pouches for things inside it's "door". So you can't use the bag on it's end and have it open upward, if you want to use those pouches. Same with the outside pockets--only two have zippers, the rest aren't usable if the bag is on it's side, so you wind up stuffing everything down into the big compartment and having to either bag it all separately in there, or fiddle with fishing things out in bunches and sorting htru them).


Again, I was sure I had pics of this stuff but they'r enot on the phone now...there is definitely something going on with that thing. :(


I'd take pics now but htere are signs all over (most fast food places seem to have them) aobut "no video / no photography" and I'd rather not risk getting kicked out just for taking a pic of my own stuff. (cuz given the problems some of these places have with people I wouldn't be at all surprised to have that happen).


Anyway, am just about done with wifi and "lunch", will be off to the grocery store across the parking lot soon, then back home to see what other stuff I can break...er..fix on the bike, or what trouble the dogs could get themselves into....
 
I almost broke the bike (at least the cargo pod) on the way home from the grocery store yesterday. :(


I was stupid, and thought to save myself a few seconds and some few hundered yards, by riding between parking spaces and their concrete "bumpers" on this single row of such spaces that essentially divides the ex-ToysRUs parking lot (empty for what feels like years now, until a couple months ago when Conns opened up in the old building; they don't get hardly any business so I dunno how long they'll last). Normally I ride around that section, this time I thought "hey, I could just barely fit between those two" and proceeded past them.

I did make it past the first pair, but the second pair I wiggled or something and just caught the edge/corner of the righthand pod (the one that's seen the most abuse, at least four impacts like this I think). I'd been going about 10MPH or so, and was almost completely stopped by the impact befor the pod went up and over the barrier and I rolled on. :(

I didn't stop to check anything becuase nothing fell off :lol: and the bike still operated. Felt "looser" than it should, especially on bumps with the fully-loaded pods of groceries, but perfectly rideable.

Got home and unloaded everything into the freezer/cabinets/etc., with TIny and Yogi following me for every item and between htem doing a pretty good job of being exactly where I needed to go every single time :roll: and then when i was done I sat down with the bike and started looking to see what damage I'd done. Tiny and Yogi both sat down with me to see what other goodies I was gonna pull out of hte bike, but when all they got was attention and petting they eventually left to go re-investigate the kitchen for noms I migh'tve missed. ;)


I didn't try to take pictures, but if you look back to around spring 2011 in thsi thread, when I crashed the bike at Death Race in Tucson and fractured my ankle, you'll see basically the same damage and how I fixed it. Also same damage a couple years ago or so when a car ran me into the sidewalk's curb, and the cargo pod hit basically the same way as it did this time.

The top cargo pod rail, the 1" square tube, was again bent at the forward bolt hole, upward and inward, several degrees. This also bent upward the right end of the red rear crossbar. The bottom rail was not really bent, because the pod mounting bolts had simply ripped right out of it instead.


Fixing it was relativley easy, like before. I unbolted the outer cover of the pod, took the insulation out, unbolted the pod from the rail, used a very long larger-size tube over the rail to lever the rail back into nearly-straight shape, remounted the pod on it, and hten drilled thru the pod into the bottom rail in different places to rebolt it to that rail. (since I'd've had to weld plates to it ot bolt to wher eit was before, where the bolts ripped out of it).


I considered replacing that bottom rail right hten and there with square tubing welded together instead of bolted on, as I planned a long time ago, but there was a big-looking storm on it's way in, and I didn't think I'd get the bike apart, welded onto for rail and supports and whatnot, and back together again, before it hit; I figured it'd take me 3-4 hours or more to do, for just the one side, and basically all rest of afternoon and evening and into the night to do both sides.


So I left it as it was, since it works like this, just isn't as stiff as it could be.


The storm did hit a couple hours later, and wasn't as bad as i'd feared but it was very windy with just a little rain. Enough to have kept me from finishing the bike if I'd started the project, which would've forced me to leave it disassembled out there overnight and having to finish it this morning before work. So it was better not to have done it.
 
Been running an experiment over the last few weeks, of not adding any air to my tires as they very slowly go down from a starting point of about 60PSI down to the lowest I could end up allowing, about 20PSI. (at that point, the rear is so low when I'm on it that I'm afraid of a pinch flat just entering a driveway, and the back end is pretty wobbly and squishy).


I started out at around 28Wh/mile efficiency, on average, for my work commute. I ended up at about 37Wh/mile.


I reaired them up to 60PSI this morning, and on my way here I got 26.5Wh/mile, but had almost no stops, managed to make every light and turn without stopping, except for the stop signs I have to stop for anyway.


I've been pondering taking all the plastic "fairing" stuff off the bike and leaving it bare frame again.

Also considering just redoing all the plastic to look neater, cuz it's beginning to get pretty fugly with all the tape adhesive residue on it, where tape has disintegrated in the sun and heat, and had to be reapplied, to hold panel coverings down.


The basic coroplast is ziptied to the bike frame and each other, but I've got "decorative" covers over that made of thin plastic printed with various things, mostly dog or pet-related, saved from work over the last year or so. Those are all just taped on. I'd've gone with bare coroplast, but it's all a bunch of discarded election signs and I really don't feel like advertising for them; I'd paint over it but haven't located enough of my spray paint (if it still exists) to do that with, and I'm not sure it'd stick anyway, given the type of plastic the coroplast is made from.


Most of the zip ties also need to be replaced, having begun breaking from UV sunrot.

So between all of those things, I'm about ready for a change of look on the bike. I guess it's been about a year it's been like this, anyway--can't leave it one way too long or people might think I stopped experimenting with it. :lol:
 
I forgot to note that I also was letting the main pack run down for a while, too, to see how much (if any) better regen would be when it was fairly depleted.

There really isn't any difference I can feel, though it shows a few watts higher for peak braking.


While I was looking at stats, I found I am about to roll over to 10,000 miles! (I'm sure I've actually passed that, but not all themileage on this frame is actually on this CA; I've forgotten to transfer some now and then during resets and repairs and whatnot). I will probably hit the actual mark tomorrow on my way to work, as my ride to and form owrk today is not quite long enough to do it, I think. Or maybe I'll just ride around the block when I get home tonight till it rolls over. :)
View attachment 14


Couple of repairs last night:

The rain (or rather, riding thru the huge puddles still on some parts of the roads) got water into the hall connector for the rear motor, which didn't cause a problem until after it sat parked during work. I found the problem was really that one of the pins (yellow hall) had backed out just a little, so what little contact it was making wasn't enough after the water settled in there and probably helped oxidize it.
20140908_224931.jpg

So I decided I'd had enough of the hall connector, as I have had problems with those numerous times before, and just soldered it straight to the controller. Not as straightforward a project as it sounds, though, because the cables are all too short to be reached around the cargo pod.


Thus, I had to take the left pod off to get to everything. Which also meant unbolting the controller from the pod itslef, too.
20140908_224804.jpg


While I was at it, the plastic assorted-stuff-tools-etc box in front of the cargo pod, under the left side of the seat, has been breaking apart for a while, and is about ready to fall off on the next good bump. So I figure dI might as well replace that, too, with the metal one off Delta Tripper as planned.

That wasnt' as hard as I'd expected. I had an aluminum plate on the inside of the plastic box acting as a stress-spreader for the bolts to go thru, clamping it to the frame. That plate was used to bolt to the new box, and then bolt that plate to the frame, cuz the new box's bottom portion is not as deep as the plastic one, even though in total including it's lid it is about teh same depth (and greater overal volume).
View attachment 8

20140909_013358.jpg


So the new box wouldn't have reached the bottom bolt hole for the lower rail, and only been suspended by the upper rail and top edge of the box, otherwise.
20140909_013229.jpg

20140909_013241.jpg


One thing that worried me before I got it on there was that since it's a lot wider than the old box, it might not let the bike fit thru the door anymore...but it turns out not to stick out any farther than the cargostrap tiedowns anyway:
20140909_013732.jpg


Now this new box is as strong as my cargo pods, and I can even sit on it and lift my feet in the air, and it doesn't shift more than just the little bit of give the lower rail has (whcih woudlnt' have any if I ever get around to replacing those with square tubing)
20140909_013254.jpg


Oh, and the bag I ended up using, for now at least, is this:
View attachment 5

When it's on the back, it looks like this, only with a yellow cargo strap around it and the seat to secure it:
20140909_013632.jpg


I also have this carabiner on the end of a strap attached to the seat frame, whcih clips onto the bag handle "just in case":
20140909_013645.jpg
View attachment 2


Tiny and Yogi both gave up on me long before I was done, and went napping. Usually they go in the cooler bedroom, but I guess they wanted to keep an eye on me, so Tiny was in the kitchen doorway (turned away from me) and Yogi was in the hallway (he'd been adorably sprawled asleep until I tried to take a pic, of course):
20140909_013502.jpg
20140909_013521.jpg


Then this morning, as I was about to head out, the chain was forced off it's track by catching on the strap holding hte center-frame ammocan pack in place, because the pack had shifted--the wedge it should be resting on had come out from underneath it, possibly when I whacked the right cargo pod against the edge of the concrete parking stop the other day. :roll:

I was already frustrated and am exhausted, with almost no actual sleep last night, cuz I'm hurting from the rain/weather changes, and more than usual nightmares from stress at work, and having taken more than a few hours to get the work above done. (it was probably well after 2am before I was able to even try to go to bed; I don't remember for sure, could've been later.)

So...I didn't repair it like I should, carefully undoing the ties and tape holding the coroplast "fairing" cover on the center, but instead I just cut the tape/ties with a utility knife that was handy and ripped the whole rightside plastic off. :( It felt "good" to do it at that moment, but I regret it now, cuz if I wanna redo it I'll have to make a whole new side now. :/

Then it took another really frustrating hour of undoing things, re-positioning battery box, supports, etc., before I could resecure things. Of course, I'd already showered and been dressed for work at this point, so I had to shower again to wash off all the sweat, grime, etc., and change clothes. :(

It's relaly my fault for never having made the permanent support under the pack, or stops to keep it from ever moving rightward into the chainline, but everytime I've planned to do that somethign else has come up and I've not been able to, and eventually I just forgot about it. :oops: Now that it came up again as a problem, I didn't have time to do it the right way. *Maybe* this Thursday I will be able to, if it isn't raining (cuz I have to take it around the back yard and do cutting and welding, over by the side of the house where the welder cord will reach the 220VAC dryer outlet).
 
Nothing else broke yesterday or (so far) today, so no real news this time. Tomorrow I should have off, and it is supposed to be sunny, 100F high, so until it gets too hot I ought to be able to work on fixing bits of the bike. (Havne't given up on replacing the frame with a new one, but for now I am just gonna concentrate on improvements/repairs/etc to this one)
 
All I got done today before it was too hot (about 8am cuz the outlet I can reach is inside the morning-sun side of the house) was to touch up some welds on the frame here and there that i'd done with the crappier HF welder years back, that though I never had a problem with, I never really trusted. I was going to redo the cargo rails but I couldn't handle the sun, and parts and tools were getting too hot to hold onto.

Ended up putting the bike back together and wheeling it inside, then mowing the front yard as it tripled in height in the last few days from rain and sun, and was close to 6" high most places, and taller in several. Was too hot by the end of that (about 10am) to do the backyard, that'll have to wait till later. :(

If I'm lucky I'll be able to continue on the bike stuff later this afternoon when that part of the house is in the shade. I still wish the backyard fence went around the carport, so I could use that as a workplace. I don't use it that way now because I often have to walk away from everything and leave it for a while either to cool off, or to rest, or to see about the dogs, find a part or a tool, etc., and I don't really trust leaving anything outside the fence where the dogs can't potentially protect it. ;) If the fence didn't stop before the carport, well, it'd be easy to use it's big shaded awning area (and concrete pad instead of dirt/grass, harder to lose screws and stuff in) as a relatively safe work area.

I am (again) pondering buying some more chainlink and poles, and some quickrete or similar, and adding a section of fence and gates around the carport. I have to ask the landlord first, though, cuz I don't know if the original rule of "anything is ok to do to the house as long as it is an "improvement"" is still in effect--that was for the original landlord, husband of the present one, and before the son was doing all the repair work here.

I'd rather just enclose the carport and turn it into a garage, but that is definitely not possible becuase of stuff the city requires, codes, permits, etc. But it *should* be possible to fence it in with the backyard instead of the front....


Anyway, I'm working on getting a week's vacation sometime this month if possible, so I can work on clearing out at least one maybe two of the sheds, so I can then insulate and cool/heat it/them, and do my work on the biek there instead. Then I won't need to worry so much about the carport (though it would still be nice to do, since for me it is completely wasted and useless space at present, serving no positive purpose at all).
 
Last night was a frustrating one. At work, around 330-4pm, it looked like a really big storm was gonna hit us, so I went out on my break to move the bike from parking lot to under the awning of the building, and while doing that, the front tire suddenly went totally flat.

I hoped it was just the worn-area from when I had to brake so hard that it scrubbed thru that worn-out General CST tire and into the tube, but no such luck: it was the valve stem, completely separated from the tube!

Probably that's my fault because I've been running the front tire pretty low to get better grab (since the Infinity Armadillo tire hasn't got the grip of a wet piece of soaped-up glass), and so it's probably been pushing/pulling the tire/tube around the rim when I accelerate/brake. I cna't get the pics to upload but the stem has a dent in it from pressure against the valve hole in the rim, and the way the tear-off from the tube looks, it apears to have pulled against hte rim and basically yanked the tube off the stem at taht point. Once the tear started, it just came right off.

Not fixable, so I had to abandon it as it was there, and go back to work. Would take at least an hour to fix, requiring wheel removal, so couldn't do it at lunch, either, and had to wait till I was off work at 630pm to take care of it. When I did get to start, the storm had blown over without a drop on us, so at least I wasn't sitting in the rain doing it, but it was hot and muggy, with sweat pouring off of me the whole time. A new coworker that rides a BMX to work helped me finish it, by holding up the bike while I got the wheel bakc into the fork/dropouts (which is the hardest part of the whole process, and usually takes me about 20-30 minutes by myself, but only took about a tenth of that with his help).

Since the valve stem was ripped off the thick tube, I used it as a tire liner by slitting it on it's inner circumference and wrapping it around the spare really thin tube. At least it gives a couple mm or more of extra thickness stuff will have to go thru if it makes it thru the armadillo-tire.

The hardest part this time ended up being airing up the tire, whcih I had to do before putting it on the bike: I dind't have my electric pump, just hte Bell hand pump, which has this gigantic fat endpiece on it that fits between a normal tire's spokes, but not this improperly-spoked 9C wheel, which has the valve hole in the wrong place, in the smallest possible gap between spokes where they cross right above the valve. I can barely get the electric pump's end in there, but this one---not happening. I would have to bend the stem to do it, and most likely it owuld break the crappy thin spare tube's stem right off if I did.

So I wound up actually having to loosen completely the two spokes either side of the valve, inflate the tube (about 90-ish pump strokes to get maybe 20PSI, and I couldn't do any more than that; it was too hard to push anymore; I was totally worn out by then), then retighten the spokes. They're not tensioned correctly, just basiclaly as tight as I could get them, and I'll have ot retrue the wheel at some point, if I keep it on htere. I think just getting it aired up took me half an hour.

But it got me home, and so far it's still good (though I aried it up to 45PSI-ish with the elctric pump before setting out again), and will hopefuly at least get me home again. I did pull out one more spare tube (thin and crappy with multiple previous patches) to put in my toolbox, just in case.


Thankfully, vacation starts tomorrow. (tonight when I get off work, really). After getting as much rest as I can the first day, though, I've gotta start tearing down the bike and redoing wiring, replacing the cargo pod framework along the bottom as previuosly discussed, and finally replacing the worn-out Suntour front fork with the better model nearly-unused Suntour, along with some "real" torque arms for it (since the newer one is alloy, not steel, and it's gotta handle the torque from the 9C+40A controller on there).

I figure those can be made by using tubes clamped around the fork legs, with torque plates that are essentially new dropouts welded to the tubes, something like John-in-CR's method, but with a slot in there to allow the original dropout to also be used.


Since I would have take the wheel off anyway, and also to retrue the original 9C wheel after the spoke-loosening necessary to do the tube-air-up last night, I think I will go ahead and try the BionX rim/wheel and rotor that used to be on another 9C-style (MXUS?) wheel, if I can make it work with the 9C stator and covers. I know it's a better wheel, and should already be true.


I'm not sure all of what else I will do to the bike while I'm at it, but I guess this will be in lieu of building a new one for now (even though that's what I'd rather do, really, I"m still not sure exactly what I want to build, so for now I'll just make sure THIS one will keep working until I do build a new one).
 
Big storm yesterday afternoon. I got to work not very long before it hit, and I parked under our awning as far away from the side the wind would blow from as I could, but even so the wind was so strong it doused the bike pretty thoroughly anyway. :(

Apparently one part I hadn't even considered a problem was the only failure: the turn signal blinker. It isn't sealed, as I had expected, but just snapped together. Since I had it mounted just kinda hanging from the wires, ziptied up to the underside of the "dashboard", water that got on it's connector end seeped down into the block-shaped cover, which acted as a cup and retained about a cubic centimeter of water--just enough to wet the "top" end of the PCB inside, and cause conduction / corrosion / capacitance between a number of SMT resistors and transistors.

So it would come on, but not blink, so I had ot manually flash it with the switch as if it wasnt' there. I didn't knwo what was wrong with it till I got home, but when I took it apart in the living room I found the water and stuff. I brushed it clean with an old toothbrush I keep around for htat, and used some alcohol to wash it with. After it dried for a few hours, it now works fine.

Now it's tied up under there with the connector end down, so even if somehow something gets in it (doubtful) it'll just drain right back out).


That's really just temporary, though, as I'll be taking a lot of the bike apart this week, probably including the dashboard, and most of the wiring, to redo all that spliced-a-zillion-times harness that's given me so many little problems because of the splices and such, over the years, as I experiment with different things.


Bfore I do that, though, I realized I ougth to revive either DayGlo Avenger, or Delta Tripper, in case I need to go get parts or something, while this bike is in pieces. :)

So probably when I get home tonight, that's what I'll do first, before ripping into CB2.
 
The good news: The bike is now MUCH stiffer than it used to be, even with a load in the pods (bunch of heavy junk just for a test ride around the block).

The bad news: I'm much stiffer, too, from too long sitting on my legs, holding stuff in place, etc.

The bke rides way way better now with the battery back in the center, too; it's more agile to lean either way. Presently I don't have the RC LiPo pack on the bike (which used to be in the center), just the EIG NMC pack, which used to be under the righthand of the seat, and is now int eh center under it. The RC pack can be mounted where the other used to be if I need it for range. In the meantime, I'll leave it off, for weight.

Maybe find another box I can mount on the rightside there for extra cargo. ;)


I started digging up bits and pieces to fix up one bike or another, and ended up not actually doing any of them, cuz I fell asleep sitting on the floor with parts around me, while pondering.

I woke up to Tiny knocking me over cuz it was dinnertime, and decided to just go to bed after feeding them.

Got up early the next day and started more digging out of parts, while waiting for a friend I was going to help out, that had already cancelled once, but he had to cancel again cuz his truck woudlnt' start (turned out to be a bad starter). By afternoon, when he finally let me know, I went on a 23-mile trip to find a new front tire, something sticky but as slick as I could find. Was hoping to get another General CST tire from Build-a-Bike, but they're not around anymore, apparently. :( Niether were the other two places close to me, so after many detours I wound up at Gordy's Bike Shop up on 43rd & Thunderbird, wher eI got a CST that looks pretty much like the Kenda Kross, except it's really sticky (unlike the Kross), and probably won't have disintegrating sidewalls like the Kendas I've had all did.

On the way home I stopped by a friend's new (to him) house, which oddly enough ahs the same stove and light/fan unit over it that mine does, except that his stove has the glass top and mine is oldstyle elements, otherwise exactly the same.


Was wiped out and hungry when I got home, so I started some more chili cooking, and did a bit more yard work and some other household stuff, while pondering what exactly to do with which bike. Then it was bedtime, and after convincing Yogi and Tiny to actually leave the kitchen (where the chili was still slowcooking hopefully out of reach) and come to bed, since they'd already had their dinner, sleep took over in fits till almost dawn.


Woke up befroe dawn and sat out there with Yogi and Tiny, who had camped out in the mostly-dirt area next to the east gate, and were both taking a nap when I came out. Managed to sneak up on them and sit there rubbing tummies before they woke up. :lol:

After we sat for a while I started hauling stuff out to get started on CrazyBike2's repairs, having come to the conclusion that I wasn't going to make up my mind what bike to fix up as spare anytime soon. :oops:


Attached to the end of this post are a bunch of pics taken of various stages of disassembly and reassembly. Right at the end are pics of the new ball hitch that was half of the reason for doing this stuff--I wanted that to be on a part of the frame that was very stiff and wasn't likely to wiggle around under load (especially if the load is wiggly and fuzzy).


It basicallly took about 16 hours to do all of the stuff needed to get CB2 back to rideable condition. Most of that was yesterday, from about dawn sometime around 630am, thru about 9pm, when I got all the tools put away and CB2 back inside. By that time, I hurt so bad everywhere i didn't know if I'd be able to do anythign today, but I'm just really achey, rather than in the pain I thought I'd be...but I had to start out using my cane almost first thing instead of bieng sort of ok most of the firs thalf of the day.

I spent most of the time working on the bike sitting with my legs under me or out in front of me or to one side, but basically down on the ground (on a soft mat, but still). I don't have my heavy-duty workbench anymore, cuz that was my metal rack laying on it's side that the cleanup crew stole. The other bench I still have isn't strong enough anymore (especially after Tiny and Yogi have been using it to get in and out of the doggie-window-door), and it isn't long enough anyway. So I had ot do it all on the ground. :/ I considered building something to lift it up first, but that would've used up all the time I had to work on it, so, maybe someday.

Then this morning from around dawn, I first moved the solar water heater tank to the middle of the yard, and oriented east-west instead of north-south, with it's original white metal covering bent into a kind of J-shape as a reflector of sorts, and the mirror off to the west side oriented to reflect some sun onto it whiel I did other things (and I kept moving the mirror until I left to come post this stuff). This is a sort of test to see how hot it'll get in the same orientation it will be on the roof.

Then after that till I left, I finished up some details liek cargo pod sides/lids back on, tying up wiring, re-mounting the horns, etc. (which are now in the headlight/turnsignal area in front), so I could test ride it around and come post the pics/etc so far.

So right now what's done is the lower cargo pod rails are completely replaced, all the way from the center section of the bike frame, where they used to bolt to the lower tube of that section (to the former dropout accessory bolt hole), all the way back to the hitch. They are welded to the frame in front, and to each other with cross-tubing top and bottom, and welded via more tubing to the top rail as well. A second cross tube is just behind the first at the hitch, making a box for the hitch plate to be welded to, and the hitch ball is then bolted thru a hole in that plate (drilled with the drill press, as I couldn't hold a drill straight ot save my life by that time of night).


I repaired some welds here and there on the frame, too, especially at the seat frame/cargopod interface. Originally just tacks to hold stuff together, it's worked well enough I fixed it permanently.

I also had to grind the axle down a little on the right side of the rear wheel, so it would easily come in and out between the pods. The old rails would easily allow that but the new one would not, as it makes the pods slightly more vertical and doesn't give the clearance on the axle it would need. It does on the left side, as somehow I manaaged to get that rail out slightly farther (more than 1/2 inch!) when I built the bike. I considered fixing that while I was at it, but decided not to mess with it for now.

I had ot add some plate (right) and tube (left) to the dropout to replace the screw-and-spacer arrangement that held the old rails off of the dropouts, and while I was doing it I left the wrench I usually use to tighten the axle nuts on the nut to ensure I would have clearance when i was done. :lol: Made that mistake before.... :oops:

I also changed the cranks back to round ones, to get teh chain tension the same all the time, as I don't have a derailer to help with that, and I've had innumerable problems because of that. Since I was moving the big battery into the frame, I also wouldn't have room for hte chain to pass thru anymore, so I routed it inside a (PTFE?) tube I'd kept for the purpose some long time back. I have some orange stuff that's even better if I can ever find it--pretty sure it is in a shed, but not a guarantee.

The problem of chain coming off the rear freewheel is still there, though, because of alignment--it's worst when reversing, iethe rby rolling bike backwards or by lifting a pedal to freewheel the chain bakcwards. But it happens even if ghost pedalling; is less of a problem when under tension like if I push a little bit during startup when it's still effective to pedal.

Only good solution I can think of right now is to put idlers on the frame itself to run the chain down under the frame, and increase wrap on the chainring and freewheel, as well as insure alignment. A derailer would also help with the alignment and tension, and wrap, but makes changing the tire or tube or anything on the rear wheel a whole lot more complicated...it already takes at least an hour off and hour back on, so anything tha tmakes it harder is totally unwelcome.

I may get the idlers done this week, but ther'es a lot of other more important stuff that has to happen first:


I still have to do all the rewiring, except for the part of removing all the connectors and thin wires between battery and controllers, except for the SB50s used to acutally plug into the batteries themselves. I even cut off the PP45s from the controllers, and wired those directly to the output of the Cycle Analyst shunt, all soldered together. It's not a pretty job, but it is tight and (at least slightly, I'm sure) lower resistance than with teh connectors and thin wire. SOme of that wire had been 16gauge, some 14. Now it is all at least 12--that's what the CA shunt uses, AFAICR, and is what's on the controllers' inputs. (it's the size on my wire stripper that fits it, anyway). The stuff on my battery connections is 8, and there's some 10 in the interconnects. Even the charging port is now 12G (had been 16).

I dug out some of the multi-wire cables off of old test equipment that is going to become my new wiring harness, but it isn't yet cut up and spliced into the harness yet. Once it is, I can just connect it up, moving from the old wires to the new ones, and then take all the old stuff off the bike (except the motor power wires, which are those just redone above).


Then I still have to take apart the whole frontend, and replace the fork, make the torque arms/fork-leg-tubes, and change the rotor/rim/spokes on the front wheel, then put the new tube and tire on there. That in itself will probably take a whole day again. I have three left int eh vacation. :)

At the very end of the pics is a series of the CA the night of the long ride to get the new tire, before I started tearing into it to get the repairs done.
 

Attachments

  • 20140930_104305.jpg
    20140930_104305.jpg
    57.1 KB · Views: 4,249
  • 20140930_104321.jpg
    20140930_104321.jpg
    80.2 KB · Views: 4,249
  • 20140930_104344.jpg
    20140930_104344.jpg
    78.3 KB · Views: 4,249
  • 20140930_112155.jpg
    20140930_112155.jpg
    73.9 KB · Views: 4,249
  • 20140930_112159.jpg
    20140930_112159.jpg
    56.3 KB · Views: 4,249
  • 20140930_112210.jpg
    20140930_112210.jpg
    72.3 KB · Views: 4,249
  • 20140930_112219.jpg
    20140930_112219.jpg
    63 KB · Views: 4,249
  • 20140930_120241.jpg
    20140930_120241.jpg
    60.1 KB · Views: 4,249
  • 20140930_132750.jpg
    20140930_132750.jpg
    64.6 KB · Views: 4,249
  • 20140930_132801.jpg
    20140930_132801.jpg
    59.2 KB · Views: 4,249
  • 20140930_132810.jpg
    20140930_132810.jpg
    79.8 KB · Views: 4,249
  • 20140930_135301.jpg
    20140930_135301.jpg
    55.1 KB · Views: 4,249
  • 20140930_140246.jpg
    20140930_140246.jpg
    69.7 KB · Views: 4,249
  • 20140930_140331.jpg
    20140930_140331.jpg
    54.4 KB · Views: 4,249
  • 20140930_155036.jpg
    20140930_155036.jpg
    58.7 KB · Views: 4,249
  • 20140930_155047.jpg
    20140930_155047.jpg
    76.7 KB · Views: 4,249
  • 20140930_185030.jpg
    20140930_185030.jpg
    52.8 KB · Views: 4,249
  • 20140930_185030.jpg
    20140930_185030.jpg
    52.8 KB · Views: 4,249
  • 20140930_185038.jpg
    20140930_185038.jpg
    48.8 KB · Views: 4,249
  • 20140930_185038.jpg
    20140930_185038.jpg
    48.8 KB · Views: 4,249
  • 20140930_185214.jpg
    20140930_185214.jpg
    36.1 KB · Views: 4,249
  • 20140930_185325.jpg
    20140930_185325.jpg
    28.6 KB · Views: 4,249
  • 20140930_185810.jpg
    20140930_185810.jpg
    61.4 KB · Views: 4,249
  • 20140930_202412.jpg
    20140930_202412.jpg
    63.3 KB · Views: 4,249
  • 20140930_202424.jpg
    20140930_202424.jpg
    61.7 KB · Views: 4,249
  • 20140930_202444.jpg
    20140930_202444.jpg
    51.4 KB · Views: 4,249
  • 20140930_205816.jpg
    20140930_205816.jpg
    36.8 KB · Views: 4,249
  • 20140930_205826.jpg
    20140930_205826.jpg
    33.5 KB · Views: 4,249
  • 20140930_205844.jpg
    20140930_205844.jpg
    42 KB · Views: 4,249
  • 20140930_205854.jpg
    20140930_205854.jpg
    28.7 KB · Views: 4,249
  • 20140930_205912.jpg
    20140930_205912.jpg
    52.4 KB · Views: 4,249
  • 0929142135-00.jpg
    0929142135-00.jpg
    15.7 KB · Views: 4,249
  • 0929142135-01.jpg
    0929142135-01.jpg
    15.5 KB · Views: 4,249
  • 0929142135-02.jpg
    0929142135-02.jpg
    16.7 KB · Views: 4,249
  • 0929142136-00.jpg
    0929142136-00.jpg
    12.3 KB · Views: 4,249
  • 0929142136-01.jpg
    0929142136-01.jpg
    14.1 KB · Views: 4,249
  • 0929142136-02.jpg
    0929142136-02.jpg
    18 KB · Views: 4,249
Alrighty; it's now nearly a new bike. :lol:

IMG_0145.jpg

Well, it certainly RIDES like one: there's no wiggliness, no play in the front fork during braking/accel/etc., and the bakc end doesnt' sway around everytime I hit a bump or ride over rough patches of pavement.

It'd still be better if I had rear suspension, but the "new" front fork (suntour xcv3?) helps out in front way more than the old suntour (version ?) that was just worn-out (it worked ok when I started out with it!). Used to be I'd have to slow down to slow walking speed to go up driveway entrances, into and out of parking lots, etc., or it'd bottom out the front fork and make it hard to steer cuz of the wiggle.

Now it just goes up like it's supposed to, and I can enter at 15MPH if I have to (if someone is right behind me honking instead of slowing, rare-ish but happens)--only tested that twice, once straight on and once at an angle, on the same up-sloping driveway with >1" of curb at it's entrance. Dunno the degree of slope, but it's steep enough to normally cause a problem even at 5MPH. It still doesn't do the backend much good but the front that usually has real problems with it now handles it fine.

Sort of a before:
View attachment 38

IMG_0062.jpg

IMG_0063.jpg

and sort of an after:
IMG_0137.jpg

IMG_0139.jpg

IMG_0140.jpg


When completely unloaded, no cargo, the bike handles REALLY well. Without the pods I'd be tempted to race around corners faster than I ought to, cuz I'd be able to lean WAY over. :lol:

With cargo, well, it's different than it used to be: not bad, but not the same. The new fork has more travel, so it makes the front end at least an inch or so higher than before, and changes the steering angles a little. There's no wiggle or wobble or anything, not like when I changed stuff before the race and had deathwobble. :oops: It's just different, more responsive I guess. Good once I get used to it. :) The heavier the load on the sides, the more you can feel it, now. Before, it wallowed around so much it was kinda hard to tell the difference! If I keep all the load in the center, across the top of the pods, it responds better, but it takes longer to do it (moment arm of mass so far above the wheel/ground, I guess). If I keep the load way down in teh pods (tested with some old 18Ah SLA laying flat), it responds much better than with it higher...but I won't be able to do a lot about that, yet.


I *am* seriously considering rebuilding the pods, so that they have an angled bottom, sloping inward down to near the bottom edge of the rim, leaving it so that there is just enough space for clearance of speed bumps and the like. That way I can have more space down low but still be able to sharply lean the bike. I could also add a hinged shelf bottom to the pods so that if I *have* to have a flat bottom for something, I can flip the panel down and put the stuff on the "shelf". Dunno if that will happen anytime soon.


Main things to be swapped out yesterday:
View attachment 40


To replace these:
IMG_0060.jpg
(no not the fuzzy part)

I did make a mistake in the brake U-brace/bosses placement, about an inch too low. Not sure how I managed that...maybe I was doing it wiht a 24" front wheel in mind (which would make sense if it was for my other bike idea, but I can't remember now). Since I haave a 26" rim on this one, and no easy way to relace it into 24", I went with leaving it as 26" and just moving the U-brace up an inch. Since it's bolted and clamped on, it was only a minute to move it. (which also means that if I decide to go with a 20" wheel on the front like I wanted to try, lacing up one of the old 9C rotors into the other ex-Zero rim if I can find or make spokes for that, I can easily move the brake U brace down so I still have rim brakes for it).
View attachment 2
View attachment 1


Now, on that U-brace: it seems to work pretty well, though it isn't quite as good (stiff) as if it were welded on; most of that is because it's a crappy U-brace to start with, and if I were to replace it with a better one off of some other fork, or make one of my own, that has a back that custom-fits the face of this Suntour fork perfectly, then it would probably brake better. But it's just about good enough now (a little weak for this heavy a bike: it'd work fine on a regular pedal bike, I think).


I didn't get the rear brake bosses added yet; I'm still looking for the little piece I'd saved off anohter frame for that. :/


The front wheel: I swapped over the rotor/spokes/rim very easily. The BionX rim that was on the MXUS rear wheel wasn't dished, so it was very easy to just unbolt the covers on this front 9C with crappy rim, pull the stator, and move it all to the MXUS rotor/wheel. I must've done something to that wheel in the time since I got it, though, cuz I had to completely retrue it--it wasn't even in-round, was very offset. It's not perfect cuz I ran out of energy, but I will go back as time permits and true it up a littel more. It's good enough to ride now, anyway, and is much better than the original rim.

Test fit of covers, stator and a magnet comparison:
IMG_0112.jpg
IMG_0115.jpg
IMG_0114.jpg


The covers had white corrosion inside, and there was rust on the magnets and stator, on the 9C. Probably from the few rains it's been thru in the last year here--there's not many of htem but there's a lot of water when it happens. :)

I didn't get a pic but to alleviate the rust I put some PB blaster lube in there on the stator itself, to work it's way donw in the lams. Then after I put the first side cover on the MXUS rotor, and lowered the stator into it, then before I put the other cover on I poured a couple of capfuls of ATF in there, to help coat the magnets and lams and try to repel water in future from them, since I wasn't prepared to do a full rust-removal and prevention-coating.

IMG_0105.jpg
IMG_0106.jpg
IMG_0107.jpg
IMG_0108.jpg
IMG_0110.jpg
IMG_0111.jpg
IMG_0116.jpg


I also don't know when or how this cover bolt got damaged, but i's very badly bent:
IMG_0103.jpg


The rotor on the MXUS is, for all practical purposes, exactly the same as teh one on the 9C. They swapped perfectly. (just like with the 1000W Goldenmotor I'd gotten from Icecube57 way back).

Actually, with the black rotor, shiny aluminum covers, and the black-and-silver BionX rim, the front wheel looks kinda snazzy. ;)
IMG_0118.jpg


OH, and as I was working on things, Yogi got his head stuck in the empty rotor...he's such a doofus. At least he didn't panic and let me hold him there while I got it off him (and took a pic!):
IMG_0113.jpg


I put on the new CST kenda-kross-clone and thick tube, but I also used the old carcass of the old ruined thick tube as a tire liner, to add at least a few mm of protection over most of the tread area of the tire. (it shouldn't slip around like the slime type liners end up doing).

It's outline is nice and round; I was afraid it wouldn't be, and cause me steering/cornering grip problems:
IMG_0131.jpg

I also did my usual, and added a ziptie to the vlave stem after feeding it htru the rim, so I can get hold of it; it's tough to do when it's deflated and you're on the side of the road, with these deep rims....
IMG_0132.jpg

I also again followed the suggestion of someone else (sorry I forgot who) and added heatshrink around the valve stem to help keep any rim issues from cutting into the stem, and also to keep any stem problems in manufacture from allowing stem failure except at hte very root of the stem/tube interface (whcih is what failed on the last one, probably from my running the tire too low).

While I was installing the wheel, I decided that I'd better also use the Nordlock washers on there (I already have them on the rear wheel). Might help keep from snapping those alloy dropouts. But to do it I had ot get the nut off the wire side of the axle, and since I managed to rip out the wire of a couple hall pins, I decided to just cut off the JST connector and solder all of the wires directly to the controller (like I did on the rear). One thing to note: When I was taking the housings off hte anderson PP45's, I pulled the wire out of the contact! So that is probably why those kept getting hot, and not a problem with the angle of contact (which I've also had with other stuff). The ones on teh 12G wire on the controller side were crimped on very solidly, but the ones on the little 14G or 16G wires on the motor side were on enough to not come out with a tug, but a good pull did get them out.

BTW, since I have removed all the power connections and directly soldered all power-handling wires from battery to controller and contorller to motor, my Wh/mile has gone up! I think it must be able to pull more current with lower resistance, at startup from a stop, cuz it feels like it does have more torque (butt-dyno). I haven't studied the numbers yet but it seemst obe th e case based on taht, too.


I did some testing on the new fork dropouts with the motor in noncritical situations, with repetitive hard accell using only the front motor, and regen braking (which uses both), and found that my "wrench torque arms" appear to be sufficient, at least for now. I am checking hte droupouts before and after every segment of every ride, to ensure I don't get a nasty surprise. ;) If any problmes arise I will just cut off the problematic dropouts and add my own using steel tubes over the fork legs. I didn't have the patience to get that done right, yet, and have a lot of work left to do on the trailer and other things, and rewiring, so since this does work I will leave it unitl I have to fix it, or wind up with the "extra" time to do it anyway.


The torque arms looked like this before the "upgrade" of the fork/wheel:

IMG_0068.jpg
IMG_0073.jpg

And the old steel fork dropouts looked like this after removing the wheel/axle/arms from it; no damage I can see:
IMG_0074.jpg
IMG_0075.jpg
IMG_0088.jpg
IMG_0090.jpg


The axle:
View attachment 28
IMG_0076.jpg
IMG_0081.jpg
IMG_0082.jpg
IMG_0083.jpg
IMG_0084.jpg
IMG_0085.jpg


The torque arms are like this now (the left side does have a clamp; I just hadn't put it on yet in the pics):
IMG_0141.jpg
IMG_0142.jpg


Somewhere in all the stuff, I damaged the headlight and now it only has the highbeam filament. :( I have a few things I could do about that, haven't decided which one to do.


I haven't made up any new "fairing" to go over it; I don't really wanna reuse the old one; it's pretty worn out and trashed. I wanna come up with something new, but no ideas yet.


So far I have a few miles on the revamped bike, and it's all doing well. More news later, as I have it.
 
Hopefully all this makes sense, as I typed up most of it last night, in bed, and I dozed off a zillion times in the process. I fixed glaring errors like sentences that didn't get finished, while I was posting it today along with inserting pics where they fit. I have so much that I posted it in several posts.


Almost, it approaches "done". :)

Well, as done as anything I ever do gets.

It might even get a new name (not really, but The Little Red Wagon might fit...).

First, a pic of it at dawn this morning, with the dogs being all bored in front of it.
1 088.jpg

Without the dogs:
1 090.jpg
1 092.jpg

This is what it looked like with the new front wheel/fork but before the paintjob:
1 007.jpg


Today just before I left to come post this:
1 100.jpg
1 101.jpg


Then some pics of itas was while I wrote most of this (last night, on Sunday), with it's "shiny" new paintjob. The first, actually, that it has ever had, aside from previous times I've pianted parts of it just to keep it from rusting away. I think I managed to get a pic of it from most angles with and wihtout flash, with and without the background lighting (so that in some of the pics it is it's only light source). the reason for the flash pics was simply to illustrate the reflective areas (mostly HF rolls of striped reflective tape, red/white on the entire rear of boxes, and yellow/black on front and sides as trim).
1 071.jpg
1 072.jpg
1 073.jpg
1 074.jpg
1 075.jpg
View attachment 12
View attachment 11
1 078.jpg
1 079.jpg
1 080.jpg
1 081.jpg
1 082.jpg
1 083.jpg


The cargo pods from the top, in the rear wheel well, to show it's still lit pretty well donw there with only three fo he dozen or so white downlight leds left functioning in that strip. Tried resoldering but it doens't fix the problem, dunno what root cause.
View attachment 4


It still has the rewiring to do, but there' just not enough time to do ti as I restart work tomorrow, but it is already MUCH better than it used to be. I'm actually glad I didn't start a new bike, but instead just fixed this one up, for the most part--I sort of want to redo the center section, and I still want rear suspension, but for now, it'll more than do.

It is way more fun to ride now, becuase of the steerer fix, new fork, cargo pod frame, and brakes on front and rear. Oh, and because of wiring the power connections solid instead of andersons--it definitely increases acceleration, enough to feel/notice but I don't have a dyno to quantify it exactly. (and that's with just the front phases soldered: I forgot I didn't do the rear phases, just the halls, so I still need to do the rear phase wires. Tough job because I can't really get to the controller that easily, and that motor and controller both have really short phase wires).


Now for a "blow by blow" of the work, if I can remember all of it. :lol:
 
I can't remember what order I did things in, so I am jus tposting them up as categories of work. First, is miscellaneous, and To Do. :)

This is the pile of hardware no longer nee3ded on the bike, replaced by other things (bolts replaced by welds, etc). But ecause of hte extra metal in the new cargo rails, it's still heavier than it would be otherwise, not counting taking off the 15lbs or so of battery in that 7.62 ammocan. :) (which also takes off at least a mile of range for every pound of battery, I think, but I don't normally need that much range, and I can easily slap that onto the side rails like the big pack used to be if I have to, under the righthand side of the seat).
1 086.jpg
1 087.jpg


This is the bottom of hte righthand cargo pod, which I use as a kickstand, having yet to build one that survived very long or was easy enough to use. (I still have to try Lightcycle's idea, of adjustable legs off a walker, bolted to the cargo pods). As you can see, it's worn thru the aluminum in places. Will have to put a skid plate on there eventually.
1 021.jpg
1 022.jpg
1 023.jpg


These are the main spaghetti bowls, with clusters of wiring I really need to totally redo. So that's gonna end up a complete removal of all wiring and replacing with a new fresh-made harness. Almost all wires can be really really tiny gauge, so I am going to use an existing multiwire bundle that used to be a test-equipment cable for as much of it as I can. For the few wires that need mroe power, I'll use multiple wires of that bundle if it'll work, or a separate cable with thicker wires if I have to. Mostly that's just the headlight and the horn that need mroe amps, and they're already on a seaprate 12V (15-16V really) battery, where the rest runs on a 12V (15V) DC-DC (old wallwart that doesnt' have enough amps for the headlight and horn). Power wires for the motors and stuff are already separate, and mostly jus tneed neatening up and shortening to fit the placment of things, rather than outright replacement.

it's jsut a lot of work, and requires for my nowadays poor dexterity several days to do, most likely, days where I must not have to go anywhere, or else first fix up another bike to do that stuff while I leave CB2 out of action with no wires....
View attachment 6
1 029.jpg
1 030.jpg


One thing I'm sure glad of is this BionX rim was laced correctly to the MXUS rotor, and the spokes are wide around the valve stem instead of crossing over it like the 9C rotor was laced to it's rim....with luck I won't need to worry abou tit for a long time but at some point I will, and I don't wnana deal wiht it like I did the last time!
1 050.jpg


The line on the chrome of the fork here shows how mcuh travel I've needed just in my regular commute, nto counting bad spots in roads and whatnot, which i have avoided so far. I don't really wanna test those untiL I have to. :lol:
1 049.jpg
.


Fairing: i think I still wanna put some sort of cover on the frame, so that it keeps water out of things on rainstorms, and gnerally makes the bike easier to see cuz i tlooks bigger (more surface area). But I want to ponder cuz I'd like to find my rivet nutserts, and put them in at the corners of where panels would go (into little tabs I'd weld onto the frame), and screw them on instead of ziptying them on. I'd also like to use metal panels instead of coroplast, but coroplast is light and I have a lot of it, if I can keep paint sticking to it (unlikely--nothing has ever worked so far). I have thin aluminum that cna easily be cut and bent to shape to fit specific frame openings, so if I run across that, it'd be ideal.

However, I will have to go buy paint at tha tpoint, because I have no more of that red--it ran out after *almost* all the bike was finally done. Enoug to call it done, but ther'es a lot of little spots I missed. One of those I thought I was going to miss was the side panels of the pods--I'd left them till last, becuase i was thinkng about leaving them white for visibility at night, but then I remembered I have all those reflective stripes all over the bike, so even if my lights are all dead anybody heading toward me could see me easily anyway.
 
Brakes:

Now it has rear brakes, for the second time in it's history! The first time was when I originally built it, I think, or nearly that far back, and they were crappy pointless caliper brakes that woudlnt' even really grab the rim I used then...I'm sure if I could've set them up correctly and had new shoes (instead of decades old) and whatnot, they'd've actually done some good, but I didn't, so...off they came next time I did work on it I think.


I never found the piece off the Trek frame (that had it's front half become the front end of what would've been the replacment bike for this one) that I'd saved for the brake bosses, which meant I needed another set. Well, I had another Trek frame I'd already started borrowing bits off of, so I cut the section of the seatstays out containing a couple inches either side of the bosses, and then cut the stay pieces in half lengthwise, so I was left with half-tubes I could just weld over the top of the existing stays on CB2. This is them tacked to the frame after alignment, with arms on tehre to be sur ethey fit and pads would line up on rims:

1 024.jpg
1 025.jpg

1 026.jpg
1 027.jpg


Since these were separate pieces, I had to align them with each other, and I forgot to take a pic of my "jig" for that, but basically I bolted them to a flat plate, and used that to theoretically hold them parallel and vertical whiel I clamped and welded them to the stays. Maybe the heat warped something and they became unparallel, or maybe I screwed up and didn't acutally have them bolted parallel despite my checks beforehand (wouldn't be the first time), but they must've come out nonparallel to cause the problem with toe-in (released) vs parallel (engaged) pads-to-rim.

A second issue is that I had to use two series pieces of cable housing, as I had no single one long enough to reach. Both came off other old bikes, too. The cable, however was new; a Sun Lite (I think?) extra long cable from ChoppersUS. I HAD housings for them too but no idea where they went in the after-fire mess. I consider myself lucky to have run across this cable itself--no other brake cable I had was long enough by more than a foot; even derailer cables weren't quite long enough by several inches.

Another possible issue is the Tektro arms; I don't like the way they feel (sort of wiggly), but they were free (and new AFAIK) from Oatnet, in a box of assorted leftover bits he sent me some time ago. I tried the pads that were on them, but got almost no braking force from them, so replaced them with the spare set of SINZ red/black KoolStop clones I had, and just doing that improved braking tremendously--now they were better than the FRONT brakes (which use AVID single-digit 5 arms (whcih arent' wiggly), and a Shimano metal lever, and a single cable housing run).

Either way, they do still work really well, especially considering the crappy plastic WuXing ebrake lever presently serving to engage them (the one on the left grip I was alreayd using for hte brake light switch...which itself would be replaced in the rewiring. I don't yet know what I will do for all that, but I have (somewhere) the mate to the Shimano lever used on the right side, and I'll use that for the left (rear) brake once I find it. Ideally the brake ligth should be a switch that comes on before ANY braking, because I want to be able to just light up the brake lights as a warning before I begin slowing, for others boht cyclist and cars/trucks that are riding my butt on occasion (instead of just going around me like they ought to). Lots of options on how to do that, just have to decide which one and implement it.
1 043.jpg
View attachment 4

1 045.jpg
1 046.jpg


Fixing the brakes took me more than two hours yesterday to resolve as best as I could, but it will require "adjustment" of the alignment of the brake bosses to actually fix the problem. :( Despite my care in clamping and positioning before welding, I apparently did nto get them vertical and parallel. Now would probbly be the bets time to fix them, but I am pondering some frame changes in the rear anyway, so I'd rather wait till I decide on that since it would affect what I do with the brakes. What I ended up with was pads that are only parallel to the rim when they are applied--they toe in a LOT when not applied, so much so that the rear is lifted off the rim by a couple millimeters while hte tip of the front edge is still touching the rim.

I haven't done it yet, but presently the only "easy" way of fixing that is to file the front edge fo the pads so it's bevelled, and clears the rim until engaged.


I messed with them more today, truing the wheels within less than half a millimeter, and readjusting the brake pads, and managed to get a little better braking and less friction when not braking, but I think it's simply gonna end up having to wear thru the tips of the pads, this time, until I can deal with the problem properly. Was thinking of dealing with it today, but I had so many little problems with the steering tie-rod handlebar end mount redo (mostly with me, a few with the welder) that I didn't have enough time before it got hot and I was too hungry (shaking) to continue; I won't have enough time once I get home from posting this and going for groceries before it gets too dark (and the mosquitoes attack in droves).


Oh: I almost forgot. The rear rim was not meant as a rimbrake type, and was painted black; the paint dind't provide any kind of braking surface, except that it got nice and hot from the pads rubbing, to the point it melted the paint to the pads so that when I stopped the tire (was just using the motor to spin it off ground for ht etests) the pads stuck to the wheel and even at full power the motor couldn't start it spinning!


Another issue is this huge dent I only noticed when about ot put the brakes on there. I have no idea when it happened, or what caused it, but it didn't hurt the rim except to make the dent itself in the rigthside edge. didn't hurt the tire or tube either. Plenty of tings I've hit that couldnt' be avoided (potholes mostly, usually unavoidable because of traffic) that could've done it, though.

1 016.jpg
1 017.jpg


So I lightly gorund off the paint with the angle grinder till it was almost aoff, then held sandpaper on a block to get the rest off, using the motor to spin the wheel under the paper. :)

I nicked the rim itself iwht the grinder apparenlty in a few places, but it doesnt' seem to be affecting it's ability to act as a braking surface.
View attachment 3
1 053.jpg
 
Back
Top