44V 17.6Ah 18650 lithium ion (cobalt) battery pack

Joined
Jan 3, 2007
Messages
192
Location
Fort Collins, CO, USA
I'd originally posted up a long battery-pack creation thread over at the old Visforvoltage site, and I've been waiting for that site to do some form of resurrection so that I could re-post it here, but I think I've given up hope. So here is my battery build thread, re-written for Endless-sphere.


About a year ago, I was riding to work with my Wilderness Energy BL-36 kit. I had a 3 cell 12V 12Ah SLA pack and it weighed about 28lbs. I would ride it in to work, carry it up four flights of stairs and then charge it at my desk, and all was well. But I was riding at about 20mph and I wished I could get the bike going a bit faster. Then I discovered visforvoltage and found that many were riding their BL-36's at 48V and that this gave them a nice speed boost. I bought another 12V 12Ah battery and made a wooden case for the 4 pack and rode it and was riding up around 25mph and this was much better. But I found that somehow 35lbs carried up 4 flights up stairs at work seemed excessive - whereas somehow 28lbs merely seemed "really heavy". Besides now I needed another charger and a better case.

So I started to look at other - lighter - batteries. My goals were: under 20lbs, more than 12Ah capacity, better than 40V (ideally 48V) and under or around $400. I wanted about 12-15Ah of capacity so that I could travel to and from work roundtrip - with extra capacity for errands - and not have to recharge at work because I'd then have to carry the chargers with me everywhere.

I already had a decent Triton SLA, NiCd, NiMH, lithium-ion, lithium polymer charger ( http://www.rc-hobbies.com/product_pages/gp-triton-dc-charger ) and I had a very nice Astroflight 109 lithium charger ( http://www.aeromicro.com/catalog/astroflight_109_deluxe_digital_battery_charger_discharger_2691678.htm ) from flying model airplanes.

For my new pack, I looked at NiMH, lithium ion and lithium polymer. With NiMH, >10Ah put me in the realm of F-cells, which to this day are not particularly attractive to me from either a capacity per weight, or a capacity per dollar perspective. Looking at D-sized NiMH, at the time - and oh how prices have changed on both nickel-based cells and lithium-based cells - 40 D-sized 10Ah were $5.25/each in quantities of 21-50. I spent a while analyzing pricing and thinking about how I would build the pack, and eventually homed in on 3.6V 2Ah 18650 lithium ion batteries as the batteries that I wanted to use. At the time, I could get a 48V 10Ah NiMH (40s1p of 1.2V 10Ah) pack for $210 that weighed 14.1lbs rated for 16A max discharge, or a 48V 10Ah 18650-based lithium ion (13s5p of 3.6V 2Ah) for $260 that weighed 6lbs rated for 15A max discharge. Both discharge ratings were from the manufacturer. So $210 for 14lbs, or $260 for 6lbs. I chose the lighter.

The problem, as was clear even in those days before Dell recalled 4.1 million battery packs, was that 18650's are not known to be the safest of battery technologies to use. They are used widely in applications - most notably laptop batteries - but their use requires a pretty good battery management system.

But I saw that All-battery.com was listing 18650 cells with built-in battery protection circuitry for a price that was under $3.70/cell with a 15% off coupon that they had emailed as part of their weekly special. I thought for a while about it, and then bought them. I purchased 101 cells - of which I planned to use 96 - with the extras planned in case I had some marginal cells. I called, double-checked that the cells really did come with built-in BMS circuitry, and placed the order. As I recall, I paid about $350 including shipping - but since I phoned my order in, I don't have an email to check this.

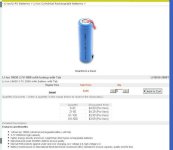
The cells that I chose are these - although the prices have changed a bit in the last year:
http://www.all-battery.com/index.asp?PageAction=VIEWPROD&ProdID=1139

Within a couple of hours, someone from all-battery.com called me and said that they didn't have enough 3.6V 2000mAh 18650's to fill the order and asked if I would take 3.6V 2200mAh 18650's instead. I asked if these 2200mAh batteries came with the same over-charging, over-discharging protection circuitry as the 2000mAh cells and was assured that they had the same safety features - only the capacity was different. So, of course, I agreed to 10% higher capacity for free.

Attached is a photo of the cells that I bought - although mine arrived as 2200mAh, not 2000mAh. It's interesting to compare this price, with the prices today.
 

Attachments

  • allbattery.JPG
    allbattery.JPG
    31.5 KB · Views: 9,799
The batteries arrived and the first thing that I did after I unpacked them was to look for this battery protection circuit. I took the cell apart, such as I could given that it's in this thick steel jacket and looked all over it and didn't see anything that looked remotely like a PCB. I pulled off the heatshrink, shown a flashlight into the gap at the top. No PCB to be seen - although there was a little whitish-orange resistor thing at the top of the cell underneath the positive pole that looked like something - but not so sophisticated that it could detect over or under voltage.

So I called all-battery and got passed along from salesperson to salesperson and then finally to an engineer who looked at the page, looked at a couple of datasheets and then said somewhat unapologetically "the webpage is wrong, there's just a PTC for protection. You can return them if you want, and we'll give you your money back." I thought about it a bit, but at the end of the day, I'd gotten a good price on the cells, I had them, I wanted to build a pack. I'd figure out how to make it safe.

I'd done a fair bit of research and decided that these are the main causes of problems with lithion ion cells - aside from manufacturing defects, it is my belief that this list is complete:

overcharging - charging to a voltage in excess of rated voltage (4.2V, usually)
overdischarging - discharging to a voltage below the rated discharge voltage (3V usually)
high discharge rate - discharging at a rate above the specifications (1.5C for lithium-ion, 2-40C for lithium polymer, where "C" indicates the capacity in "ampere-hours" usually, so 1.5C on a 2Ah would be 2Ah * 1.5 = 3A)
high charging rate - charging at a rate above the specifications (1C usually for both lithium ion and lithium polymer)
puncturing - like drilling a hole in the cell wall. Or sticking a nail through it.
high temperature - letting the cell get above the specified rate (usually >45 Celsius).

And then add to this list two things that are a subset of the list above:
balancing issues - leads to a subset of overcharging or overdischarging.
short-circuiting the battery - a subset of high discharge rate.


I bought a balancer, a Hyperion LBA10 ( http://aircraft-world.com/shopexd.asp?id=4283 ) which could balance a 6S pack (22.2V). This individually monitored each cell for overcharging, and keeps all cells within +/-5mV of each other during charging.

Then I got a temperature monitor, with a wire probe and an alarm, that I got from Radio Shack a long time ago. This is my thermal monitoring system. There's also a PTC in the cell monitoring for overheating.

Then I got two 25A fuses and fused the pack on the end and in the middle. This monitors for short-circuiting and discharging above spec. There's also the PTC in the cell monitoring for tis.

And for puncturing, I resolved to try to never stick anything through one of the ridiculously thick steel jackets on the cells.

And for overly high charging rate - my power supply can't come close to supplying a 1C charge rate for the pack that I built. The best that I can do is about 1/4C, but usually the charger is set to about 1/10C.

Which leaves only overdischarging the cells. For this right now, I'm using a Hyperion E-meter to monitor the pack current and voltage. I may try to rig up something to monitor the individual cell voltages myself.
 
I tested all of the cells with a resistive load and the voltage droop on all but one of them was similar. There was one that was marginally worse than the rest. I set it aside.

I checked the capacity of two of the cells through a couple of charge/discharge cycles and found that it held about 2.3Ah - a bit better than than the spec.

I built the pack by arranging cells in groups of two, soldering, then in sets of 2 pairs to create a square, and then used 12 AWG wire to strap 2 sets of 4 cells together into a rectangular set of 8, which was my base cell. This turned out to be a good idea in theory but a poor one in practice.

At one point when soldering one of my sets of 4 cells together, I dripped solder down the inside of one of my packs, it immediately burned through the heatshrink and created a short between positive and negative. Yes, I shudder when I recall this too.

At the time I was soldering on our back porch and I heard a distinctly loud "SNAP!". I stopped working and looked at the pack for all of about 5 seconds and then reached down and touched the pack and all the cells were all super hot. With barely a thought, I reached down, scooped them all up and tossed them about 15 feet into the middle of my lawn. I then literally ducked behind some furniture with my class ABC fire extinguisher in hand and waited for the *boom*. Which never came.

After about 15 minutes I donned safety glasses, a thick jacket (it was summer) and thick gloves and I crept out to the lawn and saw that nothing had changed. I took off a glove and touch the pack and it was still hot. Very hot. I realized the PTC's were tripped, got an extension cord and my soldering iron and unsoldered the cells in the middle of the lawn, saw the solder drip that caused the problem - which I fixed - and set the 4 cells aside.... inside my BBQ. I resumed soldering, but was much, much more careful after that.

Once I finished the pack, I wired all of the cells up using two 12 AWG to connect each pack of 8 cells to the next pack of 8 cells to create two 6 series packs of 8 cells each, or 22.2V (6 * 3.7V) 17.6Ah (2.2Ah * 8). Then I attached 18AWG wires to all of the sub-packs - for cell balancing and monitoring, I put fuses on the ends and connected the packs with E-Flite EC3 connectors ( http://secure.hobbyzone.com/catalog/HZ/eflite/eflite_connectors/EFLAEC303.html ).

Then I created a 14-pin plug using a 14-pin connector that I bought at Radio Shack. So I now had 3 plugs, the two plugs for the 22V 17.6Ah packs, and then this 14-pin connector. I then created the female side of the connector and then wired it so that this side of the plug tied battery pairs together. So (8 cell) sub-pack #1 on one of the two packs now gets tied to sub-pack #1 on the other pack, similarly pack #2, and so on. Then I created an EC3 connector which tied the two plugs together - a parallel plug. With the two outputs paralleled, and the 14-pin plug tying the pairs together, I now have a 6 series, 16 parallel pack. Or 22.2V 35.2Ah pack. This is the charging configuration. I did this so that I could charge the thing using my Astroflight 109 (37V, 10-cell max), and Hyperion LBA10 balancer (22V, 6-cell max).

For discharge, on the bike, I unplug the 14-pin connector - thus disconnecting the pairs, and use another serial EC3 connector to turn the two 22V sub-packs into one 44V series pack.
 

Attachments

  • 6s16p_charging_198 (Small).jpg
    6s16p_charging_198 (Small).jpg
    34.7 KB · Views: 9,787
  • 12s8p_discharging_168 (Small).jpg
    12s8p_discharging_168 (Small).jpg
    21.9 KB · Views: 9,786
I managed to get this post from Visforvoltage before it died.


I finished my pack last night and tested it out today. I'll post the final photos later.

I rode down to a flat, straight road and tested it out. These tests were done without any pedalling at all. I was in a semi-tuck position. The voltage/current was read from a Hyperion E-meter. The velocity was measured with a Garmin ForeEtrex 101 mounted on the handlebars.

The batteries weren't even a little warm when I was done. The start and end temperature were exactly the same measured from the wire probe buried deep in the center of the pack. It was a short test, but it bodes well for the longer ones to come.

My old set up: 36V 12Ah sealed lead acid
Start voltage: 40.13V
End voltage: 39.47V
Amps discharged: 783mA
Avg. speed 21.9mph
Voltage @ avg. speed: 37.3V
Amperage @ avg. speed: 12.1A

My new battery pack: 44.4V 17.6Ah (12s8p) lithium ion
Start voltage: 50.77V
End voltage: 49.74V
Amps discharged: 986mA
Avg. speed 28.1mph
Voltage @ avg. speed: 47.4V
Amperage @ avg. speed: 15.1A


Final stats:
Voltage: 44.4V (12 * 3.7V)
Capacity: 17.6Ah (* 2200mAh)
Weight: 10.5lbs.
Approx. dimensions rounded up, packed into bicycle bag): 11" x 7" x 4"
Discharge configuration: 12 serially strung packs of 8 cells each.
Charge configuration: 6 serially strung packs of 16 cells each
Charger: Astroflight 109 charger - up to 9S cells, max charge rate of 8A
Balancer: Hyperion LBA10

I have bricked my charging area thoroughly. The tan surface the batteries are on is an 2cm elevated 3cm thick ceramic bread "stone" which is designed for extremely high temperatures. I have a large class ABC fire extinguisher within 10 feet and two large 5 gallon buckets full of finely ground sand. And I have only charged when I have been present in the same room - this is true for all 50+ cycles that I've put the pack through. I charge only when I'm nearby. The charger has an auto-charging safety mechanism (which auto-detects te cell count to prevent accidently selecting the wrong cell count), and auto-shuts off after a time-out. And each cell is individually monitored for excess voltage, there are individual thermal fuses per cell, there are 25A fuses per sub-strand, and both the charger is fused and the balancer both contain fuses.

So far I have well over 50 cycles on the pack. I normally charge to about 85% charged, and then discharge about 8Ah in use. I haven't rechecked the capacity - I'll probably do that in the near future.

If I had to do it all over again, I'm not sure that I'd change anything. I'm a bit envious of the new A123 cells, but the price difference of using them is much higher. I'll sit on the sidelines and will wait. I expect to get at least two to three more years out of this pack before I'll need to replace it, and probably the A123's will be priced better by then and it will be easier to buy them in bulk (one would hope). In the meantime, carrying 10.5lbs up four flights of stairs isn't too bad at all.
 

Attachments

  • battery_charging.JPG
    battery_charging.JPG
    91.6 KB · Views: 4,574
  • battery_bag.JPG
    battery_bag.JPG
    48.4 KB · Views: 4,566
Excellent work, Patrick.

For the new visitors: Patrick M. has significant experience in battery technology, through participation in RC modelsports. RC enthusiasts like Patrick have methodically chronicled great amounts of valuable information regarding new battery technologies; they are the early-adopters and beta-testers of high-efficiency brushless motor designs along with emerging battery chemistries.

If any new EV enthusiasts think safety measures like Patrick's are extreme and/or unneeded, be advised: all batteries are NOT created equal. Exercise all due dilligence in getting informed about working with any particular chemistry, regardless of voltage. In particular, use your favorite search engine regarding "lithium, batteries, fire". Improper lithium battery safety measures have cost Sony corporation billions of $ in recalled batteries, but that recall may save priceless lives. No joke.

Enjoy the video below and then think about safety.
http://www.youtube.com/watch?v=0MiM2E6pvfg
 
Nice one Patrick,

Its lovely to see everything documented like this. Its these kinds of well thought out user reports that help us to make informed decisions.

Whats your final cutoff voltage on charge? I know part of Tesla's method of extending the calender life on their packs involves a final voltage below 4.2 volts.
 
The theory is that since the 8 cells are in parallel, the voltage on all of them is forced to be equal. The BMS handles it like one large cell and keeps it in the healthy range.

If one cell shorted or was damaged, then you could have a problem.
In Xyster's pack, each cell has in internal PTC to protect against short circuit.
 
Excellent work, Patrick.
Nice one Patrick
Thanks for the kind words. :)

Whats your final cutoff voltage on charge? I know part of Tesla's method of extending the calender life on their packs involves a final voltage below 4.2 volts.
I cut off when I reach 4.2V at a 4A charging rate - so I skip the CV (constant-voltage) stage of charging. I believe that the charged rest voltage is 4.1V.

but I wonder how you keep the cell of 1S8p pack in balancee?
I'm not sure that I see what you are asking... as Fetcher said, the 8 are all tied together. They are shorted together - they are always balanced by virtue of being shorted together.

The term "balanced" to me means "the voltage of two different cells are the same value". It's not possible for paralleled cells to become unbalanced in this system.

Now, as Fetcher pointed out, if a cell dies, then I have a problem. I have PTC fuses individually on the cells. I have a voltage sub-pack monitoring system during charging (the LED's on the balancer give an indication of relative voltage of the subpacks). I should be able to see a sub-pack gradually failing - in fact, I already can see one of my sub-packs is consistently about 5mV lower than the other sub-packs after draining about 50% capacity from the pack.

I have a temperature monitor set to a relative low value (45 Celsius) with a pretty loud alarm. I have PTC fuses on each and every cell.

If a cell were to suddenly, unexpectedly fail - well, there's really nothing anyone can do about this. Manufacturing errors - such as the Sony batteries in the Dell recall - is nothing that anyone can do anything to prevent except to buy the cells from a well-known manufacturer (which I did, LG is known to be a reliable 18650 vendor).
 
In Xyster's pack, each cell has in internal PTC to protect against short circuit.

To my knowledge, all commercially available 18650 lithium-cobalt cells include a PTC (there's a reference to this somewhere on the BatteryUniversity.com site). At least one type, I think from Tenergy, uses a solid-state internal PCB instead.
In uber-parallel arrays like Patrick's and mine, we've theorized the fuse-like PTC can actually cause a parallel-subpack cascade failure. Due to wide PTC manufacturing variances (also referenced at B.U.), some PTCs open the circuit before others, under load causing a sudden spike to cells still connected; the sudden spike causing thermal runaway before those lagging PTCs have a chance to open.

I think through this mechanism, in early testing I managed to rupture a couple of these cells, and kill 22 more without rupture. The ruptured cells smoked, their soldered melted, but they did not catch fire.

If my experience is any guide, this problem manifests when resting cell voltages are already below 3.7V, and the cells are called on to provide >1C of current.

To prevent a reoccurrence, I individually monitor each parallel subpack's voltage, and stop the ride when the first one reaches ~3.75V resting. At this voltage, there's only about 20% remaining capacity anyway.

Top row, 2nd from left, ruptured li-ion 18650.
img_1872_432.jpg
 
Do you have a pic of this in place on your bike Patrick?

Greg
 
gwsaltspring said:
Do you have a pic of this in place on your bike Patrick?

I took this one a few minutes ago. The pack wasn't plugged in - you can see the 2 pairs of dangling blue connectors on the back. The headlights are 2 10W 24V halogens driven by the primary pack (they use $5 Home Depot electrical conduit for the lightbulb holders). The rather large Crystalyte controller in the back is a 36-72V, dual-speed (for the dual 4-series motors), 20A controller.
 
Hi Patrick

Bike looks great nice and clean job!! what are you doing for the torque arm on the front? is it a manganese fork? this bike is way to tidy to be used as a daily commuter! ha ha, leisure use only? :) thanks for the picture.

Knoxie
 
knoxie said:
Hi Patrick

Bike looks great nice and clean job!! what are you doing for the torque arm on the front? is it a manganese fork? this bike is way to tidy to be used as a daily commuter! ha ha, leisure use only? :) thanks for the picture.

Knoxie

It's a steel fork - and it's extremely thick steel both in terms of caliper width and the amount of steel around the drop out. I bent the drop-outs on my previous bike coming out of a stop light and I was more careful this time. But I didn't put a torque arm on... I couldn't find one that fit. On the one hand, it seems risky to use a x5 motor without a torque arm, but on the other... well the steel around the wheel is very thick and there's a lot of it. I specifically chose this model of bicycle entirely due to the drop-outs (and the price... US$179).

I do use it as a daily commuter. Probably 3 days a week. I have about 100 trips on it (approximately). It's about 10 miles round trip to work. Thanks for the compliment though. :)
 
Hi Patrick

Ok I would still put a torque arm on it to be safe, when you say its metal its mild steel or chromoly? and not a composite? The Puma motor bent 4 pieces of 3mm mild steel, opened them up like a sardine tin! you may be ok at 20A but if you go up I would get something made up, wouldnt want to see you go over the bars!! I have fitted torque arms to all my bikes, the BMX one is very rigid, it has to be they just snap and bend under the torque otherwise.

A very tidy machine though and I like you battery pack as well that's a great job, all round top top marks!

8)

Knoxie
 
knoxie said:
Hi Patrick

Ok I would still put a torque arm on it to be safe, when you say its metal its mild steel or chromoly? and not a composite? The Puma motor bent 4 pieces of 3mm mild steel, opened them up like a sardine tin! you may be ok at 20A but if you go up I would get something made up, wouldnt want to see you go over the bars!! I have fitted torque arms to all my bikes, the BMX one is very rigid, it has to be they just snap and bend under the torque otherwise.

I've been over the bars - and had a bruise to show for it. I'd prefer not to repeat the experience.

Aside from the fact that it's steel - a magnet sticks to it well - I'm unsure of the alloy mix. The website is:
http://www.columbia.com/Product.aspx?top=7&p=3974&cat=72030&viewAll=False

and claims it's "high tensile steel" - whatever that means. The width of the drop out is 6mm, and it's a bit over 1cm in length from the edge of the drop-out arm to the inside of the drop out on both sides.

But your point is well taken, Knoxie. I will keep an eye out for a good torque arm. Thanks for the advice.

Maybe I'll try taking it to a metal shop and see if they could make me something.
 
Hi Patrick;

Thanks for the picture and this post.

I had been wondering whether I had the ability to build myself a battery pack and I think I will leave that to others.

I had a hunch that you might have a tidy rig and I wasn't disappointed. Very nice work. I have a similar setup but with a 406 and NiMH on the rear.

For my next bike I thought I would go to a 5304 on the rear as I find that when I hit gravel the 406 wheel spins. (My thought is that it doesn't have enough weighting) So it is interesting to see your set up.

The roads around here are pretty rough, leading me to think that a seat post shock and big gel seat are the order of the day on the next bike.

Once again thanks for taking the time to respond with the picture it was very helpful to me.

Greg
 
Yup, nice bike indeed.

You could improve handling some by shifting the battery's weight forward, say so they're under the seat/against the seat tube, or something.

High tensile steel is a fancy word for basic steel. It's easy to rust, otherwise there's nothing evil about it. Are these butted tubes?
 
Back
Top