Cowardlyduck said:
I definitely like the idea of precisely located nickel. My main concern with this whole idea is being able to accurately locate the positive cell end under a sheet of copper you can't see through.
That raises the question...for those who have done it...how are you ensuring you don't miss the positive cell end when welding?
Cheers
This was a major concern for me as well in the planning phase of my battery.
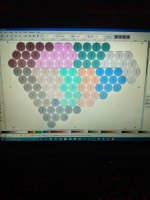
This is where using Inkscape (the open source alternative to Adobe Illustrator) really started to make sense regarding the design platform I chose. I apologize for reusing the same pics I posted on page 3, but the info needed is in these two pics so there ya go..
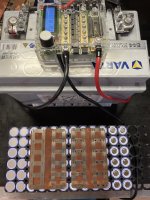
I designed everything in Inkscape. The cell holder plates, the copper bus plates, etc... no other software was used because I'm comfortable in Inkscape, and there was no reason to use anything else. Like any vector-based software you can set up and refine a grid in which all else can be based on, or not if you choose. Once I had the cell holder plates cut on my CNC from 3/8" polypropylene (a common kitchen cutting board from the dollar store) and the cells fit snuggly, I then knew the grid I had setup in Inkscape was then set in stone. The grid intersections were located at the center of the cell holes, and with snapping enabled at grid line intersections it made everything else fall into place AKA made the any remaining measuring or alignments quick, easy work.
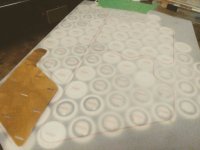
You can see in the screen grab every component and design choice layered and visible. The beauty of working in SVG (vector) files is the cross compatibility with other software. When I drew out the copper plates I then drew the "slit"- the elongated oval shape that was to sit directly center on each cell, and center-snapping made that alignment over the cell accurately. To do a quick test against the physical cells in their cell holder plate, I made the copper plate/slit artwork the only visible layer in Inkscape, and simply printed the artwork out on a cheap inkjet printer onto common Vellum paper. From there, seeing that the geometry was exactly matching the physical battery, I was then able to take the SVG file (default vector art file type) and import it into Easel. I used Easel because it can accept SVG files and it's just dead simple to use, and knowing the file was dimensionally accurate it was just a few clicks to get my CNC to cut the copper plates exactly as they were in the file/printed on Vellum paper.
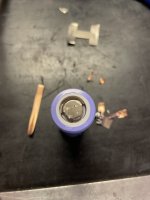
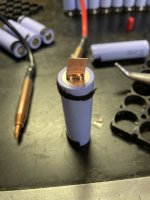
Once I had the copper bus plates cut, I just had to stay fairly close the "slit" cutout with the weld probes, as I knew that cutout was dead center to the physical cell below it.


.jpg")


")