DIY Stealthy Longboard Build Log (Integrated batteries)

@sl33py;

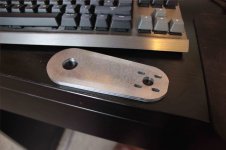
Thank you for your suggestion. I'm afraid that cutting the sheet smaller would not be a good option, the deck would snap since the sheet is now the main support structure.
The sheet itself weight just a little over 400g, which is almost unnoticeable.

So far it seems that I will indeed need to hammer it into the shape of the board

@bandaro; Upon fastening the sheet, it has pulled itself onto the curve of the longboard, it's very stiff with little give to it. My main concern here is the unevenness (bumps) in between each screw around the edges, I'm not sure how to tackle them. I'd like the sheet to be easily removable for battery swaps.

I might go into the extra effort of covering the sheet in fiberglass, masking the imperfections that way, I'll look for some more alternatives before I start

Thank you, Marcin
 
I thought it might be a critical part of the support... I like bandaro's idea of FG or CF - non conductive, lighter, and a couple layers thick should be a great stiffener.

Looking back at your pics - i can see some of the waves/unevenness. Perhaps try a countersink bit for each of the screw holes to go into the deck? If the screw head is tweaking the shape... Perhaps also try a heavy buffing wheel to the edges? Round or angle them to fit better. Might even cut/buff the edges slightly smaller than the board's edge to better follow the lines?

Great project and can't wait to see your first ride!! Small hurdles and challenges, but you obviously have the skills to figure it out!

GL!
 
View attachment 1

This weekend I've made a lot of progress, I even test-rode the board for 18 miles around in central London (It was a blast!)
I've discovered one thing so far; London streets are dirty, and by dirty I mean really dirty:

IMAG0007.jpg
IMAG0006.jpg

The pictures above were taken when I've started disassembling the board after the initial test ride, to clean it up and continue the works. This is how it looked like before the ride:
IMAG0004.jpg

Things that went well

  • - It's super fast
    - Comfortable, I did not get tired after a three hour long 18 mile ride
    - Relatively light
    - Structurally strong yet bouncy when it needs to be
    - Did I mention the range? :D
Things that went wrong

  • - The screws that hold the sheet attached to the deck started to wear the drilled holes and popped out one by one. You can see what I am talking about in the second picture of this post. This was later fixed (See below)
    - The welded/brazed bracket broke off before I even left my home, I do not recommend brazing for anything that requires strength.
    - Braking too harsh, I will need to reprogram the ESC, I've been thinking about a servo controlled mechanical brake instead, sounds like a fun project
    - The pulley that is mounted on the motor shaft kept tearing up my setscrews, luckily I have found higher quality ones around in my toolbox

What happened the day before:

The 12 tooth pulley that I have ordered did not have a hole drilled through the center, so I have drilled a 6mm hole and drilled + threaded two 5MM holes for the setscrews.

IMG_7929.jpg
Charging up the batteries in the meanwhile ...

View attachment 21

The motor mount:

After measuring the diameter of the truck, motor screw distances and roughly estimating the distance for the motor for the best belt tension I went ahead and opened up my trusty SolidWorks and started designing a bracket.
Plain and simple, nothing fancy here...

Screenshot 2015-05-15 18.25.02.png
After finding a piece of scrap 5mm aluminum, I've placed it in my CNC machine and pressed the green button :D

IMG_79292.jpg
Looking good so far..

View attachment 19
Done!

IMG_79294.jpg
Quick brush-up later..

View attachment 6

It fits!

IMG_79296.jpg

The weld
Since I do not have the suitable machinery to weld aluminum, I wanted to give brazing a go. The weld looked good, but it broke, twice. I later went ahead and made some different mount, you can see it in the pictures below

IMG_79297.jpg

What happened the day after:

After the initial test-ride it was time to continue finishing this project up. I have taken the board apart, sanded down and straightened the aluminum sheet, it was in a bad shape.

The receiver (Sounds like a metal band name)
It was time to get rid of that taped-on cardboard box and hide the electronics away for a clean look.

View attachment 15

Rough guideline

IMG_79299.jpg

Slotted + installed

IMG_792991.jpg

//Random pictures
Charging ..

IMG_792992.jpg
View attachment 11

The result so far..
fin.jpgfin2.jpgView attachment 2fin4.jpgfin5.jpg

Next-up: "Bodywork" and painting!

Kind regards, Marcin
 

Attachments

  • IMG_79295.jpg
    IMG_79295.jpg
    199.4 KB · Views: 886
Boom! that is awesome man. nice range and good updates with all the pics! you have done really well!
 
sl33py said:
I like bandaro's idea of FG or CF - non conductive, lighter, and a couple layers thick should be a great stiffener.

Nope. Nope nope nope. Carbon is conductive. Very conductive. So is the dust. So don't go cutting it on power tools without proper ventilation, as well as a good mask. If the air has enough carbon dust in it, you will get potentially lethal sparks out from your tools. If you have a properly pressed bit of carbon, you will get a very nice short across the battery terminals in this board, much the same as aluminium will. If there is a bunch of resin on the surface it might insulate it, but I would want to insulate it normally as well to be safe.

Otherwise, great to hear the board is working, keep us updated to how it holds up over time!
 
Thanks Bandaro! I did not realize CF was conductive.

Great build!!! Looks great and super stealthy!

Could you let us know how much it weighs ready to roll? What wheel/hub are you using? looks low profile and not the "common" abec 11 83mm. Just drill through the thane to attach the hub?

Nice work!
 
Thanks you everyone for your amazing input!

Yesterday in class I've had someone ride my board that is considerably heavier than me, and the board did bend uncomfortably much, I have temporarily added a stainless steel support bar through the middle of the board, adding quite a bit of weight.
Because of that I have decided to make a "slight" change in my plans; I will either CNC machine a new deck made out of 6082 aluminum, or purchase a new deck and lay it out in a way that I can add carbon fiber support rods that run in between the batteries. We'll see how that goes.
Apart from that, everything has been going really smoothly and so far I have covered well over 50 miles without any major issues.

In terms of wheels, I'm using the stock 70mm wheels that came with my board. They get the job done but I will upgrade to 90mm in the future for a bit more riding comfort.
The motor mount is indeed attached to the truck by drilling and threading a 5mm hole, so far it has been holding up fantastically.

Tip: Always thread lock EVERYTHING
 
I dig your build but I want to know more about your routing table more than anything. Any info? Looks like four nema17s on leadscrews? No problems with aluminum with that setup?
 
There hasn't been much progress lately as I am still rethinking the entire project

I have however started to minimize the footprint of my electronics and started integrating them into one of my trucks, this way I can make the board look a little bit sleeker.
I have also started modifying the ESC, the first mod was to change the 6v bec to 5V output, which was easily done by replacing one of the resistors. Next up I'll start extracting the firmware and try to find compatible open-source firmware that I can use as a base

1.jpg

2.jpg


This is the temporary remote control I've been using:
rem.jpg

I've went though various iterations so far, joystick, sliders, phone app and now the two buttons
In a non-brake setup I feel like the two buttons give me the most control over my board. A joystick tends to be imprecise, especially when going over curbs/bumps. I will make a custom 3D printed enclosure once I settle on a final design
Regards
 
I did it !!!!

After two days of struggles I've managed to port one of the existing ESC firmwares to this little tricky device! I am now able to fully program custom breaks and a better start-up routine

[youtube]L6zQm_X6Z4w[/youtube]

Updates will follow :)
 
This build is utterly amazing. stealth battery packs, electronics hidden in the trucks... its just beautiful.

How much was the CNC machine? I've been seriously thinking about getting one.
 
I've finally came up with an idea on how to finish this board the right way! The aluminium sheet started to show signs of wear and metal fatigue after ~ 120 miles of travel.
The plan is now as follows:
- Remove the metal sheet
- Reinforce the deck with a couple carbon fiber tubes / strips
- Cover the batteries with a sheet of maple ply, apply varnish and maybe do a custom spray job, 2nd option to varnish would be a carbon fiber sheet for the ultimate stealth look
- Sand everything down to perfection

I'm super excited!

Regarding the CNC machine, it cost me roughly £700 to DIY but that included making my own custom electronics to save a large portion of the investment

Regards
 
sleziak said:
I did it !!!!

After two days of struggles I've managed to port one of the existing ESC firmwares to this little tricky device! I am now able to fully program custom breaks and a better start-up routine

[youtube]L6zQm_X6Z4w[/youtube]

Updates will follow :)

Cool! What ESC are you using and can you share steps to reprogram? Will it have regen braking possible?

Nice build btw and can't wait to see your v2!!!
 
sl33py said:
sleziak said:
I did it !!!!

After two days of struggles I've managed to port one of the existing ESC firmwares to this little tricky device! I am now able to fully program custom breaks and a better start-up routine

[youtube]L6zQm_X6Z4w[/youtube]

Updates will follow :)

Cool! What ESC are you using and can you share steps to reprogram? Will it have regen braking possible?

Nice build btw and can't wait to see your v2!!!

I'm using the turnigy aquastar 120a which surprisingly doesn't even get hot without a heatsink.
The microcontroller it uses is different from the common atmel chips, it's a silabs one, I've managed to program blheli software onto it after heavily modifying the way it senses the motor fases. Reason being is that the ESC unlike any other uses a dedicated voltage comparator chip. That is great news however since using it allows me to sense the motor position at much lower RPM and it's also much faster than using the integrated voltage comparators.

By default, the Blheli software does not support braking , but writing one will not be an issue. It ofcourse will be regenerate as well, since that makes more sense than shorting out the motor causing heat buildup in the mosfets.

Once I finalise this I will post the source code, the binary and a somewhat detailed tutorial.
Hopefully I'll also manage to port my receiver code onto the ESC allowing me to directly connect my RF receiver to the ESC, but time will tell

The thing that's slowing me down the most is that Blheli is written in ASM; a low level language that I have limited experience in, and a language that is hard to make major code alterations in especially when you don't have a debugger (like me)

The skateboard has been a real workhorse for me, covering roughly 15 miles daily, and making me wake up on time because it's so exciting!

Regards
 
I did a quick weight check today, the entire board weighs in at 6.5kg with 15A 6S worth of batteries
How does that compare to other boards?
 
sleziak said:
I did a quick weight check today, the entire board weighs in at 6.5kg with 15A 6S worth of batteries
How does that compare to other boards?

That's about 14 pounds, and mine weighs in at about 18 pounds, and you seem to have about 6 miles on me range wise, even when I'm not burying the trigger the whole way. I'm on a 10ah 6S pack with dual 270's, but mine's got a big black box and isn't nearly as sleek as yours.

I'm not comfortable building my own CNC, but i did do some price checking since your post and it looks like a brand new table top mill just big enough to produce motor mounts and other things of that size would be about $5k american plus the tooling kit and a PC to run it. One day, i may spring for one, but not today.
 
longhairedboy said:
sleziak said:
I did a quick weight check today, the entire board weighs in at 6.5kg with 15A 6S worth of batteries
How does that compare to other boards?

That's about 14 pounds, and mine weighs in at about 18 pounds, and you seem to have about 6 miles on me range wise, even when I'm not burying the trigger the whole way. I'm on a 10ah 6S pack with dual 270's, but mine's got a big black box and isn't nearly as sleek as yours.

I'm not comfortable building my own CNC, but i did do some price checking since your post and it looks like a brand new table top mill just big enough to produce motor mounts and other things of that size would be about $5k american plus the tooling kit and a PC to run it. One day, i may spring for one, but not today.

My recommendation would be finding a 4060 CNC router on ebay, changing the spindle to a 1.5KW one (£150).
It would result in a very similar rigidity to my machine costing about the same as well

Regards
 
sleziak said:
longhairedboy said:
sleziak said:
I did a quick weight check today, the entire board weighs in at 6.5kg with 15A 6S worth of batteries
How does that compare to other boards?

That's about 14 pounds, and mine weighs in at about 18 pounds, and you seem to have about 6 miles on me range wise, even when I'm not burying the trigger the whole way. I'm on a 10ah 6S pack with dual 270's, but mine's got a big black box and isn't nearly as sleek as yours.

I'm not comfortable building my own CNC, but i did do some price checking since your post and it looks like a brand new table top mill just big enough to produce motor mounts and other things of that size would be about $5k american plus the tooling kit and a PC to run it. One day, i may spring for one, but not today.

My recommendation would be finding a 4060 CNC router on ebay, changing the spindle to a 1.5KW one (£150).
It would result in a very similar rigidity to my machine costing about the same as well

Regards

That's good advice. Looks like they have them for as little as $2500 with shipping and it could make larger parts than the one i found. Thanks for the direction!
 
@longhairedboy
The 4060/6040 CNC should cost no more than $1800, you might want to dig deeper in your search -> http://www.amazon.com/Sanven-Engrav...=UTF8&qid=1432760969&sr=8-3&keywords=6040+cnc

The above linked machine also has the necessary motor and VFD, so no need to upgrade those.

If you don't mind a 30x40Cm working area, a 3040 router might be fine, costs ~$650 in the UK
http://www.amazon.com/Eteyo-3040t-d...F8&qid=1432761004&sr=8-4&keywords=3040+router

[youtube]awah4PXwAAo[/youtube]

In terms of a computer to run it, you can get just about any second-hand old computer with a parallel port for less than $50. I've omitted that step by building a custom USB interface and some software

Add £150 of tooling on top of that and you're set for a while!

Tips for cutting aluminium using a router (Learned them the hard way):
- Don't go beyond 0.4mm depth of cut
- Always use carbide bits, routers are less rigid so we have to remove less material per rotation causing the tools to heat up faster
- Have a can of WD-40 on stand-by and spray the workpiece every pass or two, try not to spray on the tool as it can shatter due to thermal shock
- Always mount your workpiece securely, the stiffer the better.
A safe start would be .2mm depth of cut, 10K RPM and 900mm/min surface speed.

Regards,
 
torqueboards said:
That's pretty awesome $650 for a CNC! How well does that thing work for cutting aluminum parts?

They seem to cope quite fine, obviously not as good as a dedicated CNC mill but it's perfect for hobby use

Here's a video of one:
[youtube]KVmf_dac8gY[/youtube]
 
torqueboards said:
Perfect for testing stuff. Looks great.

How's the learning curve to learning the programming and such?

The programming is the easy bit imho. There are loads of tutorials and free software out there.
The thing that bites you the most is being in a rush. I can't count the amount of times I broke £10 tools or almost drilled through my work bed due to stupid mistakes

My recommendation would be to read up a lot and always triple check everything before hitting the green button

A bit off-topic: I plan to machine a few custom longboard decks in the future, I wonder if there would be anyone interested
I think that making this, electric would be mind blowing

brd.jpg

Regards
 
Back
Top