OptimusPrime
10 W
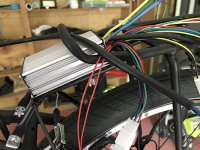
Reading the forum gives me the impression that putting the controller in a bag is a no no. Given that, what do you do about the rats nest of wires? I want a clean look but need some ideas on how to achieve that. Thanks!


")


OptimusPrime said:[...]at the same time I wonder how makers like Bafang and Golden Motor can get away with putting their controllers inside the hot motor itself, I would think it's a lot hotter in there than in a bag on the frame.

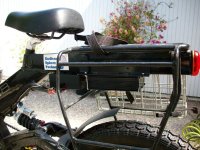
dogman dan said:My fave is on top of a rear rack, tight up under your ass. connections can often be hid under the seat, a drier place. Seal up the controller if needed, for the rain from above. In motion, your controller will be in the wind shadow of your ass, and water from the wheel will be deflected if you have some kind of fender.
markz said:Small controllers are great to hide.
If I were you, having a black rack and a silver controller - paint the cont black!!!!
That is what I am going to do.