methods
1 GW
You are not.
Bona fide Space Monkey you are.
-methods
Bona fide Space Monkey you are.
-methods
 it will be a proud day
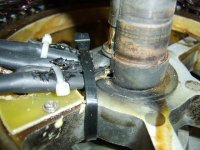
 bikeraider said:Hum ... and both guys I have burn an X5 with cooling hole on both side of the hub motor :?, I'm actually thinking to use the X6 from Markcycle to put on my next ebike project :lol:
Good day!
Bikeraider
Yeh but I don't want to be #2liveforphysics said:Right on Arlo!
Its good to see another person giving the controller a proper thrashing, and the controller comming out un-harmed.
You will likely join Methods soon as the 2nd person to have burned up a X5 on this forum.
Maybe i could be the first to fry an x6 :lol: It realy is to bad I like the x5.Arlo1 said:Maybe i could be the first to fry an x6
bikeraider said:Hum ... and both guys I have burn an X5 with cooling hole on both side of the hub motor , I'm actually thinking to use the X6 from Markcycle to put on my next ebike project
Good day!
Bikeraider
Thats about where I am at with all of this. But I love building things and no Methods not in the getofabulious way you think I meen. So I am working on both options right now.gasfreeearth said:Have you or anyone figured out how to mount a freewheel to the 65mm axle of Marks motor? I have been thinking about this too, but this part has got me stuck. I actually wanted to use the x6 with Methods controller, but because of this went with the 5304 which turned into the 5303. Unfortunately I do want pedals on the bike so mounting a freewheel setup on the x6 would be necessary.
Thanks,
Terry
methods said:CANT RECOGNIZE PORT
* Go into Device Manager and look in the com port section. Look for the USB device. Make sure it has a com number of 5 or less. You can manually assign com numbers by going into the advanced properties and manually setting the com port to a lower number. Com's 1 and 2 are usually open. These were reserved on older computers for things like parallel ports that no longer exist on new computers. Use one of those. You may have to take something that is on 1-5, change it to 6 or 7, then change your USB dongle to one of those lower numbers.
* Make sure the USB dongle has lights on and is actually plugged into a USB port and not your network port or some other hole on the computer Don't laugh - happens all the time. Guys will put the dongle into any hole where it will fit.
EVERYTHING IS RUNNING - JUST WONT PROGRAM
* The controller must be powered off for this entire sequence.
* You must have the software running (i.e. pressed start) before plugging into the controller. This is because the controller only accepts a firmware update right at powerup. After that the controller multiplexes the programming pins out to other functions. So - if your controller is powered or the USB is plugged in before you hit program the microcontroller inside will be ignoring the programming ports. You must apply power to the controller 5V buss (via the USB) at the same moment you attempt to program. Dont worry - it is repeatable and reliable.
* If you get a message that says that the download FAILED then what is happening is the peripheral devices on your controller are sucking more current than your little USB dongle can source. Please disconnect a few items like the throttle, ebrake, cruise control, 3spd switch, etc. All those devices draw power from the +5V buss
SpeedEBikes said:Since it isn't keyed one can easily insert it upside down or offset. I don' know that catastrophe would ensue if connected wrong, but wouldn't rule out the possibility.
will_newton said:Hey Methods, I'm reading the 18 fet infineon thread now and hit up the tech. ref. forum to tease out the details on how to run the programming software. It's a bit funky.
will_newton said:I am thinking of using your DC30AC80_65ADC.asv as a template, but with voltage set for 17S lipo. I have a problem getting a 3.2 v/cell cutoff, which using your conversion info from page one should be 45v, but I can only choose 42.5v or 51.5v, nothing in between.
will_newton said:I am looking for an E-bike Lab walk-through that tells what each field means, all the info seems to be spread everywhere.