
My econo-e-bike
- Thread starter E-HP
- Start date
It's an evolution, but genetically engineered, since you apply things you learn on the forum and get a better idea about what works or would work better. I had a lot of fun with just $600 invested, and something to work on when it's the rainy season, which is down to a few days a year lately.ebuilder said:Just cruised the thread and only to add, cool bike and you capture the DIY ebiker spirit with your build E-HP.
Well done sir!
99t4 said:Those 4-pot calipers look like they have a lot of good features. Hope they are easy to set up.
What magnetic switches did you order?
I'll report back. I'm hoping they have enough clearance with the hub motor
EDIT: They arrived! But not the cut off switches. I haven't installed them yet, but placed them on the disc to check the clearance, and there's plenty. A whopping 3/64" or so; more than a mm anyway.

The quality of the calipers is pretty nice. The levers look even nicer and have adjustable reach.
These are the switches...that should have arrived today.
https://www.amazon.com/dp/B07RYCSDMK?psc=1&ref=ppx_yo2ov_dt_b_product_details
Oh wait, they just updated the tracking again. They're supposedly a mile away.
EDIT 09-21-22 I can't believe I waited this long to upgrade my brakes. They work great. I did a long descent and no fading, but heated up the discs, which were making clicking sounds of metal cooling when I got back. Hopefully they keep performing this well, but already day and night compared to the cable actuated calipers.


EDIT 09-22-22
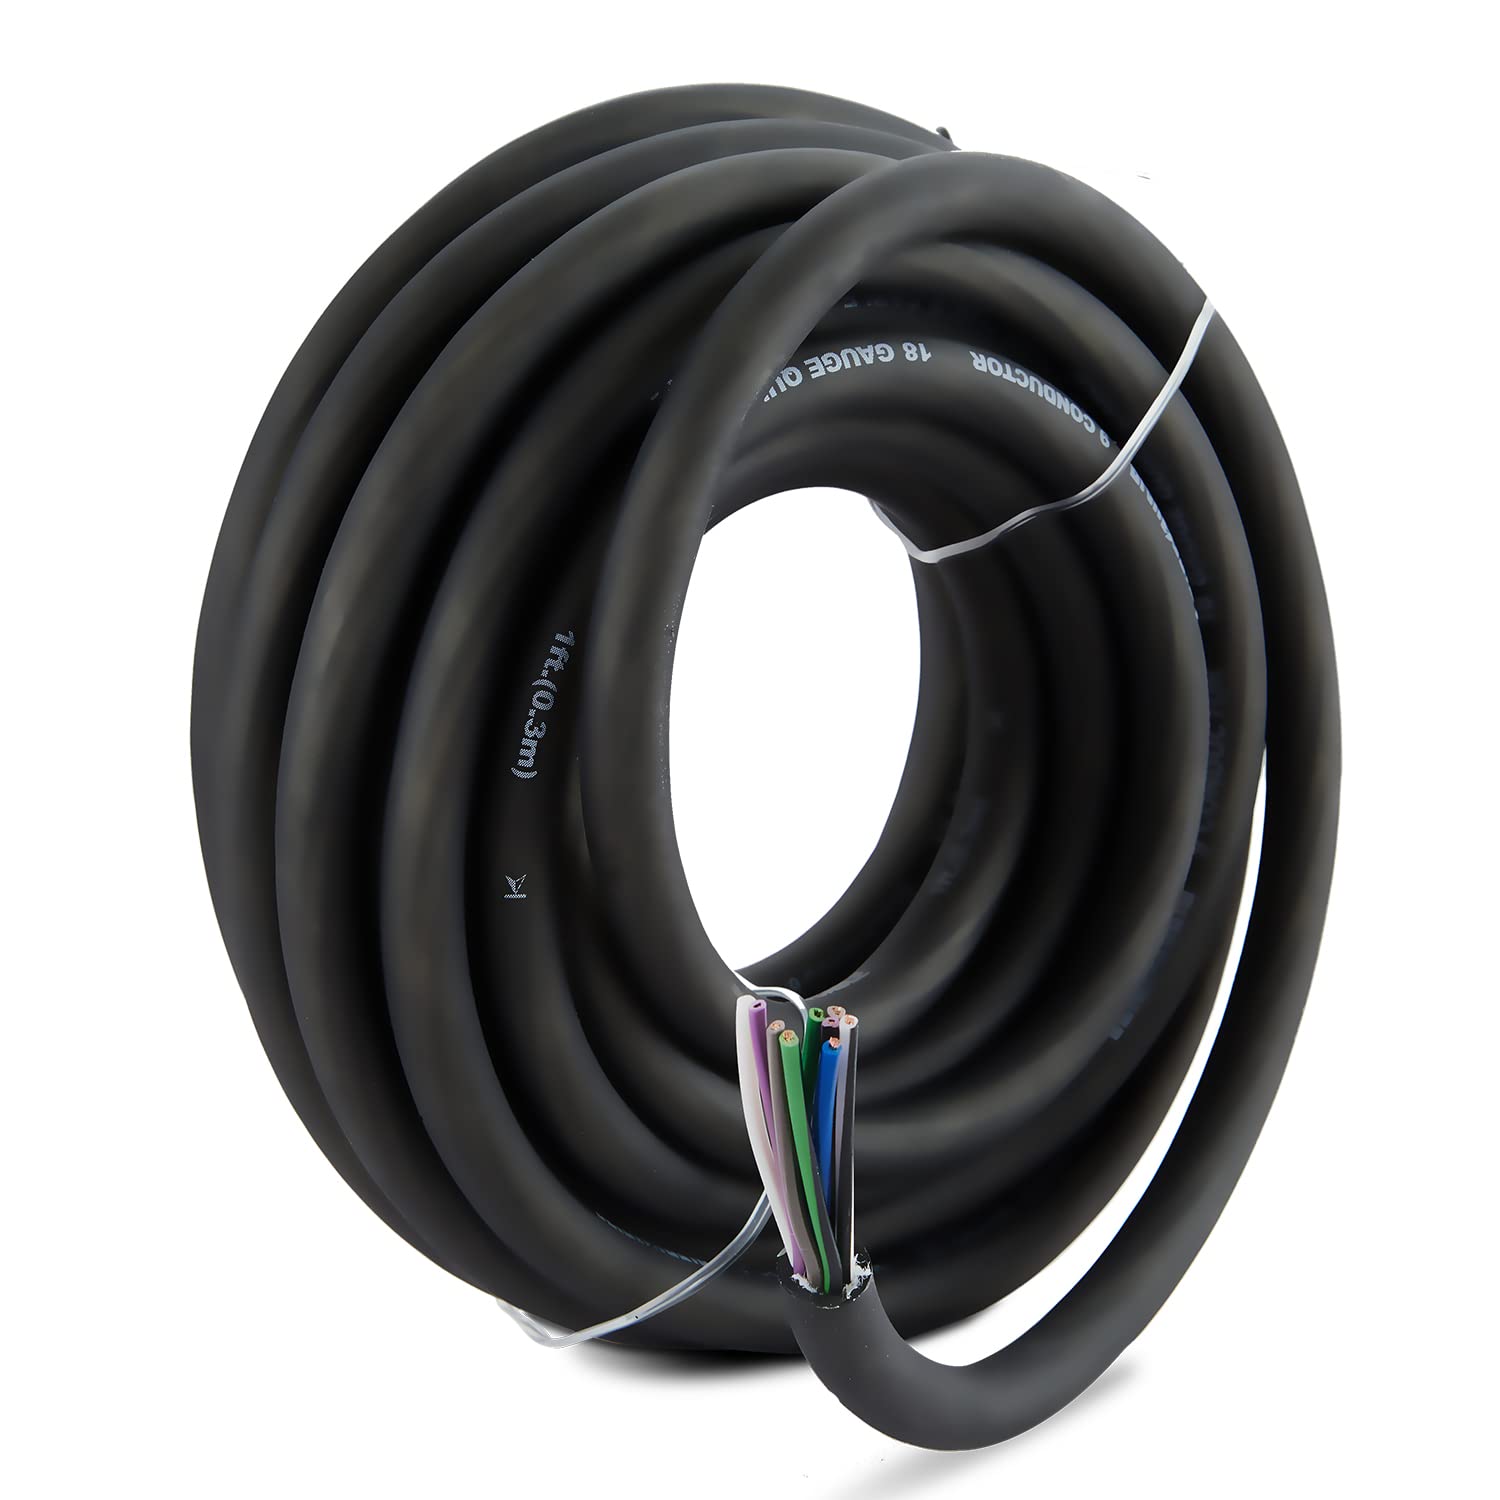
I ordered this 9 conductor, 18AWG cable to consolidate the wiring going from the front to back of my bike. I'll add 2 and 3 pin JST's on either end to interface with the controller, motor temp sensor, and the buttons/switches up front.
1 - temp sensor
3 - 3 speed switch, 2 signal, ground
2 - on/off, batt (+), controller on
2 - cruise, ?
2 - soft start, ?
2 - brake cutoff, signal, ground
I need to do some measurements to see if cruise or soft start include a ground wire, each. That allows those to be consolidated into one conductor. This way i have two harnesses, this one and the CA harness.
I'm also moving my piggyback lipos from the rack bag to behind the seat tube, mounted in an ABS housing, yet to be fabricated. I'll wrap it with the fake carbon fiber too, and will allow me to move a lot of the battery level wiring, with their bulky connectors, out of the connector box and down to the new seat tube area. I shrunk (cut down) the connector box yesterday, but after relocating the battery wires and XT90's, I can shrink it down more.
And, since everything will be disconnected already, the new controller is going to get a, hopefully, mild shunt mod. 75W-80W is what I'm shooting for, but I'll use the trial and error method, so I'll go slowly. The new consolidated cables and relocated battery wiring will make yanking the controller in and out easy. I want the extra amps, but my recent changes to my CA settings will need the soft start feature for normal riding, since I'm already pretty low on the CA ramp. Charged up, the front is lifting at 10 MPH. It's more manageable at half charge, so I'd use the soft start for the first half of the pack.
The midrange acceleration, even at half charge, is pretty satisfying with this controller. Even at 25 MPH, it doesn't wheelie, but takes the sag out of the forks. I rolled on the throttle a little too fast going around a corner and broke the rear end loose. I need to start researching better throttle options.
This cable is pretty impressive for anyone wanting to consolidate their cable runs. I thought by the Amazon picture that if might be a rubber casing, and a bit concerned that it would easily be cut/nicked and open up. It turns out it's some other type of plastic casing that wasn't even easy to slice open with my pocket knife, which is pretty sharp. It's still really pliable, like rubber. Under the casing is a paper like wrapping around to conductor bundle, and down the center is a nylon like material, the same as is used for some cheaper nylon cords used for packing, so a lot of tensile strength. The 18 gauge wires are a good size too for a reliable harness.

So, if everything checks out with the grounds, I should be able so use this to consolidate everything but the CA cable into one run, for any controls that need to communicate with the controller.
I also decided to order an off the shelf box for my piggyback/parallel lipo, rather than fabricating from ABS. It saves time and doesn't cost that much anyway. My plan is to use this box to house the small lipos, and all of the battery (serial and parallel) connections, away from the control related connections in the existing connector box. That will also making swapping out controllers easier. I'm adding a surface mount female XT60 on the base of the new box for my bulk charging of the franken-battery.
https://www.amazon.com/gp/product/B07DJD152P/ref=ppx_yo_dt_b_asin_title_o00_s00?ie=UTF8&th=1&psc=1
This should fit behind my seat tube, up near the top by the existing connector box. With my 24" wheel, there's enough space and still has decent clearance with the tire.
drguitar
10 mW
- Joined
- Nov 19, 2009
- Messages
- 28
Congrats on the very nice build. I read in your initial post that the motor was under $200. I'm guessing that is the reason for calling your bike an econo-e-bike. However, you have upgraded many parts along the way, even the seat post (didn't you mention a Thud-buster?) The question is, what is the current total spent on this econo-e-bike?
drguitar said:Congrats on the very nice build. I read in your initial post that the motor was under $200. I'm guessing that is the reason for calling your bike an econo-e-bike. However, you have upgraded many parts along the way, even the seat post (didn't you mention a Thud-buster?) The question is, what is the current total spent on this econo-e-bike?
Depends on what would be considered the cost, and whether the donor bike and any upgrades to that are part of the costs. I also paid for a laced rim, and ended up relacing it myself when going to 24" instead. Which meant getting a new front wheel as well. The cost of the original kit with battery was around $650, using my old mountain bike as the donor. If I considered the same components as my current "kit: and battery, that the corresponding cost would be ~$1986, so around triple the original "econo" version, but a big chunk of the cost increase is battery (not surprising), and that Leaf shipping cost was steep.
For perspective, the ebike cost 2/3 the cost of my (pedal) mountain bike, and probably less than half in today's dollars.

Do you happen to have a link to the sale page?E-HP said:This cable is pretty impressive for anyone wanting to consolidate their cable runs. I thought by the Amazon picture that if might be a rubber casing, and a bit concerned that it would easily be cut/nicked and open up. It turns out it's some other type of plastic casing that wasn't even easy to slice open with my pocket knife, which is pretty sharp. It's still really pliable, like rubber. Under the casing is a paper like wrapping around to conductor bundle, and down the center is a nylon like material, the same as is used for some cheaper nylon cords used for packing, so a lot of tensile strength. The 18 gauge wires are a good size too for a reliable harness.
Cable Harness.jpg
This is it:amberwolf said:Do you happen to have a link to the sale page?E-HP said:This cable is pretty impressive for anyone wanting to consolidate their cable runs. I thought by the Amazon picture that if might be a rubber casing, and a bit concerned that it would easily be cut/nicked and open up. It turns out it's some other type of plastic casing that wasn't even easy to slice open with my pocket knife, which is pretty sharp. It's still really pliable, like rubber. Under the casing is a paper like wrapping around to conductor bundle, and down the center is a nylon like material, the same as is used for some cheaper nylon cords used for packing, so a lot of tensile strength. The 18 gauge wires are a good size too for a reliable harness.
Cable Harness.jpg
https://www.amazon.com/dp/B098MRHGXC?psc=1&ref=ppx_yo2ov_dt_b_product_details
EDIT 09-26-22 - The off the shelf box arrived and it's way too bulky, so it's going back. I should have done more measurements. So, going back to the old plan of fabricating it with ABS. So much for shortcuts.
Thanks. ") I'm actually looking at it to replace the under-carpet cable from my music computer to the amp/speakers and also the effects rack to the audio recording interface (the old cabling has problems sometimes from wire damage inside it from the dogs walking / laying / etc on it over the years). This one ought to be long enough to route around the furniture instead of having to go under the carpet, and tough enough to survive even if it does get walked on or laid on or pulled on (when Jelly Bean "digs" her "nest" randomly).
I'm actually looking at it to replace the under-carpet cable from my music computer to the amp/speakers and also the effects rack to the audio recording interface (the old cabling has problems sometimes from wire damage inside it from the dogs walking / laying / etc on it over the years). This one ought to be long enough to route around the furniture instead of having to go under the carpet, and tough enough to survive even if it does get walked on or laid on or pulled on (when Jelly Bean "digs" her "nest" randomly).
May also be a good replacement for all the lighting cabling on the SB Cruiser trike (and later on the Cloudwalker bike) to the front end and another to the rear end, instead of the multiple two-wire cables I'm presently using, next time I have to rewire anything.
I'm actually looking at it to replace the under-carpet cable from my music computer to the amp/speakers and also the effects rack to the audio recording interface (the old cabling has problems sometimes from wire damage inside it from the dogs walking / laying / etc on it over the years). This one ought to be long enough to route around the furniture instead of having to go under the carpet, and tough enough to survive even if it does get walked on or laid on or pulled on (when Jelly Bean "digs" her "nest" randomly). May also be a good replacement for all the lighting cabling on the SB Cruiser trike (and later on the Cloudwalker bike) to the front end and another to the rear end, instead of the multiple two-wire cables I'm presently using, next time I have to rewire anything.
I had a good late sunset ride. Really clear out, and cool, but not cold, wearing a windbreaker and flannel shirt. It's hard to explain, but this cheap controller makes the motor run really smooth. It's silent, but the motor doesn't even have a hint of vibration, like everything is perfectly timed. The PowerVelocity controller was quiet, but at certain speeds or when regenning, the motor encounters some sort of resonance and would hum.
I must have climbed up and down the hill 5 times, just riding around different streets. I saw a big temple near the top of one hill, and this treehouse a few blocks down. The treehouse was about 3 stories high, and am guessing it has a panoramic view of the bay, and possibly down the canyon on the other side of the hill. The motor stayed cool, maybe hitting 80C at most, but I forgot to see if the controller got warm or not, but given that it's limited to 60A and 1/2 of the whole thing is a big aluminum heat sink, I doubt it got warm at all.

Anyway, I think the only advantages the PV controller had over this one, was variable regen, and the peak power wasn't limited, so could hit double the amps of the new one. It seems that may account for the disappointing 0-30 times. But, by the seat of the pants, it's significantly more powerful when rolling on the throttle. It pulls hard, and dead silent. I have the throttle ramp down to 1.3V/sec, and it still will lift the front when giving it throttle at lower speeds, even with the super slow ramp. I'll be hooking up the switch for the soft start feature this weekend, so I may be able to increase the ramping then.
The ride was so good, that as soon as I got back, I ordered another one of these controllers. I'll mod the new one, and not have to worry about taking my bike out of commission if I mess up. I have to charge a little longer by not having regen now, but only riding about 30 miles a day, so I just top it off a couple of hours before going out.
I think I'll be happy if I can get the controller to output the rated 80A. even if I rarely use it. Finding a way to setup regen would be awesome, but I'm not optimistic. My coasting technique is getting better, and the new brakes haven't faded yet. :thumb:

I can't wait to replace this rat's nest with my new cable harness. I have the rear brake hose flopping around, until I make the harness, since I'll need to clip those 1/2" zip ties to run both underneath.

EDIT 10-03-22 I only need to test the soft start connectors to see if one of them goes to ground. If so, I think everything can be consolidated to the one cable harness. The new controller arrives on Wednesday, so I'll do all of my soldering after that.

I must have climbed up and down the hill 5 times, just riding around different streets. I saw a big temple near the top of one hill, and this treehouse a few blocks down. The treehouse was about 3 stories high, and am guessing it has a panoramic view of the bay, and possibly down the canyon on the other side of the hill. The motor stayed cool, maybe hitting 80C at most, but I forgot to see if the controller got warm or not, but given that it's limited to 60A and 1/2 of the whole thing is a big aluminum heat sink, I doubt it got warm at all.
Anyway, I think the only advantages the PV controller had over this one, was variable regen, and the peak power wasn't limited, so could hit double the amps of the new one. It seems that may account for the disappointing 0-30 times. But, by the seat of the pants, it's significantly more powerful when rolling on the throttle. It pulls hard, and dead silent. I have the throttle ramp down to 1.3V/sec, and it still will lift the front when giving it throttle at lower speeds, even with the super slow ramp. I'll be hooking up the switch for the soft start feature this weekend, so I may be able to increase the ramping then.
The ride was so good, that as soon as I got back, I ordered another one of these controllers. I'll mod the new one, and not have to worry about taking my bike out of commission if I mess up. I have to charge a little longer by not having regen now, but only riding about 30 miles a day, so I just top it off a couple of hours before going out.
I think I'll be happy if I can get the controller to output the rated 80A. even if I rarely use it. Finding a way to setup regen would be awesome, but I'm not optimistic. My coasting technique is getting better, and the new brakes haven't faded yet. :thumb:
I can't wait to replace this rat's nest with my new cable harness. I have the rear brake hose flopping around, until I make the harness, since I'll need to clip those 1/2" zip ties to run both underneath.
EDIT 10-03-22 I only need to test the soft start connectors to see if one of them goes to ground. If so, I think everything can be consolidated to the one cable harness. The new controller arrives on Wednesday, so I'll do all of my soldering after that.
I've been looking for other controllers with the "soft start" feature, since it will be a pain to get to those wires with the controller installed, to determine if one of the leads is GND, but haven't found much. I'll be testing it out once I get a switch wired up anyway so I can start working on my wiring harness, but while searching, I found the same controller with additional specs than the other listings:
https://retail.uumotor.com/product/80a-controller/
My PowerVelocity had a 70A battery and max 200A phase current, and even with the 60A limit, this generic controller feels stronger. The 240A max phase current may have something to do with that. Also, this description states FOC, which may explain why the motor runs so smoothly with this controller.
"60V,72V battery universal. max bus current 80A, max phase current 240A, FOC, 60V 3000W motor controller, 72v 3500w controller"
My second one arrives Wednesday, I'll add the CA connector, and get a baseline of the current limit before I start making changes.
Eastwood
100 kW
- Joined
- Jan 13, 2021
- Messages
- 1,480
Enjoyed reading all your updates for the past couple months! Great work my friend! I’ve been away for a while haven’t been on here. Nice to see you’re still moving along with perfecting your bike :thumb:
I see you’re up to 80amps now are you liking that more? I’m sure that pulls a bit harder than when you were capped at 60 A.
Also I like how you hide all the wires in that box you made, looks really nice and clean! 8)
I see you’re up to 80amps now are you liking that more? I’m sure that pulls a bit harder than when you were capped at 60 A.
Also I like how you hide all the wires in that box you made, looks really nice and clean! 8)
Eastwood said:Enjoyed reading all your updates for the past couple months! Great work my friend! I’ve been away for a while haven’t been on here. Nice to see you’re still moving along with perfecting your bike :thumb:
I see you’re up to 80amps now are you liking that more? I’m sure that pulls a bit harder than when you were capped at 60 A.
Also I like how you hide all the wires in that box you made, looks really nice and clean! 8)
Welcome back! Actually capped at 60A now, but will be modding the new one to get it to 80A spec. I think this controller's phase amp rating in the specs must be real though. The old controller was 70A and pulled hard off the line, but the new one has crazy mid range. I just can't believe the price, but I guess I'd believe it more if I end up frying it. So far no detectable heat when feeling the case. Might be the best thing available covering that middle ground between the typical 30A controllers and the bigger 150A ones, similar to the niche the Leaf motor covers.
EDIT 10-05-22 The controller arrived today, so it's time for surgery. I noticed the label has a manufacture date, so I'm going to compare with the one on my bike to see if they were made in the same batch. In any case, I plan to add my CA connector and clip the unnecessary wires (but not the soft start wires this time) and change connectors to match what I'm using. I'll then install and get a baseline of the max amps, likely to be set a 60A like the first controller, but maybe I'll be surprised. If the max is 60A, I'll start on the shunt mods, which may take a few iterations to get up to around 80A.
I woke up this morning and had a bit of a revelation. While planning out my controller modding and testing. I realized that when adding the CA connector to the first controller, I never had to open it up, tapping into the external wiring harnesses. And, the harnesses are detachable. DOH!!! So, I don't have to spend a few hours soldering up a new CA connector and swapping several other JST and Molex connectors, since I can just plug the harness into the new, soon to be modded, controller.
I may even get around to doing a baseline test of the new one to determine what the max battery current is limited to before starting with the shunt mod.
EDIT 10-07-22 Wired up the new controller and just went for a short ride to max out the current. The new one is within a 1/2 amp of the other (60.35A), but probably exactly the same since the current limit seems to register on the CA +/- less than 1/2 amp. Since they're basically the same, I'll leave the new one installed and mod the old one since it's off the bike already.
UPDATE: 1st iteration of the shunt mod produced a 7A increase, so now at 67A. Looks like I'll be doing at least one, maybe two more iterations to get it to 80A.
Just got back from a test ride. I feel like the modest 7A battery current gain must also scale up the phase current. Since the specs have max phase amps as a multiple of 3 times the battery amps, that would translate to an extra 21A max phase current. So at 67A, that's 201A max phase amps, same as my old PV controller. I rode around for about 10 miles and the bike felt really good, but with all the hard throttle testing, the Leaf definitely was heating up more quickly, hitting 86C on flat ground, but cooling down quickly when off the throttle. Seems to be maxing out a little over 5kW up the hills, so maybe 600W more than before the shunt mod. 
I'll probably go out again just to ride around more, then take it back off the bike and attempt to get it up to 80W and see how that feels. On APL's thread, he's peaking at 119A, so I think if I overshoot and go above 80A I shouldn't have an issue. :thumb: I'm not trying to blow up the controller, but am willing to push it more, since I have the stock one if I do.
EDIT: Charged the battery to 81V and went to Popeye's to grab a couple of chicken sandwiches. 6 mile round trip. Even with the mild mod, it's crazy above 80V on throttle (2nd speed on the 3-speed switch); power wheelies at 20 MPH. Power consumption is triple the normal, so probably best to stick with quick errands or short trips when riding like that.

EDIT: 2nd round. I wrapped some strands of copper around the shunts to hold the solder in place while adding it.

Isn't going to win a beauty contest...

Looks like 80A to me, LOL.
I'll mount it on the bike tomorrow morning to see and feel the results.
Last update:
I couldn't wait, since it's so easy to mount the controller the way the harness is set up. Getting close, and possibly even there. I only took it for a spin, literally around the block, and I tested on a short 1/2 block part of the next street over that's around 15%. I slowed way down near the bottom, then hit the throttle to climb it in an attempt to max out the current. It was noticeably faster climbing than the last round, and my battery was down around 77V, so will be even faster when charged.
I checked the CA when I pulled into the garage, but then remembered that I was still in the middle position on the 3 speed switch, so might be able to pull more current; won't know for sure until tomorrow. Pretty dark out, but my headlights worked great.
If this it the actual limit, then I have one more iteration to go...

Power consumption going around the block was 71Wh/mile. I think I peaked at around 5.8kW, so well under APL's near 9kW.
EDIT 10-08-22 I've confirmed that the limit is now 76A after a few hard launches, so I'll make one more shunt adjustment today. It's odd that I'm getting some bogging on launch, and a sort of motor vibration off the line. Everywhere else it's really strong, but I'm not able to get below 4 sec from 0-30 MPH mainly due to that.
At least it's silent. The buzzy sound is from my tires It loses close to a second off the line. 
UPDATE:
Oooops!!

Obviously it's not an exact science LOL.

I rode down to the bay to see if I could catch the Blue Angels since it's Fleet Week. There was a thick layer of fog placing a damper on the aerial displays, but I could at least see something above the bank
90A reminds me of going to watch the F1 500cc 2 stroke GP bike races, way back before they stopped 2 stroke racing. Throttling coming out of a curve and the front comes up. I always like riding around these little curves on this path, racing up to the overpass. You can hear my front tire coming down at around 7 seconds since I wasn't expecting the power increase. Same happened going around the hairpin a few curves later.
I don't think I'm going to increase the amps any further. It's performance with 90A feels like a good match for the Leaf motor. I'm going to do two more things to it. First, I'm going to add a temp sensor, just need to figure out the best location. Then I'm going to pot the thing with thermally conductive epoxy and make it waterproof.
I think there would be enough for two controllers.
Thinking of drilling a hole right around here:

EDIT 10-09-22 I tested the soft start switch. Doesn't seem to be soft start. The motor made a grinding noise and spun backwards. I unplugged the jumper and it ran normal. The reverse wires are blue and black, and this was wasn't spinning normal. I ended up setting the CA current limit to 80A and the throttle ramp to 1.3V/sec, like amberwolf mentioned that he was using. That made for a very smooth response and much more manageable off the line, but still produces great response.
I'll probably go out again just to ride around more, then take it back off the bike and attempt to get it up to 80W and see how that feels. On APL's thread, he's peaking at 119A, so I think if I overshoot and go above 80A I shouldn't have an issue. :thumb: I'm not trying to blow up the controller, but am willing to push it more, since I have the stock one if I do.
EDIT: Charged the battery to 81V and went to Popeye's to grab a couple of chicken sandwiches. 6 mile round trip. Even with the mild mod, it's crazy above 80V on throttle (2nd speed on the 3-speed switch); power wheelies at 20 MPH. Power consumption is triple the normal, so probably best to stick with quick errands or short trips when riding like that.
EDIT: 2nd round. I wrapped some strands of copper around the shunts to hold the solder in place while adding it.
Isn't going to win a beauty contest...
Looks like 80A to me, LOL.
I'll mount it on the bike tomorrow morning to see and feel the results.
Last update:
I couldn't wait, since it's so easy to mount the controller the way the harness is set up. Getting close, and possibly even there. I only took it for a spin, literally around the block, and I tested on a short 1/2 block part of the next street over that's around 15%. I slowed way down near the bottom, then hit the throttle to climb it in an attempt to max out the current. It was noticeably faster climbing than the last round, and my battery was down around 77V, so will be even faster when charged.
I checked the CA when I pulled into the garage, but then remembered that I was still in the middle position on the 3 speed switch, so might be able to pull more current; won't know for sure until tomorrow. Pretty dark out, but my headlights worked great.
If this it the actual limit, then I have one more iteration to go...
Power consumption going around the block was 71Wh/mile. I think I peaked at around 5.8kW, so well under APL's near 9kW.
EDIT 10-08-22 I've confirmed that the limit is now 76A after a few hard launches, so I'll make one more shunt adjustment today. It's odd that I'm getting some bogging on launch, and a sort of motor vibration off the line. Everywhere else it's really strong, but I'm not able to get below 4 sec from 0-30 MPH mainly due to that.
At least it's silent. The buzzy sound is from my tires
It loses close to a second off the line. UPDATE:
Oooops!!
Obviously it's not an exact science LOL.
I rode down to the bay to see if I could catch the Blue Angels since it's Fleet Week. There was a thick layer of fog placing a damper on the aerial displays, but I could at least see something above the bank
90A reminds me of going to watch the F1 500cc 2 stroke GP bike races, way back before they stopped 2 stroke racing. Throttling coming out of a curve and the front comes up. I always like riding around these little curves on this path, racing up to the overpass. You can hear my front tire coming down at around 7 seconds since I wasn't expecting the power increase. Same happened going around the hairpin a few curves later.
I don't think I'm going to increase the amps any further. It's performance with 90A feels like a good match for the Leaf motor. I'm going to do two more things to it. First, I'm going to add a temp sensor, just need to figure out the best location. Then I'm going to pot the thing with thermally conductive epoxy and make it waterproof.
I think there would be enough for two controllers.
Thinking of drilling a hole right around here:
EDIT 10-09-22 I tested the soft start switch. Doesn't seem to be soft start. The motor made a grinding noise and spun backwards. I unplugged the jumper and it ran normal. The reverse wires are blue and black, and this was wasn't spinning normal. I ended up setting the CA current limit to 80A and the throttle ramp to 1.3V/sec, like amberwolf mentioned that he was using. That made for a very smooth response and much more manageable off the line, but still produces great response.
Last edited:
86c is damn hot for a motor. But I bet it's fun getting there.
There is another way to mod the shunt that allows it to be adjustable with a small pot. This is done by placing a resistor divider between the shunt and the chip that's measuring the current. You also don't need to mod the shunt wires themselves this way.
There is another way to mod the shunt that allows it to be adjustable with a small pot. This is done by placing a resistor divider between the shunt and the chip that's measuring the current. You also don't need to mod the shunt wires themselves this way.
IIRC there's some discussion in APL's thread about a controller like this one, about doing just that.
With the heavy and very long SB Cruiser trike, even the ~80A split between two controllers and motors on the rear wheels is only enough to get me about 4 seconds from 0-20mph acceleration, no wheelies/etc.
The Grinfineon is very smooth and silent, but it is not nearly powerful enough by itself (it'll get me moving and eventually to 20mph, but nowhere near quickly enough), and the generic on the other motor is not silent or smooth, and also makes a very annoying "tinnitus" whine all the time inside the motor (like the FOC controller I've used a few years back), even just sitting still with no throttle input at all (even 0v).
I'm using "no ramping", with all the ramps set to 99v/second (whatever the max is in each field) so it essentially instantaneously tracks the actual input, and I also have no current limiting (again, the max in the field, as well as for watts). It *is* speed limited to 20mph, but it doesn't rollback response till it's right at that limit and just holds it right there nice and smoothly.E-HP said:I ended up setting the CA current limit to 80A and the throttle ramp to 1.3V/sec, like amberwolf mentioned that he was using.
With the heavy and very long SB Cruiser trike, even the ~80A split between two controllers and motors on the rear wheels is only enough to get me about 4 seconds from 0-20mph acceleration, no wheelies/etc.
The Grinfineon is very smooth and silent, but it is not nearly powerful enough by itself (it'll get me moving and eventually to 20mph, but nowhere near quickly enough), and the generic on the other motor is not silent or smooth, and also makes a very annoying "tinnitus" whine all the time inside the motor (like the FOC controller I've used a few years back), even just sitting still with no throttle input at all (even 0v).
fechter said:86c is damn hot for a motor. But I bet it's fun getting there.
There is another way to mod the shunt that allows it to be adjustable with a small pot. This is done by placing a resistor divider between the shunt and the chip that's measuring the current. You also don't need to mod the shunt wires themselves this way.
amberwolf said:IIRC there's some discussion in APL's thread about a controller like this one, about doing just that.
I'm using "no ramping", with all the ramps set to 99v/second (whatever the max is in each field) so it essentially instantaneously tracks the actual input, and I also have no current limiting (again, the max in the field, as well as for watts). It *is* speed limited to 20mph, but it doesn't rollback response till it's right at that limit and just holds it right there nice and smoothly.E-HP said:I ended up setting the CA current limit to 80A and the throttle ramp to 1.3V/sec, like amberwolf mentioned that he was using.
Hmmm memory is shot. I can't recall now where I saw the 1.3V/sec, but I recall noting it for future reference. But it does work well and makes normal riding more enjoyable.
EDIT 10-14-22 Finally pulled the trigger and ordered an ERider torque sensing PAS and crank arms. Should arrive in 3 weeks, so I just need to order a chainring before it arrives.
EDIT 10-17-22 Less than a month after switching over to hydraulic calipers, the rear pads are down to metal. The fronts are still good. Inspecting the calipers, it doesn't appear to be anything wrong, the pistons move freely, and nothing has been dragging. I think it's the longer descents without having regen, that just results is fast wear on the cheap stock pads. I have some sintered pads on the way, and will only have front brakes until they arrive.
EDIT 10-19-22 Turns out the rear caliper needs to sit lower for full engagement with the disc. This will require machining off 1/16"-1/8" from the caliper adapter. Hopefully the new set of pads last longer after that adjustment.
The adjustment seem to have worked, and the engagement and braking power is way higher than with the last set of pads now.
You can see once the portion of the pad that wasn't engaging above the green and blue arrows and pad to pad contact started, the pads started shifting, eventually having metal to metal contact where the orange arrows point to.

Removed enough from the adapter to allow the caliper to sit lower on the disc to create full engagement.

I'll inspect the fronts this weekend to see if I need to do the same thing.
EDIT Tracking shows the torque sensing PAS is going through customs. I still haven't ordered chainrings, because I want to make sure they shipped me the right version. They said to add to the notes when ordering to select the 4 bolt or 5 bolt model, and even though I did, things can get screwed up. Either will work in my case, but don't want to order the wrong chainring and deal with returns.
You can see once the portion of the pad that wasn't engaging above the green and blue arrows and pad to pad contact started, the pads started shifting, eventually having metal to metal contact where the orange arrows point to.
Removed enough from the adapter to allow the caliper to sit lower on the disc to create full engagement.
I'll inspect the fronts this weekend to see if I need to do the same thing.
EDIT Tracking shows the torque sensing PAS is going through customs. I still haven't ordered chainrings, because I want to make sure they shipped me the right version. They said to add to the notes when ordering to select the 4 bolt or 5 bolt model, and even though I did, things can get screwed up. Either will work in my case, but don't want to order the wrong chainring and deal with returns.
A-DamW
1 kW
Nice job on the brake re-work!
thundercamel
10 kW
I've had the same problem. This is one of the arguments grin has for the gmac motor. Skip to 50 seconds.
[youtube]cnaucA7qVGs[/youtube]
[youtube]cnaucA7qVGs[/youtube]
They're labeled like the correct ones and seemed to work with the BB7 calipers, but looking at the front, it seem like the same thing may be going on there too, so I may need to do the same with the front.99t4 said:Was the adapter not the correct one for your caliper model?
That was definitely contributing, but I already filed the dropouts about 2mm to get the axle to the be on the same axis as the stock wheel.thundercamel said:I've had the same problem. This is one of the arguments grin has for the gmac motor. Skip to 50 seconds.
EDIT 10-28-22 The ERider torque sensor arrived yesterday. They sent the right version, so I ordered the chainring which should arrive tomorrow. I decided to use a small enclosed unit for the buck converter, and that won't arrive until next week. If I can't wait, I can rig up a supply from stuff I have around...
The days are getting shorter fast. I went on my late afternoon ride, thinking I'd catch the sunset. By the time I got down by the water, it had already set. It was totally dark by the time I got home. It was still light doing the same ride last week.
https://www.youtube.com/watch?v=a38eXbmeD-I
Winter upgrade/maintenance time is right around the corner...
EDIT 11-12-22 The weather isn't cooperating. It's been nice enough to ride, so I keep putting off my torque PAS upgrade, and all of the other minor upgrades I have on my list. All of the parts are in, but I still don't know if I'll have the chainring clearance I'll need, but will cross that bridge when I get to it. Just doing some partial assembly and holding the parts up to the bike, I think it's a matter of a couple of millimeters on whether it fits without an issue, or if I'll need to do something more creative.
This street is nice for riding up and down since it's wide enough and traffic isn't usually too busy. Pretty much a steady 17% climb, and great views during the descent.

EDIT 11-19-22 Another nice day, cool, sunny, and very little wind.

EDIT 12-14-22 We've had a little rain, but not enough to stop riding and start my winter upgrades. Lately it's been super cold (for this area), but when it's too cold to ride, it's usually too cold in the garage anyway. It was sunny and almost warm for a few hours this weekend when I took this pic, but cooled off fast with the temp dropping 15 degrees or so on my way home.

I'm at a crossroads and need info or advice. I've gone through my second set of brake pads since my last controller with regen died, and as much as I like this new cheap generic controller, I'm not sure replacing pads every couple of months is something I'm looking forward to. The cheap organic pads that came with the calipers lasted a month before they hit metal. These cheapish sintered metal pads lasted two months, and I've been off my bike for a few days now deciding what to do.
https://www.amazon.com/gp/product/B09N36HS95/ref=ppx_yo_dt_b_search_asin_title?ie=UTF8&th=1
Do I get better, more expensive pads, and hope they last longer? Or just buy cheaper ones in bulk, and accept the fact that living on hills without regen comes with maintenance. That's a big change, given that I had thousands of miles on the bike, in its various iterations, but never did any maintenance. The major overhaul for the year would be lubing the chain.
So, are there pads that would be cost effective, given my current run rate? Or does it just come down to the same cost over time, whether I change cheap pads every other month, or really good ones twice a year?
I think I'll open up my spare generic controller to see if there's anything obvious for adding regen. The MCON version of the controller has regen settings in the programming options, but that board also has the programming port installed already.
I'm also getting noticeably less range without regen, so I've changed how I ride places and the routes I take. Now when I get to the top of the ridge, I can no longer count on refilling the battery once I'm ready to descend, so I'll descend on a route that puts me closer to home, rather than farther.
I'm finally about ready to perform my winter upgrades, and the list is huge. A lot of small things, plus re-aligning and tensioning my wheel and swapping in the eRider toque sensor. I decided to accept old age, and bought a Cloud 9 saddle a couple of weeks ago. Not the super wide one, but in the middle (I see they have a fairly narrow version that looks like a wider MTB seat, but didn't look as much like my couch as the one I got). For the amount/ratio that I pedal, it feels fine, and the comfort is like sitting on my recliner.
From a distance, you can barely tell how big the seat is, LOL. This was my first ride with the new seat, and the last time I rode my bike since the brakes were completely shot by the time I got home.
Chalo
100 TW
If you can get EBC Gold HH rated pads for the brakes you have, try those first. It's wacky how long they last. If you're not happy with their endurance when they're spent, you can add regen or plug braking then.
Cloud 9 Cruiser Select Airflow ES is my go-to comfort saddle. I've never put anyone (big or small) on one, who didn't decide they liked it.
Cloud 9 Cruiser Select Airflow ES is my go-to comfort saddle. I've never put anyone (big or small) on one, who didn't decide they liked it.
Similar threads
- Replies
- 13
- Views
- 1,749
- Replies
- 16
- Views
- 904