#define   __dsPIC30F3010__
#include "p30F3010.h"
#define FCY 5000000   // 5 MHz Xtal*PLLof4/(4*Postscalerof1)
#define MILLISEC FCY/10000// 1 mSec delay constant
#define FPWM 16000
#define Ksp 1200
#define Ksi 10
#define RPMConstant 60* (FCY/256)
void InitTMR3(void);
void InitADC10(void);
void AverageADC(void);
void DelayNmSec(unsigned int N);
void InitMCPWM(void);
void CalculateDC(void);
void GetSpeed(void);
struct {
unsigned RunMotor : 1;
unsigned Minus : 1;
unsigned unused : 14;
} Flags;
unsigned int HallValue;
int Speed;
unsigned int Timer3;
unsigned char Count;
unsigned char SpeedCount;
int DesiredSpeed;
int ActualSpeed;
int SpeedError;
int DutyCycle;
int SpeedIntegral;
/*************************************************************
Low side driver table is as below. In this StateLoTable,
the Low side driver is PWM while the high side driver is
either on or off. This table is used in this exercise
*************************************************************/
unsigned int StateLoTable[] = {0x0000, 0x1002, 0x0420, 0x0402,
0x0108, 0x1008, 0x0120, 0x0000};
/****************************************************************
Interrupt vector for Change Notification CN5, 6 and 7 is as below.
When a Hall sensor changes states, an interrupt will be caused which
will vector to the routine below.
The user has to then read the PORTB, mask bits 3, 4 and 5,
shift and adjust the value to read as 1, 2 ... 6. This
value is then used as an offset in the lookup table StateLoTable
to determine the value loaded in the OCDCON register
*****************************************************************/
void _ISR _CNInterrupt(void)
{
IFS0bits.CNIF = 0; // clear flag
HallValue = PORTB & 0x0038; // mask RB3,4 & 5
HallValue = HallValue >> 3; // shift right 3 times
OVDCON = StateLoTable[HallValue];// Load the overide control register
}
/*********************************************************************
The ADC interrupt loads the DesiredSpeed variable with the demand pot
value. This is then used to determing the Speed error. When the motor
is not running, the PDC values use the direct Demand value from the pot.
*********************************************************************/
void _ISR _ADCInterrupt(void)
{
IFS0bits.ADIF = 0;
DesiredSpeed = ADCBUF0;
if (!Flags.RunMotor)
{
PDC1 = ADCBUF0; // get value ...
PDC2 = PDC1; // and load all three PWMs ...
PDC3 = PDC1; // duty cycles
}
}
/************************************************************************
The main routine controls the initialization, and the keypress to start
and stop the motor.
************************************************************************/
int main(void)
{
LATE = 0x0000;
TRISE = 0xFFC0; // PWMs are outputs
CNEN1 = 0x00E0; // CN5,6 and 7 enabled
CNPU1 = 0x00E0; // enable internal pullups
IFS0bits.CNIF = 0; // clear CNIF
IEC0bits.CNIE = 1; // enable CN interrupt
SpeedError = 0;
SpeedIntegral = 0;
InitTMR3();
InitMCPWM();
InitADC10();
while(1)
{
DelayNmSec(10);
// read hall position sensors on PORTB
HallValue = PORTB & 0x0038; // mask RB3,4 & 5
HallValue = HallValue >> 3; // shift right to get value 1, 2 ... 6
OVDCON = StateLoTable[HallValue];// Load the overide control register
PWMCON1 = 0x0777; // enable PWM outputs
Flags.RunMotor = 1; // set flag
T3CON = 0x8030; // start TMR3
while (Flags.RunMotor) // while motor is running
   {
if (HallValue == 1) //IF in sector 1
{
HallValue = 0xFF; // force a new value as a sector
if (++Count == 5) // do this for 5 electrical revolutions or 1
// mechanical revolution for a 10 pole motor
{
Timer3 = TMR3;// read latest tmr3 value
TMR3 = 0;
Count = 0;
GetSpeed();// determine spped
}
}
PWMCON1 = 0x0700;// disable PWM outputs
OVDCON = 0x0000; // overide PWM low.
Flags.RunMotor = 0;// reset run flag
DelayNmSec(10);
}
} // end of while (1)
}
/*******************************************************************
Below is the code required to setup the ADC registers for :
1. 1 channel conversion (in this case RB2/AN2)
2. PWM trigger starts conversion
3. Pot is connected to CH0 and RB2
4. Manual Stop Sampling and start converting
5. Manual check of Conversion complete
*********************************************************************/
void InitADC10(void)
{
ADPCFG = 0xFFF8; // all PORTB = Digital;RB0 to RB2 = analog
ADCON1 = 0x0064; // PWM starts conversion
ADCON2 = 0x0000; // sample CH0 channel
ADCHS = 0x0002; // Connect RB2/AN2 as CH0 = pot.
ADCON3 = 0x0080; // Tad = internal RC (4uS)
IFS0bits.ADIF = 0; // clear flag
IEC0bits.ADIE = 1; // enable interrupt
ADCON1bits.ADON = 1; // turn ADC ON
}
/********************************************************************
InitMCPWM, intializes the PWM as follows:
1. FPWM = 16000 hz
2. Independant PWMs
3. Control outputs using OVDCON
4. Set Duty Cycle using PI algorithm and Speed Error
5. Set ADC to be triggered by PWM special trigger
*********************************************************************/
void InitMCPWM(void)
{
PTPER = FCY/FPWM - 1;
PWMCON1 = 0x0700; // disable PWMs
OVDCON = 0x0000; // allow control using OVD
PDC1 = 100; // init PWM 1, 2 and 3 to 100
PDC2 = 100;
PDC3 = 100;
SEVTCMP = PTPER; // special trigger is 16 period values
PWMCON2 = 0x0F00; // 16 postscale values
PTCON = 0x8000; // start PWM
}
/************************************************************************
Tmr3 is used to determine the speed so it is set to count using Tcy/256
*************************************************************************/
void InitTMR3(void)
{
T3CON = 0x0030; // internal Tcy/256 clock
TMR3 = 0;
PR3 = 0x8000;
}
/************************************************************************
GetSpeed, determins the exact speed of the motor by using the value in
TMR3 for every mechanical cycle.
*************************************************************************/
void GetSpeed(void)
{
if (Timer3 > 23000) // if TMR3 is large ignore reading
return;
if (Timer3 > 0)
Speed = RPMConstant/(long)Timer3;// get speed in RPM
ActualSpeed += Speed;
ActualSpeed = ActualSpeed >> 1;
if (++SpeedCount == 1)
{SpeedCount = 0;CalculateDC();}
}
/*****************************************************************************
CalculateDC, uses the PI algorithm to calculate the new DutyCycle value which
will get loaded into the PDCx registers.
****************************************************************************/
void CalculateDC(void)
{
DesiredSpeed = DesiredSpeed*3;
Flags.Minus = 0;
if (ActualSpeed > DesiredSpeed)
SpeedError = ActualSpeed - DesiredSpeed;
else
{
SpeedError = DesiredSpeed - ActualSpeed;
Flags.Minus = 1;
}
SpeedIntegral += SpeedError;
if (SpeedIntegral > 9000)
SpeedIntegral = 0;
DutyCycle = (((long)Ksp*(long)SpeedError + (long)Ksi*(long)SpeedIntegral) >> 12);
DesiredSpeed = DesiredSpeed/3;
if (Flags.Minus)
DutyCycle = DesiredSpeed + DutyCycle;
else DutyCycle = DesiredSpeed - DutyCycle;
if (DutyCycle < 100)
DutyCycle = 100;
if (DutyCycle > 1250)
{DutyCycle = 1250;SpeedIntegral = 0;}
PDC1 = DutyCycle;
PDC2 = PDC1;
PDC3 = PDC1;
}
//---------------------------------------------------------------------
// This is a generic 1ms delay routine to give a 1mS to 65.5 Seconds delay
// For N = 1 the delay is 1 mS, for N = 65535 the delay is 65,535 mS.
// Note that FCY is used in the computation. Please make the necessary
// Changes(PLLx4 or PLLx8 etc) to compute the right FCY as in the define
// statement above.
void DelayNmSec(unsigned int N)
{
unsigned int j;
while(N--)
for(j=0;j < MILLISEC;j++);
}

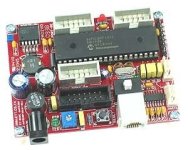
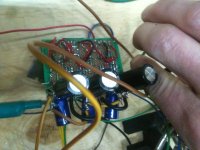
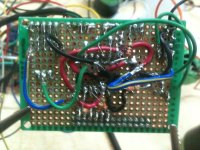
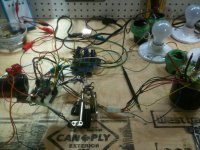
") ... It was with a lm350 it does get hot though they say you dont need heat sync but I would advise in using one.
... It was with a lm350 it does get hot though they say you dont need heat sync but I would advise in using one.