Portable snow tank for towing skiers

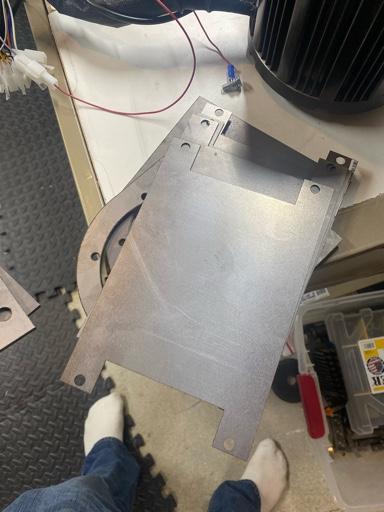
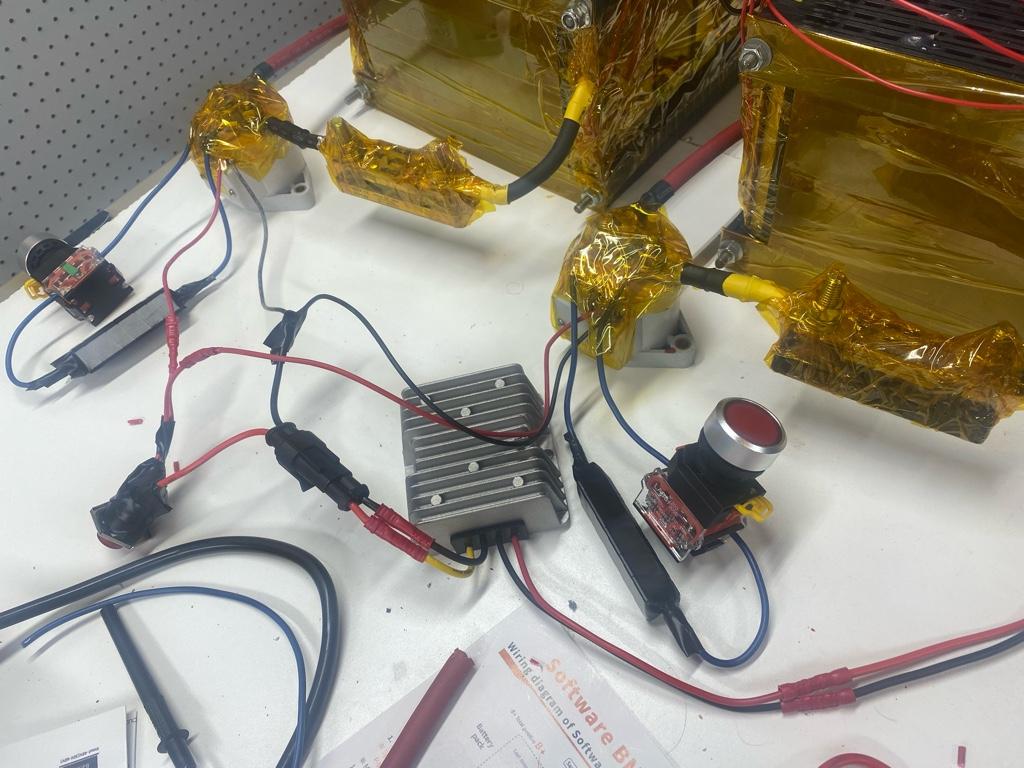
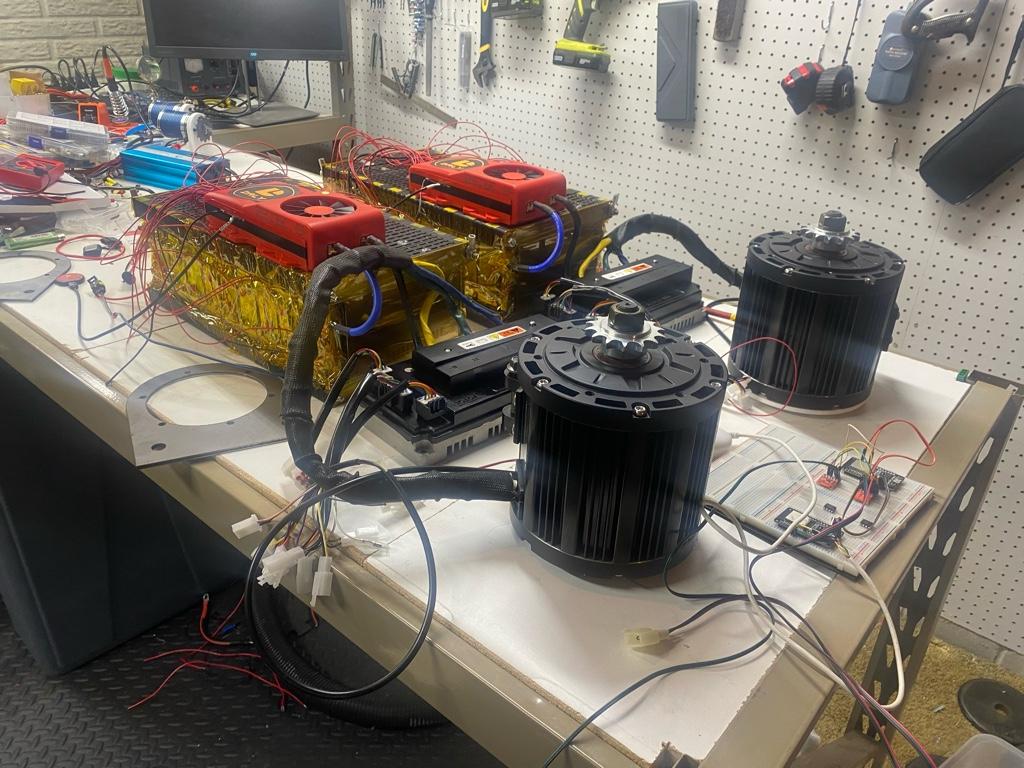
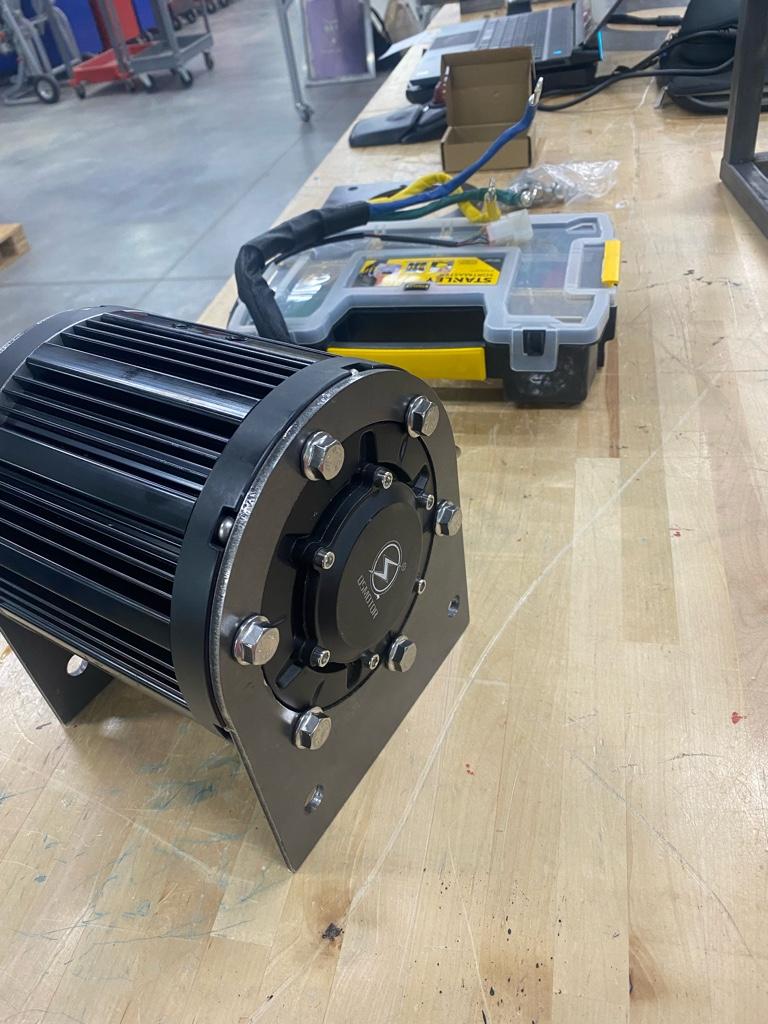
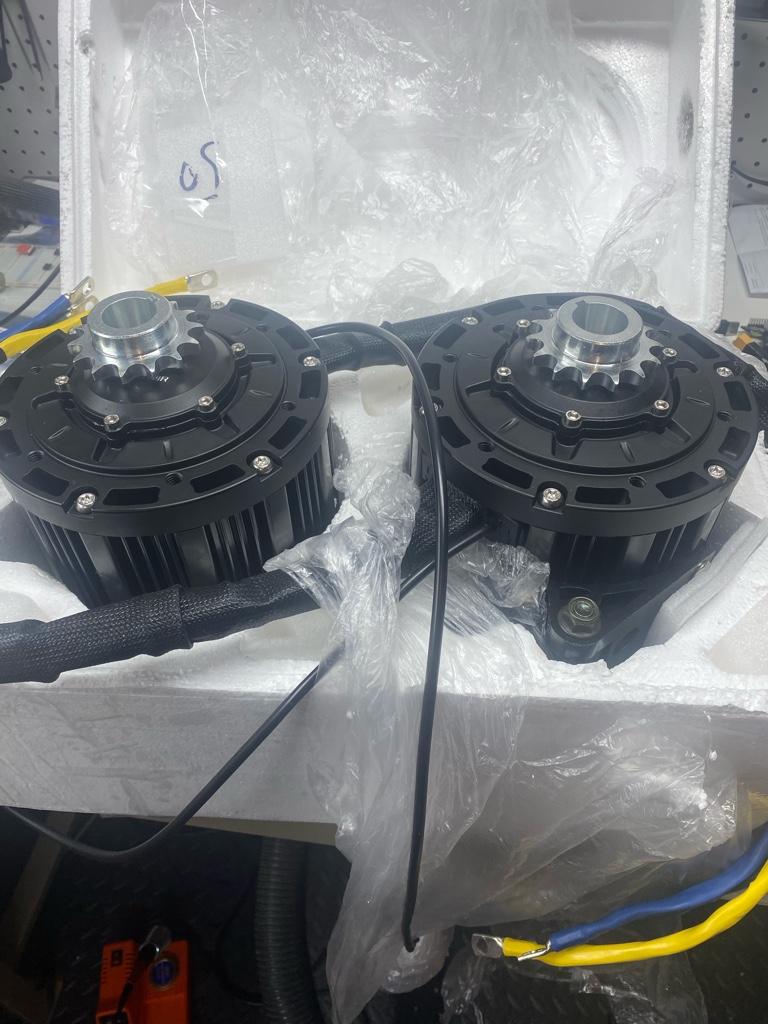
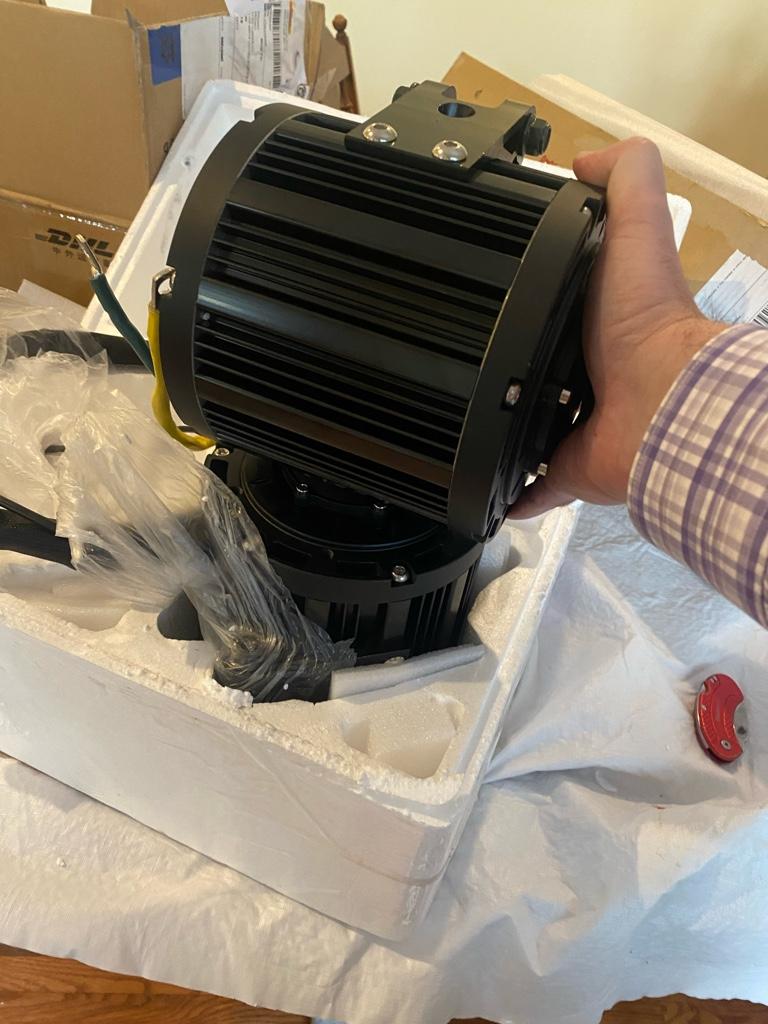
Finally pulled the old motors and Fesc off another project to start testing the remote control. Haven’t ordered batteries yet. I’m heading to the metal shop tomorrow to get some advice on the body and learn some tips on bending aluminum.

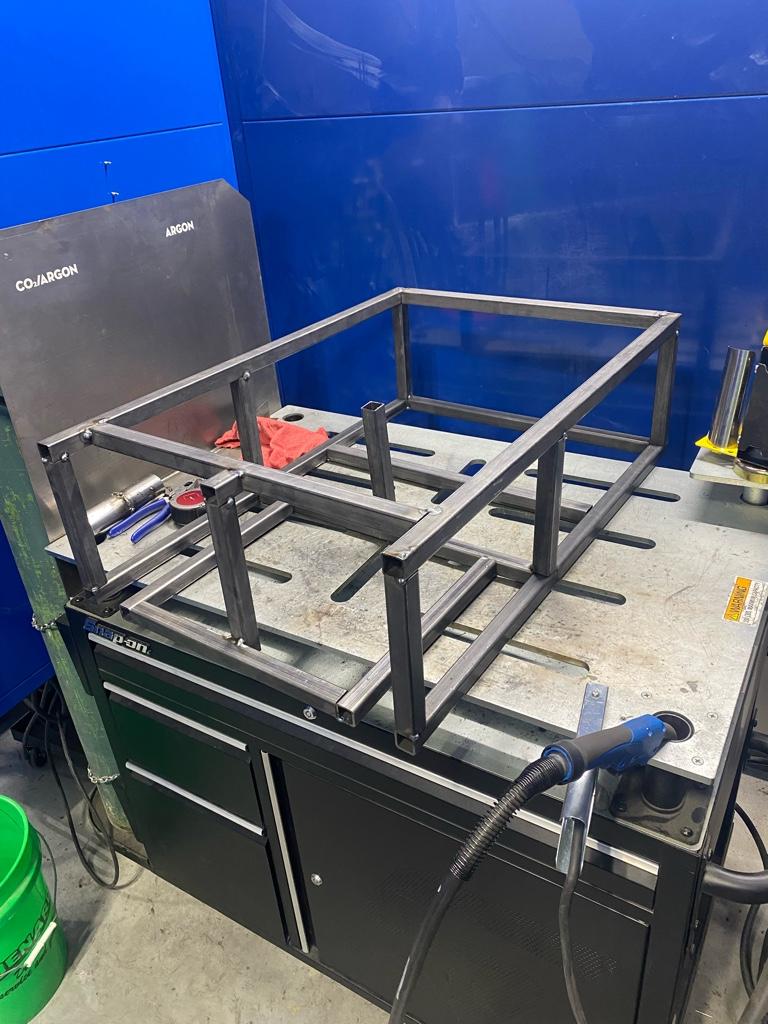
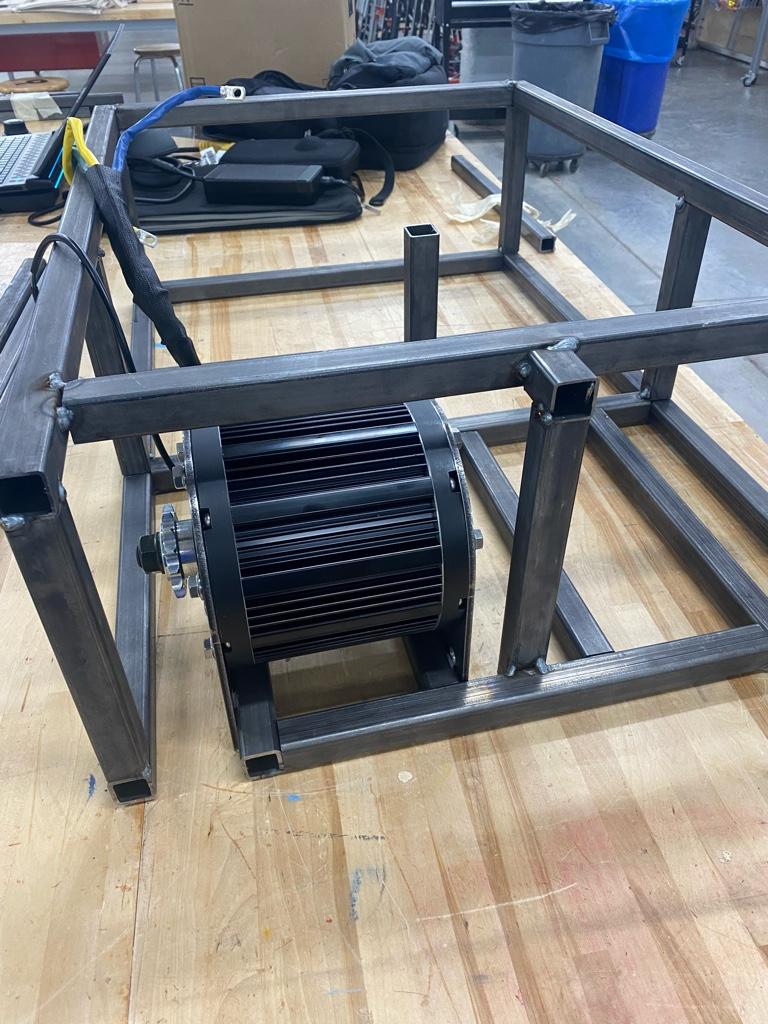
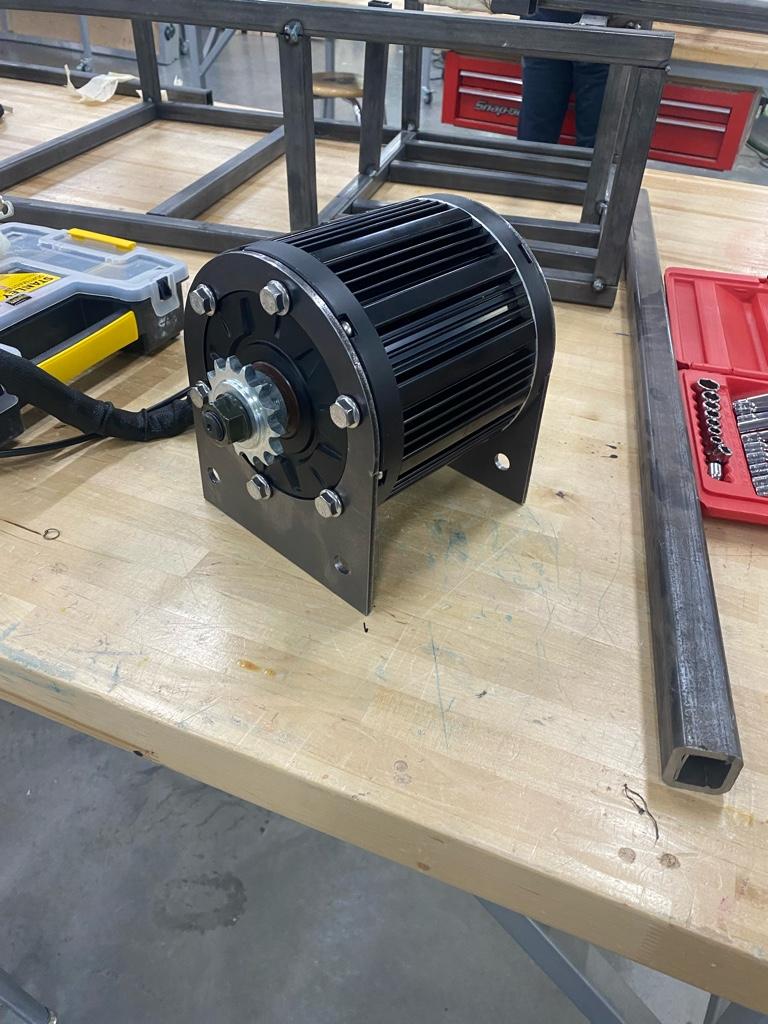
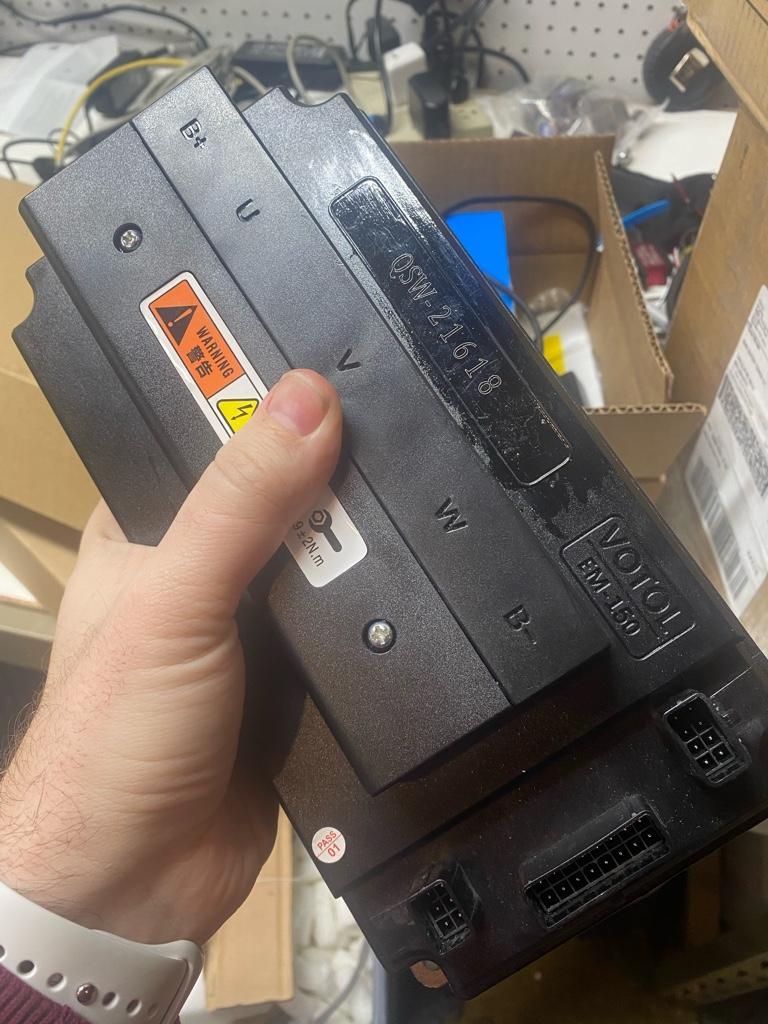
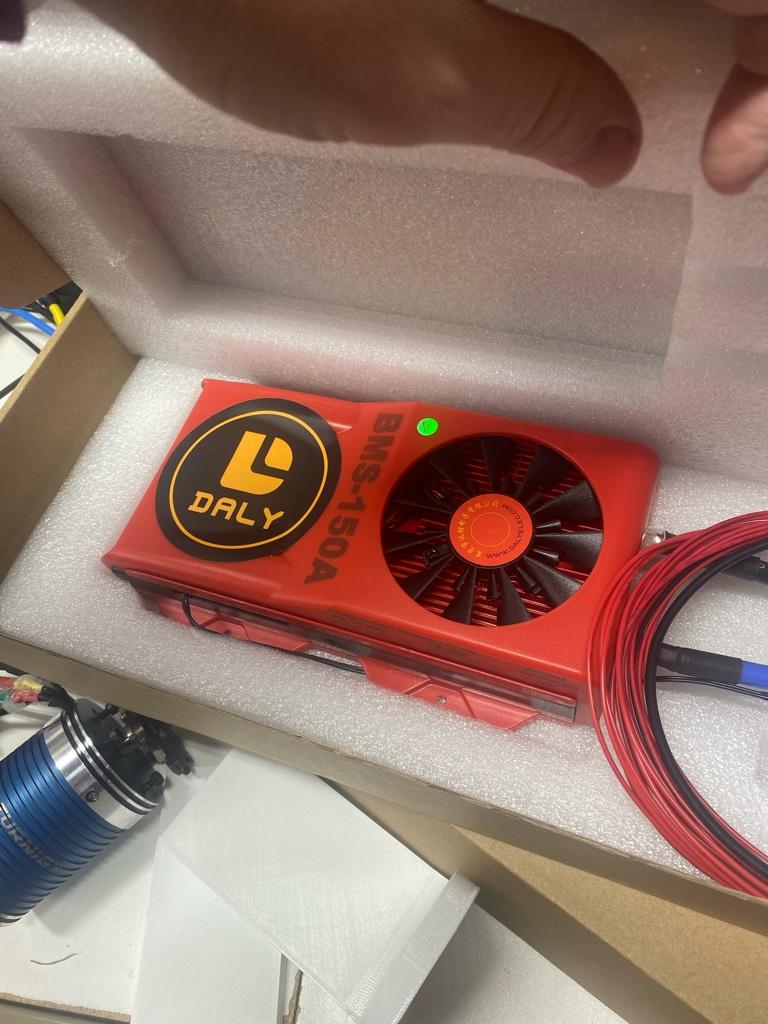
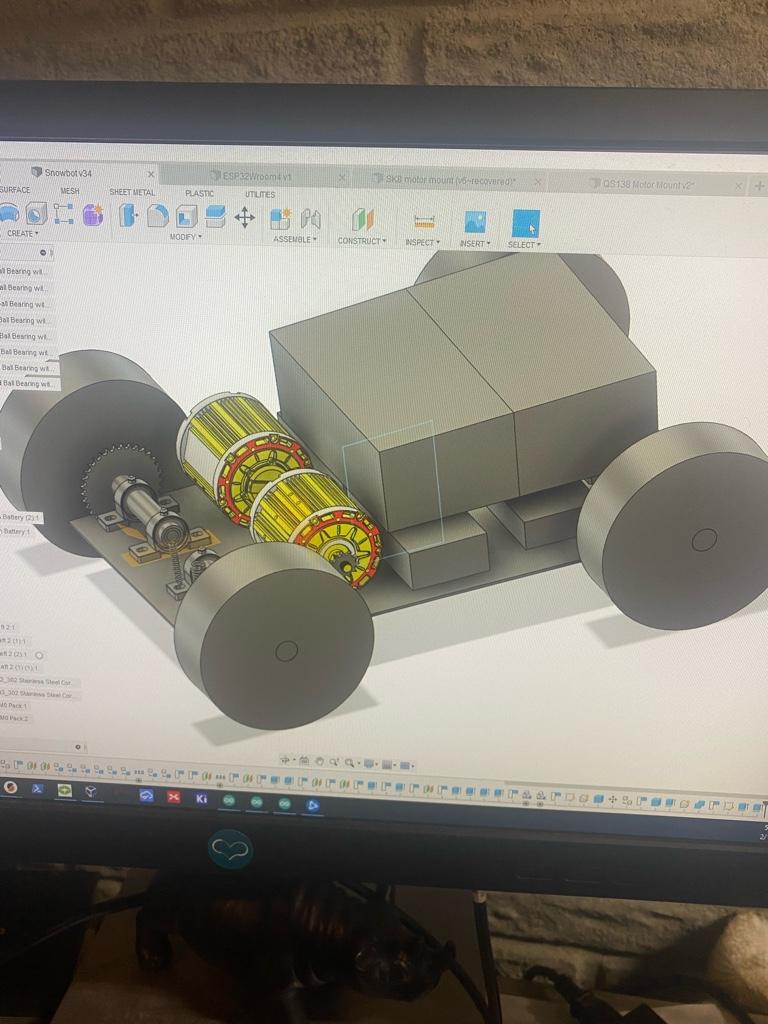
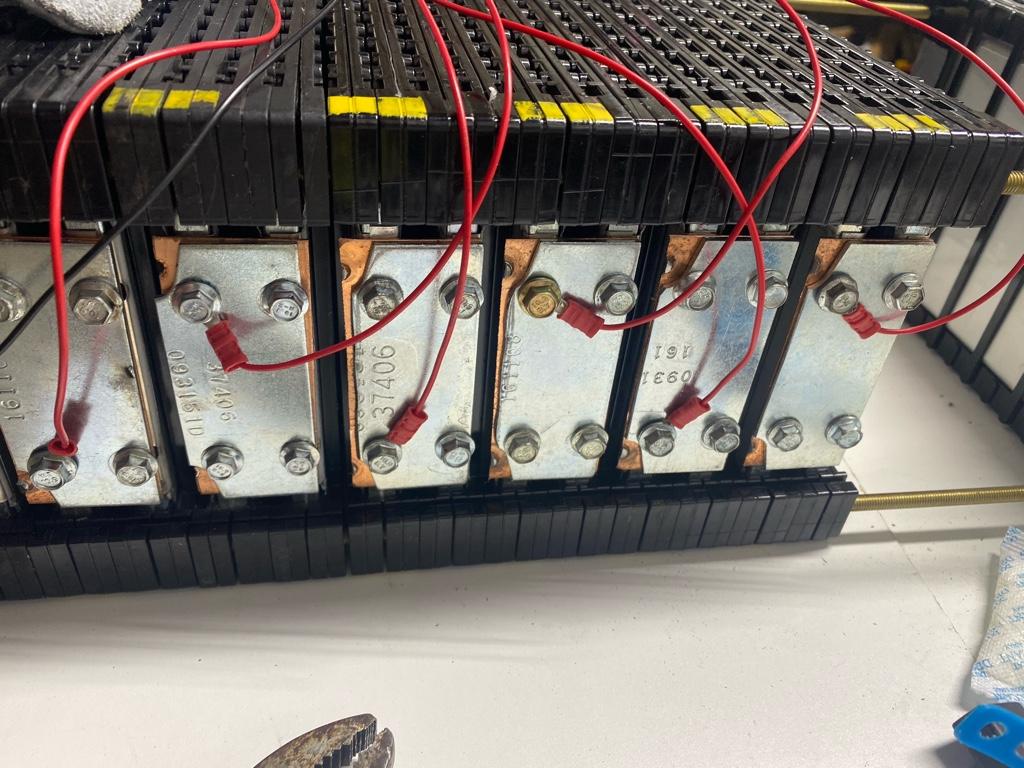
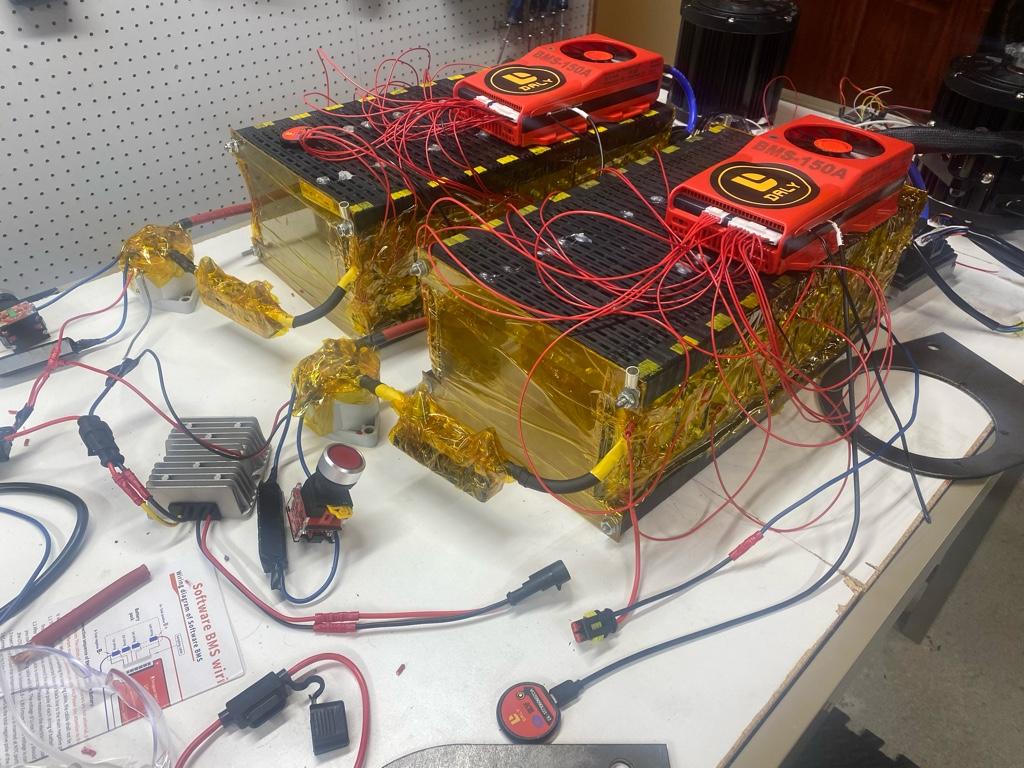
Here’s a picture of the current draft. The motor controllers are behind the motors, and the batteries are in the back (current estimates is two 20s2p packs of SPIM08HP) with BMS on top (Daly).

I intend to sink the controllers to the body, I might have them and batteries on some kind of standoff so if a rock bashes the bottom it doesn’t break the controller.

I’m debating what to segment off from what else. I want to manage heat and protect from water.

42c80065e7b38f0243c69e8256d092a1.jpg


Sent from my iPhone using Tapatalk
 
Ignore the gears and wheels. Those are placeholder. I want tank treads but wheels are easier to plug in for now.


Sent from my iPhone using Tapatalk
 
Work continues. The parts came, so with this much money in I better deliver now. I’ve done some more work on the remote control. Admittedly I’ve really enjoyed reading the documentation on the microcontroller and hone down some rabbit holes. The body design continues as well; I think I’m going to build the prototype on a wood frame to make sure everything plays well before making out of metal. I also plan to use wheels but really want to get to track drive with this. I will have access to a Tormach soon, but need to learn how to use it, so in the meanwhile I’m designing everything to be welded together. I’m struggling a little with his best to design the motor mounts. I went with SPIM08HP batteries.

Here are some pictures of parts and progress
8c1392abf0a29b143dcf70fe6e27abe4.jpg

1ce2422091f552fb18caed64eba7da7a.jpg

36719a39892d241873fdd63228d7f5be.jpg

e3b59e2ea3faad66f69d3fc845ef4816.jpg

cd5867901ba1b8585ca524aa2e029867.jpg

d48de990a5022a7d8203dae4c826b987.jpg


Sent from my iPhone using Tapatalk
 
Work continues. The first battery pack is almost finished. I spent a few hours over the weekend cutting Busbars down to size.
f36795bf2a630a97e3624420bbd3f1d6.jpg

CAD work continues. I’m close to never buying parts off Amazon again after cutting some terminal connectors that were supposedly tinned copper to find they were just “tin.”
0b1be9e484e97ee0d30ae445d9eed630.jpg

I’m excited to hopefully have the motors driving soon so I can focus on the frame. I want to get some more welding time in!

The thumb stick controller is still half finished. I spent some time on it over the weekend, mostly working on a digital to analog converter to communicate with the EM-150. More to come-


Sent from my iPhone using Tapatalk
 
Finished wiring up the battery packs. I’m still waiting for my charger. I went with a Luna 72v 3A charger. The shrink wrap is just to protect the terminals and me from bumping in to anything and shorting. Tapatalk keeps throwing errors when I try to upload pictures.

I’m designing the driveshaft to have a hub so I can interchange gears. I have access to a really nice fiber laser so making my own sprockets isn’t hard.


Sent from my iPhone using Tapatalk
 
I spent a few hours on the remote tonight. I got the DAC working and translating single axis joystick commands from the sender unit into the 5v signalf for the Votol on the receiver. Next up is to finish the code that converts one joystick position into two motors commands, wire in the other DAC, then test that it all actually works on the votols.


Sent from my iPhone using Tapatalk
 
The shrink wrap is just another layer of temporary protection to keep little fingers from potentially grabbing tools and touching the busbars in case I forget to lock up. I need to research but was planning to put some kind of foam layer over top, then cut acrylic sheet to go over that. Or just liquid electric tape, but that seems like a lot of work. I’m welcome to suggestions.


Sent from my iPhone using Tapatalk
 
And yeah, cutting busbars took me a couple hours and I had a metal band saw and a belt grinder!


Sent from my iPhone using Tapatalk
 
Update: lots of documentation reading. Ordered fuses and fuse holders and some Kilovac contractors. Read up on precharge circuits and I think I need one (seems like a good idea, and I can’t tell from the documentation). I just need to find the time to wire everything up.


Sent from my iPhone using Tapatalk
 
I cut the compression plates for the SPIM08 batteries today, and also cut the motor mounts for the qs138s. I need to file the edges and install, but fit is perfect.
205a33d9bd8d0c8c2e0cb58d4847257e.jpg

ce948ce88fd217b9894b06e3b7326750.jpg

e6192dfe44ff004e03e5f8c7f5f1e95c.jpg


Sent from my iPhone using Tapatalk
 
This thing is going to be so sturdy and strong you should make a seat on top of it and just ride it as a snow-ATV :wink:
 
SlowCo said:
This thing is going to be so sturdy and strong you should make a seat on top of it and just ride it as a snow-ATV :wink:
Hey now there’s a good idea!

My daughter wants me to put a little seat with a stuffed animal on top.

I got the thumb stick transmitting signals and got the receiver to put out the (mostly) correct speed settings, but I still need to finish getting those converted to voltages, so this joystick is getting there. However the thumb stick ive been using is a cheap resistor-based one and the resolution is really bad on it, so I scavenged a wii nunchuck and spent some time last night wiring that in. It wasn’t hard since there are libraries for it. The wii also had two more buttons I can use now - maybe a break? Maybe I’ll install a horn? Open to ideas. I’m thinking deadman switch for one. When I get this done I’ll have to remember to post the source and a quick build instruction online.

I also got around to installing the compression plates. I wrapped them in kapton- probably unnecessary, but the extra precaution felt good.


Sent from my iPhone using Tapatalk
 
The work continues.
454de75b1811c275291e19f8bd3101b5.jpg

e3e0fd95c1ae2c9a9ae858d25b8080a3.jpg

45ad4d787e21b3e18d5ad272e14bb447.jpg


I have contractors and pre-charge for each battery. In hindsight I’m wishing I’d ordered a 400+ amp bms so I could just have one big battery instead of two - at this point I have Almost entirely separate drivetrains for left and right wheel.

The joystick is working - it outputs 0-5v signals to drive the speed of the two motors correctly. However, the motors are not behaving correctly; I think the votols need something more like .8-4.2v. I did get a couple of brief motor jumps when I tried accelerating, which reminded me how powerful these things are. I haven’t had a chance to plug in to the controllers and look at the settings yet. I’m expecting the fix to be easy. I also have a deadman switch on the wii nunchuck so it has to be held down to drive, and code to shut the motors down if the remote stops sending a signal.

The contractors are driven by 12v and a push button. I’m going to wire a fuse into that circuit yet. I electric taped the fuses.

I realized I probably need to reinstall a bunch of the BMS leads so they aren’t touching the bus bars (to prevent a short from melting). I’m killing kapton left and right. Pointers on BMS wire management are welcome. I also discovered that one of my cells is slowly leaking voltage, so that has to come out. I don’t need a spicy pillow. Thankfully I bought a few spares.

I’m trying to think of how to cool this since the votols will be fully enclosed and their heat sinks aren’t flush with the mounting holes. I might fashion something to connect the heat sinks to the metal body.

At this point I’d say - rate my setup. Any feedback is welcome. Once I get throttle working then the drive is basically done (enough) that I can move on to the metalworking bit of building the body. That should be less thinking and more old fashioned labor. I’m going to just put wheels on right now, I want to actually have something to show. Tank treads later. I also found some python code for reading Daly’s that I think would be cool, then I could put more automated safety into the drive. Then a thermal imaging camera, a paintball turret, a…

I may slap the whole kit on a steel frame and drive a couch around a little bit first in the short term too. Don’t worry, I’d put a software limiter on it.


Sent from my iPhone using Tapatalk
 
Quinc said:
Looks great! For the wires I tucked them all down one side on mine using each wires to hold down the wire behind it. . Also wait until you try and play with the votol software configuration. It's a pain in the arse. but you can adjust the throttle input voltages.

Thanks for the advice. I finally got some time to connect to the controller software tonight. I read the manual first so that helped some… but yeah, not straightforward.

The big one of tonight was getting the whole custom controller assembly to work. The voltages are in the wrong range and the way the DAC works if I go negative (which currently looks like putting the stick back into reverse) it just restarts from the top, so 5v, then goes down until it gets in the range the votol will read (aka full throttle). That excited the right motor and I don’t have a video of it trying to wrap the controller around it, but I do have proof that the wii / esp / wifi setup does work, I just need to fiddle with the voltage settings and wire reverse into it.

Here’s proof:

https://youtube.com/shorts/qIejY1E9TUk?feature=share

Next step it to build a basic frame for this thing to put the kit into before I beat the motors up further. I need to do a bunch of testing to dial in the controller voltages and I’d like the motors mounted to something for that.


Sent from my iPhone using Tapatalk
 
Cut and tack welded the frame today. Next up is to complete the welds and mount the motors. I’m still fiddling with how I want the motor mounts to work. Once everything is in and secure then I’ll dial the software in on the controller.
0f9c20a9c91485c6799222f224991687.jpg

f0b2c167a42932b327d4f32689adea15.jpg


It’s looking more and more like a 90’s era battlebot, but I keep telling myself that’s just because it’s a first version


Sent from my iPhone using Tapatalk
 
When you first posted I thought you wanted to build a small RC scale tank type thingy to gentle pull you through the snow.
But this thing is turning out to be able to rip your arms off and plough through a mountain of ice... :lol:
 
SlowCo said:
When you first posted I thought you wanted to build a small RC scale tank type thingy to gentle pull you through the snow.
But this thing is turning out to be able to rip your arms off and plough through a mountain of ice... :lol:
I do want it to be able to pull you up a mountain if you want to test uphill skiing. All joking aside, I’m aiming for something with a lot of juice behind it!


Sent from my iPhone using Tapatalk
 
I took the day off today and am working on this beast. I got the motor mount holes corrected (too narrow) and mounted and am using it to place the frame rails that it will mount to. About to start a lot of welding. Wish me luck.
eb547b600fb62e62875f2acbc30bcf1d.jpg

a0afdee8e95a00d4dc23015d5f46f66f.jpg

2b21dd95a0f45ca18bc29923acb5e363.jpg


Sent from my iPhone using Tapatalk
 
Back
Top