Supertux1's First eBike: Yet Another Commuter

Yossarian33 said:
I agree the bike is pretty damn low-end. The roads are salted here in winter and it's really corrosive. It'll be my first winter bike commuting, and I want a "disposable" bike. My normal commuter is the 2011 Kona Dew Plus which is pretty nice and I don't want to ruin it.

I won't even buy BB7's because I don't want them ruined by salt. I fully expect to either trash the bike after 1-2 seasons, or need to replace the entire drivetrain. And I don't expect high-end performance, but commuting speeds in winter are pretty slow.

Thanks for replying about the fenders! I want to avoid salty slushy snow getting over everything, so I'll need full fenders for sure.

Yah this bike will do you good for winter. Believe it or not, cheap crap bikes like this make the best platforms for ebikes.
 
I am expecting the same kit next week from cell-man.
Couple of quick questions:
Notice you did not use the ebrakes. Was there a problem with integration or use just don't prefer them?
Also can't you get cruise control with the CA 3? Have you set it up?
What is your average range on the 18.5 battery when you are not holding back?
Thanks,
Roger
PS NICE build!!
 
I can confirm that the CA v3 has a cruise control option. You can set the number of seconds it takes holding a steady throttle for cruise to kick in. You then need either ebrakes or flick the throttle again. Ebrakes recommended as it's easy to forget.
 
rogerc said:
I am expecting the same kit next week from cell-man.
Couple of quick questions:
Notice you did not use the ebrakes. Was there a problem with integration or use just don't prefer them?
Also can't you get cruise control with the CA 3? Have you set it up?
What is your average range on the 18.5 battery when you are not holding back?
Thanks,
Roger
PS NICE build!!

Thanks!

Sorry for the late reply, haven't been checking the forum much as its cold here and riding less.

I do use the ebrakes, I took the cell-man kit ebrakes and changed/shortened the connector on them, made a Y adapter and ran them through the CA so the CA is the only thing that interfaces with the controller. When I pull either the brake the throttle out goes low. The brakes are kind of crappy and have a lot of play so I replaced the brake handle pivot pins with bolts and put some washers to shim it up on the inside. The switch inside the brake is simply a normally open pushbutton switch that goes closed when the lever is pulled away from it.

CA has a cruise control option, but it doesn't work very well for me since I don't have the CA limit speed, only power.
My bike will always get up to about 25mph on the flat no matter what power level I use, higher powers - 25-35A get there faster and help hold that speed up hills.
(acceleration etc...) I do use the cruise control but only so my wrist doesn't get sore.

At the most inefficient high power setting I do about 35 Wh/mile which would be about 25 miles on the flat.
A lot depends on the tires, terrain and rider too. 25-30mph is scary and requires frequent checks for loose bolts and worn parts that could throw you.
 
A few more pics from this summer. I put the bike away for now as it is getting cold and wet here and road salts will ruin it over winter.

I think I put about 1800 miles on it since June.

null_zpsbcbe786c.jpg


null_zps907309bd.jpg


null_zpsa4fd53e7.jpg
 
Very nice! I think about 80% of potential E-bike customers who need a street commuter would be well-served by this exact kit and battery. Over the last year there have been several threads about builds that are using the MAC-10T at 50V, many happy customers.

I especially like how you posted all the links to get the accessories you added, along with the prices.
 
spinningmagnets said:
Very nice! I think about 80% of potential E-bike customers who need a street commuter would be well-served by this exact kit and battery. Over the last year there have been several threads about builds that are using the MAC-10T at 50V, many happy customers.

I especially like how you posted all the links to get the accessories you added, along with the prices.

Thanks! I wanted to be realistic about the costs. I consider it a cheap build since most of the stuff came from Amazon, tax and shipping free.
I think the best things about it are the kickstand and the rear rack, so easy to load up which makes commuting much more enjoyable.
I see lots of builds that look great but there's nowhere to put standard bike stuff for a long ride. (your toolkit, rain gear, lunch, sodas etc...)

The kit is very well matched, controller, battery and motor are all near the same power spec (a little over 1000W) so nothing is really the limiting factor.
The most amazing thing is that I haven't had ANY flats this summer. I just replaced the disc brake pads.

The only real issues were the spokes and the motor cover screws being too short and falling out. Easy fixes.

I'm starting to see the lifecycle with the battery, it won't charge up to 57.9 / 58v any more - 57.7v is typical in the morning after a night of charge.
Not a huge deal, I expected for how hard I ride it, still an awesome battery.
 
efergy kb said:
Supertux1 said:
1 x CA-LOG_GPS, 1 x CA3_Switch, 1 x JSTCrimp, 2 x ConBag, 1 x T-HTwist, $263.38, http://www.ebikes.ca

What exactly are the JSTCrimp and or ConBag and how do you use them?
Closest thing i saw no ebike.ca for the 'JST' were some type of temperature guage.
Is this not standard with the CA?

This is a tool and parts bag to make your own CA connectors. I rewired the brakes with it.

The cellman kit comes with brakes that directly wire into the controller.

This is not bad, but the CA is the brain and is designed to manage all inputs and outputs.

I wanted my CA to be the only thing that talks to the controller (besides the power switch) so I had to rewire the brakes to go through the CA first.
I wanted the visual braking indicator and the ability cancel the auto cruise function of the CA so this had to be done. As a bonus, I only have to run
two wires from front to back, the CA 6 conductor wire and the power wire, instead of four wires. Increases stealth and eliminates long stretch of
wires which can break/short etc...

I cut the kit brake cables very short and put JST connectors on each one. I made a Y cable which combines the brake signals and plugs into the CA.
This way I can take each brake off the handle bar separately for maintenance or sliding on other handlebar accessories before it.

Edit:

I also cut and shortened the throttle and the 3 position switch leads and used these connectors to make the rats nest of wires near the handle bars as neat as possible. No sense have 3 feet of wire to go 6 inches, wire coils on the handlebars attract attention. :)

"JSTCrimp" is the crimping tool:

JSTCrimp.jpg


"ConBag" is the bag of JST connectors:

ConBag.jpg


Both Available Here:

http://ebikes.ca/store/store_connectors.php
 
Hello Friends!

I have updated my commuter over the winter months to make it even more awesome.

My girlfriend also got a really good winter sale deal on a BH Neo City pedelec-only and was giving me crap about having a throttle and her not being able to keep up etc... I was admiring the dynamo powered lights on her bike too. Something had to be done!

So I have added the THUN Pedelec and Torque Sensor:

7adc06be-5233-437a-ac59-3584e7227b2d_zps4d54eea7.jpg


Yes, it requires a hole to be put in the frame but no big deal. Just seal it up with some hot glue so road dirt and water doesn't get in there.
Yes, one side of the Thun is PLASTIC but it appears to work. This is a 116mm Thun, replacing a 113mm BB, so the front derailleur had to be tweaked a bit.

I also figured out how to get the wheel to work WITHOUT ANY SPOKES at all:

BD8B54F2-19FE-47A9-A14E-69F26B86882D_zps2d1wtrrt.jpg


Just kidding. This is an action shot of the wheel spinning after truing.
I forgot what the shunt value was on my controller so I'm trying to calculate it with a Watts Up meter.
It's 1.01, 1.02. or 1.03. I'll have to take it on a long ride to be sure.

This is a really great truing stand. Well worth the investment.
I sanded off the cheap chinese paint on the motor and repainted it with some high temperature epoxy paint used to make engines pretty. (From auto store.)
5C5103BA-8E8D-4AFE-A11B-62EB32381EB1_zpsicgo6fea.jpg


I decided that the wheels sucked and replaced the rims on both the front on the back with Alex Rims Supra D's.
These rims are really nice welded rims, they have steel eyelet holes and are a little bit deeper than the Alex DM 24's.
For spokes on the back I used Sapim Strong Single Butted spokes and for the spokes on the front I used Sapim Double Butted.
I laced the rear to have the leading spokes tension from the torque of the motor.
The front is laced backwards to handle reverse torque from the disc brake.

4FD4B949-A23D-46FC-B670-3E2B0B06172E_zps3gc5rfex.jpg


I upgraded the disc brake on the front from 160mm to 180mm and replaced the crappy Suntour fork with a Rockshox 30 Gold TK Air Shock.
I also added a dynamo to the front wheel to power some lights. Learning how to lace and true a wheel is a skill I'm glad that I invested in,
you can build a lot of cool custom stuff that is MUCH better than the factory produced junk.

94A5AA9E-2DEB-49CF-BA5E-4D1CC3BDF21A_zps9fnfxfse.jpg


The RockShox fork didn't have a hole in it to mount a light or a fender, and I was about to drill and tap the cross bar but then I remembered
that this is an AIR fork and that there are probably hidden air channels etc... So I glued one on with JB Weld, painted it black, and attached
my old fenders and a new dynamo powered B&M Light:

33E4E2D7-F59B-4A7A-96BB-AFDCBEEE4B33_zpsglrbjxte.jpg


I filed off some of the anodizing on the fork and used some zip ties to keep the metal tube I glued on there relatively straight.
A4BEEAB1-C099-42EF-8320-BF39BF22AF31_zpsz9vgi1ng.jpg


Last year I experienced frequent shoulder pain from riding hunched over, so along with the fork upgrade, I decided to raise the handlebars
with an adjustable stem for a more upright riding position. The extra height required replacement of the front brake cable with a longer one,
so I did that too. I broke the original CAv3 mount, but it was too big for my handlebars anyway. I made a suitable replacement out of an
old reflector bracket. It's also harder to steal now. :) I also replaced every Phillips head bolt of importance with stainless steel metric ones.
I can take apart the entire bike with my Topeak Alien II tool and a big wrench for the rear wheel nuts.

I like to ride with my phone running a tracking app and a map, so I decided to add a USB power source that runs off the dynamo:

7CD9A1C6-3F9A-450D-AAFF-ADAE74FA9E86_zps2hjlylxp.jpg


And here we are hauling the mutts around, I am hoping the stronger wheels hold up to this a little bit better:

08F32E43-BE8E-416F-ABB4-EF5E250765F7_zpsu04hjces.jpg


Some more shots:

675456FB-9983-431B-8C82-3E00BDB74656_zpswq60lqc1.jpg


7B3C389B-71DD-4D6A-AFA7-2C0ADB13ABA2_zpsl22p9jdo.jpg


Here's the shopping list:

Thun Torque Sensor
http://www.ebikes.ca/thun-120k.html

Alexrims Supra D 26" 36h Black Disc, $69
http://www.amazon.com/gp/product/B001F2UT3A/ref=oh_details_o05_s00_i02?ie=UTF8&psc=1

190mm/188mm Sapim Strong Single Butted Spokes / 22mm Velox Cloth Rim Tape, $70
http://www.wheelbuilder.com

Alexrims Supra D 26" 32h Black Disc Only, $69
http://www.amazon.com/gp/product/B001GSQLIU/ref=oh_details_o09_s00_i00?ie=UTF8&psc=1

259mm/258mm Sapim Strong Single Butted Spokes / 22mm Velox Cloth Rim Tape, $62
http://www.wheelbuilder.com

180mm Avid HS1 Heat Shedding Rotor, $43
http://www.amazon.com/gp/product/B00553YRVA/ref=oh_details_o08_s00_i00?ie=UTF8&psc=1

20mm Avid Post Mount Brake Adapter, $18
http://www.amazon.com/gp/product/B009P3LYU8/ref=oh_details_o07_s00_i00?ie=UTF8&psc=1

RockShox 30 Gold TK Crown Adjust Solo 100mm Air Fork, Black, 26-Inch, $297
http://www.amazon.com/gp/product/B00DFJFRME/ref=oh_details_o05_s00_i00?ie=UTF8&psc=1

SRAM I-Light Dynamo 730 3W Front Hub Disc, $92
http://www.amazon.com/gp/product/B008OEANV0/ref=oh_details_o04_s00_i00?ie=UTF8&psc=1

Supernova The Plug III Dynamo USB Charger - USB Charger, $228
http://www.universalcycles.com/shopping/product_details.php?id=64930

Supernova Plug II Expander, $15
http://www.universalcycles.com/shopping/product_details.php?id=52242

Busch & Müller Lumotec IQ CYO Premium T Senso Plus, $110
http://harriscyclery.net/product/busch-mller-lumotec-iq-cyo-premium-t-senso-plus-3693.htm

Busch & Müller Toplight Line Plus BrakeTec w/Pulse. Rack Mount Generator Taillight, $55
http://harriscyclery.net/product/bu...ulse.-rack-mount-generator-taillight-3633.htm

Zoom 25.4mm Adjustable Stem, $21
http://www.amazon.com/gp/product/B001V5CF38/ref=oh_details_o03_s00_i01?ie=UTF8&psc=1
 
When I was out riding with the dogs, the screws on the brake side cover plate partially backed out and in doing so ripped the plastic BB7 inner caliper adjustment wheel off. :(

I was examining the depth of the screw holes and decided to go back to a smaller length cover screw (in stainless steel hex head), closer to the original screws, because the motor cover screw holes are almost fully countersunk. The longer screws I had used before might have been bottoming out on the rotor case and not holding the cover on as tightly as they should.

One area for improvement with this motor is to possibly make the cover screws a bit bigger/deeper since they tend to want to come loose due to the sheer forces of braking and drive torque.
I have a metric tap and die set to do this but I am not that desperate yet. (High fudge factor times 12.)

I have replaced the 160mm rotor with a 200mm rotor and new BB7 on the back. (pic shortly.)
The 200mm rotor allows the inner caliper adjustment screw to rise above the MAC motor diameter and easily clears the motor cover screws so that they can be replaced or tightened without interference.
I didn't even have to grind anything down as before.

The 200mm rotor kit below comes with everything you need and includes all sorts of extras for 160, 180 and 200mm IS frame mounts:

Avid BB7 Mountain Disc Brake, $69
http://www.amazon.com/gp/product/B00553YPEY/ref=oh_details_o00_s00_i01?ie=UTF8&psc=1
 
I have to say this is awesome; i have bought as much of the same parts as yourself.

I should of given more thought re: the rack as the 26" doesn't give much clearance. Now i've had to order the 29". ;(
Are you able to take snapshots of the back of your bike and how you stuck the controller with the junction box under the topeak?

I've been looking around the hardware store for some clips similar that will extend the width of the rack.

I am also curious if you've added any
- battery isolater
- key switch or precharge switch?
 
Okay here is a better picture of the mounting. Everything is black so it's hard to see, which is sort of the point. :)

I use four P clamps on each corner of the rack to create mounting points for two horizontal wooden beams that run under the rack from left to right:

BF53AA6D-F12B-42B0-AC11-9AEFEFF22730_zpsgtqh7sfp.jpg


The controller then bolts upside down to these wooden beams:

11B80EB5-2886-441E-9EC3-8C536B3C6077_zpskgbcqis8.jpg


The project box is in front of the controller, also mounted upside down and secured by using the four bolts that hold the rack to the rack supports.

I put holes and cutouts on the sides to accept the wires. Black rubber bands made from old tubes hold the lid on the box.

EC52C4B3-62B3-4CE5-B50B-6621DC957746_zpsqfu62elf.jpg
 
nice one! very ingenious and here i was going to drill into the slider rack then file off topeak bag plastic bit >_<
 
efergy kb said:
nice one! very ingenious and here i was going to drill into the slider rack then file off topeak bag plastic bit >_<

Yah no need to ruin an awesome rack by doing that. I like Topeak accessories like the basket and bags that slide into the rack.

Oh I don't have a key switch or a battery isolator. Just a switch on the handlebar.

Cell_man wired up a pretty neat precharge circuit into the battery/controller connectors, which is basically just third positive Anderson connector with a series resistor that engages mechanically before the main positive power terminal, very elegant and simple.

The rubber on the outside of the controller is just a sleeve that I used to hold all of the unused controller wires, since the CAv3 is doing everything. I could clean it up by disassembling the controller and removing them but I might need them for another project later. All of my stuff is put together to be removed and re-used somewhere else, like computer parts.

I have also cut some wood strips on the table saw with an edge angle that will slide into that channel so I have a fairly decent & removable mounting platform for whatever I want to put on the rear. I did this with the plastic basket you can see in one of the older pictures.

I like this bike so much that I recently bought a replacement MAC 10T for when this one dies.
 
So my MAC 10T motor has been showing signs of 'wear', so I decided to swap it out for a new identical one.
By wear, I mean to say that this was my first electric bike motor and I beat it up pretty good as a noob.
The quality of the motor is superb because it still works despite all of my manhandling.
I decided to replace it because several things on it were broken or in the process of breaking due to my own incompetence and learning. :)

Some of the dumb noob stuff I did to it:

o I broke the temperature sensor and/or wire a long time ago when disassembling the core and pounding on each end with a mallet and never got it to work again.
o Rolled off the workbench several times.
o I overheated the motor to the point where the paint started peeling from the cover under the freewheel.
o I broke the thin ground hall wire that exits the motor axle and had to solder/splice a new one in.
o More wires in that area were knicked from removing the wheel and not being careful. I dumped a bunch of liquid electrical tape in there.
o I may have broke the clutch a little because its starting to slip thanks to my full throttle @ dead stops without understanding ramp up. :)
o I'm sure the gears were stripped just a little.
o Broke and had to solder the connectors off the hall plug several times threading them through stuff.
o Stripped one of disc brake holes by HeMan-ing the tool.

Even with all the above it still worked just fine, I just wasn't comfortable riding it like that 20 miles a day, so I VERY CAREFULLY put its replacement in and it works great!

To the parts bin!
DB0C5BCC-2141-4573-9CB4-492888B23E1F_zpswyehth9y.jpg
 
Thank you for the build thread. I found it in your signature when reading another thread.

I hope to build something like this soon. How do you like the controller? Does it ever get warm?

When did it overheat? Was it from the high speed?

How loud is the geared motor? Is it noticeable when riding the bike?
 
The controller I have is a 12 Fet 60V Infineon and I believe it can handle up to 40A. BMS on the battery cuts out at 40A. I have never put more than 35A continuous through it (limited by the CAv3), and it sits exposed to moving air. It's been warm but never as hot as the motor. I think the controller will always be cooler at any given amperage than the motor due to the oven like effect inside the motor vs the directly exposed cooling fins of the controller case. Of course if you put your controller in a box or bag, all bets are off.

Since I got the thermal monitoring back with the new motor build, I can see how easy it is to overheat hub motors and particularly geared hub motors which don't have as good a thermal conductivity path to dump heat to the outside air.

Over the weekend I went for a long big ride, pulling between 1000 and 1500W continuously over about a 45 minute period, cruising 20-25mph into a strong headwind. Toward the end of my ride and about two miles from home I hit my thermal cut off of 80 degrees C and the CAv3 started limiting based on that. (I lowered the default CAv3 limits 10 degrees for safety.) I was able to get home on a slow pedal assisted 200-500W cruise at about 10-15mph without the temperatures getting out of control.

I was surprised at how easy it was to reach that 80 C limit, and I am sure that I exceeded it regularly with the previous motor, when my first few rides were of the 2000W variety. :) Thermal monitoring is definitely a great thing to have and to be able to use for active throttle feedback.

It took a very long time for the motor to cool down back to room temperature. After almost an hour (inside) it was still sitting at 30 degrees C and room temp was 22 C.

The motor is not loud at all, it gets quieter after the gears break in and mesh, especially if you use a good silicone grease on the teeth parts, but not too much so you don't gunk up the clutch (less is more.)
 
So i bought pretty much the same as you did in terms of the mounting the controller upside down - love it... what i didn't think of properly was that project box; i bought one that is too big and had to cut it down to size and now the back is exposed with all the wires. i didn't consider waterproofing... doh!!! Back to radio shack; again for the billionth time...

Supertux - can you take another picture of where you cut the holes on the project box? Assuming you said: 1) you cut holes on the side and potentially 1 or 2 holes in back where the controller wires go into? Did you end up sealing the holes for waterproofing?
Looking at the pictures.. and its so well concealed i can't seem to figure out how you waterproofed
i) the exposed wire from the controller. and
ii) the wires into the project box.
- Are the wires inside the project box further protected? ie. tape/ different connectors/ tubing. Wondering if you've had issues with anything becomes disconnected or getting back in there for further service.

I also didn't know how you managed to squeeze so many wires into that project box of <3" or how you got tubing stretched enough to fit around the project box!! :shock:


Supertux1 said:
Okay here is a better picture of the mounting. Everything is black so it's hard to see, which is sort of the point. :)
I use four P clamps on each corner of the rack to create mounting points for two horizontal wooden beams that run under the rack from left to right:

The controller then bolts upside down to these wooden beams:

The project box is in front of the controller, also mounted upside down and secured by using the four bolts that hold the rack to the rack supports.

I put holes and cutouts on the sides to accept the wires. Black rubber bands made from old tubes hold the lid on the box.
 
On my bike the only wires I have in the box are the CAv3 connector wire, the controller power switch wires, the phase and the hall connectors.
All of the rest of the wires on the controller are unused and I bundled those up, put them in a tube and zip tied the tube to the side of the controller.
That's the big tube running along side the controller. It goes nowhere, but those wires can't be left dangling! (I could be cleaner and cut them off or desolder them from the inside of the controller and pull them out but I didn't want to mess with it.)

I mounted the project box upside down as well, with the lid on the bottom facing down. On my controller the wires exit from two holes, so I cut two
square 'slots' like this |_| about a half an inch wide in the walls of the box adjacent to the controller wire exits. When the lid is put on the box, it forms
the fourth side and that is the square hole the wires go through into the box. You have to mount the box with the cut outs in it before the controller, then you just screw the controller down and the wires will go through the |_| channels. Those wires are wrapped with a short section of tube before going into the box to protect the wires from the sharpish edges of the box, snug them up and keeps some water out. Towards the front, there is only one |_| channel that the CAv3, brake and motor cables go through. I put that channel on the right front side of the box so there isn't too sharp of a bend for the motor cable.
The rest of the box holds the slack from the CAv3 and the power switch wires.


efergy kb said:
So i bought pretty much the same as you did in terms of the mounting the controller upside down - love it... what i didn't think of properly was that project box; i bought one that is too big and had to cut it down to size and now the back is exposed with all the wires. i didn't consider waterproofing... doh!!! Back to radio shack; again for the billionth time...

Supertux - can you take another picture of where you cut the holes on the project box? Assuming you said: 1) you cut holes on the side and potentially 1 or 2 holes in back where the controller wires go into? Did you end up sealing the holes for waterproofing?
Looking at the pictures.. and its so well concealed i can't seem to figure out how you waterproofed
i) the exposed wire from the controller. and
ii) the wires into the project box.
- Are the wires inside the project box further protected? ie. tape/ different connectors/ tubing. Wondering if you've had issues with anything becomes disconnected or getting back in there for further service.

I also didn't know how you managed to squeeze so many wires into that project box of <3" or how you got tubing stretched enough to fit around the project box!! :shock:


Supertux1 said:
Okay here is a better picture of the mounting. Everything is black so it's hard to see, which is sort of the point. :)
I use four P clamps on each corner of the rack to create mounting points for two horizontal wooden beams that run under the rack from left to right:

The controller then bolts upside down to these wooden beams:

The project box is in front of the controller, also mounted upside down and secured by using the four bolts that hold the rack to the rack supports.

I put holes and cutouts on the sides to accept the wires. Black rubber bands made from old tubes hold the lid on the box.
 
Hello,

is you're bike Controller this 3077ST?

https://images.app.goo.gl/CrNmzbt1CfRYBz278


Supertux1 said:
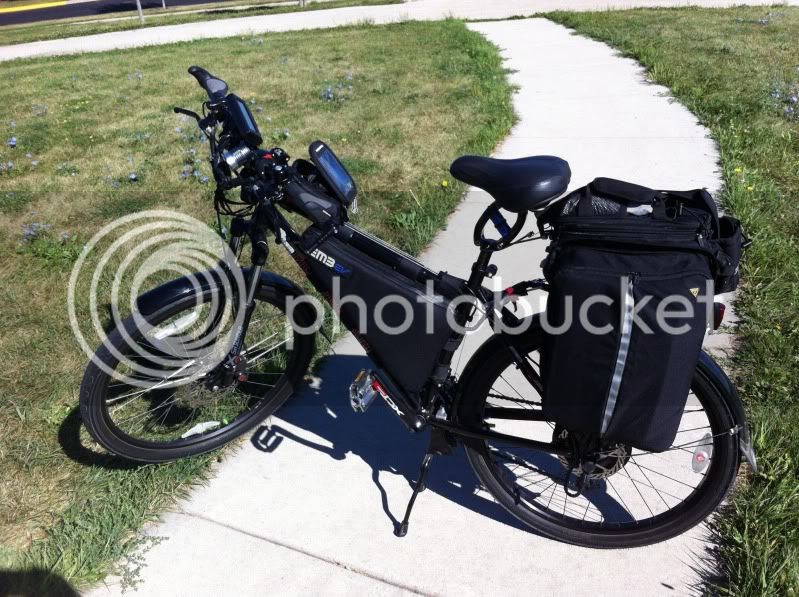
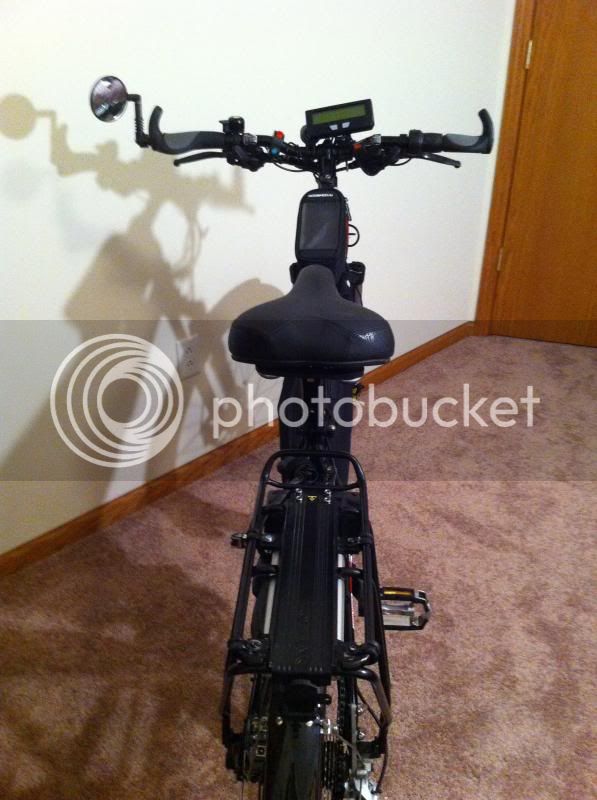
I have been lurking for awhile reading many threads and putting together my first eBike. I tried to maximize stealth, utility and range.

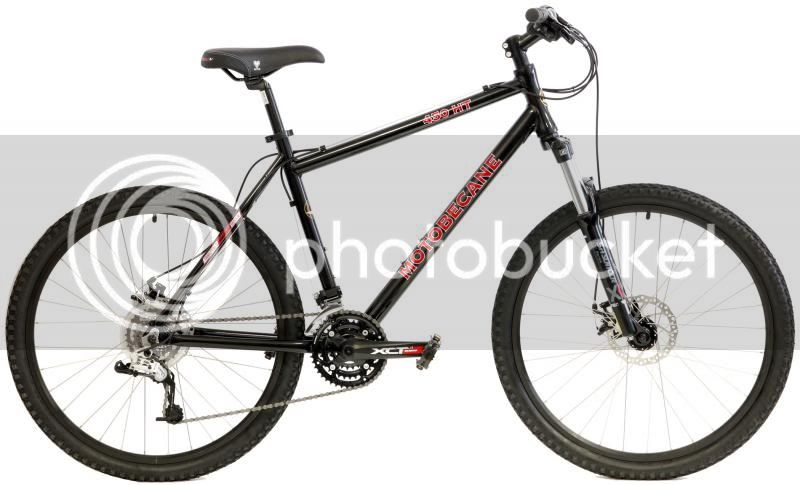
Started off with a $319 donor bike from bikesdirect.com:
450ht_black_2100_zps1fefaff0.jpg


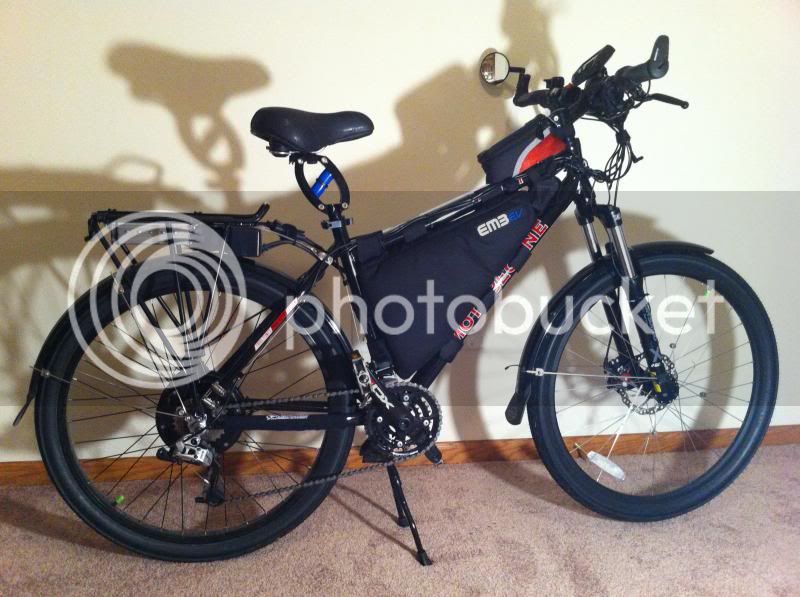
A few miscellaneous upgraded bike components later...

(EDIT: Most Current Images Here...)
675456FB-9983-431B-8C82-3E00BDB74656_zpswq60lqc1.jpg


7B3C389B-71DD-4D6A-AFA7-2C0ADB13ABA2_zpsl22p9jdo.jpg


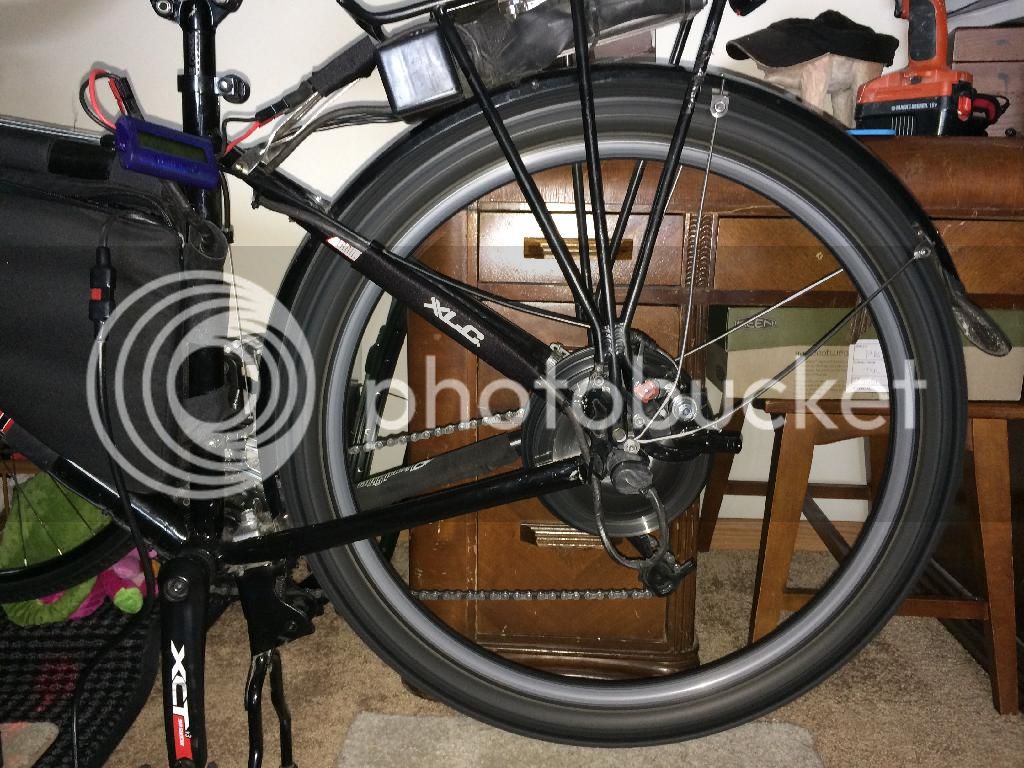
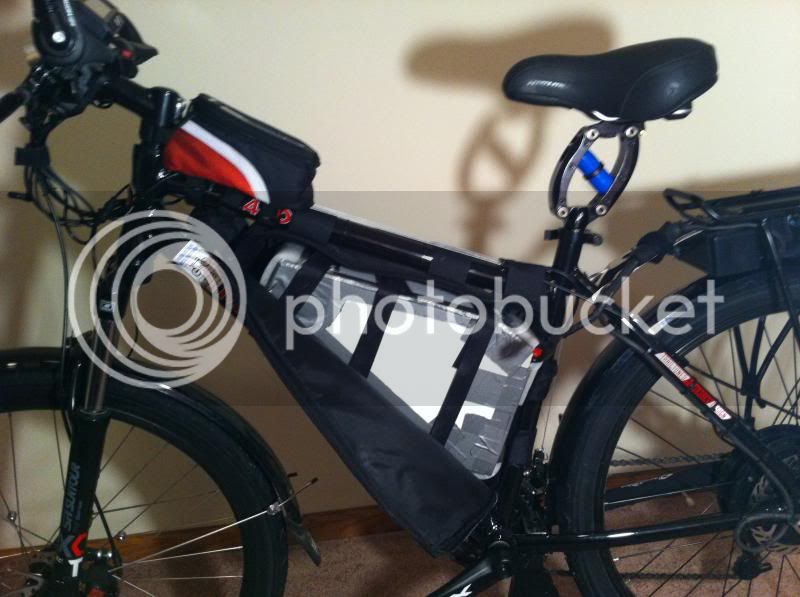
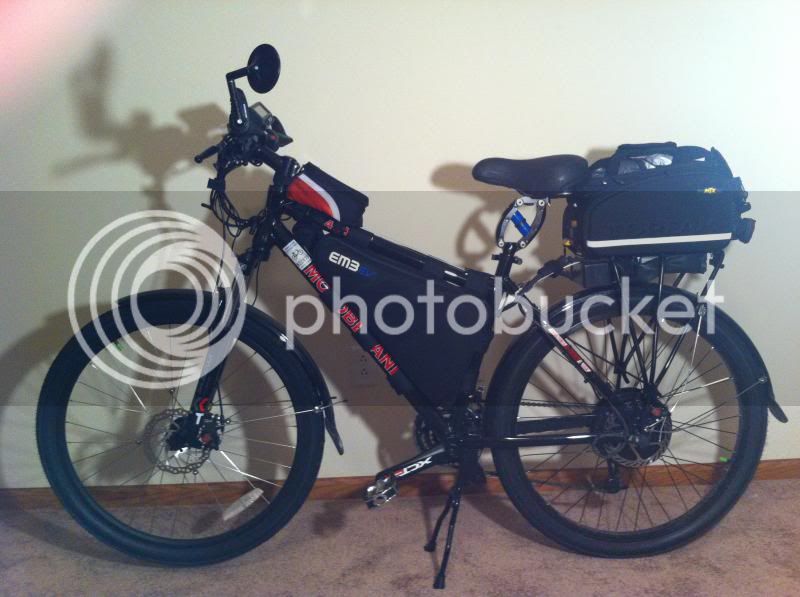
Added one of cellman's kits. A MAC 10T, 50v 18.5Ah (14s9p) LiMNC Triangle Pack, CAv3, 12 FET 3077 Infineon Controller:
IMG_1484_zps96b8c56d.jpg

(I had a problem with the kit at first and cellman came through and I highly recommend his products.)

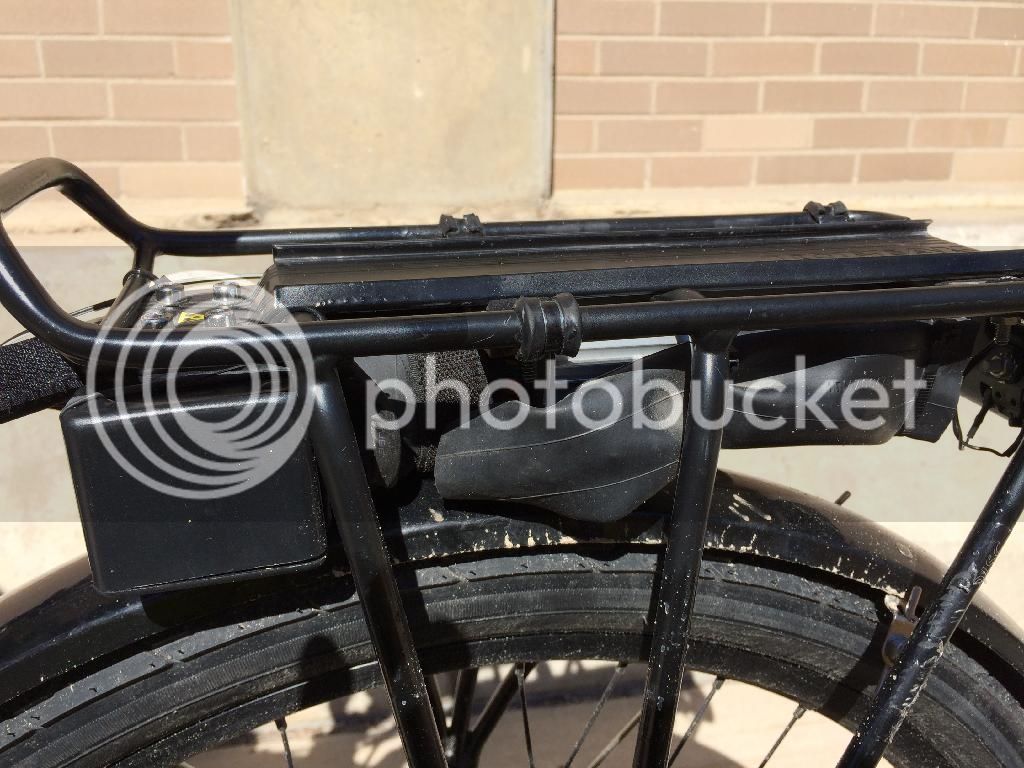
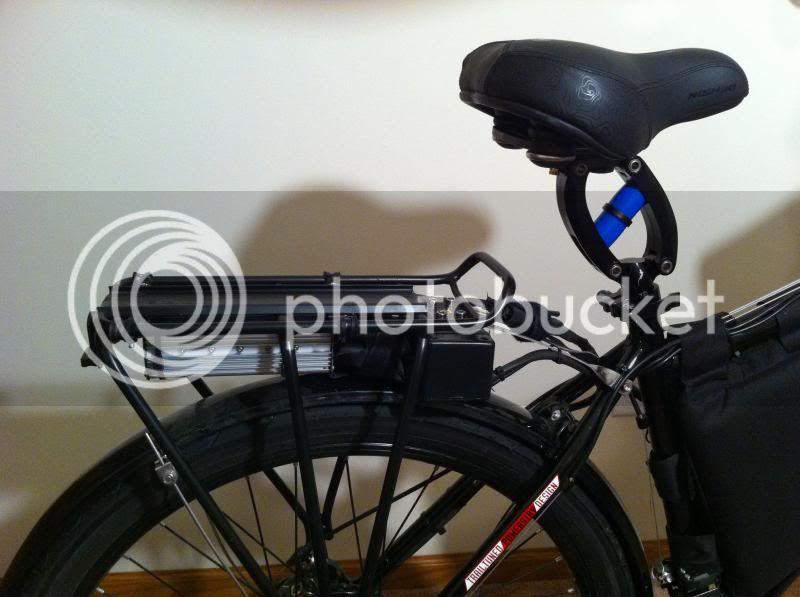
The rack is actually made for 29" frames and I use the extra couple of inches to hide the controller and wiring:
IMG_1481_zps731e14fb.jpg


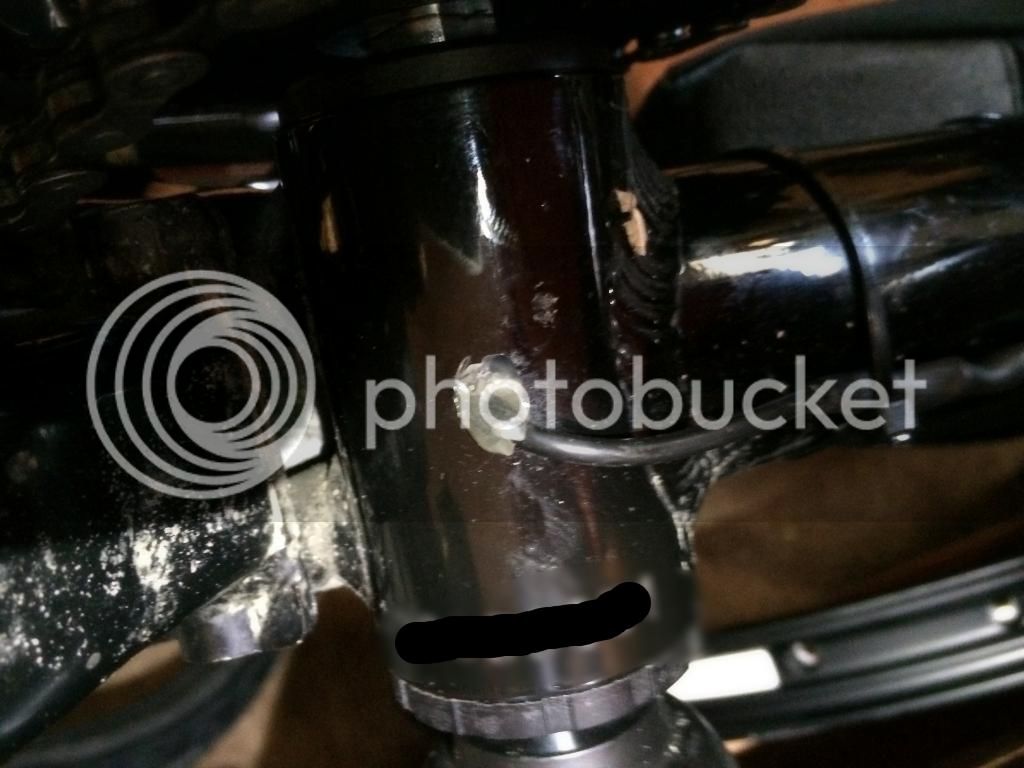
I encased all wires in rubber (old tube) and I used a black Radio Shack project box as a junction box to hide and protect the connectors:
IMG_1488_zpsbb638037.jpg


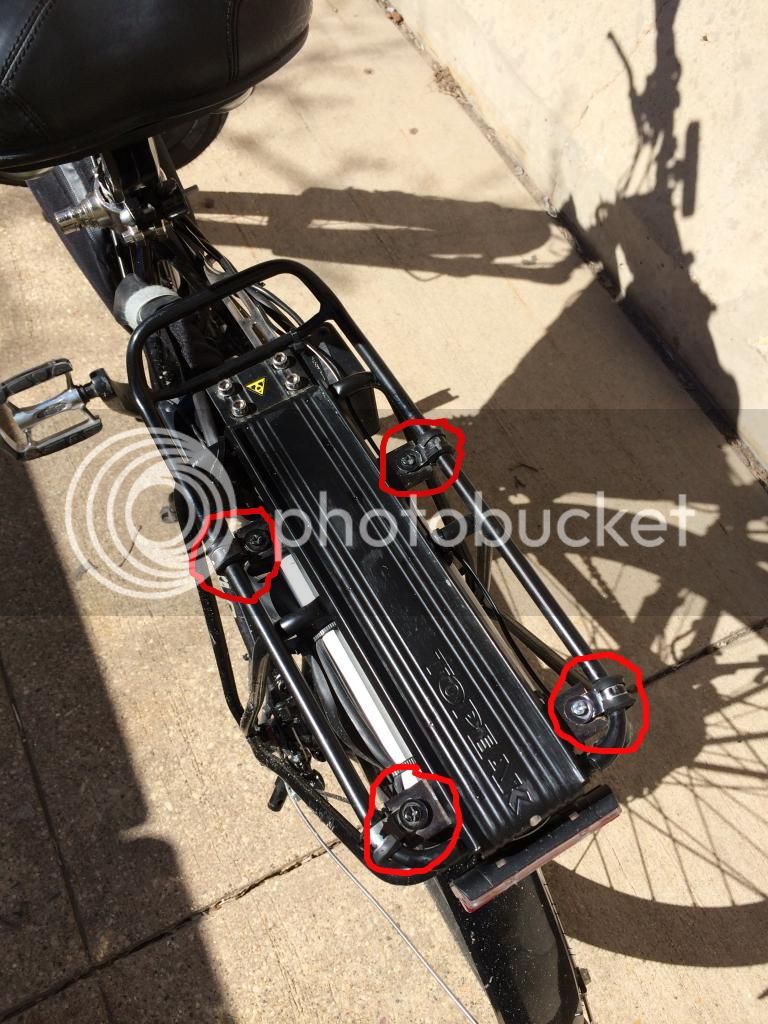
The controller is mounted upside down using some hard wood supports (painted black) attached to P brackets under the rack:
IMG_1486_zps7db951dd.jpg


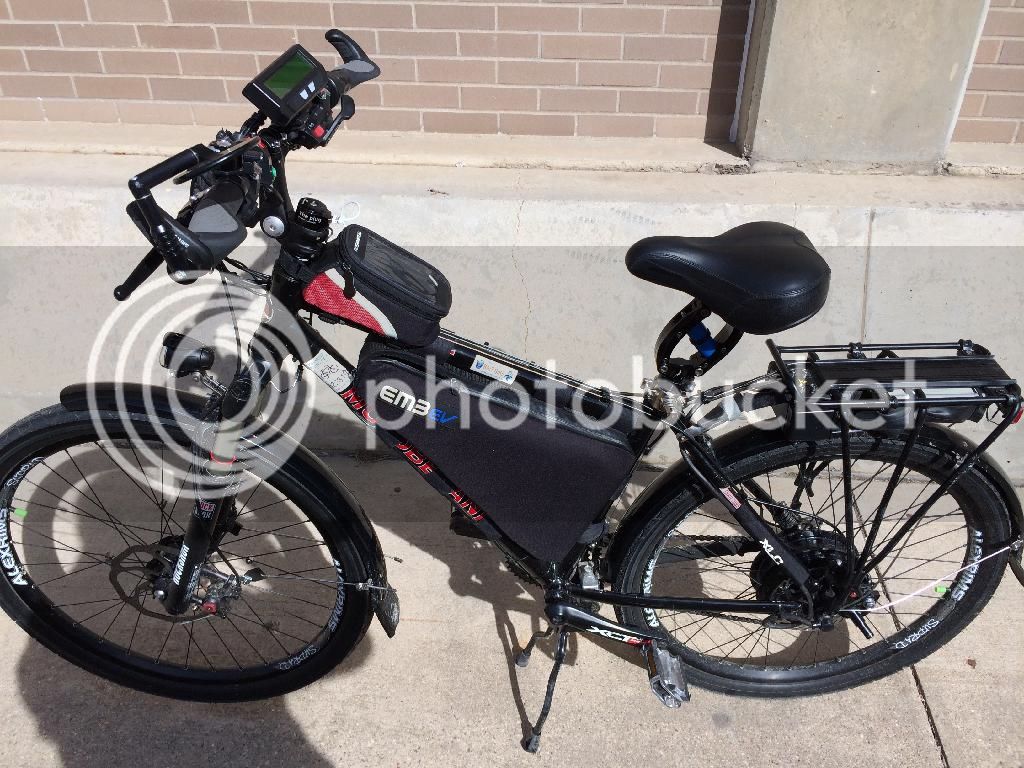
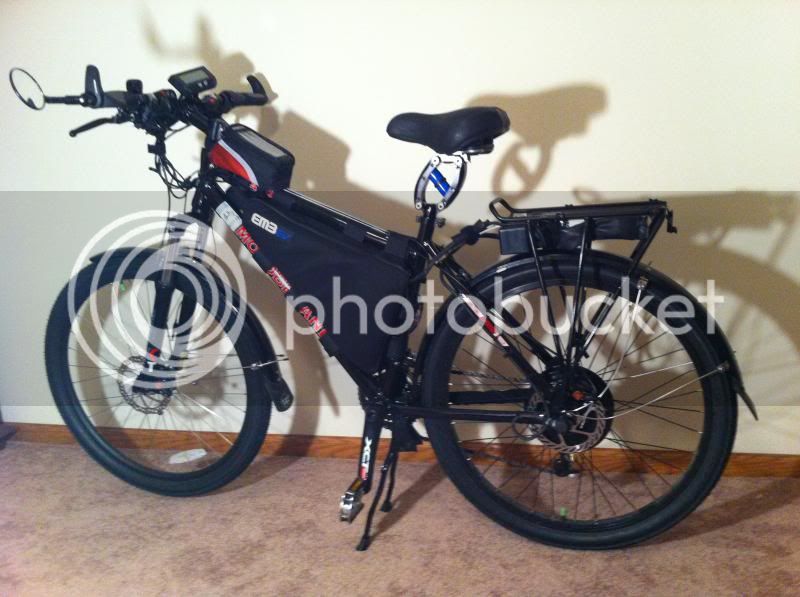
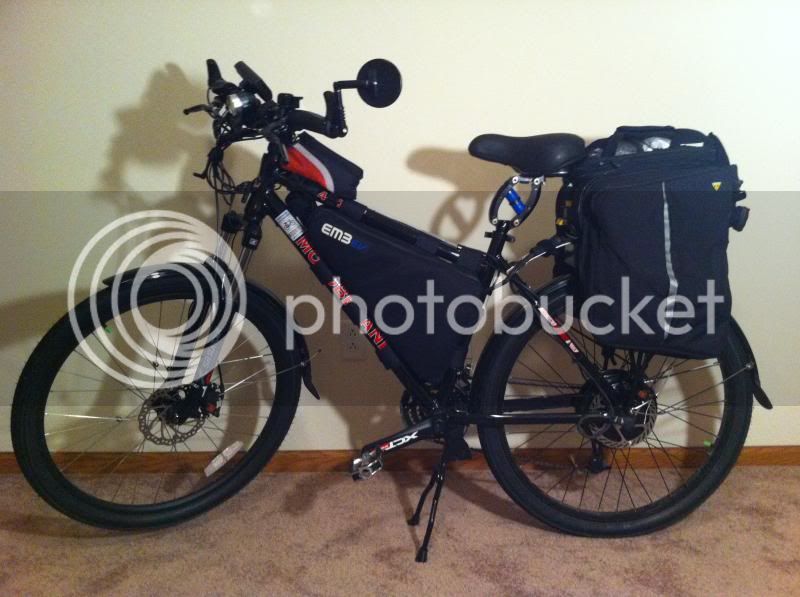
I encased the battery in some yard sign material and duct tape and put some foam around the corners and pressure points. I can remove it easily with no tools to take with me in to stores or to charge at work. It can even fit in my pannier bags for extra stealth. :)
IMG_1492_zps44452c2b.jpg


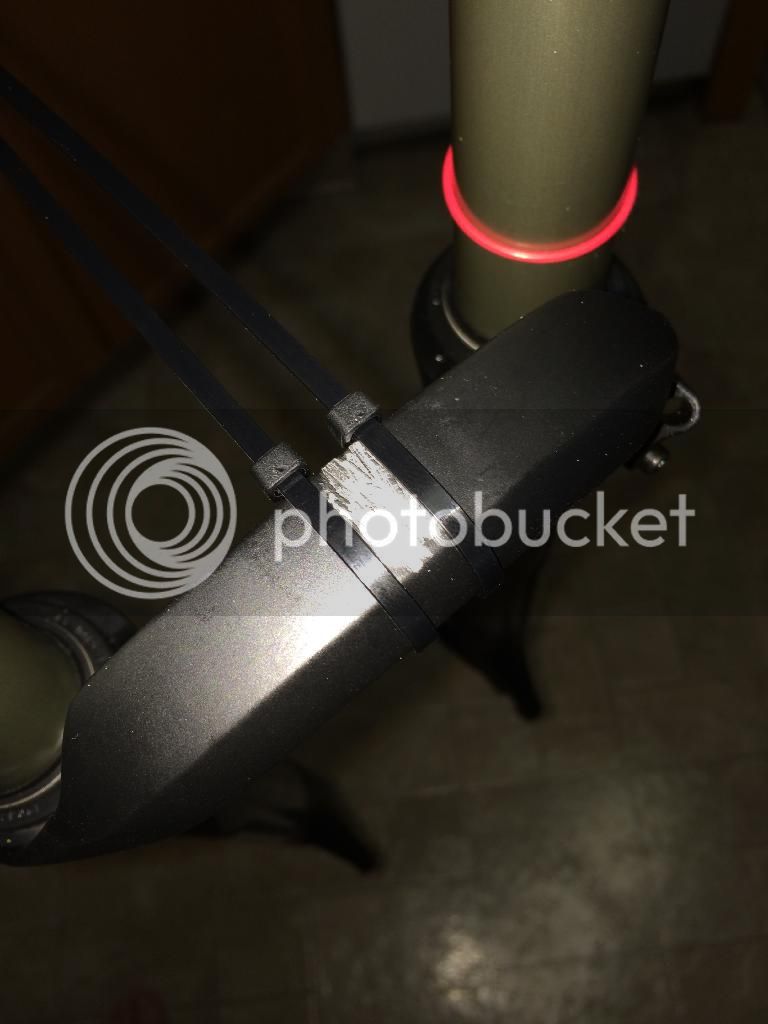
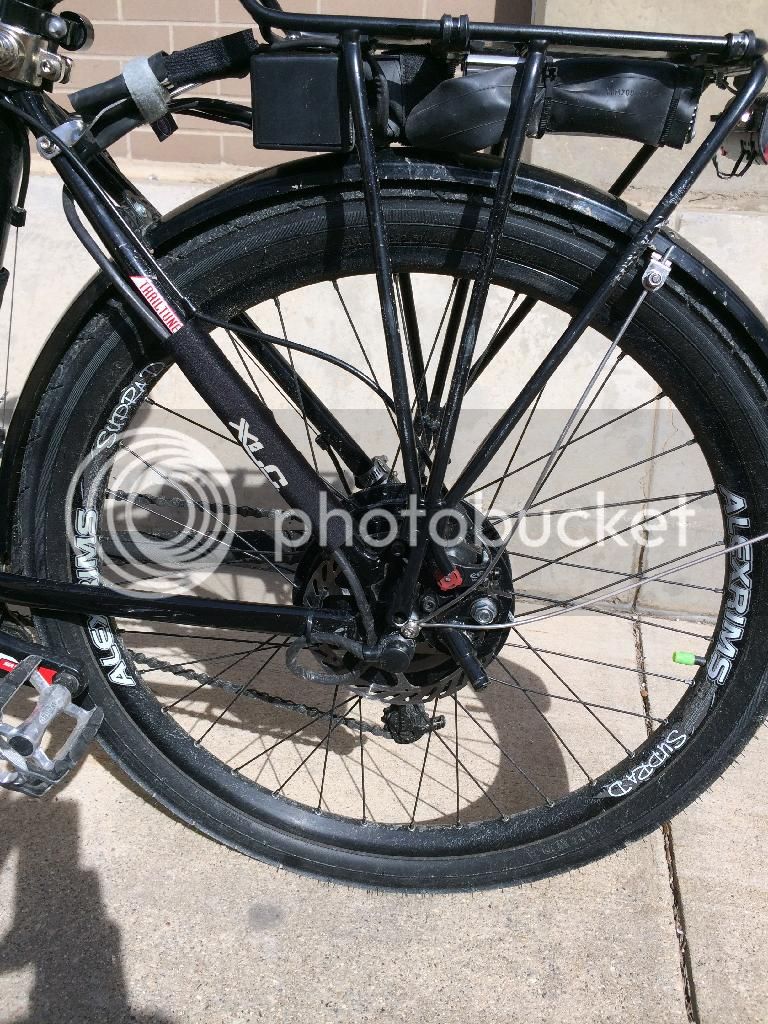
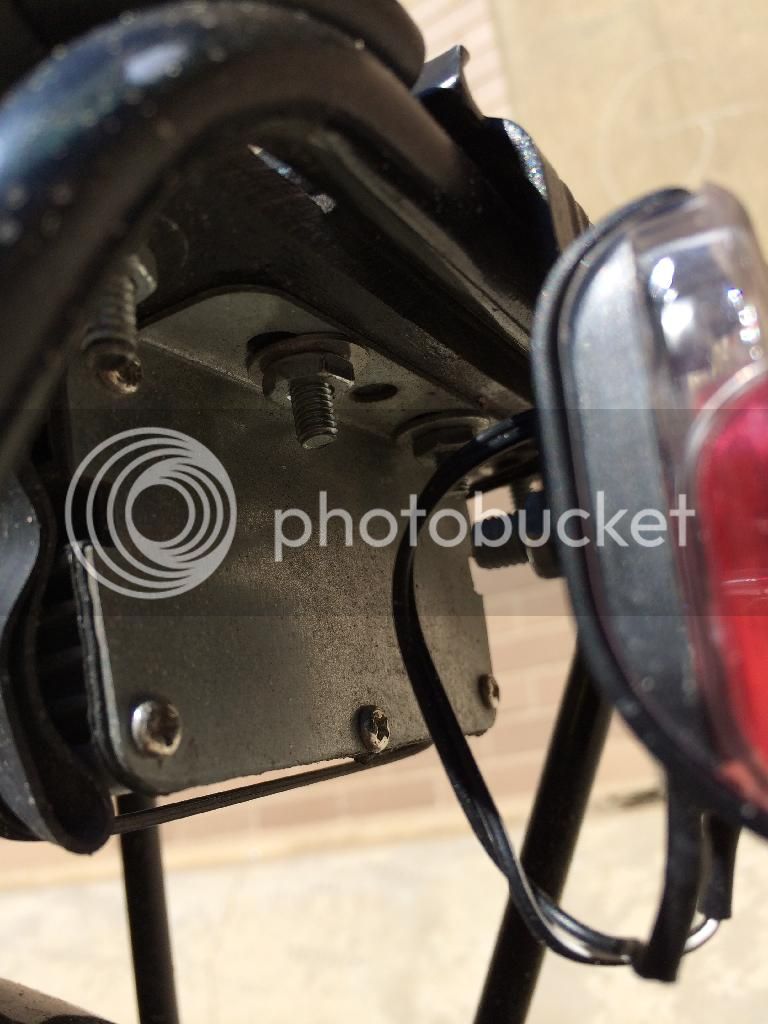
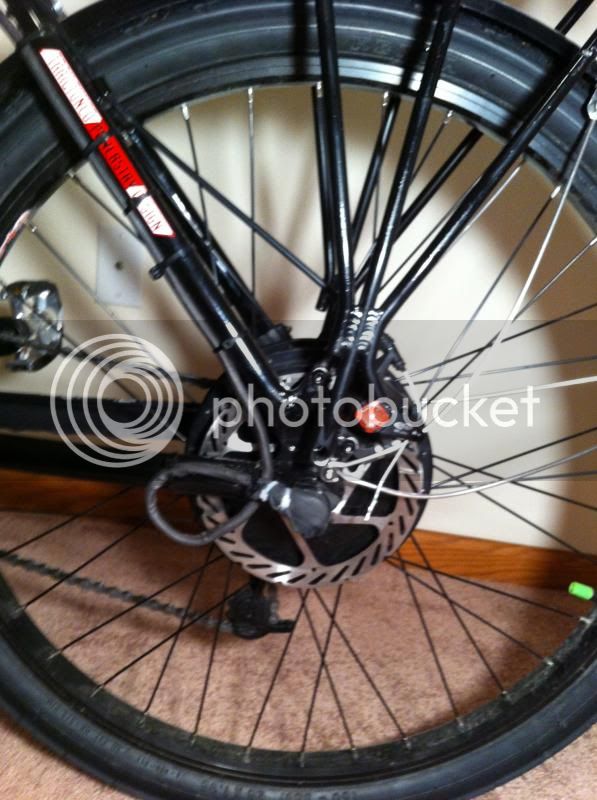
Drip loop and rubber cover. There's a Grin Tech rear torque arm on the other side. Nord-lock washers. I used a car tire iron to tighten. :)
IMG_1493_zps3a09f699.jpg


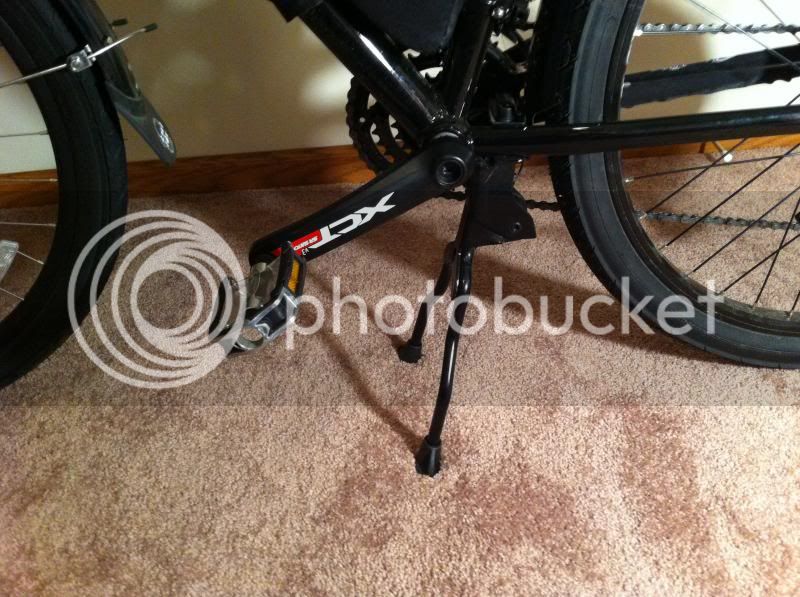
A heavy duty double kickstand. Best investment ever. This facilitates loading and unloading of the battery and pannier bags and working on the bike. When the front is weighted, the rear wheel is off the ground and I can play with throttle settings without worrying about the bike taking off:
IMG_1494_zps9443efd3.jpg


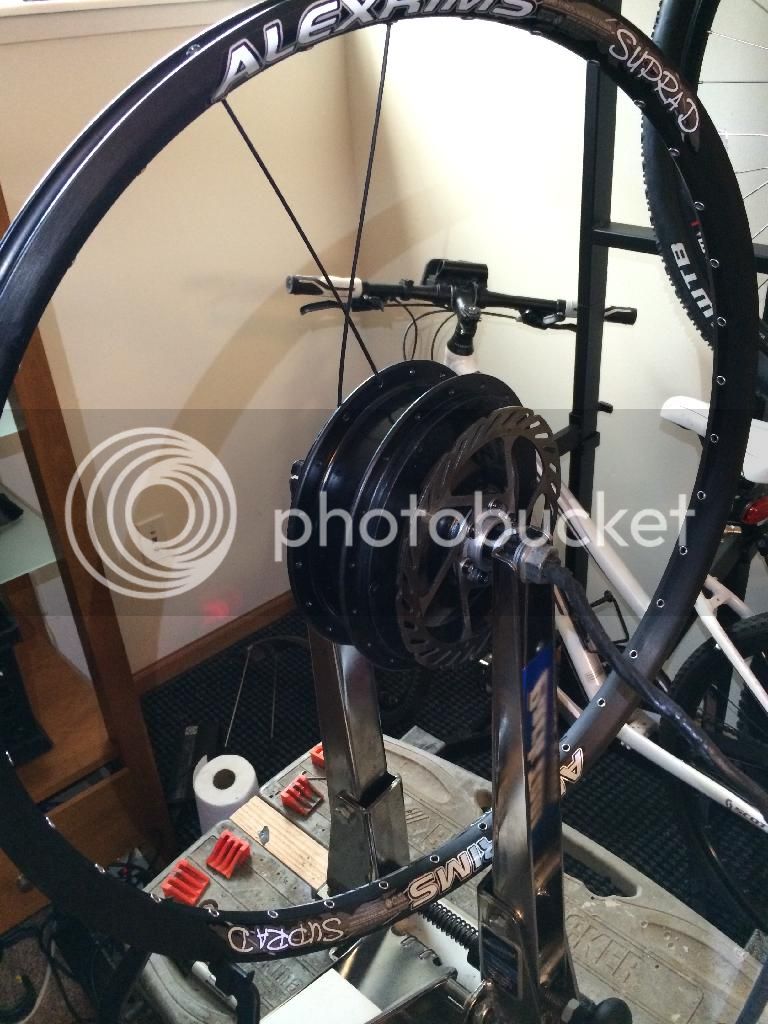
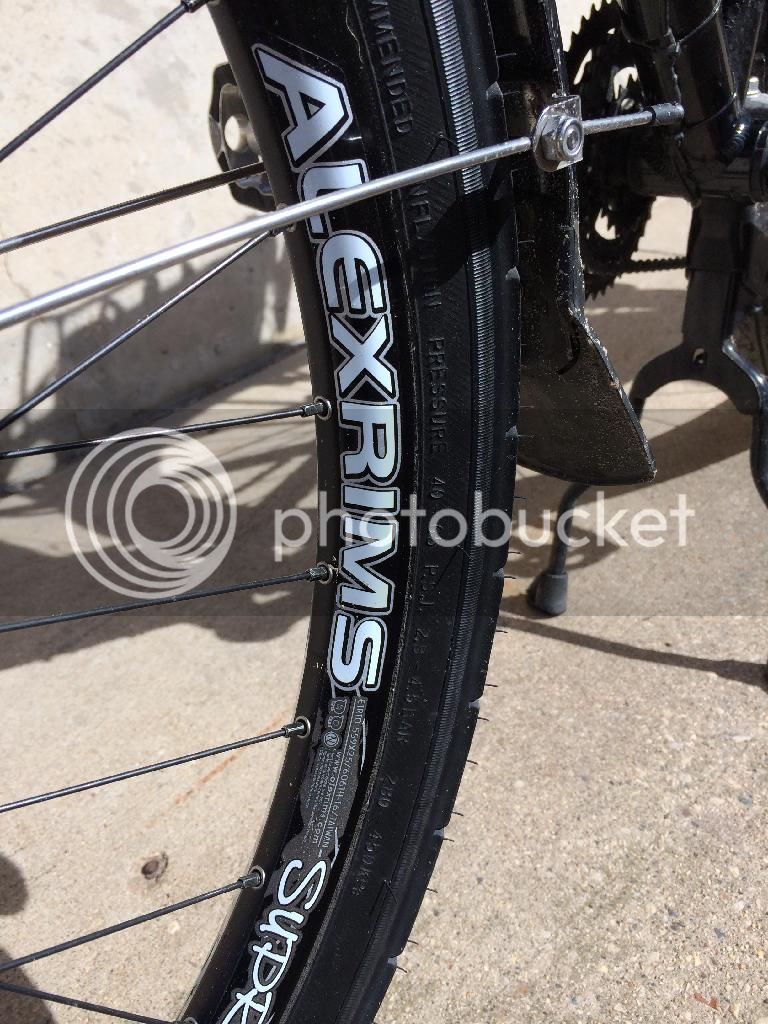
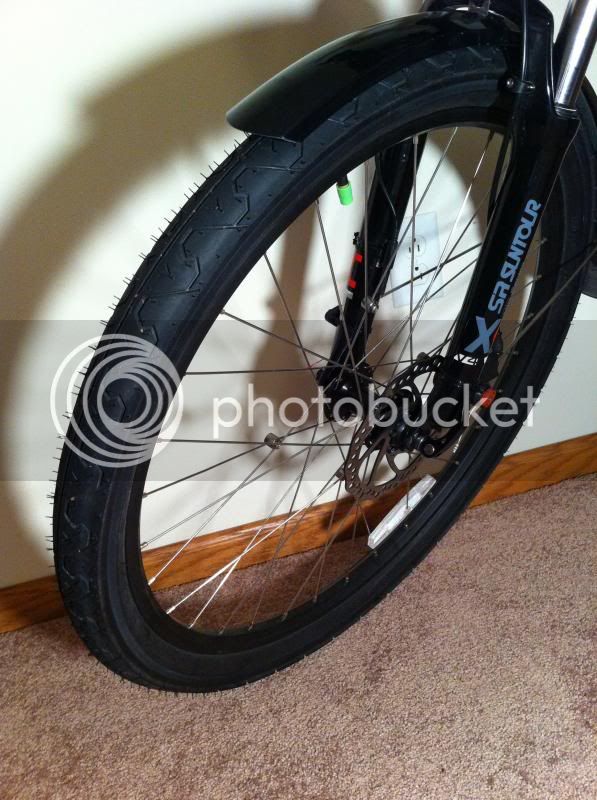
The tire system. Kenda K838 Slicks, Planet Bike Fenders, Extra Thick Slime Tubes, RhinoDillos Tire Liners, four spoke magnets. I hate flat tires!
IMG_1495_zps2cf0b836.jpg


The controller is mounted to the rack in a way that does not interfere with the rack or its mounting system:
IMG_1499_zps6f468ccc.jpg


With the pannier bags unfolded, the controller cannot be seen and is protected from rain etc:
IMG_1502_zpscfbcd119.jpg


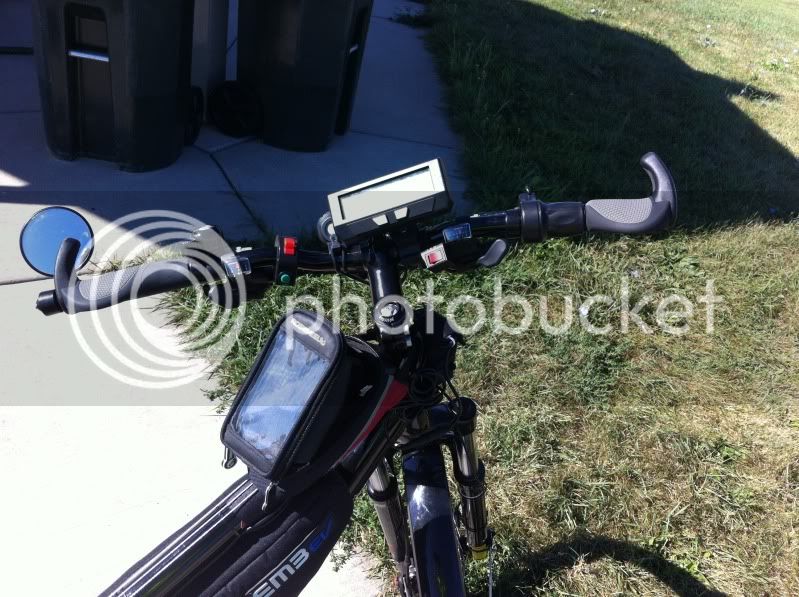
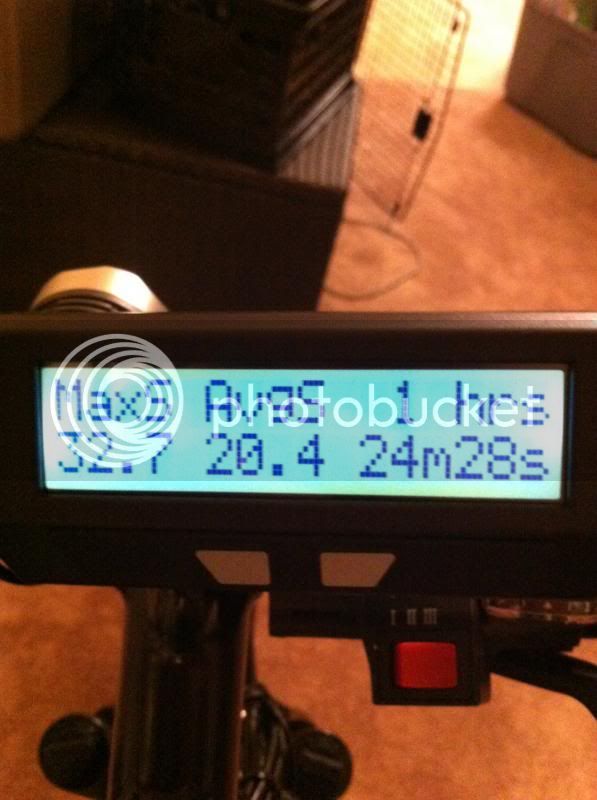
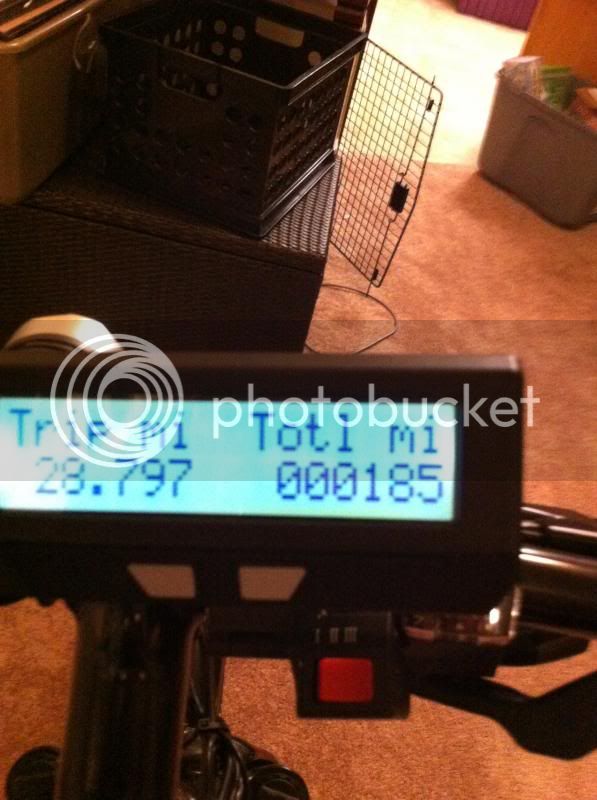
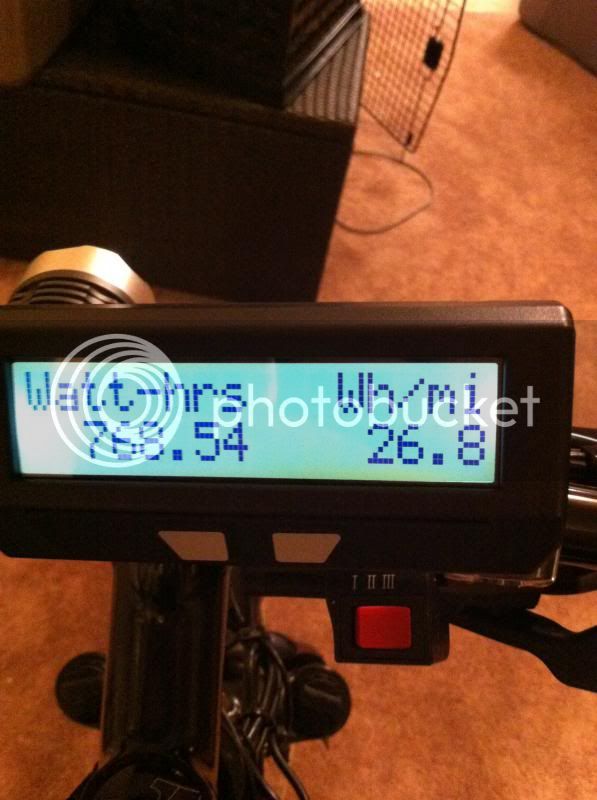
Screens from my last ride (a night ride in a thunderstorm!):
IMG_1480_zps788d0df3.jpg


IMG_1479_zpsf9bf54f2.jpg


I used about 3/4 of my battery for that. I only ever use about 3/4 of the capacity, I charge it to %90 and limit the draw to 30A (just under 2C) to preserve the LiMNC chemistry and battery lifecycle. This isn't a LifePO4 so no 2000W speed demon. Most of the time I cruise around using 9 amps (1/2 C)
IMG_1478_zps73d91069.jpg


I use the CAv3 closed loop throttle control, throttle controls total Power (W) used by the controller/motor.
I use a three position switch to set the limit of maximum power to 500W, 1000W and 1500W max.

Some video of my commute:

[youtube]Zl4qWQ9QJ9s[/youtube]

Thanks again for looking!

So you want to know how much this costs and where to get the parts? Here you go.
Note that quite a few of these items are optional luxury items, but make the ride more enjoyable.

TL;DR: Total Cost: $3040

Motor / Motor Mount Parts / Electronics:

Mac 10T w/ Temp / Upgrade Phase, 12 FET Infineon 3077, 50.4V / 18.5Ah LiMNC, CAv3, $1750, cell_man, em3ev

20 9/16" (14mm) NORD LOCK VIBRATION PROOF LOCK WASHERS, eBay: $23.89

7-Speed Trigger Shifter, $15:
http://www.amazon.com/gp/product/B002MQZD1G/ref=oh_details_o00_s02_i02?ie=UTF8&psc=1

1 x CA-LOG_GPS, 1 x CA3_Switch, 1 x JSTCrimp, 2 x ConBag, 1 x T-HTwist, $263.38, http://www.ebikes.ca

Bike / Bike Upgrades:

MotoBecane 450 HT Bike, $319:
http://www.bikesdirect.com/products/motobecane/450ht_new_xii.htm

Cane Creek ThudBuster Seat Post, $145:
http://www.amazon.com/gp/product/B000T3BYH6/ref=oh_details_o02_s00_i00?ie=UTF8&psc=1

Spring Seat, Dicks' Sports, $29

Avid BB7 Disc Brakes , $62, x2:
http://www.amazon.com/gp/product/B003TV7FHI/ref=oh_details_o06_s00_i01?ie=UTF8&psc=1

Double Kickstand, $17.50:
http://www.amazon.com/gp/product/B001NGD5D4/ref=oh_details_o02_s00_i04?ie=UTF8&psc=1

IncrediBell, $7:
http://www.amazon.com/gp/product/B004HH4NMI/ref=oh_details_o07_s00_i00?ie=UTF8&psc=1

Mirrycycle Mirror, $11:
http://www.amazon.com/gp/product/B0009R96YK/ref=oh_details_o07_s02_i00?ie=UTF8&psc=1

Lighting:

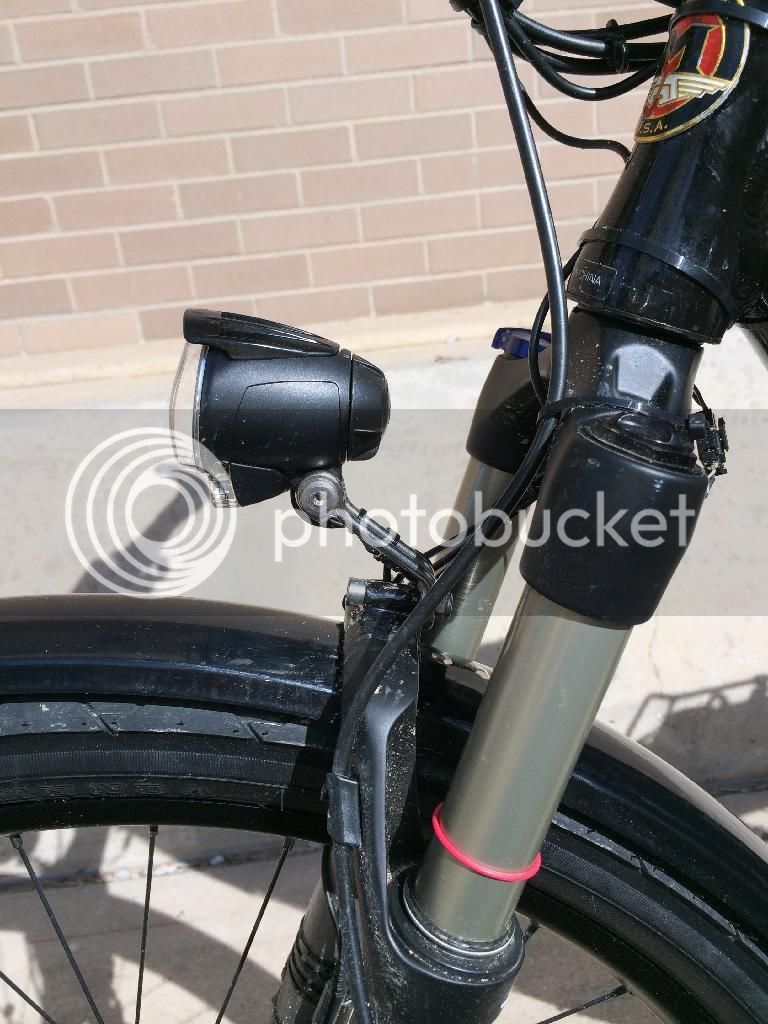
1000 Lumen ATC Cree Light, $25.44:
http://www.amazon.com/gp/product/B005WPXNQ6/ref=oh_details_o02_s00_i03?ie=UTF8&psc=1

Lens for Cree Light, $5.49:
http://www.amazon.com/gp/product/B004WLCLQY/ref=oh_details_o03_s00_i00?ie=UTF8&psc=1

CygoLite HotShot 2W Tail Light, $25:
http://www.amazon.com/gp/product/B005DVA57Y/ref=oh_details_o02_s00_i01?ie=UTF8&psc=1

Rack Mount Clip for Cygolite, $6:
http://www.amazon.com/gp/product/B009VUB0Q8/ref=oh_details_o01_s00_i00?ie=UTF8&psc=1

Rack System / Bags:

Topeak Rack Bag, $79.76:
http://www.amazon.com/gp/product/B000ZKES0S/ref=oh_details_o01_s00_i00?ie=UTF8&psc=1

Topeak Rack Bag, Cover, $19:
http://www.amazon.com/gp/product/B000ZKAU0A/ref=oh_details_o08_s01_i01?ie=UTF8&psc=1

Topeak Rack, $40.77:
http://www.amazon.com/gp/product/B005YPRCMA/ref=oh_details_o07_s01_i00?ie=UTF8&psc=1

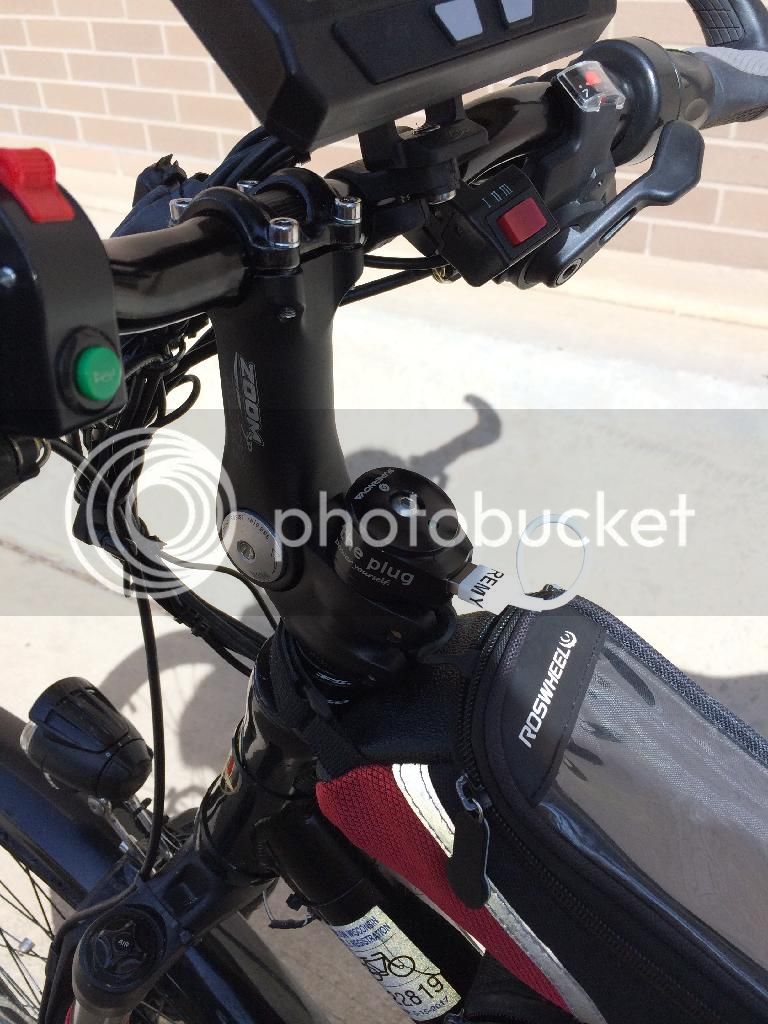
Roswheel Stem Bag, $6:
http://www.amazon.com/gp/product/B00A68UX6M/ref=oh_details_o04_s01_i01?ie=UTF8&psc=1

Wheels:

Planet Bike MTB Fenders, REI, $40

Kenda Slick Tires, $14.99 x 2:
http://www.amazon.com/gp/product/B002DX1DWG/ref=oh_details_o06_s01_i00?ie=UTF8&psc=1

Slime Tube, $13 x 2:
http://www.amazon.com/gp/product/B000ENQRCI/ref=oh_details_o07_s00_i01?ie=UTF8&psc=1

Bike Tire Liners, $17.51:
http://www.amazon.com/gp/product/B0066DGZKY/ref=oh_details_o07_s00_i02?ie=UTF8&psc=1

Extra Wheel Magnets, $3 each, Chinese eBay Seller
 
Back
Top