Custom Frame Cruiser:+/- finished pg.5

100volts+ said:
Ignorance in this case is bliss.
Yep yep. But I keep track of my money. It's easy since I seldom have much to count :D

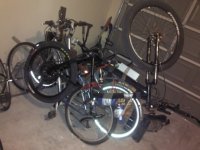
Ground off the rear rim brake bosses. Small job, but feels like progress since the bike can sit on it's wheels now and roll around without damaging the tire. Ordered some bottom bracket taps from webbline.co.uk. These here: http://www.webbline.co.uk/popup.asp?img=W46x Not the double handled ones that are designed to ensure alignment, so I may end up regretting it later. We'll see. Alf at webbline was very communicative and pleasant. Says he does a lot of business to the US, and that shipping is actually less than to Europe. Odd. He has good prices on tools compared to other places I looked, but of course remember to convert from GBP to USD or whatever currency you use. Also, an e-mail in advance of your order can help since the PayPal shopping cart doesn't automatically calculate international shipping.

Fiddled with the seat placement. Trying to decide if bolt on will be good enough or I should weld at least the rear mounting bracket (that the seat shock then bolts to). Measured for the handle bars, and I won't need too much sweep back. I almost mounted the handlebar and controls group from the Genesis, but it's still all attached to the rear rack and controller and just wasn't in the mood to separate all the plugs and wires and such. I should get on that today if other chores don't take precedence. I'll likely need a bar that's not quite as straight later. I soooo want to just plop a board on for a seat and see how it rolls down hill, which means I should probably get at least the front brake on. I suppose I can mount the disc on the MAC as well. Typing it out reminds me of my to-do's.

Still considering different welders. Having my own would future proof future builds & repairs. My budget took a hit, though, as some car maintenance came up. I had estimated $1k. I was half right. :| Before giving the shop the go-ahead,I eyed Lenk's for sale thread... http://endless-sphere.com/forums/viewtopic.php?f=9&t=51610 If it would have been up before I started down my own flight of fancy this thread might not exist. It is a fantastic bike for the price considering I don't have much less than that in my Genesis build. Of course, I'm crazy and wanted a cruiser and the joy (frustration?) of building my own. What a world.

One more cup of coffee while I catch up on other threads, then decide where to spend today's efforts.
 
Ive had a bad experience with the cheap bottom bracket cap tool,im sure i did not have the double handled one.i couldnt get it right but its been about 6 years since i did one.good luck,im really keen to see performance from youre mac on a longer type frame... as im thinking of getting one in the spring 6t mac,plus my bike is very similar to yours,but a hardtail,dont seem to want to go fast this year for some odd reason :oops: .
 
Well, I was encouraged to buy these vs. the set that was double the price since I can actually start the threads of the bearing cups for the jackshaft. They are AL though, so I didn't push past the point of resistance. If these don't work out for this BB, I'll be a'buying the purge fitting/heat sink for round 3, which should save me from this problem.

I'm expecting the MAC to feel anemic on acceleration, with the extra weight, but with a 40A controller, maybe it'll just dump max amps for longer. Top end shouldn't be affected, right?, just take longer to get there and use more watts to stay at top speed. Long range goal is still a middrive, either Crossbeak style or not, or a honkin' hub with high volts.

As far as progerss, I got the front caliper on. Just a matter of disassembling the handlebars, pulling off the components, Separating all the wires I had so tediously bundled together, getting the right ISO rather than post adaptor, figuring the correct amount and order of concave/convex/flat washers, taking it all apart and re-assembling with locktite, all to discover the cable is to short!

So.. I took it outside, placed a foot on the bottom tube, and played scooter. It tracks well, seems stable (at a whopping 5 mph) and turns well enough.

Tomatoes, dog, car, girlfriend, and brother took the rest of my day. Rear brake tomorrow. Bits and pieces. Bits and pieces.
 
Skyknightjohn, I'm excited. finally got a road tested roller. Just need to mount controller and 28s2p lipo.

IMG_20131015_150818.jpg

Genesis v2100 donor bike
RockShox Rear Shock Mounting Hardware-3-Piece Set (1/2X1/2-Inch 50.0x8-mm)
RockShox High-Pressure Shock Pump (300 psi max)
Zoom 25.4mm Adjustable Stem Headset
RockShox XC28 Front fork shocks Coil 100mm 26-Inch 9mm (Black)
RockShox RT3 Monarch rear shock
Maxxis Hookworm 26x2.5
Double Leg Kick stand
Home made wiring harnesses
Zombiess 24 fet 150v controller
V2 Cromotor
8 7s Zippy compact lipo in 28s2p configuration
home made battery box
1800 lumen lipo powered headlight
Version 2.3 Cycle Analyst
Crystalyte full twist throttle
generic brake levers with electrical inhibit
Avid BB7 Mountain Disc Brake 160mm front, 185mm rear
handle bars with a 5" rise
Portland Design Works Danger Zone Tail Light
icharger 4010 duo dual channel charger
Efuel 1200w charger
36H QR Front Wheel
Sunlite Alloy Single Speed Crankset - 152mm x 32T, Silver
 
I received my BB taps yesterday. Seven days across the pond, not bad! The left side (nearest) worked fine and the bearing cup fits nicely. The right (far, crank) side was more difficult due to some too deep weld penetration. I was able to screw the cup in 90% of the way, but it is misaligned. Looking into solutions...
2013-10-17

2013-10-17


Otherwise, I have the rear disk and caliper on. Alignment was perfect with ES wisdom to use a 2.5mm spacer. Added the old handlebars to get a better idea of positioning and cable length. I should get the seat on sooner or later...
 
FWIW, I have the seat on...
2013-10-24

2013-10-24


I have a single shock adapter, which seemed like a good idea, but their is too much side-to-side instability. It fits well and seems comfy, but I think it will work better with a three point base. If I go with this design, with the top tube extending past the seat tube, adding a T, there will be seat mount spots and mounting locations for shocks. For the current bike, I'll probably scrap the motorcycle bobber type seat and configure a traditional bike seat.
Cruiser+middrive26.png
 
I'll probably scrap the motorcycle bobber type seat and configure a traditional bike seat.

That's too bad. That is a badass looking seat.
 
Well, I won't scrap it, but scuttle the idea of using it on this frame. In the far distant future, when this bike is rolling on it's own power, I'll start frame two. The best part of prototyping is finding out what doesn't work. :D And of course figuring out how to improve the design.

I have a few ideas for a good looking & functional bike seat/saddle. I'm gathering the other bits for the next round of assembly, too.
 
I received a bunch of parts over the last few days. I installed one of the DNM shocks that are becoming popular on e-b. Added properly sized spacers instead of a stack of washers and lo-and-behold... less rattling. The air shock seems a vast improvement over the spring-thing, but all I've done is bounce on the seat a bit. No pics of that yet.

I got a big box of parts from http://www.custommotoredbicycles.com/ -- the same place I got the Suntour Double down forks. I continue to be impressed with Lynn's customer service and communication.

I installed the 'chrome and foam' grips over my throttle. I started by removing the plastic/rubber grip:
2013-11-12


Here is a 'chrome and foam' grip disassembled.( only $6 - they're also available in black) Just a nut and washer on the inside securing the closed end to the inner liner. The open end is kind-of twist-locked on.
2013-11-12


The open 'inboard' chrome piece (plastic) needed to be reamed out the width of the ridges on the throttle in order to fit over.
2013-11-12


I cut the foam to the right length and slipped it on.
2013-11-12


Cut the grip inner to the new 'outboard' length and re-assembled.
2013-11-12


And here's the final assembly on the handlebars. At first there was some sticking of the throttle when I released it, not returning to idle smoothly from the friction between the foam, but after some working and maybe touch of spread it moves without hesitation. Best of all, it looks great! From not-too-far-away, the seam disappears.
2013-11-12


More parts are awaiting my free-time. More pics to follow.
 
More pics. Here is the DNM shock.

2013-11-14


Here's the Gyes leather saddle I went with. The seat post on the frame is 1.5"x 0.083", with a 1.25"x 0.120" spacer tube, which is shimmed an extra 1/16", into which a 1" standard seatpost fits perfect. The bottom 1/4" bolt is through all three, the top one is through all but the foreward wall of the frame tube and threaded through both sides of the 0.120" wall. Yes this makes the height permanent unlless I drill new holes. I measured carefully and often. It wasn't the first plan I had for the seat, but it is solid and secure. I'll find proper fitting and better looking bolts later.

2013-11-14


Here's a couple of overall shots.

2013-11-14

2013-11-14


Brake cables are next... then probably duct tape a battery on and go for a short spin... legs splayed out to the sides 'cause I still gots no pedals...
 
Watch those duct taped short test rides. I duct taped some old 6s lipos to my cromotor and look what happened when I accidently goosed the throttle in my garage (I'm used to weak sensorless hub motors) If you look closely you can see the duct tape motors on an upside down bike that wheelied out and went airborne.
 

Attachments

  • IMG_20131102_183823.jpg
    IMG_20131102_183823.jpg
    90.3 KB · Views: 3,454
It is not a deathtrap!

The brakes have been on for a while, but the weather has been too cold to mess with it. We had a break in the temps, so I duct taped & zipped tied the electric bits on and took a -pedalless- ride.

My goal was to make sure that the bike didn't have any un-live-with-able characteristics. I was happily surprised. With the balloon tires, long wheelbase, dual suspension, and spring seat, it rides very smooth. It is an 8t Mac @ 36v of a123, 40a controller. Top speed was 25mph, the same as when this kit was on the Genesis. Acceleration was noticably slower, but not pathetic. I didn't get a lot of data as it was wet and I kept the ride short, and I was paying attention to the riding characteristics more that the electrical info, but it was running at 750w while maintaining 25mph.

The most pleasant surprise is that at 25mph, it is straight and stable hands-off. I don't plan to do a lot of hands-free riding, but the Genesis was scary-shaky with less than two hands at the same speed.
AussieJester said:
Looks the shiz mate :wink: ....personally I would have a tad more rake, might be a little twitchy at higher speeds...look forward to seeing it rolling, keep up the fantastic work
The rake is 30 degrees, though it looks less in some pics, and it seems to have worked out well. Now that I know it's not a deathmachine, I can press on to a third attempt at adding pedals, or maybe some pegs and a big battery/hub; see how it handles at 40. :D ... Someday...

Some pics and a short video: (nothing exciting)
2013-12-26

2013-12-26

[youtube]kVf_4Aq6rok[/youtube]
 
Took a little bit longer and drier ride, gathering info and just having a bit of fun while the sun was shining before I break it down for more work.
3.16 miles - 5.85 km
WOT, max 26.7mph/49.4kph, avg 21.7mph/40.2kph
38.5 Amax
600-900 Watts while cruising at full speed.
2.94 Ah - 110.64 Wh
35.0 Wh/mile - 18.9 Wh/km

On the Genesis WOT no pedaling I typically saw 25 Wh/mile, or about 18 with moderate pedaling. This sounds about right considering the extra amps needed to accelerate the added weight of this frame. All preliminary numbers of course, but a nice starting point.
 
It handles fine on turns... long, sweeping turns! :D
In the video you can see me turning it around in the width of the road without putting a foot down, but that is about the narrowest turn I think it could do without stopping. At speed, it was fine for making normal turns. There was no flopping over of the wheel or tendency to snap back to straight. I guess I mean it has a positive dynamic stability - tends to want to right itself, but not violently.
 
Good to see it on its first run :D ..
 
Thanks for kind words guys. Any yes, fitting plenty of just about any battery should not be a problem. Heck, I could probably get 72v of lead in there if I wanted to. I don't. :D

It's been super cold here in the mid-west of the US for a couple of weeks, a real winter for a change, so the only thing I've done to the bike is measure the rake and trail.
rake+and+trail.JPG


Due to my inadequate quality control, the frame's bottom tube is sloped upward toward the rear 5 degrees. The headtube is 30 degrees relative to that tube, resulting in a rake of 25 degrees.
For example, the rake angle on all the Harley-Davidson Touring models is 26 degrees.
--> (from http://www.ridermagazine.com/motorcycle-features/understanding-motorcycle-rake-and-trail.htm/) This is not what I wanted, but it works nice up to 25 mph. I haven't gone down a big hill yet to see how is handles at higher speeds, but if Harley does it...
Anyway, lowering the rear with a smaller wheel should fix that. I've been reading up on wheel lacing and have an extra 26" wheel lying around. With winter in full swing and me wanting to stay inside, it's time to practice.

As it sits, the trail is 3.5".
On the Harley Tourers, that measurement is 6.2 inches.
(also from ridermagazine.com) 3"-6" seems to be normal on most non-chopper motorcycles. Lowering the rear will increase the 3.5" some, but probably not by much.

In other news, I just ordered a TIG machine. The Everlast 160STH http://www.everlastwelders.ca/powerarc-160sth-with-foot-pedal.php No more struggling to get time with a welder. No one to blame for misalignments. No more MIG splatter and overheating/distortion.
Let the good times roll! :lol:
 
100volts+ said:
I've been working on my garage shop and looking a tig welders. Did your Everlast tig welder come in yet?

It arrives tomorrow, Friday, less than a week from ordering. I ordered it on a Saturday, and Everlast Canada shipped it first thing Monday morning. There are some TIG machines out there for less if you don't mind using lift-start, but I decided I wanted HF start and pedal control for smooth taper-off. For those features, this seems the best deal to me. Still have accessories to gather, but I'll report back as I have info and an opinion.
 
Back
Top