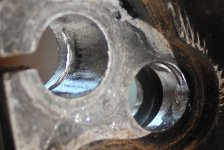
Giant DH Comp Drop Out adapters and conversion

Done. Except I got the wrong length bolt for the drive side. Have just finished them now and its late. HAve not yet tried them in a bike, will do that tomorrow, fingers crossed I didn't do anything stupid and they fit.
Sorry no price yet, lazer guys gone quiet.
Oh and 16.3mm space so the cromoto should go straight in.

Heres some pics.
IMAG0129-1.jpg

IMAG0130-1.jpg

IMAG0132-1.jpg

IMAG0133-1.jpg
 
ok $$$,

If your in the top 5, first run $125USD, this includes freight.

If your in the second 5, $185USD, this includes freight.

I will send paypal details.
 
Quality design and I don't have to hack my dh cheers kiwi can't wait
 
Ok, the first 5 , apart from Kristoffer (sorry) whos set is on my bike, are in the post.
I have found a few issues mainly to do with the fitting of the derailer, nothing you guys cant work around.

The clamp up worked better than expected, however, I found on the drive side, after i had clamped it up, I could not get the axle back out as it had closed up the drop out, so be careful not to over tighten it. I may try for a harder grade of stainless for the next lot to try to prevent this.

There are a few tweaks you will need to make, will let you know soon, right now I got to go and do more family fixing.

Kiwi.
 
Awesome Kiwi. What size front chain ring would you think best to help with possible chain rub on right chain stay? I guess it depends on what combo of sprockets one is running on the rear wheel? I have an 11 tooth that is my smallest rear sprocket so I may want to hunt for a bigger front ring I am guessing to pick the chain line up a bit higher. Thanks again Kiwi for your genius on this one!
 
Kiwi said:
GRrrrrrr! :evil:

Picked up the parts, still crap. The lazer apparently needs a service, currently blowing allot of slag off the back edge and making a general mess. To top it of, the machine operator thought he would be nice and grind all the slag off, but rounded off all the edges, so there will be gaps everywhere.
I'm going to pick out the better bits and make up a couple to try them, I will make them available at a discount if they function properly, which they should.
I not planning on paying for these, they can do them again after the lazer is serviced.
The shite part is that I end up spending ages cleaning off the slag to get the parts to fit together, hardly worth my time.

But I will get some together this week, and some more with fresh parts in a few days.

IMAG0115.jpg

IMAG0116-1.jpg


Yeah.. i see... I had same problem with the ultimate torque arms at the begining when i received the first batch... I returned them and finally got 100% quality part i was expecting.

I know that to fine tune their laser for different material is a real pain when the buyer ask for high precision (like me.. 8) )

It cost me time and patience.. but now everything is fine :wink:

If the can get for you a precision like 20um like i get actually you will appreciate alot!

Doc
 
Hi kiwi great work on the drop outs are you planning to have any more made up and how much many thanks mark.
 
Where bouts do you live? I'm hoping mine show up before the 3day weekend! :p

Edit: Well I answered my own question... in DC eh? Hmm maybe I have a chance for that to happen in Canada!
 
good to hear they are turning up.

Few things,
1. cut off the thread of the screw that sticks out on the drive side. The head of this screw is used as a locator.
2. You may have to cut away a piece above where the derailleur bolts on to be able to fit your dérailleur.
3. You will need to space off your derailleur by about 3mm.
4. You may have to run a 10mm drill through the hole that was used to secure the derailleur hanger, but try it first. The screw head is 9.8, will be snug.

You will need to file the drop out gap just enough for the axle to drop in.
You may need to file a little bit here and there depending on your frame.
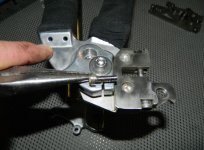
Dont over tighten the clamp.
I did my best but hold no responsibility if you tear your bike and your self apart putting 15kw into a CroMotor or something silly like that.
Also, mod away, would like to see what changes, issues you have.

Kiwi
 
Kiwi said:
You may need to file a little bit here and there depending on your frame.
hey kiwi,

just had a minute so popped in the disk side to see how snug it was. there were no obstructions and looked like it'd be an excellent fit, so i tried to force it in with a clamp. but i couldn't! i'm tempted to wrench down on it so it never comes out, but don't want to screw anything up either...

i also wasn't sure what to do w/ that bolt that tightens the axel. it's kind of a shame that can't be accessed to tighten it, so it'll have to be loose when the adapter goes on, right?

i didn't see obvious gouge signs when i removed the adapter, but i'm thinking the place to file will be the thick flat edge.

[youtube]_qSdahLOfdw[/youtube]
 
do1.JPGMy set just arrived here in Canada. Thanks Kiwi, looks awesome. Your the man! Install is going good. Just got them mounted to swing arm tonight and will fit to bike tomorrow.
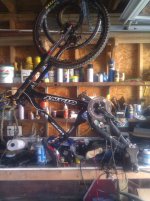
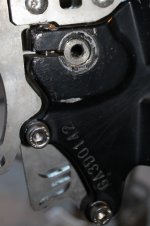
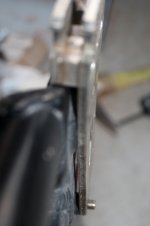
A tip for instal. On the drive side, the frames swing arm pinch bolt needed to be shortened. Were the frame wants to clamp around your drop outs locating axle boss the machine screw from the frames drop outs would have hit the new drop out assembly and not been able to tighten the frame assembly around the boss. Its hard to explain but see the machine screw in picture and imagine if it was super long its not going to tighten the frame axle hole around the boss. Easy fix to shorten the machine screw in my case. Awesome job KIWI. Fits like a glove with a little bit of filing. Made sense to file the aluminum frame drop outs instead of the stainless drop outs you supplied as a bit easier going. Can hardly wait till tomorrow to get it all up and running!
 
They are a snug fit. Yeah you cant get to the axle clamp bolt, just do it up as much as you can so you can still get the plate on. You might have to clean a bit of powder coating out of the holes. Use the screws to pull it into place.
It will kind of plane away the aluminium frame when you do the screw up, but it might pay to file either the adapter or the frame to make it easier.

PICT0888.JPG

PICT0890.JPG

PICT0897.JPG

I rode my bike for the first time today. Pretty happy, though a few over heating issues.
 
I'm doing my dance to the delivery gods. Let them bless me with dropouts for the 3 day weekend!
 
hey kiwi, mine are quite snug!

it's really hard to see in there and tell what's hitting. doesn't look like anything is, so i've been reluctant to file anything.

i've found it way too hard just to draw the plate in with the bolt alone. i found various ways of persuading it...
View attachment 2
View attachment 1
IMG_20120217_162230.jpg

is this inset enough?
IMG_4736.JPG
is this gap ok?
IMG_4739.JPG

the disk side has been much harder. i did more filing, around but still used substantial force. on both holes, you can see the aluminum scraping:
View attachment 4
the locator bolt may be a bit off for my frame. see the right hole.
IMG_4733.JPG
 
Back
Top