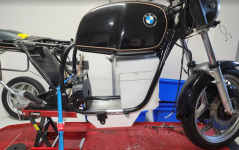
Street legal Cafe Racer build.

It feels good to have the time to work on the bike again.
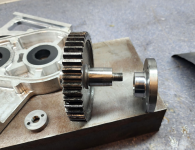
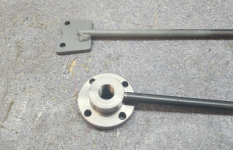
This morning I made these bits:
Screenshot 2024-04-20 121301.png

I turned an M12 (should have been a 14 or 16) x 1.25 thread on the end of the output shaft and ground a 4 degree taper on the end.
The output flange does double duty as the oil seal face, so it took some work holding trickery to maintain it's surface finish. It has a matching taper on the ID. Finally there's a nut to hold them together.

The output flange bolts up to a flange on the drive shaft.
Screenshot 2024-04-20 122024.png

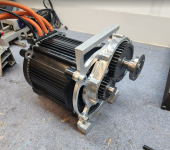
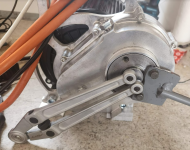
Made a few spacers from some stainless stock and got the front case mounted to the motor
Screenshot 2024-04-20 121226.png
 
It feels good to have the time to work on the bike again.
This morning I made these bits:
View attachment 351408

I turned an M12 (should have been a 14 or 16) x 1.25 thread on the end of the output shaft and ground a 4 degree taper on the end.
The output flange does double duty as the oil seal face, so it took some work holding trickery to maintain it's surface finish. It has a matching taper on the ID. Finally there's a nut to hold them together.

The output flange bolts up to a flange on the drive shaft.
View attachment 351409

Made a few spacers from some stainless stock and got the front case mounted to the motor
View attachment 351410
Is there a keyway between the output and coupling or just the M12 and taper fit holding the torque?
 
No keyway, just a tapered interference fit of the output coupling on the 25mm shaft.
Ok, I'm no mechanical engineer but have always noticed a keyway or splines when working on cars for power/torque transfer couplings. Based on the quality of your previous work in this build I'm sure you've done the calcs and it's all good.
 
Tap
Ok, I'm no mechanical engineer but have always noticed a keyway or splines when working on cars for power/torque transfer couplings. Based on the quality of your previous work in this build I'm sure you've done the calcs and it's all good
Taper fits are a little hard to calculate, but a shrink fit of 0.025mm (1 thou) in a 25mm shaft with 20mm of engagement is good for 200Nm of torque.

The hub section of the coupling is quite thin (35mm OD, with a 25mm bore), so the plan is to shrink and press fit the hub onto the shaft, then measure the OD to get a feel for how much stretch happened. If I can measure 0.05mm then I reckon it'll hold and I might still have a chance of getting it off one day.

Hey, if it slips, I'll put it back on, drill and slide a round key in there. Or just weld it....
 
No pictures for this one. But a significant milestone was reached today.

If you think about it, it's vitally important that the bearing seats in both halves of the casing line up exactly and are very close to being in the same position WRT the outside of the case (although this is not so vital).

After machining the cases on the CNC router, I bored the seats on the manual mill to get an interference fit on one side and a slip/light tap with a hammer fit on the other.
Having machined one side and ended up with a little less clearance (100um) on the gears than I was hoping for, a significant amount of time was spent "Chasing the micron fairies" measuring the exact distance between the centers of those seats and then jigging up the other side to ensure I had half a chance of getting the same spacing on the other half of the case whilst keeping the outside profiles of the two halves close to aligned.

As an indication of the care required, I can tell you that the boring head in my mill cuts 52mm diameter holes that are 0.01mm larger in Y than X.... Doesn't sound like much, but I was chasing 52.05mm +-0.02, so perspiration was had and adjustments were made.

Anyhow, this morning, bearings were pressed onto shafts, cases were heated and assembled and the thing spun perfectly!
I'll need just a couple of little shims to stop one gear from rubbing on the case, but it's bang on!
So I spent the afternoon working on the tooling marks and it's looking pretty good.

Next milestone is a motor+controller+Dougs 96V battery + gearbox run up on Friday!
It feels good to be making progress!.
 
There are a few small tasks remaining on the gear case:
1. Face, drill and tap fill and drain holes:
Screenshot 2024-04-30 105533.png

2. Make a flange for the rubber boot that seals the gear case to the swingarm to slip over:
Screenshot 2024-04-30 105721.png

3. Mill a slot in the case to locate this, and assemble:
Screenshot 2024-04-30 105805.png
Screenshot 2024-04-30 105848.png
 
Cool, is pin 12 a ground pin on yours? Does it say version somewhere? The new v4 of the smaller controllers have some sort of 3speed switch input on pin 12.
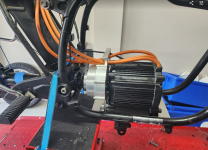
Apologies, it took a while to get to wiring the control. The manual lists pin 12 as GND.
 
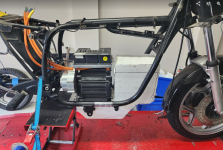
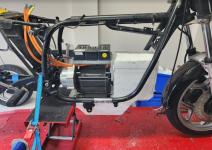
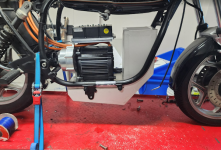
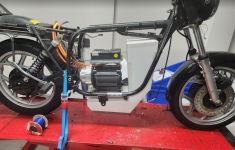
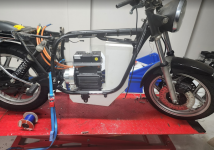
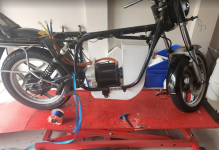
This morning I made a bracket to support the front of the motor and drilled the motor mount plate. I also went out and got (nearly) all of the correct bolts to put it together, previously it was bolted up with whatever fasteners I had lying around...
All of that let me get the thing in the bike properly.
Screenshot 2024-05-04 155614.png

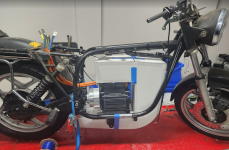
So now I'm back to playing battery Tetris...
Screenshot 2024-05-04 155625.png
 
Hi PK2000. I’ve just found the forum and joined as I’m doing something similar with an EV cafe racer - also in Aus. Awesome looking build and will be keen to see how it turns out with the mid motor!
 
It probably seems like I got busy with other things, but I've actually been working on the bike quite a bit.

I'm just about there with the battery box design and it's been quite the evolution!
1.png2.png3.png4.png5.png6.png7.png

The templates are cut from 2mm card stock on a CO2 laser, held together with packing tape and I set myself the goal of doing an iteration every day. It was a worthwhile exercise. There's no substitute for seeing a physical model of something. Early on I realised that the bike wasn't sitting on the jack as it would on the road, so the rear end was re assembled I dropped her on her wheels, loaded the suspension up with a strap and all the angles changed!

Plan A was to sit the controller on top of the motor and go wider with the battery box to get them all in. The more I thought about this, the more I realised that it would make assembly of the battery into the bike almost impossible.
Now, the controller will sit just forward of the rear mudguard and I can undo a few bolts and drop the whole battery box and motor out the bottom of the bike.
I'll machine some saddle clamps to lock the box to the frame in a few places too. There's a lot of mass there and the design standard calls for it holding together at 30G's

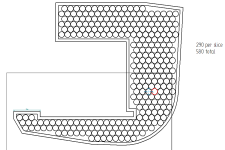
Assuming I can come up with a way to string all of these together:
Screenshot 2024-05-13 053126.png
I get 29S 20P. That's close enough..

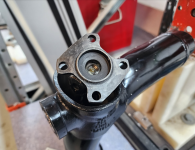
I also made a couple of tools for getting that output flange on and off.
Screenshot 2024-05-13 052111.pngScreenshot 2024-05-13 052123.png
Whilst there are still a few tweaks to the box layout. I'm going to order the metal and switch from battery Tetris to "Solve the electro-pixie maze"
 
Back
Top