1984 Honda VF500F Interceptor conversion.

wb9k

10 kW
Joined
Jun 29, 2013
Messages
820
Location
Metro Detroit area
Hi all,

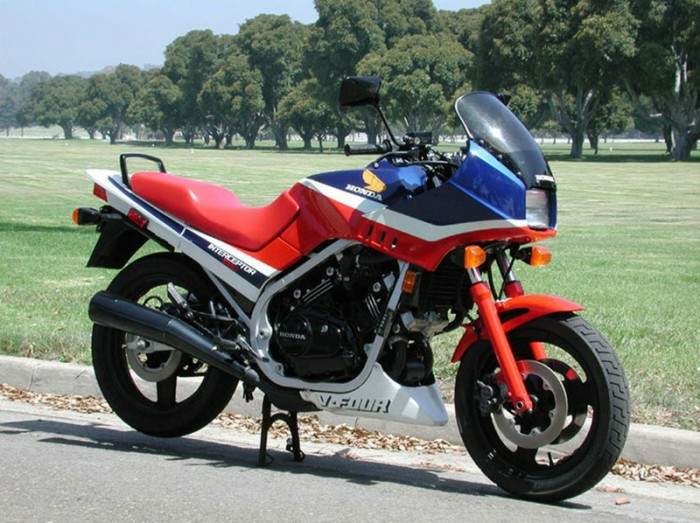
After a month or two of improvements and tweaks, I'm finally getting around to posting about the motorcycle I recently picked up. The bike is a 1984 Honda VF500F Interceptor that was converted initially two owners ago, and taken to functional completion by the guy I got the bike from. Setup is basically a series-wound forklift motor driven by a Curtis 36-48V, 300A controller. Batteries were 48V/35Ah of lead when I got it. Here are a couple of photos of the bike as-received:


Performance with lead was pretty abysmal. A test ride with fully-charged batteries made it clear the bike had decent performance potential (good enough to meet my present needs/desires), but range was 8 miles at best, and after the first mile or so, voltage drop was bad enough to cause the controller to start dropping out, resulting in a chattering chain and obvious loss of power. Top speed was about 45 mph. The lead didn't last the first night in my garage.

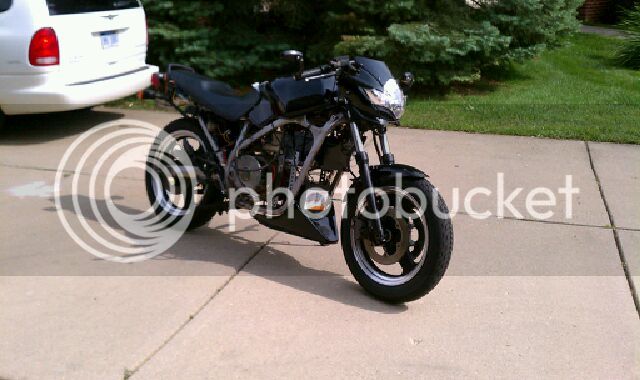
After some experiments with an undersized A123 pack (26650's in 16S, 11P), I decided it would be fairly simple to mount four 60Ah A123 starter battery modules, Amp 20 pouch cells in 16S 3P. This gives us a safe amount of overvoltage with 52.8V nominal from the pack. The install is coming along gradually as I continue to ride the bike to work and around town. I've also painted and remounted some of the original plastic, upgraded the contactor, precharge resistor, and cleaned up the harnessing significantly. Also removed the DC/DC that was sourcing 12V before and replaced it with a small 12V battery. This enabled me to float the 48V pack off the chassis--it had been grounded to the frame, a configuration forced by using the 48V battery to drive the 12V DC/DC. I also added a fuse (rated 250 Amps) at the center of the 48V pack. Here are some pics of the bike as it sits today:


You can see my mobile charging arrangement in some of these pics. I'm using a DC supply (24V mobile, 35V at home) to drive a DC/DC converter to 57.3V. Each battery module has balancing provided by the usual electronics used in the native application, not fully exploited here.

At this point I am hesitant to invest much more time in improving this present iteration, though the control electronics and styling leave much to be desired. Performance is now what I consider "usable" but not yet all I would like. Range is around 30 miles on a charge. Top speed is ~60 mph, holding 55 mph is no problem in real-world traffic. Acceleration is pretty strong above 20 mph or so, a bit on the sluggish side below that--surely due mostly to the controller. For next season I want to take the bike to another level. I'm contemplating a hub motor along the lines of the Cromotor Mammoth. This would open up space on the frame for two more battery modules, taking me over 80V nominal and 60 Ah. I expect this would easily achieve highway speeds and maybe 40-50 miles of range if the hub motor is much more efficient than my present motor. I would also like more acceleration out of the hole. I have no idea what controller I might want to use when changing the motor. I'm reading and learning a lot about motors right now and matching controllers to them. Can anyone give feedback on the direction I have proposed here?

I'll get more pics with the (used to be) gas tank and seat removed posted soon.
 
Here are some more photos showing the uglier innards of the upper battery and associated parts with the "gas tank" (now a bottomless cover) removed. This is not intended to be a permanent install, so go easy on me. I know I'm abusing the electronics, but realize that none of the power-handling circuitry is connected, so it's not really quite as scary as it looks. As the battery enclosure is, it's splashproof for the bottom 2/3 or so, but there are big openings in the upper sections yet. These will be sealed off soon. For now the bike never goes out when there's a chance of rain. The plank under the gas tank supports (front to back) the center of pack fuse, the contactor, the 4th battery module--on top of which are the balance board and precharge resistor. The resistor is huge, overkill for this application, but charge time is fast and the resistor runs stone cold all the time. The mounting of the top balance board is very ad hoc as of yet. The lower three are much better secured in their intended configuration, not really possible in this top position. Panasonic contactor, and you can see the ratings on the fuse.


With the side panel removed, the 12V battery (an A123 ALM12V7) can be seen in its position. It's on its end, the black box with an orange top:


Here it is on the bench. Pack contains 26650's in 4S 2P.


Here's a closeup of the controller.


And, a photo of the cockpit view.


The top display is pack voltage as seen at the controller power inputs. Turning on the key turns on the 12V system and also connects B+ to the precharge resistor, which is always connected to B+ on the controller side of the contactor. After a second or so, you can flip on the contactor with the switch at the lower right. A Magura 5K twist throttle provides control. The Bell unit is the speedo, odo, etc.

I know I don't get any points for originality here or for even having done much heavy lifting, but these numbers don't appear to be bad for the ingredients used. This was a chance to get into an electric motorcycle quick and dirty and get my feet wet. I'm enjoying the bike very much right now and am looking forward to some serious scheming in the off-season. I'm very curious to know how much efficiency and performance improvement could be had with a better motor and/or controller. I originally thought I might go for a new controller and drive this motor at 75-100V or so, but I'm not sure that's a good idea. With the present system, the motor can heat to around 225 F after a hard ride on a hot day. I'm not sure how hot the motor can safely run. If I ran it with higher voltage, would it run cooler because the current would be lower? Am I likely to run into other problems? I like the extra room opened up on the frame with a hub motor, but I'm not sure the performance gains would be worth the $2K or so it would cost me to get there.

Comments?....anyone?......anyone?.......... :lol:
 
I was on vacation last week and was able to add on-board charging to the bike. I was given a 15A charger from an Enginer Prius kit. There are apparently many known issues with workmanship on these, but so far my unit is working fine. This cuts my charge time pretty dramatically and means I no longer have to make special effort to carry a charger with me. Still need to install a DC/DC to also charge the 12V battery at the same time--I have a nice Vicor unit on hand which I plan to use.

I've got a concept together for covers for the motor's brush/commutator compartment which will also require active cooling of the motor. I've got a squirrel-cage fan culled from a scrapped Hymotion pack for the purpose that I think will work well. If that manages to get the motor to run cool enough, the door should be open for driving the motor with higher voltage. I've decided that I will likely pursue that upgrade path rather than wholesale replacement of everything for two reasons: 1) I'll learn more by upgrading gradually, and 2) upgrades will be more affordable for me if taken in steps. I'm also considering options for making side panels for the bike to better protect the batteries and enhance aerodynamics. So much to learn.....
 
Here are some photos of the charger installed and in use. With the left side panel removed, the charger is clearly visible. The cord stows neatly into the compartment where the tool kit used to go. The 12 Volt battery and it's box have been moved to the space between the controller and the battery pack, directly above the motor:


A closer look and the charger and cord stowage:


The side cover can be put back in place such that rain is kept off the charger even when plugged in. Full charge can be achieved from zero in about 4.5 hours.

The Vicor unit for simultaneously charging the 12 Volt battery is ready to go in, but not yet installed. I plan to secure it to the top of the motor controller with tape or something similarly temporary for the time being. All outside components are in place, and the unit is working as expected. Because I'm sourcing less than half of the rated current, an additional heatsink will be unnecessary:


The cooling fan is working wonderfully. I heat-formed some clear plexiglas to fashion a cover. My first attempt broke in two from trying to form too fast. This one isn't quite right either, which is why the tape is presently necessary where the fan tube meets the motor cover. I'll have to build a third cover and clean up the interface for the permanent install. There is white air filter paper glued to the intake of the fan to keep debris out:


The plexiglas motor cover will probably remain clear for a nice view into the motor. When the tape is gone, this should be a pretty striking effect. The cover will ultimately be gasketed so that all airflow from the fan will get forced all the way through to the other end of the motor where it is exhausted:


Use of this fan lowers operating temperature of the motor pretty dramatically--I would estimate it runs about 80 degrees F cooler than before. I believe the door is now open to higher voltage with this motor. Now I need to find the right controller. Any suggestions to that effect are welcome.
 
Due to the engine being V4, that frame style is an awesome donor for an E-motorcycle.

Honda%20VF%20500f%2084.jpg
 
Why does it have a separate 12v battery? Do you have awareness of the available DC/DC options to run from your pack voltage and generate a 13.8vdc isolated bus for lights and things my friend?

What a fortunate thing that EV ended up in your hands to liberate it of the lead it was carrying, great job making huge improvements!
 
Thanks for the feedback, guys.

Luke, the bike had a DC/DC on it when I got it, but it did not have an isolated ground. This is what prompted me to make the change to a 12 V battery. If you look closely at the DC/DC I'm now using to charge the 12V battery directly from the on-board charger (now installed), you'll see that I could use that alone and dump the 12V battery altogether with no loss of functionality or isolation of system grounds. However, since adding the cooling fan, the load on the 12V system has become substantially greater and getting rid of the 12V battery would cost some tangible range. It makes more sense to me to stick to the light little 12V batt, which still fits easily on the bike, in order to preserve as much range as possible. This may well change going forward depending on how things shape up for the next rev.

The steepest curve for me here is getting up to speed on motors and controllers. Any thoughts on driving that motor with more voltage...say, between 75 and 100 Volts? Is there a multi-mode controller available that would work well for this?
 
I like the fan setup. How much power does it pull? I have a smaller pc fan that I want to attach to my perm132. Even if I just run it while stopped at traffic lights, should help a fair bit. its 12v 1amp.

Looks like a good conversion. Good sized bike for it.
 
With no load, at 14.4 Volts the fan draws about 5 Amps. Adding load pushes current down. Between the back pressure from the motor, the head imposed by the tube, and the mechanical impedance of the filter paper, the fan is drawing about 2.5 Amps in situ. It pushes a lot of air. I finally got around to taking some temperature measurements during a ride and am presently seeing max motor temps of about 60C. Running temp in normal traffic is more like 40 C, not bad at all. Hard, fast riding makes the most heat, not surprisingly. The fan needs to be run continuously. The motor heats up pretty rapidly without it, and even just shutting the fan off at lights raises the operating temp pretty dramatically. I think I'm setting my sights on 100 Volts for the next rev. Looking for a multimode controller that will either maximize range, or win drag races--the kind this sort of motor can shine in.
 
My friend at work recently picked up some pretty nice LED lighting strips on Amazon and eBay that I liked so much I got some of my own. Today I changed the rear turn signal bulbs for LED's and put some LED running light strips on the frame to add better visibility at night and a decorative effect. Here's a pic:


The running lights draw about 1 Amp at 12V per strip, but with 10 Ohms in series, they draw only about 100 mA each and the brightness is nicely toned down--they were much too bright when powered wide open for the way I'm using them.

I recently inherited a 1989 CBR600 chassis, and my wife is expressing possible interest in riding herself, sooo....this bike might not change much after all. With the new chassis, I can build something from the ground up and have a nice rider that won't be dangerous for someone not interested in flying off the line. Decisions, decisions.....
 
Nice to see an older conversion brought back to life, well done.

The ducted cooling system looks great.

The front headlight unit seems to suit the look of the bike quite well. Is that a generic aftermarket unit or has it come from another bike?
 
Thanks for the kind remarks. It's little more than a happy accident that I had that fan on hand. I put it where is seemed to fit best, and it worked out OK!

I didn't select that little fairing, it was on the bike when I got it. I believe it's an aftermarket part. I still have the original fairing and am considering painting that and putting it back on. The look would change some, but I think the bike would be better aerodynamically, not to mention warmer when the weather is cold.
 
Been a while since I've made any updates to this thread, but several issues have popped up over the last many months that are now resolved.

Firstly, I had begun to make too much of a habit of draining my battery pack completely. I don't recommend constantly trying to break your own distance records with the same battery pack unless you have cell-level monitoring to prevent disaster.....a few attempts in one week and .....:oops: Well, I can afford to make these mistakes because of my fortunate access to more cells. Anyway, late last riding season I realized I had driven a cell beyond it's critical low point. The pack voltage was settling too far, and I could feel a warm cell through the case in module 2. To test the many stories I have been told about driving a vehicle with a toasted cell in an LFP pack with no apparent consequence, I decided I'd give that a go before replacing the module with the bad cell group (there was indeed only one.) To my surprise, the loss of performance was not at all severe, and if not pushing the bike to its limits, one might not even notice a problem. Top speed fell off around 2-3 mph, and acceleration was very mildly affected. I only rode the bike about 10 miles like this, then tore the pack down. Cell group 4 of module 2 was shot...I believe OCV was a couple hundred mV. The cells were a bit puffy and had copious copper plating on the cathodes inside. The abuse was severe, though the symptoms were not. The cells got warm during charge, but not severely so. It's a testament to the safety of LFP that this is such a common experience, but this is certainly not the only possible outcome, and I still recommend better precautions than I took here. I replaced the module and rode a bit more to finish out the season, taking better care to avoid full discharge of the battery. By the end of the season, I had put a total of 4500 miles on the bike since I had got it.

I brought the bike into the (walk-out) basement of the house for the winter, thinking I may do some upgrades of the bike during the off-months. It sat untouched until early January when I was showing the bike to some visitors. I noticed the pack voltage was down into the low 50's, but didn't think too much of it. By the time I started to look at actually doing some work on the bike it was February and the 52 V pack was down to about 8 Volts. Modules 3 and 4 were still OK to use, but modules 1 and 2 had both been taken well below 0.5 Volts per cell and had to be scrapped. My 12 Volt battery was fully charged, thanks to the fact that I had left the DC/DC on all winter. Between keeping the 12 Volt battery topped off and quiescent losses in the DC/DC, I had managed to more than fully deplete the 52 V pack. Damn. So the whole pack came off. Replacement module candidates were measured, as were the remaining old modules, using the Cellpro PowerLab 8. I finally got around to using the PC control and graphing capabilities of this setup and it's pretty nice--a great value for the money, IMO. The regenerative discharge capability meant I actually used little power to run all this testing, and I now have a very good idea of the capacity of my pack. The weakest module is a replacement (though several years old) and weighs in at 55.4 Ah.The best one is also a replacement of similar vintage as the other, but with just shy of 58 Ah of capacity.

Now knowing the Ah capability of the pack, I am positioned to best leverage the features of the Cycle Analyst (V2.3). I've had this device for about a year, but have not used it until now. When putting the bike all back together, I removed the old bicycle speedo and pack Voltage monitor and replaced them with the Cycle Analyst. I have the high current version with a third-party shunt, so the 300 Amp draw potential is not a problem. I fashioned a bracket for the display from aluminum bar stock. The look of the "dash" area is much cleaner now--I'll try to get pics up soon. I also cleaned up some lingering wiring issues and messiness, wrapping pretty much all harnessing in abrasion tape, and fixing my intermittent high beams. No more electrical tape on the boards and precharge resistor at module 4 or the DC/DC converter now either.

This morning I calibrated the Cycle Analyst and this afternoon I went for a ride--it's a beautiful sunny day here, about 50 degrees. Numbers are all about what I expected, but having the Wh counter on the CA is invaluable for protecting against overdischarge when you know exact capacity of your pack. This is a good stopgap improvement until I get cell-level monitoring, which I plan to develop this summer. I plan to use wireless transmission of voltages to either an Arduino with a display, or to my cell phone (if I can find somebody to help me develop the app). Great to be on the road again!
 
Back
Top