A2B Metro (Gen 1) Restoration and Upgrade

99t4 said:
What did you use for "potting compound?"

lol, hot glue. Just trying to have it not be a bare resistor.

I'm also realizing that since I had to make this, I should have swapped it over to a male plug for this and the solid plug. That way the bike could have a female plug instead of a male plug exposed (which are easier to accidentally short).

I'll probably flip that around at some point.
 
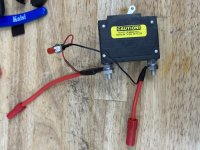
Did eventually make the gender swapped precharge, but the idea of carrying around a bunch of XT90's, dropping them, etc, just wasn't appealing. So I reworked my case (made it a bit more compact, while I was at it) to have space for a breaker and a momentary switch.

2022-12-14 08.59.45.jpg
2022-12-14 09.14.42.jpg

The momentary switch bridges the positive connection while pressed with the 75ohm resistor which slow charges the caps. Then you just flip the breaker. When you move your hand away, the momentary disconnects.

Technically, you can still do this wrong, ie, just flip the breaker. But the hand position will make it a very simple procedure and this isn't a bike I'll lend out much.

 
Last edited:
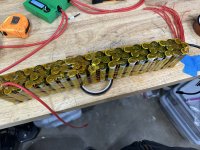
After half my battery pack was killed dead, I got to re-open the pack and rebuild it.

2023-02-06 10.57.56.jpg

As you can see, I got a little more optimized on the parallel connections for the rebuilt half. Wired it up to a simple Daly 60A 20s that fits in bottom section of the down tube. Quite a bit less fancy than the previous BMS, but hopefully won't kill the pack -- yikes.

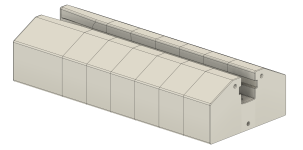
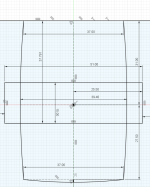
I've also decided to bring back the additional rear-rack batteries I had previously, but make a better mounting solution. I spent a TON of time going through measure/model/3d-print cycle to get the curve, size, and fitment of the rack mount sliding system down. Printed a few full size battery cases that will slide on/off like the stock version and went to discover flaws. This is a LONG print too; 60+ hours on the super fast BambuLabs X1c. On the third fullsize print; I think I've got it sorted this time, though.

I will have to relocate the controller, though, as the batteries extend all the way up to the seat post.

The model:
2023-03-15 14_05_19-Autodesk Fusion 360.png2023-03-15 14_06_30-Autodesk Fusion 360.png

I'll also attach the Fusion 360 file and a STEP file variant for anyone interested.
 

Attachments

  • a2b rear rack battery case.zip
    752.5 KB · Views: 2
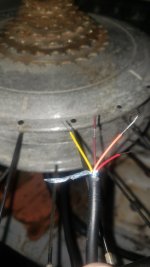
Hi, do you know what the four pin connector coming out of the rear of the wheel for the A2B metro is?

yellow orange red and purple wires?

I cut the connector part off.

thanks in advance


20231216_174016.jpg
 
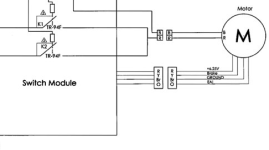
Those wires go to the throttle.

Orange is the throttle signal. Nominal 1-5v.
Brown is ground
Yellow is the ebrake (grounded = stop)
Red is the power for the throttle. Usually this is 5v on most bikes, but they say 6.25v on the Metro.

1702831573309.png
 
Back
Top