Denver commuter e-bike

Toshi said:
I worked on the electric bike project tonight for about three and a half hours (9:15 PM - 12:45 AM. My neighbors must think I'm crazy)

Eh. First night I worked on it from about 9:30PM to 2:00AM. Then I took it for a test ride.

Toshi said:
I have a feeling I just need to read the Cycle Analyst and Crystalyte controller manuals online to see how to start the thing up properly... :D

I don't have one, so I'm just guessing here, but that might be a good idea. :p
 
As far as I understand, the red button is the power switch and the key switch is forward/reverse.

If you connected the polarity backwards you just blew up your controller...but assuming the throttle/hall sensors/and phases are connected correctly it should just work.
 
Mark_A_W said:
As far as I understand, the red button is the power switch and the key switch is forward/reverse.

If you connected the polarity backwards you just blew up your controller...but assuming the throttle/hall sensors/and phases are connected correctly it should just work.

Everything was sourced from ebikes.ca, so I hope the connectors were set such that the polarity wasn't reversed...
 
I rejiggled connectors and kept the battery on the charger overnight even though the charger had been satisfied before (assuming green means ready to go -- it's amber when charging from a known partially depleted state and turns green). The key indeed seems to mean direction, and green in my setup is backwards. After all that, still nothing when I hit the power switch on the controller.

However, I then pedaled the bike out into the street, felt a lot of resistance, and everything came to life. I guess it needed to figure out what was what. Now it turns on and off without doing this maneuver, and seems to work!

After a brief cruise around the neighborhood in sandals I added electrical tape to all connections save for that to the battery (how do people waterproof this connection?). I still need to figure out how to secure the battery pack in the rack trunk -- it rattles and bounces around mightily even with some rags and bubble packs thrown in there in an effort to dampen the movements. I also need to figure out whether I'll be using clipless or flat pedals on this bike... and then I'll be out on it for its first errand once the battery pack is topped off again!

I'll report back with stats on energy usage post-ride, with the caveat that I haven't measured my actual wheel diameter yet.
 
pics plz!

I picture it having a black machined V w/red stickers in the back and a gunmetal grey box section up front. Fashion faux pas. And since you're gonna have to give the spokes some loving anyways, may as well re-lace the oem rim on the clyte hub, eh?
 
Toshi said:
- rigged up a torque arm to lower forces at the dropout by lengthening the lever arm using one 10mm wrench, two hose clamps, a plastic bag, and a ziptie :D . I first rigged this up on the right side ahead of the fork but thought better of it, and moved it to the left. My middle-of-night force diagram in my head might be backwards, but I think it belongs on the left if ahead of the fork.

Do a DocBass torque arm on the right side ... a 21(?)mm box wrench tight and on the entire main axle nut, and strapped to the frame. Torque forces will make this wrench on this side tighten the nut if the axle starts to turn.
 
I'm hoping to sell the OEM front wheel (with nifty built in generator for the light), the light, and the funky handlebar that the light bracket bolts directly onto, so the big honkin' rim will remain.

Energy use for my shakedown ride, which involved several decent hills, one of them really steep:

end voltage 49.2V (forgot to check it at the beginning -- was 52? 53?)
11.37 miles
4.251 Ah, with maybe 0.750 Ah coming solely from the one steep hill at the end

I'll definitely have to look into taller gearing, however. Currently the bike has a 38t chainring up front, 21t cog on the 7-speed geared hub, and my cadence is about 100 rpm at ~20 mph. I'd like for 1.5x or even 2.0x taller gearing ideally. With the stock crankset (4-bolt 104mm bolt circle diameter) I think I'm limited to a 48t chainring, and there's a 19t cog available for the rear hub. That'd be ~1.4 times taller. Maybe that'd be enough... hmm. I suppose I could always pop the crankset from the road bike on for a test, with its 52t (I think) chainring...

I'll get pics later, perhaps tonight on the real camera. I didn't take any last night since build pics are frankly boring even to the builder, and the area outside my garage isn't all that well let at midnight. :D
 
kbarrett said:
Toshi said:
- rigged up a torque arm to lower forces at the dropout by lengthening the lever arm using one 10mm wrench, two hose clamps, a plastic bag, and a ziptie :D . I first rigged this up on the right side ahead of the fork but thought better of it, and moved it to the left. My middle-of-night force diagram in my head might be backwards, but I think it belongs on the left if ahead of the fork.

Do a DocBass torque arm on the right side ... a 21(?)mm box wrench tight and on the entire main axle nut, and strapped to the frame. Torque forces will make this wrench on this side tighten the nut if the axle starts to turn.

Thanks for the tip. I'll do this with a tightly fitted adjustable wrench once I get the chance to swing by the hardware store to pick up more hose clamps (and return the unneeded extra 10mm crescent wrench). It's always fun to bust out the rubber mallet...
 
Toshi said:
(how do people waterproof this connection?)

Silicone gel, and cover with fairly large diameter heat-shrink tubing. Keep a small throwaway box-cutter, as well as a small pair of dikes, for emergency work.
 
kbarrett said:
Toshi said:
(how do people waterproof this connection?)

Silicone gel, and cover with fairly large diameter heat-shrink tubing. Keep a small throwaway box-cutter, as well as a small pair of dikes, for emergency work.

This holds true for connections that are severed each time the bike is parked?! I plan on bringing the batteries indoor whenever possible to warm, be secured, and charge. Additionally, the bus regulations and prudence dictate removing the battery when the bike's on the bus front rack (55 lb weight limit and racks that I don't entirely trust with high-mounted masses).
 
For those who run a 4-bolt 104mm BCD crank or Shimano Nexus internally geared hub who wish for taller gearing:

Bikeman sells Shimano rings in 48t for 104/4 cranks.

Harris Cyclery sells cogs for internally geared hubs. Sturmey-Archer, Sachs, and Shimano share the same variety, but Nexus hubs are limited by the geometry of the shifting mechanism to 16t minimum.

48-16 would be quite a bit taller than the current 38-21... I found myself in the three tallest gears in the hub's range for the majority of my riding today, including taking off from a standstill at traffic lights.

(A photo is coming, yes yes. I snapped one in the sun on my phone, but can't post it yet as I'm surfing the Internet on that same phone from a bus: the bike's up front and the battery is my seatmate...)
 
Toshi said:
kbarrett said:
This holds true for connections that are severed each time the bike is parked?!

For my battery's main connector, I use two pieces of heatshrink, one on each side, and snug them up as far as I can without interfering with being able to separate them.

I leave the controller on the bike, and have steel ribbon ties ( similar to cable ties, but made of stainless ) to prevent theft.
 
Toshi said:
(A photo is coming, yes yes. I snapped one in the sun on my phone, but can't post it yet as I'm surfing the Internet on that same phone from a bus: the bike's up front and the battery is my seatmate...)

photoam9.jpg
 
Slick! That's definitely one of the better-looking bikes. :wink:

Be sure to post a high-res pic. And let us know how the numbers go as you continue to settle into your riding style with the motor.
 
I'm now just over 35 miles into this adventure, and have been averaging a hair under 16 Wh/mile so far. This is including some serious hills, one of which saw an indicated draw of 1400+W on the CA at around 8 mph (with me pedaling my heart out simultaneously). Yikes. The CA is set for 35A limit nominally.

I just ordered a centerstand for the bike. It's sold at Spooky Cycles for $20 USD + $9 shipping. I apologize for the hideous site: doesn't render properly in many browsers and the "header" images for the categories are as big as oatnet's ridiculously large signature image...

:x

34085.jpg


The controller has been moved, also. It was originally mounted on the downtube with the upper bottle cage bolt (at its lower end) and a ziptie (at its upper end). Although I stuffed a plastic bag behind the controller, between it and the metal of the downtube itself, I'm sure it would have worn a groove in the paint before long. Furthermore, I was worried about it being stolen, and didn't think it looked particularly good there, what with the arc of wires heading towards it. Finally, it wasn't waterproofed.

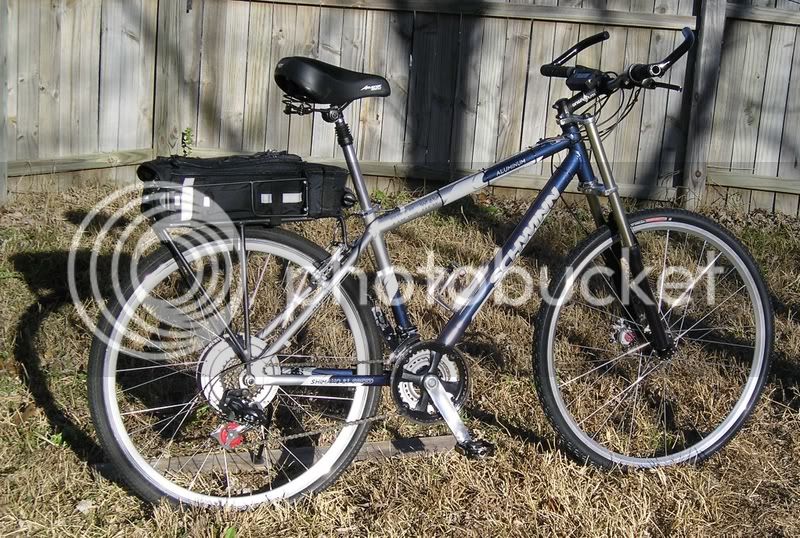
Now, after a bit of work, it's living on the left side of the rack. As can be seen in the original image below the Transfer's rear rack is quite nice in that it has a lattice of bars on the sides as well. Originally intended for panniers, they work quite nicely as mounting points. I bought two plates of aluminum about 20mm x 100mm x 4mm at the hardware store, drilled an extra hole to fit the pattern of the Crystalyte controller's preexisting holes in the case, and then sandwiched the rack's side bars between the controller and these plates using 10x24 x 1 inch machine screws, washers, and nylon locking nuts. I realize a picture is worth a thousand words, and I'll get good shots up at some point soonish.

I also made an attempt at waterproofing the controller, since I do live in Seattle, and I plan on using this rig rain or shine throughout the upcoming year. I started with a gallon sized Ziploc bag, and immediately cut off the zipper. Thus "modified" it was then placed like a comically overly-wide controller-condom :lol: , and sealed with that rubber tape that Justin at ebikes.ca apparently throws in with orders. This bag/tape combo had to be penetrated by the mounting hardware as above, but I added an extra turn or two of tape over those areas. If not waterproof, the controller should at least be resistant (provided that my setup doesn't just cause water to pool! perhaps I should put a drain hole in the bottom... time will tell)

Finally, I'm done with the Swagman, and am going to return it to amazon.com tomorrow. The locking mechanism is really quite a joke. I'm also not happy with how sharp-edged the mounting hardware is, as that requires one to add another layer of padding or protection for batteries. The top of the rear rack also simply seems like a poor position for 18 lbs. of batteries. I realize things would be a bit better if I used a slider setup as detailed elsewhere, but the weight would still be pretty far back and very high.

The good news is that the relocation of the controller to the left side of the rear rack now leaves the front triangle open. My plan is to waterproof the battery brick, possibly with giant heatshrink, possibly just with a high quality plastic bag taped at its proximal end. Then I will build a quick-release holder for it. It will run parallel to the downtube, and will use the two bottle cage bolts as attachment points. It'll clearly be metal with some sort of 90 degree "shelf" at the bottom to hold the battery along with side supports, but I haven't decided on what to use to actually secure the battery. Velcro straps seem too insecure for an expensive 18 lb load.

I guess I'll be browsing around the hardware store tomorrow... Fun. :)

The original image to illustrate the side bars on the rear rack:

photoam9.jpg
 
If the batt is small enough, a .50 BMG ammo can makes a good container. Easy to weld/rivet/bolt mounting hardware to it as well.

Try disassembling the controller, and then reassembling with a tube of silicone sealer at hand. You can make these plenty water resistant by getting generous with the goop.

You really do want a pair metal zip-tie/seals to secure that controller. Some tweaker will take it and try to sell it if it sits there with something that can be defeated with a box-cutter.
 
Oh, it's not ziptied anymore. It's bolted (using concealed hardware beneath my waterproofing mess) quite solidly to the side of the rear rack. If someone with proper tools came by they could certainly remove it, but they could also remove any number of other components. I feel that it's secure enough now.

Thanks for the tip about the ammo can. I'm not sure where I'd come by one, but if I run out of other ideas I'll go hunting.
 
Surplus shops, sporting goods stores ( GI Joes in Lynnwood ), gun shops.

You can also get heavy plastic substitutes at Joes.

If you want to internet shop, there are a bunch of different ones here
 
i ended up trying a few battery mounting options today.

IMG_0014.jpg


IMG_0013.jpg


IMG_0012.jpg


IMG_0011.jpg


above is the second version. steel plate with angle brackets and side supports. secured to the water bottle holder bolt bosses. was met with immediate failure: water bottle holder bolts were too flimsy to torsional stresses, the battery itself barely fit in the triangle, and the whole assembly was too wide, causing the cranks and my legs to hit it every revolution. came off after only 5 feet of riding...

the third version was also short lived:

IMG_0015.jpg


the third version, used only for one ride, from home to REI. the battery itself is huge! here it is strapped directly onto the rear rack, with a super-strong (too strong, actually!) bungee cord on top for good measure. note the waterproofing job on the motor controller, now bolted with plates to the rack. bit more theft resistant this way.

IMG_0016.jpg


at REI i bought a Ortleib Bike Shopper waterproof pannier. the zipper is the same kind on my old drysuit. sweet. the battery itself fits inside nicely, and seems happy to be in its new home.

IMG_0017.jpg


mounted up to the right side of the rack. the cord from the controller on the left to the bag just reaches.

IMG_0018.jpg


a view from the rear. you can see the cord snaking from the left, under the rack, and into the bag, where it attaches with the battery.

IMG_0019.jpg


yes, the bike now has more weight on the right than the left. it's not that big of a deal when you're riding.

i think we have a winner:

IMG_0020.jpg
 
Not bad... :D

If you can flip the zipper (or bag) so the cable has some slack, you can keep a "drip-loop" to keep rain from wicking into the bag.

:mrgreen:
 
Looks good, but that unbalanced weight would get anoying fast. If you could split the cells of that battery between right and left, and balance the load, it would probably work realy well, But it doesn't look like that pack can be split real easy. IMHO, your 3rd placement, with it on the back rack might work out better for you in the long run. You could also move your controller up to sit infront of the battery and then cover them both with a bag to keep them water proof.

Thats what I ended up doing with mine, and its held up well. The bike is top heavy but the high COG makes it a bit more stable at higher speeds. Its weatherproof and I don't have odd parts sticking out in the airstream adding wind drag.


P1010066.jpg
 
TylerDurden said:
Not bad... :D

If you can flip the zipper (or bag) so the cable has some slack, you can keep a "drip-loop" to keep rain from wicking into the bag.

:mrgreen:

Thanks for the tip, Tyler. I like it this way for a couple of reasons, however:

1) I'm lazy and it works at the moment. :eek: (the bag itself is not reversible)

2) The controller doesn't have much slack in the cables as it is, and the left side is the logical place for it given that the motor leads run up the left of the fork and frame.

3) I'd need to free up some pretty significant slack to create a loop given the decent gauge of the battery cable.


On a slightly different topic related to this bike, I've been averaging just under 14 Wh/mile over the 57 miles that I've logged so far. (This figure is by my own spreadsheet. The CA reports its own figures that are a bit lower/more efficient, actually. I'm guessing it's not using the assumption of a constant 48V?)

This efficiency is achieved with gearing that forces me to spin about a 100 rpm cadence at 20 mph, so I tend to naturally back off the throttle to this speed no matter what the grade and pedal along. On hills I've been trying to contribute a good power output myself, with the gear and additional power from the motor such that I can maintain 18-20 mph.

Since I have so much battery still to spare even running 15 miles at a pop -- I could probably eke out 40+ miles -- I think I'm going to modify my riding style a bit to gain speed and to see how efficiency is affected:

1) Motor only when the grade is close enough to flat that it can propel me at > 20 mph, with this speed chosen because efficiency is ~66% or higher

2) Hill climbing at 18 mph, full throttle, with me pedaling only enough so that the speed doesn't sag vs. pedaling fiercely as I've been trained to do for all these years (it's a strange feeling being in a really tall gear on a hill that I'd have no chance of pushing on my own!).

ebikes.ca/simulator with my setup: 48V, 35A controller, 100% throttle, 26" wheel, 407 motor

picture1rd6.png
 
Drunkskunk said:
Looks good, but that unbalanced weight would get anoying fast. If you could split the cells of that battery between right and left, and balance the load, it would probably work realy well, But it doesn't look like that pack can be split real easy. IMHO, your 3rd placement, with it on the back rack might work out better for you in the long run. You could also move your controller up to sit infront of the battery and then cover them both with a bag to keep them water proof.

Thats what I ended up doing with mine, and its held up well. The bike is top heavy but the high COG makes it a bit more stable at higher speeds. Its weatherproof and I don't have odd parts sticking out in the airstream adding wind drag.

I commend you for keeping your bike pretty clean looking. 8) :lol: How do you figure that "the high COG makes [the bike] a bit more stable at higher speeds", however? That statement makes no sense to me. Oh, and one other comment: your signature has "triple" spelled with two "P"s. 8)

The placement on top of the rack didn't work too well: it bounced and jostled around with every bump, not surprising given 1.75" tires at ~75 psi, 36 beefy spokes, and a strong rack rated at 25 kg load. There's simply not much give, and 18 lbs of LiFePO4 is only reluctantly accelerated upwards.

Furthermore, any placement on the top of the rack sacrifices much of the utility of the rack. I'd love to be able to strap items down to it such as my trumpets' case (yes, multiple trumpets, such is the life of the orchestral player).

The off balance weight really hasn't been that annoying so far! We'll see how I fare. (There's a reason I bought it from REI, besides their current sale, namely an unlimited return period...)
 
Toshi said:
I commend you for keeping your bike pretty clean looking. 8) :lol: How do you figure that "the high COG makes [the bike] a bit more stable at higher speeds", however? That statement makes no sense to me. Oh, and one other comment: your signature has "triple" spelled with two "P"s. 8)

Thanks.

Physics are weird like that. Counterintuitive sometimes. Take a ruler, strap 4 quarters to one end, put the other in your palm, and try to balance it on its end. Pretty easy. Now flip it over and try to balance it. If you can, you have some serious skill. the point is its harder. Its all about mass and inertia. The principle behind how you stay upright on a bike is the same as how you balance a ruler on your palm. Thats the simple answer anyways. Move the weight up for stability, down for manuverability.

As for the extra P, I wouldn't be the Drunkskunk if I spelled sober. :twisted:
 
(This figure is by my own spreadsheet. The CA reports its own figures that are a bit lower/more efficient, actually. I'm guessing it's not using the assumption of a constant 48V?)

Nope. The CA measures current and voltage in real time and integrates watts over time. As long as your Rshunt value and wheel diameter are accurate, all of the CA's numbers will be very accurate.

And spreadsheets can be misleading. Real-world data is far more meaningful.

Since I have so much battery still to spare even running 15 miles at a pop -- I could probably eke out 40+ miles -- I think I'm going to modify my riding style a bit to gain speed and to see how efficiency is affected:

Be warned, padawan. This is the first step in the path to the dark side...

:mrgreen:
 
Back
Top