flyinmonkie
10 kW
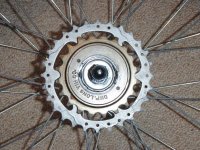
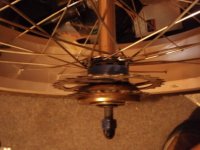
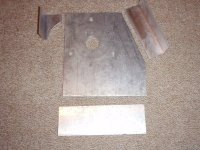
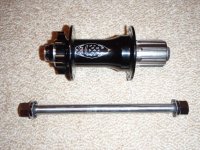
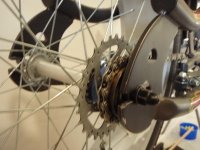
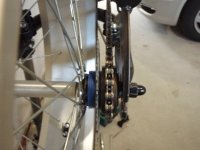
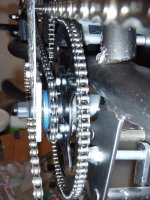
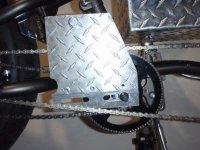
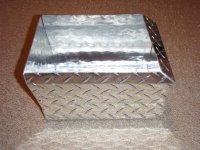
Well, it has been ages since I have worked on my bike! And I am still alive! So, I finally have done some work after a week off of real work and some fun. I also had to think long and hard about my rear hub. The one I built didn't really come out true and my wheel wobbles pretty good. I am going to push on until the other hub I ordered from the US arrives in a couple of weeks. I have moved on to the battery box and have it all cut and bent up. I am hoping to get the corners welded, but it is thin aluminum, so I may not be able to find someone cheap enough. We will find out soon.
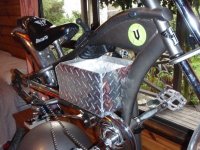
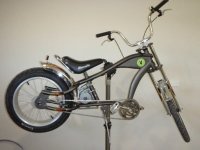
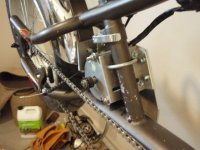
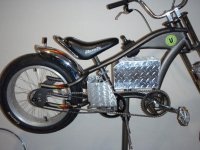
After I get it sorted and mounted, I will start a lid as well. I may incorporate the charger into the lid. I have also set aside a 36v controller and throttle just in case I'm not happy with the 24v system like I was with my other build. So let the fabricating continue. From here is mounting the battery box and guts, mounting the motor and gear reduction, and sorting the rear wheel. I have included some early pics of the battery box.
FM
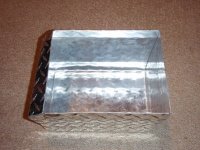
") Instead of welding perhaps follow the route i did with my new battery box ie. aluminum angle on the corners, you could simply pop rivet it to the checkerplate box...(check my worklog if your not sure what i mean i just posted pics)
Instead of welding perhaps follow the route i did with my new battery box ie. aluminum angle on the corners, you could simply pop rivet it to the checkerplate box...(check my worklog if your not sure what i mean i just posted pics)