TSDZ2 Fluid Cooling
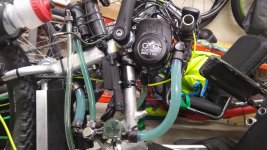
I’ve been working with this all summer. With several different leaks, different pumps, different tubing, different fluid routing, different fluids, and other difficulties. I finally have a fluid made to fill-up brushless Motors and it is working the way I wanted to from the start with no leaks. I can ride at 700 - 850 Watts all day long and the motor never gets more than 10-20 degrees warmer than the outside air. With all the same steps, but with only fluid in the left side of the case, and no external addons will keep the motor at 30 to 50 degrees warmer than the outside air at 700-850 watts. So that means you can ride at high watts at 100 degrees outside and note worry about overheating. I use a led temp display attached to the bottom of the 860C. It has 2 probes and both temps show, one I leave out in the air on the front of the bike the other one is in the oil in the motor. This also allows you to use a throttle and still have a temperature sensor. It’s cooler, quieter and it’s smoother, but unfortunately like everything I had to learn it all the hard way.
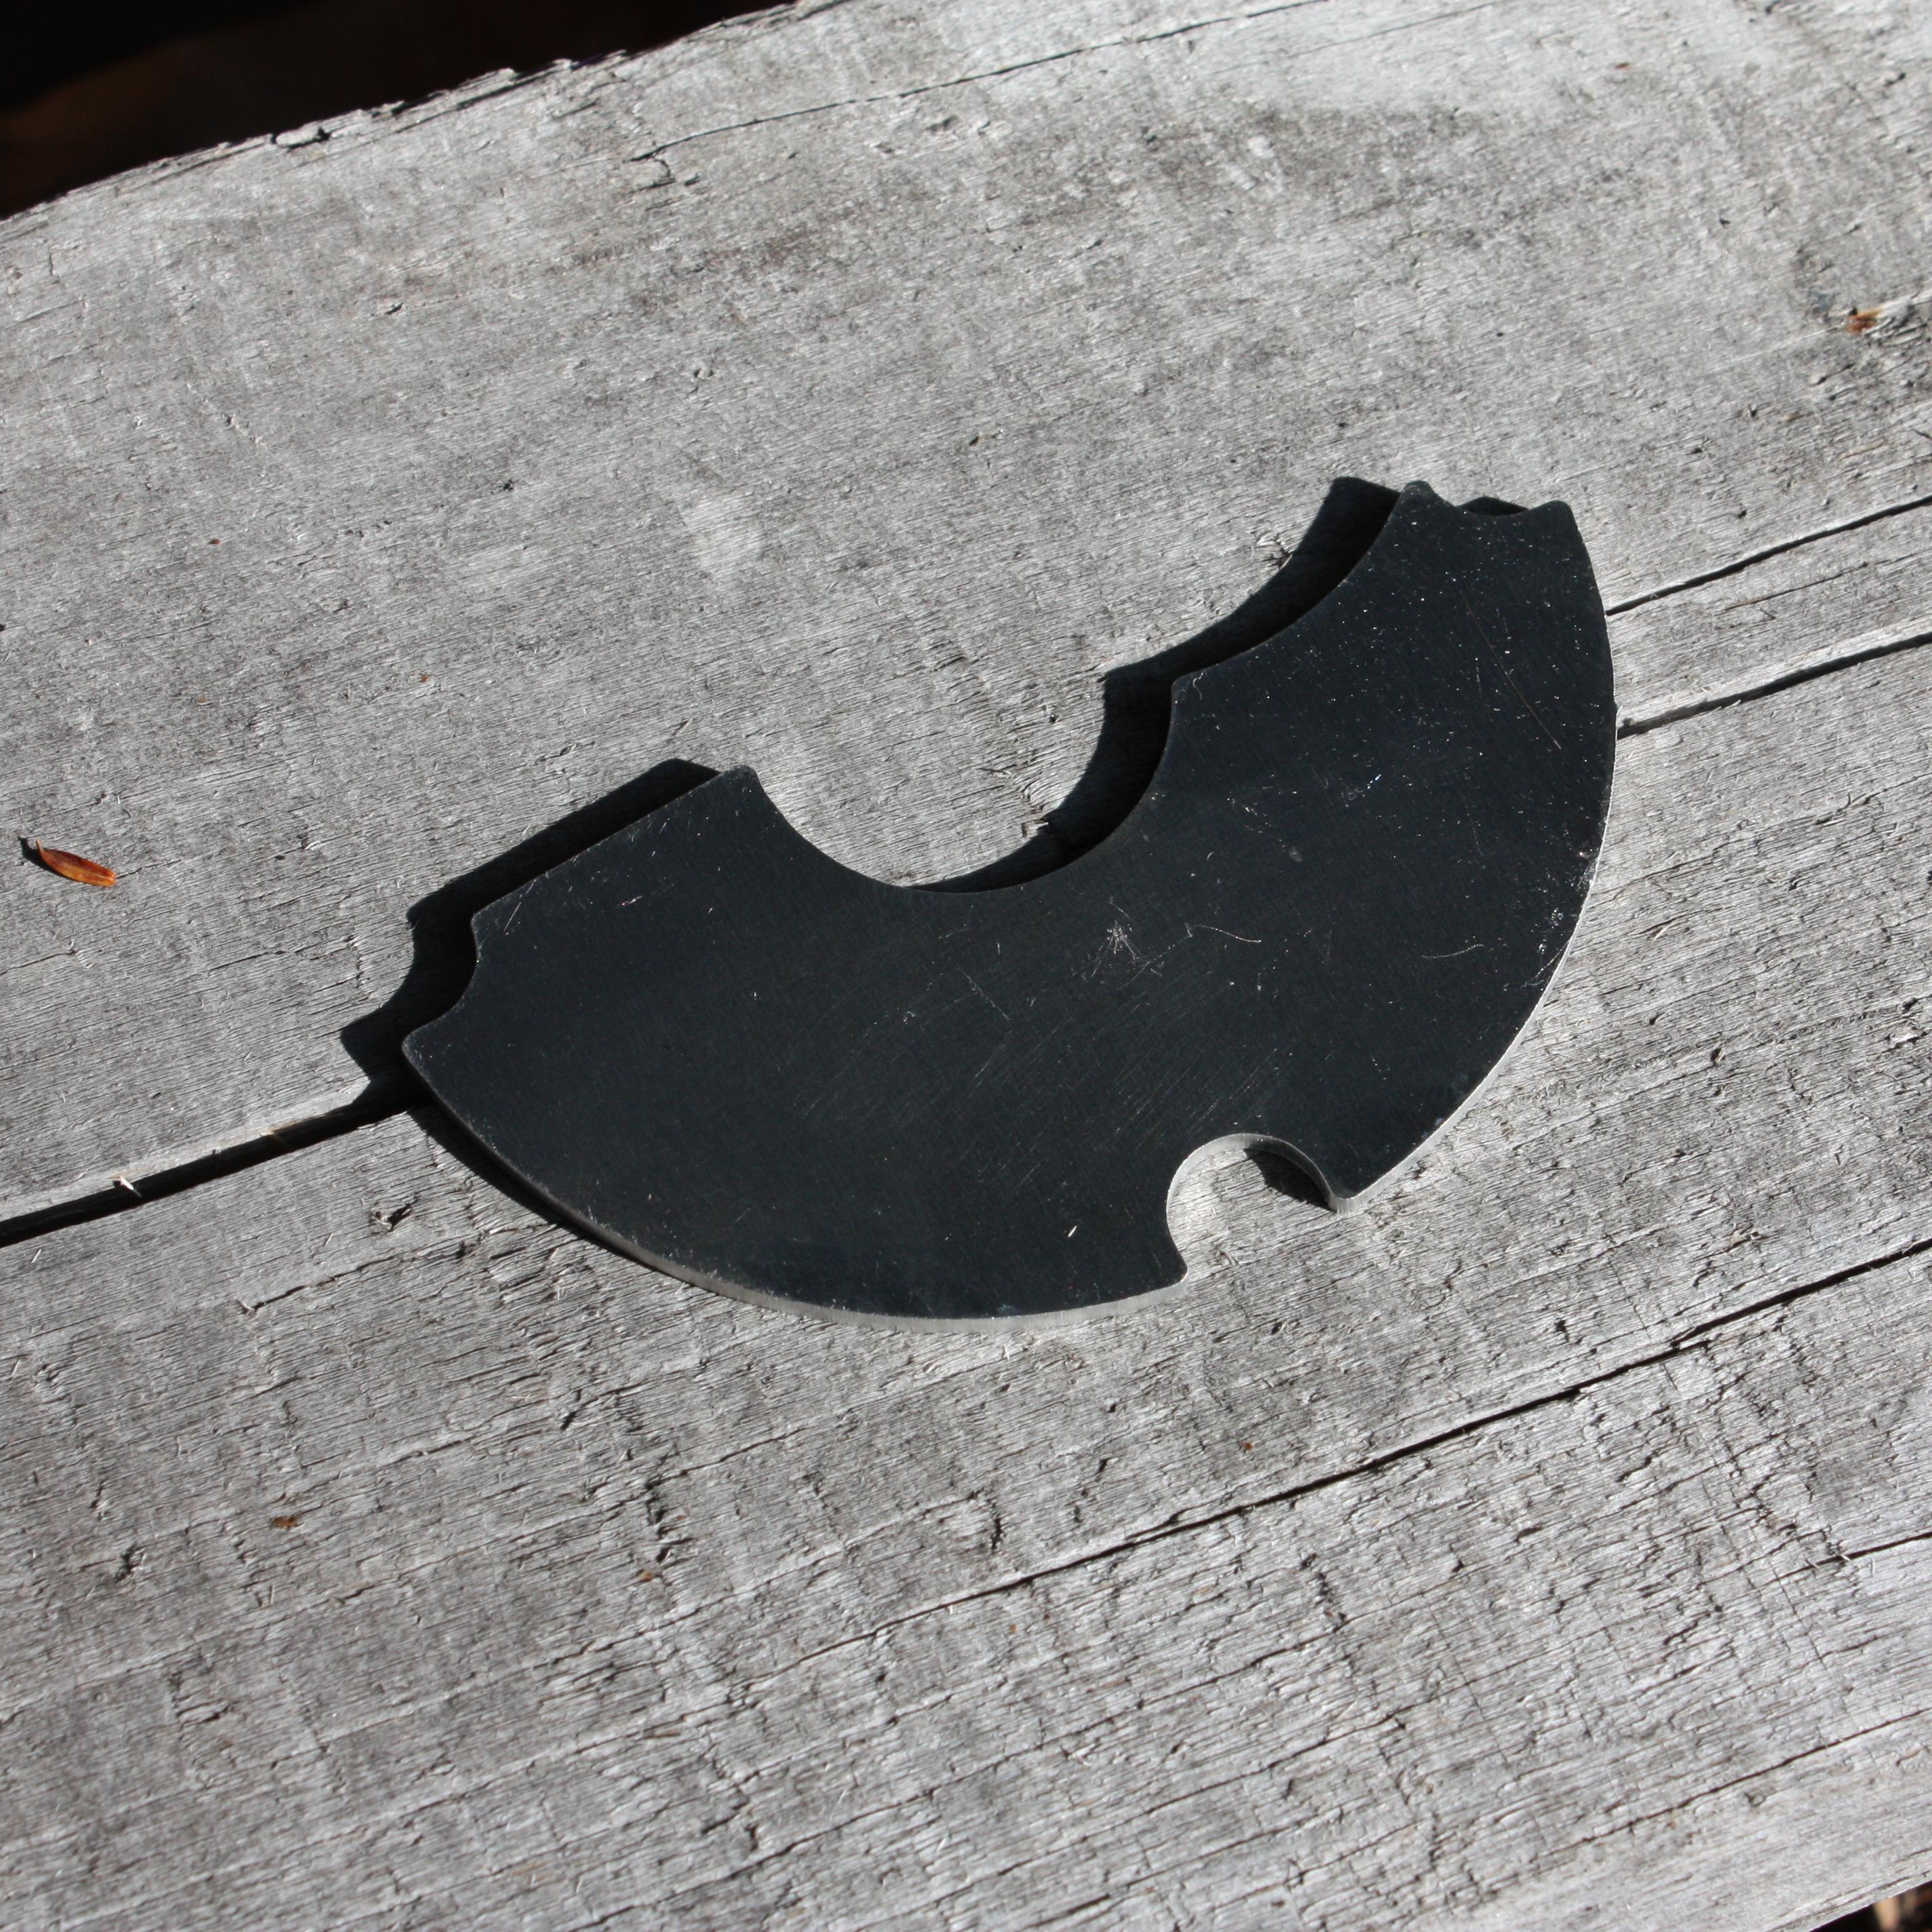
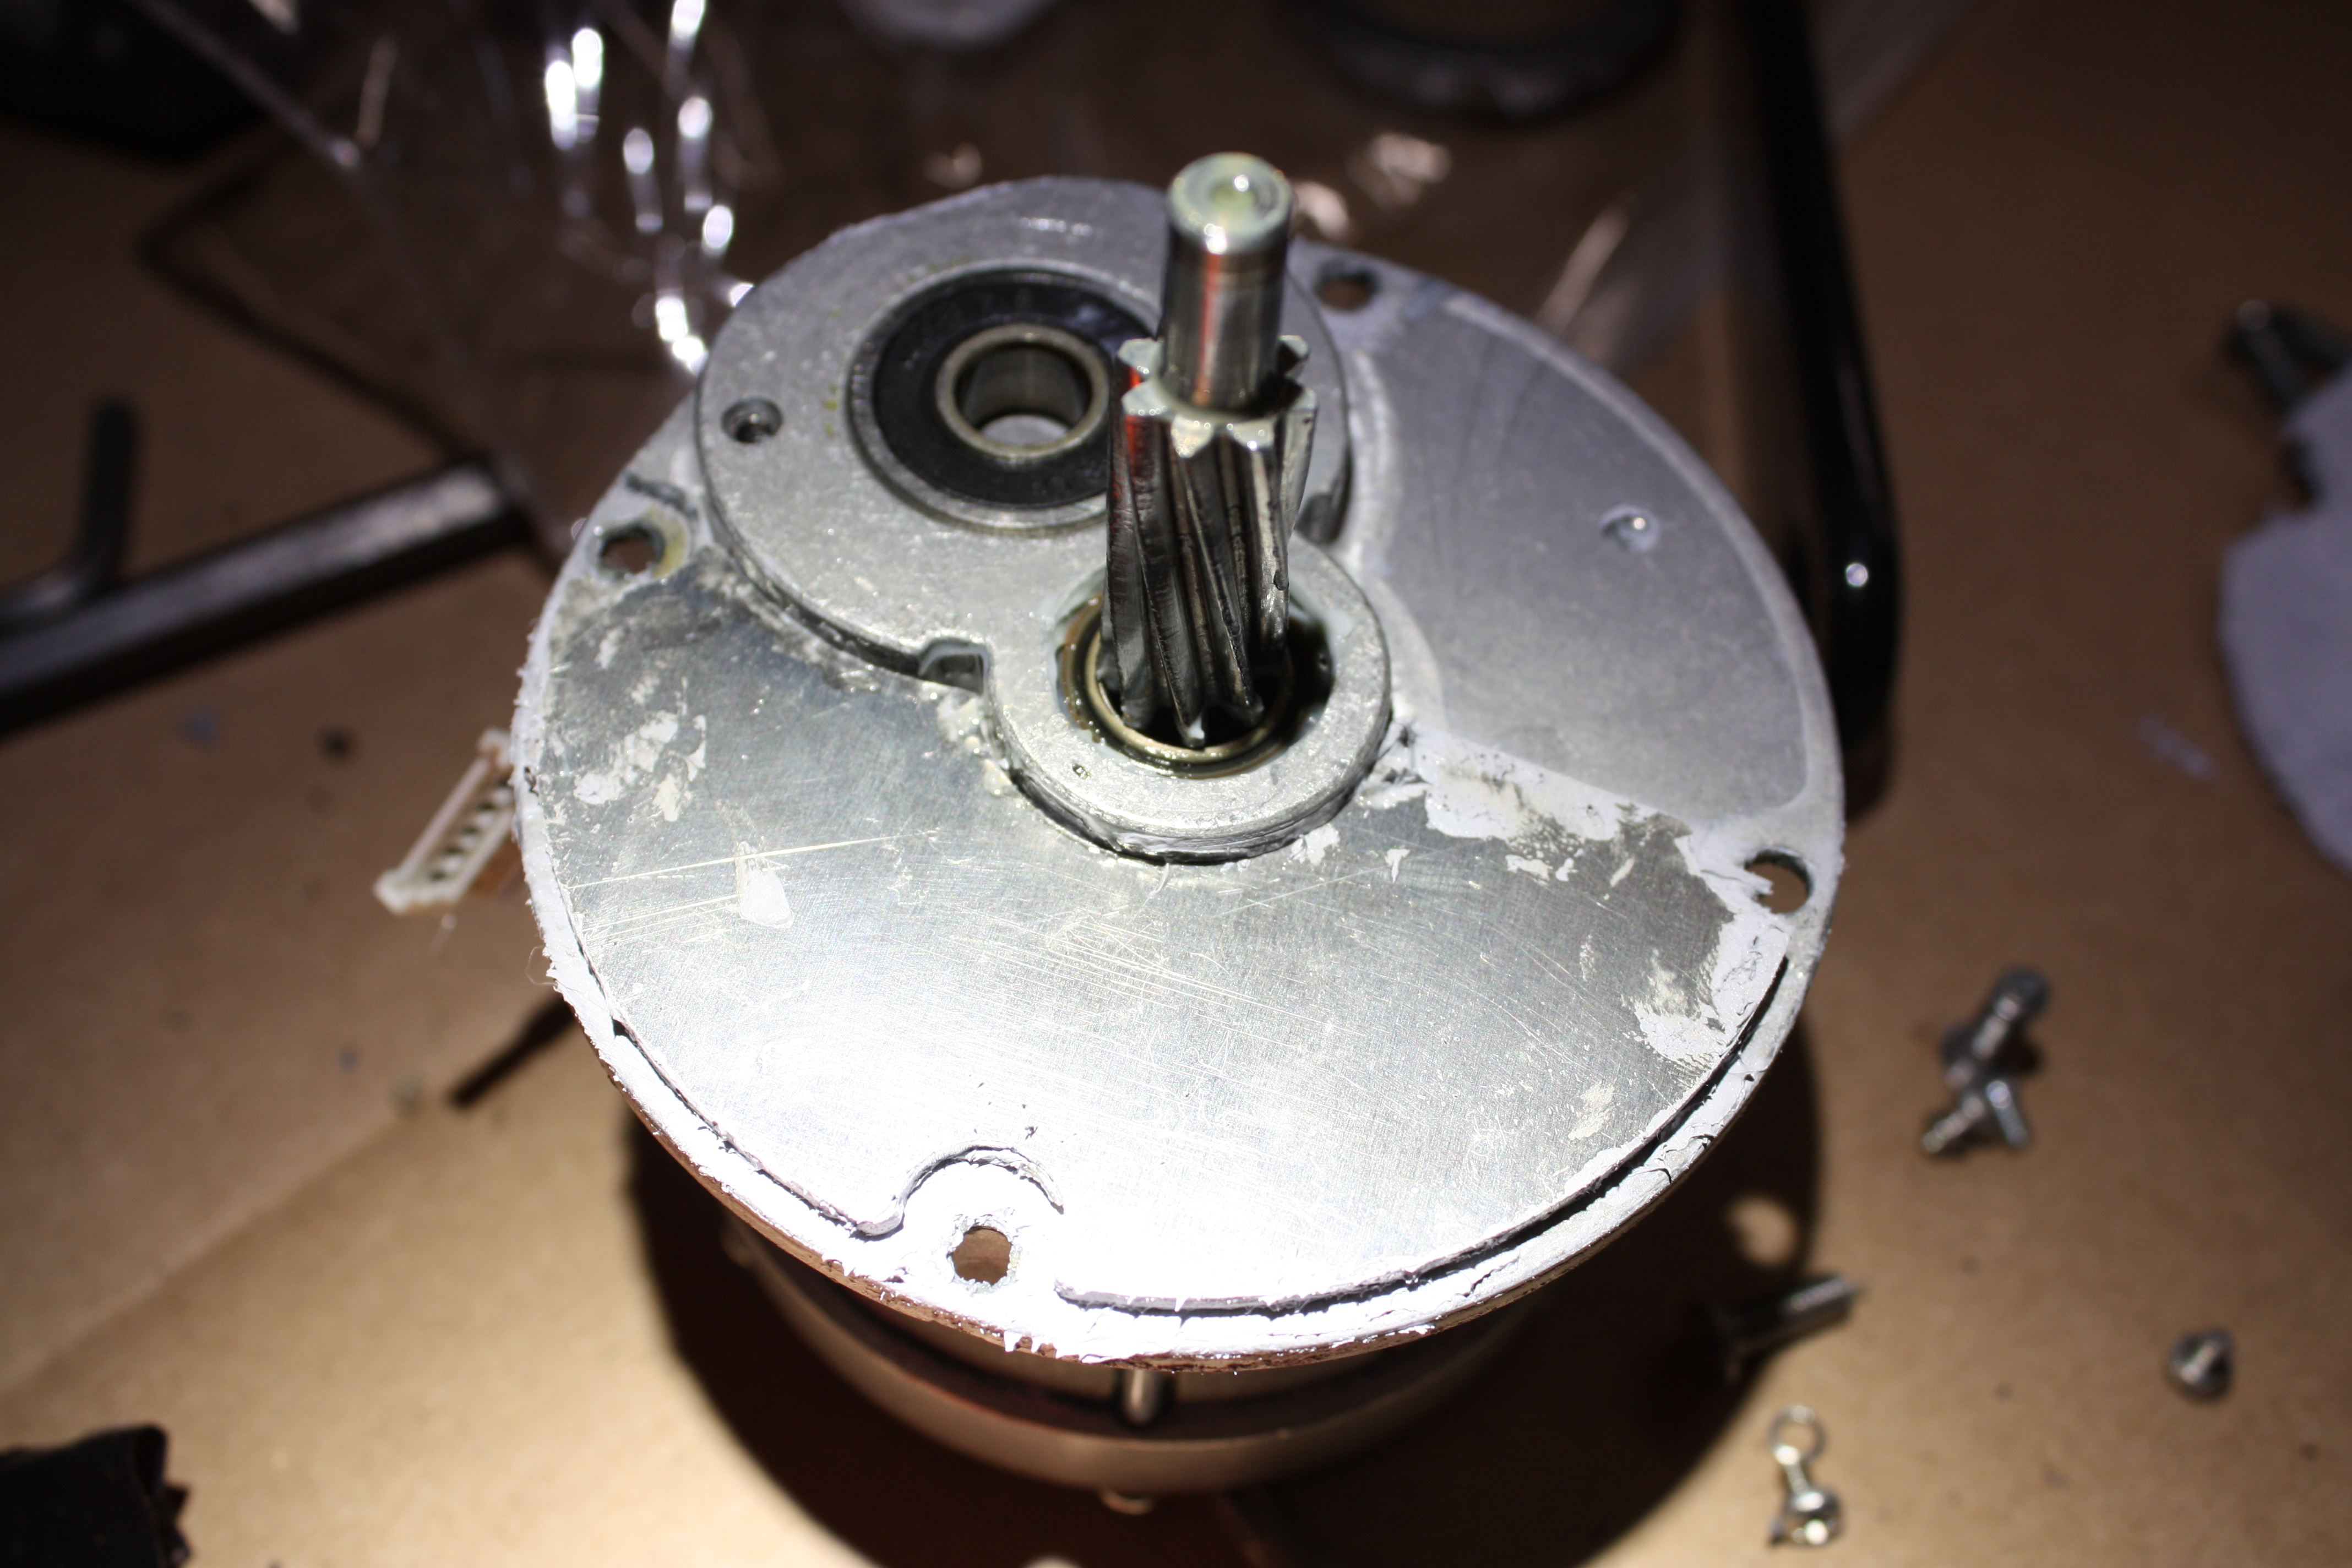
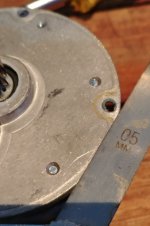
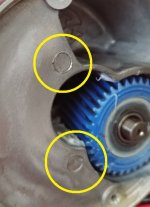
When the riding season is over in about 60 days I will be doing a step by step how-to, with directions and pictures so those that want to tackle this should be able to do it without all the mistakes I had to go through. I’ve attached a couple of photos, so you can see what I’ve done. I also added a new 42 tooth chainring from https://www.eco-ebike.com/collections/d ... lid-e-bike That works great and costs less than the other brand.
I’m trying to decide if I want to go through the effort to offer a kit with all the parts and fluid needed for both types, internal only and external cooling. There was a lot of trial and error finding the right fittings, the right type of hose, the right fluid the right pump, and everything else. To get all the right parts I had to go through several different suppliers, no one-stop-shop here. It’s a lot of work, but If I decide to do this they will be offered through,
www.electrifybike.com and possibly www.eco-ebike.com
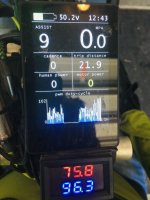
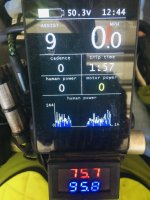
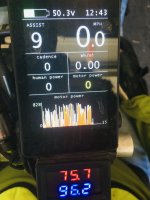
Here are some Photos of my 860C showing air temp, fluid temp in the case, human power, motor power, and pwm duty-cycle.


 "
"