
You are using an out of date browser. It may not display this or other websites correctly.
You should upgrade or use an alternative browser.
You should upgrade or use an alternative browser.
Hardware temperature control tsdz2
- Thread starter andrea_104kg
- Start date
Which thickness has you used there.hefest said:These thermal pads I got from Ali are like clay, easy to shape and remove when necessary. ...
And only around the cor or also between top/bottom of the motor and case
Elinx said:Which thickness has you used there.hefest said:These thermal pads I got from Ali are like clay, easy to shape and remove when necessary. ...
And only around the cor or also between top/bottom of the motor and case
You can see the exact place where it's used in the picture. Didn't want to put much more before knowing how easy it is to remove.
I think pad is 5mm thick, I have posted the link on the page 2 of this thread.
I put 10 mm thick pad on the same position, on The Dahon that I am building for my wife.
I cut one strip of 10 mm thick metrial (100 x 300 mm), found out that when you strech it and wrap around the stator, it behaves like a mixture of clay and rubber, so It shrinks back with a bit of delay, just enough to put the lid back in place (with some practice and few carefully chosen words).
So I believe it is not a bad solution, the thick material keeps a bit of pressure between the motor and the outer casing, improving the heat transfer (at least in theory :wink: ).
Unfortunately, the battery that I ordered 2 months ago is now stuck somewhere in the middle of the quarantine chaos, so I wasn't able to test it yet.
Oh well.
Nick2 said:I put 10 mm thick pad on the same position, on The Dahon that I am building for my wife.
I cut one strip of 10 mm thick metrial (100 x 300 mm), found out that when you strech it and wrap around the stator, it behaves like a mixture of clay and rubber, so It shrinks back with a bit of delay, just enough to put the lid back in place (with some practice and few carefully chosen words).
So I believe it is not a bad solution, the thick material keeps a bit of pressure between the motor and the outer casing, improving the heat transfer (at least in theory :wink: ).
Unfortunately, the battery that I ordered 2 months ago is now stuck somewhere in the middle of the quarantine chaos, so I wasn't able to test it yet.
Oh well.
Any kind of heat dissipation improvement is good. It's not like I'm going to push the motor to the limit all the time, it's used for commuting after all.
silentguy
100 W
- Joined
- Sep 15, 2009
- Messages
- 162

 External case temp vs internal motor temp.
 Case was at 100F when the internal motor temperature was 185F.
Update ;
External case temp is about 40F cooler than internal motor temp.
100F case ; 140F motor.
This is with all my copper mods.
So if you don’t want to install the internal lm35 temp sensor you can just use external temp probe on the case
Keep the external temperature under 90F and it should be fine.
silentguy
100 W
- Joined
- Sep 15, 2009
- Messages
- 162
Results of my heat reduction attempt using copper.
It appears to be working well.
I haven’t overheated yet on my long hill , but it’s winter and outside temp is 50 F here.
We shall see in summer
I also found experimental mode tends to heat up the motor much faster. I stopped using experimental mode though I do like to use it because it has a higher cadence.
I also have the internal temperature sensor working now too so that I had some extra protection If I’m not paying attention to the external temperature sensor


Hi!
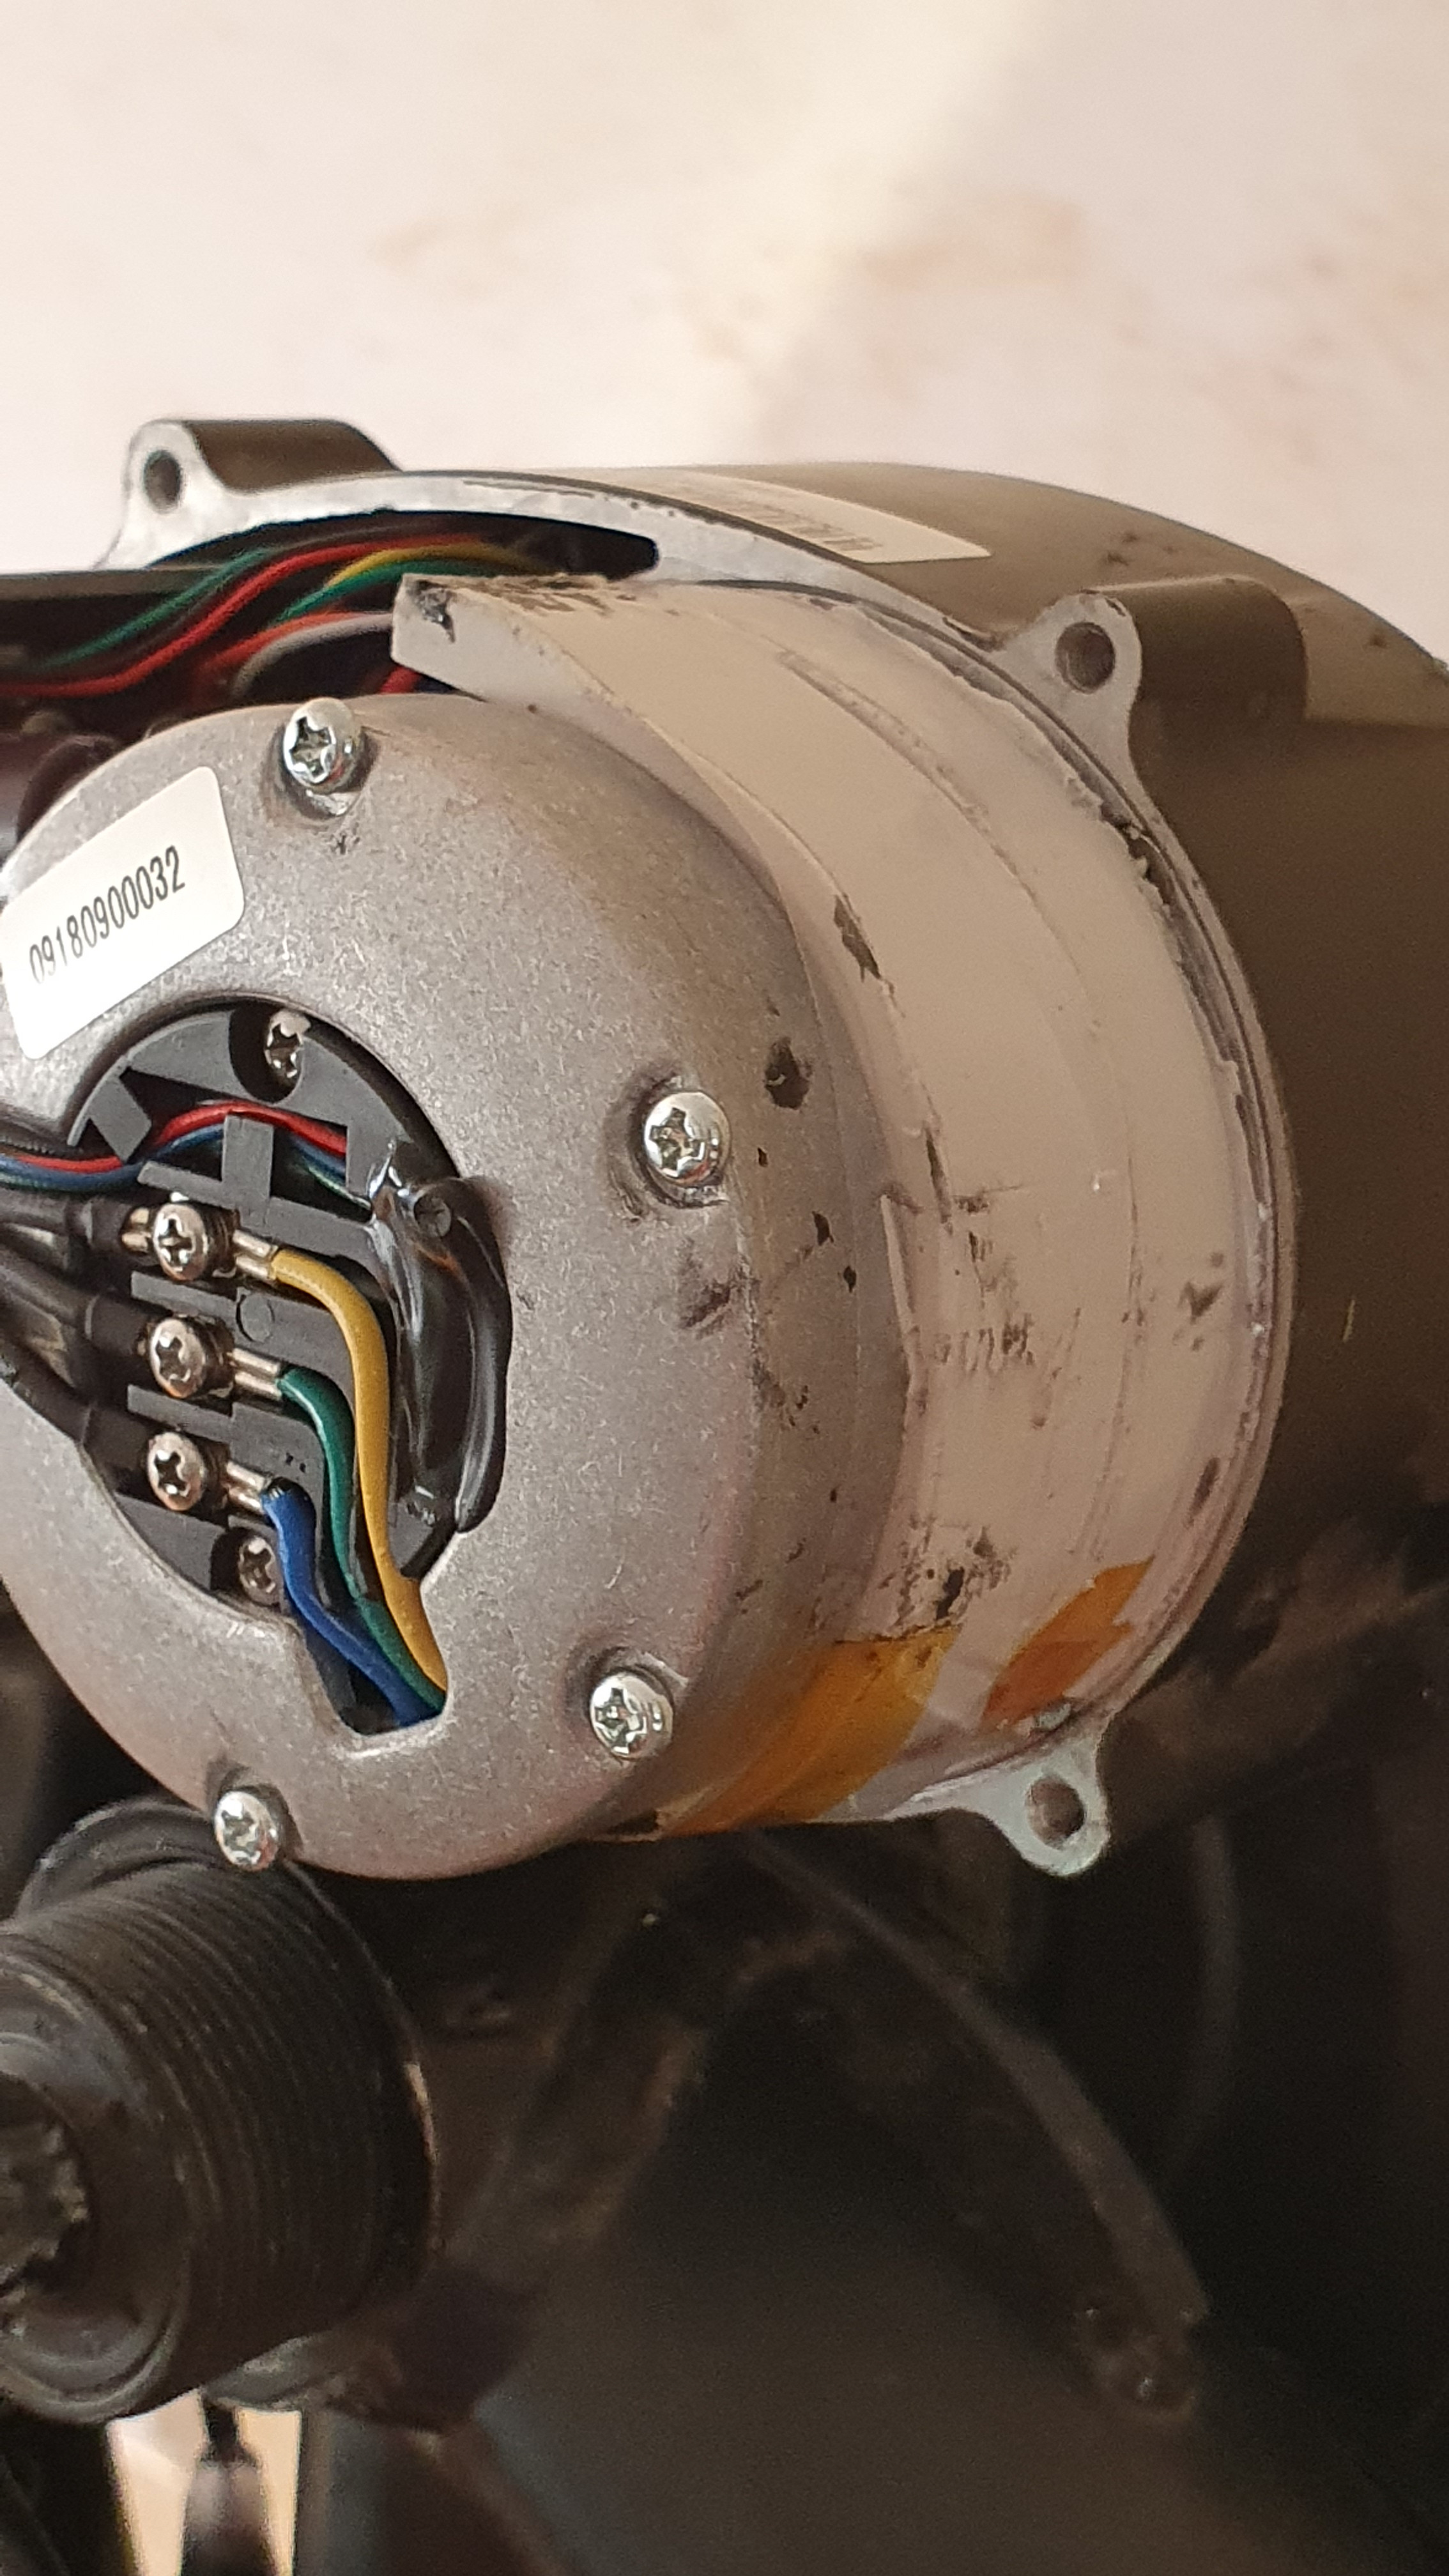
I added a termometer (for a bit of "steam-punk" flair, i put the classic capillary thermometer, without a single electronic component")
I put the thermometer probe in the cavity behind the plastic cover and added some thermo pad to keep the pressure agains the housing. Not directly on the stator, but better than nothing (I hope).

Also added one 10 mm thick thermo conducting pad to help cooling a bit.
I added a termometer (for a bit of "steam-punk" flair, i put the classic capillary thermometer, without a single electronic component
I put the thermometer probe in the cavity behind the plastic cover and added some thermo pad to keep the pressure agains the housing. Not directly on the stator, but better than nothing (I hope).
Also added one 10 mm thick thermo conducting pad to help cooling a bit.
Attachments

What's the thickness?silentguy said:Crafting copper
Or dimensions and weight per sheet?
silentguy
100 W
- Joined
- Sep 15, 2009
- Messages
- 162
Nick2 said:Hi!
I put the thermometer probe in the cavity behind the plastic cover and added some thermo pad to keep the pressure agains the housing. Not directly on the stator, but better than nothing (I hope).
Thermo.jpg
Also added one 10 mm thick thermo conducting pad to help cooling a bit.
So what kind of temperatures are you seeing ?
You have heat reduction on the motor side too ?
Yes, I cut one strip of 10 mm thick thermo pad (100 x 30 x 10 mm), stretched it around the stator and put the cover in place.
I tested it only once, climbed on one hill (altitude difference about 160 m).
ambient temperature was about 15 degrees Celsius. Temperature climbed from 15 to about 30 degrees Celsius.
I believe that actual motor temperature was higher than that, but in the short run like this the housing didn't have time to warm up to the same temperature as the motor.
It is difficult to say without further testing, but currently it is not possible.
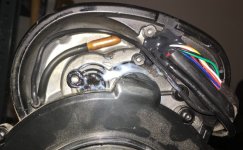
casainho said:Looking at the picture of your motor that it is brown, it is almost for sure already demagnetized/damaged and so has lower torque and pulling more current, that will result you pulling more current to have the desired assistance and it will get hot even faster.......
I suggest you to replace you motor asap and be careful with your tests of temperature or you may repeat the same demagnetization/damage to the new motor.
Also the results of your tests may not reflect what happens to a good working motor that other users have.
What can cause demagnetized/damaged, can you provide more info?
casainho
10 GW
- Joined
- Feb 14, 2011
- Messages
- 6,045
read the TSDZ2 FAQ: https://github.com/OpenSource-EBike-firmware/TSDZ2_wiki/wiki/FAQtruongap said:casainho said:Looking at the picture of your motor that it is brown, it is almost for sure already demagnetized/damaged and so has lower torque and pulling more current, that will result you pulling more current to have the desired assistance and it will get hot even faster.......
I suggest you to replace you motor asap and be careful with your tests of temperature or you may repeat the same demagnetization/damage to the new motor.
Also the results of your tests may not reflect what happens to a good working motor that other users have.
What can cause demagnetized/damaged, can you provide more info?
casainho said:read the TSDZ2 FAQ: https://github.com/OpenSource-EBike-firmware/TSDZ2_wiki/wiki/FAQ
I don't see any references to demagnetization of motor.
casainho
10 GW
- Joined
- Feb 14, 2011
- Messages
- 6,045
You need to read about temperature sensor. You need to go in detail on the wiki pages.truongap said:casainho said:read the TSDZ2 FAQ: https://github.com/OpenSource-EBike-firmware/TSDZ2_wiki/wiki/FAQ
I don't see any references to demagnetization of motor.
Than you haven't searched good enoughtruongap said:casainho said:read the TSDZ2 FAQ: https://github.com/OpenSource-EBike-firmware/TSDZ2_wiki/wiki/FAQ
I don't see any references to demagnetization of motor.
https://github.com/OpenSource-EBike-firmware/TSDZ2_wiki/wiki/TSDZ2-motor-demagnetized-due-to-overheating
colsaunders2 mentioned here another solution by filling the gap with silicone thermal putty. No results yet
" I decided to try silicone thermal putty (TG-PP10). 50 grams is only $30 and is just enough to fill the gap between the stator midsection and the side cover. The excess putty squeezed right up to the seals, so I think that was a good fit! I don't have a temperature sensor but have touched the cover after riding a few miles, and it is usually warm to the touch. Disassembly might be interesting, so I haven't popped open the cover since."
_________________________________________________________________
Cristian comments here the results of the cooling modifications mentioned in the wiki.
" I have tried as hard as i could to make it overheat, going uphill (800W-900W) or on the flat with 45km/h and 500-600W continuous power, but i only managed to get it to 70° C once. It usually stays under 65° C and cools down very fast when it's not working hard.
I used 6.0 W/mK 2mm and 3mm thermal pads. With 5.15 W/mk thermal grease paste.
Before the mods, it would be at 85° C in 10 minutes of 500W and would cool down very slow. I would have to stay under 350W the rest of the trip, otherwise would go to 85° C much faster, being already a bit hot. "
soo, I followed the link and read about the temp probe install. I honestly do not want to give up my throttle. So why would we not just go the simple route of installing a $8 probe with LCD display?
I take it I would just drill a larger hole in the case, place the sensor against the motor and cover it with the heat dissipating silicone everyone seems to be using?
also, I do not have my motor yet but it is on its way. How much airgap thickness is there? In other words how thick can the padding be?
https://www.adafruit.com/product/3084
Probably not the cheapest way to go but a number of these and then also the silicone padding seem like would be a good solution
even this might work, although they do not state the height
https://www.dfrobot.com/product-1128.html?gclid=CjwKCAjw4871BRAjEiwAbxXi25qRCp3U1643XSxYxXXQbbdJ9iEqGpOnCNGbgFsc-y1nz8iJO5xynxoCb_UQAvD_BwE
imho finns are not always necessarycavi said:...
Probably not the cheapest way to go but a number of these and then also the silicone padding seem like would be a good solution
even this might work, .......
There are enough experiences that the temperature is more controlled down with easy filling the airgap between motor and covercase (about 4mm to 5mm) or maybe better the wiki method to optimize the contact between motor and the complete metal case.(2mm and 3mm).
Ofcourse you can combine all solutions for the best heat dissipation and use expensive but better heat conductive silicon and finns, but I doubt if this all is needed to lower the temperature for your needs.
If the cable from the temperature sensor for the external display isn't too thick, you could maybe use the cable input to the controller behind the plastic cover.
Similar threads
- Replies
- 8
- Views
- 663
- Replies
- 35
- Views
- 17,329
- Replies
- 11
- Views
- 2,198
- Replies
- 112
- Views
- 19,903