jeff.page.rides said:
Sorry I wasn't clear on where the double bearings would go. I realize there's no room for double bearings on the small gear shaft. I was asking about double bearing setups for all the other bearings everyone else is doubling up, why I am Ordering Bearings
Thanks Jeff
On the non-drive side, there is approximately 8mm behind the circlip where the factory bearing sits. You can't use all this space as the bearing position requires adjustment.
Outboard of the circlip there is about 14mm to where the taper starts. Allowing for crank arm intrusion it's more like 12mm. Using the 6mm factory dust seal leaves only 8mm which is just enough for another standard 7mm wide 6902 bearing and circlip. To use a wider bearing here it would be need to have contact seals.
On the drive side there is about 9mm between circlip and the taper, so 7mm usable space allowing for crank arm intrusion.
So the only place you could use a wider bearing is outside of the circlip on the non-drive side.
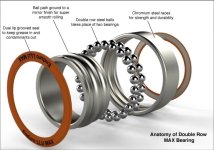
I couldn't find much from name brand manufacturers though, mostly Chinese manufacturers. 15 x 28 x 10mm seems to be the size for what they designate as 3902 RS double row bearings. This one is angular contact and so designed for both radial and axial loads.
https://www.ebay.com/itm/1PC-3902-2RS-15x28x10-mm-3902-RS-Double-Row-Sealed-Angular-Contact-Ball-Bearing/264570548938
Enduro seems to make a 3902 LLU MAX in this size, which is what you'd ideally use without a separate dust seal. They are expensive, if you can find them in stock.
https://www.papanuicycles.co.nz/products/enduro-double-row-bearings-max
https://www.swinnertoncycles.co.uk/wheels-c293/hubs-c294/spares-c299/enduro-bearings-sealed-bearing-3902-llu-abec-3-max-p87161
I imagine the wider bearing would be an improvement, mainly on the shaft as that has the most play. But whether its worth the extra cost over the Enduro 6902s and especially the 10mm wide inner race MAX-E variant is hard to say. Just having the extra bearing on the spindle goes a long way towards improving play, and the tolerance between outer race and case is not "too" bad. I'm having trouble getting a 0.025mm shim sleeve around the bearings.
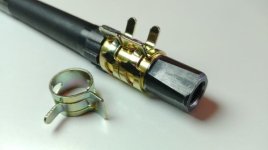
As for the roller bearings on the torque sensor assembly, I'd stick with the standard HK2214.
Using a wider roller bearing such as the HK2216 on the non-drive side will extend past the torque sensor so it's of no benefit. You can't push the bearing in any further due to a step in the case. Plus you aren't then likely to be able to fit the inboard factory 6902 bearing behind the circlip.
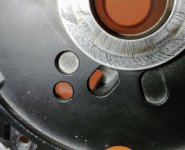
The drive side has only has 14mm available space inside the case until the step so you couldn't fit wider the HK2216 here either. The roller bearing on this side is captive on the torque sensor with a circlip. It's a total pain to remove as the hall sensor needs to have the wires cut to remove it, then resoldered and recalibrated (hence my other recent posts). The bearing is actually loose behind the circlip with a couple of mm extra space, about 14.5mm in total. I'm not really sure if this extra space serves a purpose, perhaps it adds float for the discs in collaboration with the little springs, and I've been wondering if it should be shimmed.
I actually have some INA HK2214 standard size bearings to replace both of these, but the play on the torque sensor assembly shaft is just as bad as factory. These INA ones have a seal on one side, so the side-to-side play is much better than factory which have a very loose inner race with empty space, and the seals add an element of firmness to the fit. But the trade-off is the rollers look to be slightly shorter that the factory versions.
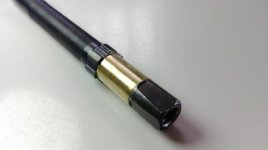
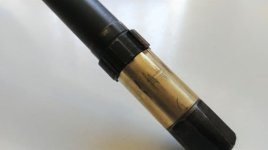
Here's what those Enduro double row bearings look like.