NYX Cromotor Max-E Build

Ohbse said:
Cool bike, look forward to seeing it complete.

Where did you source your 2.5" rims and how much?

Thanks Ohbse!
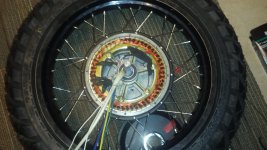
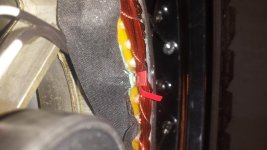
They were sitting on the for sale thread for a while...when I inquired about them I was told they were "no-name" (which I tried to look for too because I wanted a second set for street tires). He had them listed as "Supermoto Rims 17x2.5". There may be a post there from when they were For Sale, but I'm not sure if it gets cleaned up once an item is sold or how that works. If you do see them and you inquire about them they are pretty decent. They were very easy to true and the flat spot you see sometimes at the weld was hardly noticeable to my surprise.

Drunkskunk said:
Awesome build. It looks like My bike's brother. Nice to see another Monster bike here! Got a name for it?

I talked to Risse about the 12" version of that fork called the Bigfoot back when they were still developing the wider clamps for them, but I came across a NOS Marzocchi Super Monster and couldn't pass that up. From everything they told me about it, it should be an awesome fork.

Can't wait to see what it will be like when finnished.

Thanks Drunkskunk!
I am a HUGE admirer of your build. That has to be one of my favorites. Have you made any mods lately or have a thread that I could follow? That's funny, I swear I knew you mentioned these forks at some point and stuck in the back of my mind after all this time.

Haa no I haven't put a name to it yet..well I keep telling my fiance that it's my "side piece" cause she complains time to time that I spend more time researching and working on my Ebikes than I do with her. So maybe a girls name like the movie Gone in 60 Seconds..or something evil (I like horror movies, that why my tattoo on my back is a joker with dead people on nooses for his puppet strings)...now you've got me thinking...

Anyways thanks so much for your support and interest..your build is a perfect example of great talent that I've witnessed on this forum.
 
Right now I have Magura MT5 discs installed. My goal is to keep my main rear brake lever on the right, and have an additional mini lever on the left side; each operating/going to the same rear caliper using a "Y" splitter. If I were to use an additional MT5 lever (which incorporates the master cylinder), would this work, or would it put too much pressure on the opposing piston in the lever not in use? The lever appears to be strong enough not to break and withstand being pushed in the opposite direction it is designed for... I don't know if I am forgetting something that would create an issue if I kept them at the same level.

I would appreciate any advice someone could offer....I decided I don't just want to swap each lever's typical side because although that would make it easier controlling my wheelies, it now makes tricks like circle & rolling burnouts, weave drifting, and endo's more challenging IMO..maybe I won't feel the same having a POT throttle now but even so the brakes don't have the same power and range of motion compared to a street bike....
 
I've got some more good stuff coming up that I've been working on but while I'm out of town here's something relatively cheap (Total cost under $20 because I only had to buy the sticker).

I wasn't a big fan of the Adaptto display neon green and blue colors for this build and because that is the only option when you purchase it, below is the steps I used for a work around anyone here I would be confident could do.

1) Apply a thin layer of "Plasti-Dip" over the green rubber sides. This is to act as a bond-breaker so to say in the event I had to access the internals in the future, and also sealed any voids on the wire side where they exit.
The picture you see is the result of the second time doing it because I made sure it worked by taking it apart and before doing this on the wire sides as well.

2) Mixed up some spare Thermally Conductive black epoxy used on circuit boards I had laying around with a little less hardener than the 1:1 ratio and poured it over the cured "Plasti-Dip". I used this because I have lots of it and since it's only for aesthetics, the strengths are weaker than say the 3M DP-40 that I see used frequently on here and I wanted the ability to remove it in the future if need be.

3) Sent a vector based drawing to the sticker company and it's black red and gold reflective. The sizes all appear to match the scale I sent them, but I didn't apply it yet because it looks like the bottom is offset for some reason. Maybe at that scale it is difficult I don't know I don't make stickers but until I get home in a few days I will try cutting it or tell them to send me a new one.

The rear brake fit perfectly with the bracket NYX provided so I'm pumped I figured for that correctly with the spacers I used at the swing arm and axle and amount of wheel dish. So gonna machine a new rear brake caliper bracket to accept two for what I was trying to determine the best approach for I mentioned in a post above, carbon fiber fenders with alum brackets I'm making (something I think will be a little different than other designs out there), and some other little machined parts for the two Ferei lights and and all.
 

Attachments

  • NYX-17.jpg
    NYX-17.jpg
    80.1 KB · Views: 2,735
  • NYX-18.jpg
    NYX-18.jpg
    87.1 KB · Views: 2,735
Like what you did there. Imho there should be a way to use the smartphone as a display rather then the original display.
That would look much better and it could display all sorts of info, including much that original display can not.
 
macribs said:
Like what you did there. Imho there should be a way to use the smartphone as a display rather then the original display.
That would look much better and it could display all sorts of info, including much that original display can not.

Thanks, yea I would be surprised if we don't see that sometime in the future. Personally, I would like the option to swap out either-or in case something happened to my phone. I curse out my phone daily, I'd smash it if it was just as temperamental while riding haa.
 
macribs said:
Did you get the sticker cut and lined up?

Hey, no I'm sorry I haven't yet, as soon as I came back from my trip I had to leave again unexpectedly to visit my hometown (NE Philly) for a family matter....not sure when I'm going back yet unfortunately....

Here's the dimensions that I sent them in case you would like to use it to recreate it or something similar of your own. It did appear that it was going to cover well though...It is a little bit larger than the original but I wanted to a little bit of a buffer because I didn't know how accurate the sticker company would be able to produce it.

So my only concern was how it didn't print symmetrically. The black diamond seems to be shifted off-center to the left and I can admit I have a bit of a OCD or whatever you call it about things like that.

Sorry, will probably be away until after the weekend I'm guessing at this point, but hope it helps..
 

Attachments

  • NYX-19.jpg
    NYX-19.jpg
    35.6 KB · Views: 2,656
Sharing is caring bro :)
Looks like it will not be Max-E this year for me. I'll get a Kelly or sabvoton or even an infinion to hold me to next year.
 
ridethelightning said:
nice build!

Thanks ridethelightnightning! BTW always wanted to ask if you were a Metallica fan? Classic album, got some favorite tracks on there being the Metal Head I am.
Anyways, thanks again for the support, glad I caught your interest with all the knowledge you share.

macribs said:
Sharing is caring bro :)
Looks like it will not be Max-E this year for me. I'll get a Kelly or sabvoton or even an infinion to hold me to next year.

Anytime man, no secrets here, just looking to help and give back for all the knowledge I gained from here after hiding in the shadows all this time. I don't even have a Facebook nor did anything online like this before so wasn't intentional but glad I started.
 
walkev85 said:
macribs said:
Like what you did there. Imho there should be a way to use the smartphone as a display rather then the original display.
That would look much better and it could display all sorts of info, including much that original display can not.

Thanks, yea I would be surprised if we don't see that sometime in the future. Personally, I would like the option to swap out either-or in case something happened to my phone. I curse out my phone daily, I'd smash it if it was just as temperamental while riding haa.
:lol: the only thing that saved my phone from being smashed by a tramcar was the offer of a lump of cash for it.

I absorbed a fair bit of metallica by osmosis at high school. I still enjoy selected highlights.

this machine is going to roll over everything. the wide front forks will help increse the steering angle as it is a little constricted with a standard fork on the nyx.

id be aiming for maximum battery capacity as its going to be a watt guzzler :wink:
 
ridethelightning said:
this machine is going to roll over everything. the wide front forks will help increse the steering angle as it is a little constricted with a standard fork on the nyx.

id be aiming for maximum battery capacity as its going to be a watt guzzler :wink:

It'll definitely be interesting to ride and have high hopes of being able to rolling over everything ha. I like how I have the flexibility to orient the rear brackets in multiple configurations and had NYX sell me an extra of each "high" and "low" profile brackets to mess around with. My first ebike is designed like crap and have bottomed out a few times with it. I probably shouldn't say that because I've been contemplating selling it but may try and convince my fiance to ride it or keep it as a beater. Lot's of good memories with it though too.

Yea, it'll also be interesting to see how much of a watt guzzler it is too, I haven't got my hopes up in relation to efficiency...if it is than I'll swap out the rims and tires for something more narrow and lighter. The overall diameter of them is 24" and I picked that particular tread pattern because when you look down the center the tread gaps are fairly close compared to others hoping this would help a bit with rolling resistance on pavement. IDK it's a stiff tire too so hopefully that helps the contact area???

Trial and error I guess, and am hoping that the Adaptto will help being sine wave and that the weight I saved in other areas that other bike/frames don't will level things out. Maybe having all that added strain being a heavier wheel makes more of a difference than the entire bike??
 
my thoughts are that the width of tyre will be what makes it fun off road, but at the same time will eat the power.

you could pump them up hard for a little increase in efficiency, as the bike will only be lightish compared to a moto. with softer low pressure tyres it will be much cushier and stick to the road but chew the power.

personally, iv long ago thrown the idea of being pedantic about efficiency out the window. my solution- get the largest motor and battery you can :lol:
it should only be of great concern if you want to go on really long road trips where there is no powersockets available to top up. the adaptto charging system is very fast and convenient for charging mid ride, when you have ,say an Eaton apr48 3g.

id be hoping to pack say min. 2, pref.2.5, maybe wishfully 3 kilowatt hours on a bike like yours.

this is doable with the currently available 18650's in the nyx., if you keep the controller external, as it really should be...without fans.

i would not be too worried about the weight of the tyres causing strain, unless you plan to do crazy jumps
 
ridethelightning said:
id be hoping to pack say min. 2, pref.2.5, maybe wishfully 3 kilowatt hours on a bike like yours.

Hmm, I'm using 20 EIG cells in series (I think C020's 3.65V,20Ah)...so 3.65V x 20Ah x 20cells = 1460Wh or 1.46kWh...Is this correct?

I wish I was home to weigh what I have but I think approximate weights for all of these are about 420g each cell or 8.4kg total battery, Cromotor is about 11kg, NYX is about 6kg for a total of 25.5kg or 56lbs (without forks and other components)....Would calling it 32kg or 70lbs finished sound about right?

I thought about trying to weigh everything ahead of time but I figured I'd just do my best ordering the lightest parts I could and that wouldn't change the ultimate reality of what it would be...I admit I thought I would fall shorter than that..

Anyways, thanks! Let me know what ya think or any suggestions...oh yea I'm about 170lbs give or take...maybe less when the bike is done...I start loosing weight when I miss the gym and don't eat when I'm stressed running a mile a minute...so yea my fiance hates me and says I'm "un-American"..guess I don't run on Dunkin like the majority..embarrassing slogan for the US when ya think about it; who approved that? Maybe a battery company will buy the rights to it in later years when I go in the ground..
 
:lol:

i think you got the math right aprox but depends a fair bit on how you discharge them.Eig's are reputably really good cells, but i have never used them.

I think for not too long rides, say max 40-50km round trip, you might get away with it if you go slow.

my first adaptto bike has 22s 10p samsung 20R pack. as i recall its 72watt hours/10p group so total would be just under 1.6kwh THEORETICAL capacity. weighs aprox10kg.
total bike is around 45-50kg at a guesse. its a prick to lift. I dont care about the weight like some, its an awesome solid ride :D
sometimes i wish it was heavier, like when im going 80-90kph in really strong wind


depending on how crazy you ride,10kw+ peaks, that can just dissappear in a puff, like say 20- 30km. going slow-ish(around 50kph) i can get aprox 50km and thats def. without pedalling cause i havnt even got a chain :lol:

this is with a 26" hookworm on front and a 3"x16" hydenau moped tyre on rear(21"wheel dia)with a cro.
hydenau k36.jpg

so not too much road friction but even with the 3"moped tyre i can sense the extra power required to get that thing squelching along the road, the friction of the rubber flexing as it rolls, as say compared to a 2.5"mtb type.

whatever, I think you'll have a lot of fun, and all the good components are there for flexability if you want to up the Ah down the track, or even go 22s.
 
You da man! Thanks for your time and providing all that insight for me! I will definitely make sure to post some results about it as I'm sure it will help someone down the road be cognizant of what they can expect on a build like this one. I agree I think there is a lot of fun to look forward to. I think it will be worthwhile at some point down the road to see what I am sacrificing choosing these tires. Again, thank you for taking the time to address what you did from your prospective, I found it very valuable, and sincerely appreciate it.
 
Thanks for the appreciation bro!

but really, i just love this stuff :D

only too glad to share what i can.
 
I am looking forward to see the finished build and the power consumption. What you are building is kind of the picture I had in my head for the ultimate e-bike. I think it is so cool that you take the road less traveled and go for those big fat tires. They look awesome and I am sure they will be nice to ride. If consumption is too much add a backpack for those long rides and be aware you are looking cool getting there. *two thumbs up*
 
macribs said:
I am looking forward to see the finished build and the power consumption. What you are building is kind of the picture I had in my head for the ultimate e-bike. I think it is so cool that you take the road less traveled and go for those big fat tires. They look awesome and I am sure they will be nice to ride. If consumption is too much add a backpack for those long rides and be aware you are looking cool getting there. *two thumbs up*

Ha yes, how 'bout a vest and balance it out? Great suggestion, I'll roll with it as necessary when the time comes, thanks for the encouragement...may have more of a use for that old ebike than I thought and use it for backup batteries..
 
Here's some updates and more pictures as usual if it helps anyone out or want to give any criticism.

- Sticker on the Display mentioned previously...my bad Macribs...schedules all Facocked now trying to catch up now that I'm back
- NYX knocked it out of the park as expected with the batteries, nice weight distribution and holds its balance..will have more when I make more electrical progress...uh yea that's what this site is all about finally gettin to it
- Replaced 10K thermistator with KTY81...I saw it seems to be resolved but only made it through 35 or 40 pages of the Adaptto Owners Thread so I wanted to just do it right the first time and an excuse to open it up and give it a good check. It ended up being a good decision IMO cause I was able to put hardly any pressure on the 10K and chipped right off with my finger and whatever glue it was shattered like clay, those guys seem to know there stuff so not saying it wouldn't have survived either. I use 3M Epoxy; not sure why a lot of members use Permatex or whatever but this is how I did it on my last bike and appeared to give accurate results. I did go back after this picture and put a little more of glaze like over the leads/shrink tube.
- With the amount of time lost and what I have left I decided to leave the stock teflon 11ga phase wires and cut em for a pig-tail exiting the axle. I don't know how worth it this was but dropped like $200 on Shielded wrap/tube and did the every wire in and out of the motor and will do the 8ga Turnigy and rest going to the controller. Not sure it was worth $200 but rolled with it.
- Got a picture there of the grommets I'll be using to fish wires through that need to go in the frame. They fit 8ga nice and click/lock as you tighten them and the seal compresses around the wire to be water tight.
- Made my Hydraulic Splitter to run 2 levers to one caliper that I mentioned I wanted for versatility doing tricks. Turned out well just waiting for Nitrile O-Rings because I'm keeping the Mineral Oil and if you don't know it's different than what's required for DOT fluid but think I'm good once I do that for no leaks...Oh yea those Peckers I bought the hose from said they would be black and that's a new type of color blind thing I guess so gonna cover that purple up with Polyester or something Black Braided Sleeves.

I dunno who reads this if anyone really and just checks the pictures out but it's all there for anyone who wants an idea and if it works they can follow some of this stuff for a guide and when/if I screw up you can learn from my mistake. There's one that you may learn from we'll have to see when I mount this controller and start making connections. I know you need to plug the BMS in order but if anyone can offer what other connections to do in order (if it matters) I'd appreciate the advice...Think this is what I'll do if I don't hear from anyone but honestly I tried reading so much I didn't retain everything I read or remember exactly...


->Connect Phase Wires Motor to Controller
->Connect Sensor Wires Motor to Controller
->Connect Charging Coil to Controller?????
->Connect Throttle to Display
->Connect Display to Controller
->Connect BMS Board to Controller
->Connect 2 packs to be one in Series
->Connect the Controller Negative to Battery Negative
->Connect BMS Leads from Batteries to BMS Board-In Sequential Order
->Connect the Controller Positive to Battery Positive
 

Attachments

  • NYX-20.jpg
    NYX-20.jpg
    223.7 KB · Views: 2,512
  • NYX-21.jpg
    NYX-21.jpg
    131.2 KB · Views: 1,221
  • NYX-22.jpg
    NYX-22.jpg
    257.9 KB · Views: 2,512
  • NYX-23.jpg
    NYX-23.jpg
    352.6 KB · Views: 2,512
  • NYX-24.jpg
    NYX-24.jpg
    351.6 KB · Views: 2,512
  • NYX-26.jpg
    NYX-26.jpg
    272.9 KB · Views: 2,512
  • NYX-27.jpg
    NYX-27.jpg
    204.8 KB · Views: 2,512
  • NYX-28.jpg
    NYX-28.jpg
    133 KB · Views: 2,512
  • NYX-25.jpg
    NYX-25.jpg
    266.9 KB · Views: 2,512
  • NYX-29.jpg
    NYX-29.jpg
    100.9 KB · Views: 1,221
  • NYX-21.jpg
    NYX-21.jpg
    131.2 KB · Views: 1,221
nice to see the progress.

im guessing the cable gland there is for the display wire, and the controller will be in the frame?

i would have liked to do that too, but iv decided to stuff as many 18650 samsung 30Q cells in there as i can and mount the controller externally.
looks like il be able to get 22s12p in there, 84v nom. ,~29AH

im also a fan of those cable glands, best waterproof seal for wires.
btw. what are your plans for waterproofing the hatch cover?
 
ridethelightning said:
im guessing the cable gland there is for the display wire, and the controller will be in the frame?

The gland isn't mounted there maybe the picture was deceiving or misleading, but it took me a little bit of time to find a gland that size which is smaller than ones I'm use to seeing placed on a car's firewall so that was really my intentions for that picture.

I'm going to mount the controller externally as well, but actually what I am giving a lot of thought to, that has me stalling at the moment is the orientation of the controller.

Before I brainstormed my wire routing options, I assumed that I would place the controller with the wires exiting at the bottom bracket to reduce my vulnerabilities to water puddling or running with gravity down the wires. This approach would also reduce resistance having the shortest possible Phase wires which presents another advantage.

Unless there are "short cuts" by splicing wires (I don't even know if possible) to minimize the number of wire holes entering the frame, from what I see when I did a rough layout sketch, was to have the wires from the controller oriented at the top, allows for cleaner wire routing in my situation. I know I still have the same number of wire holes if this isn't possible, but maybe the access points can be arranged more efficiently if it were and would reconsider IDK.

My logic whether controller wires pointed up or down, the potential problem of water intrusion should be addressed regardless. Assuming if I run thicker 8ga with EMI shielding individually on each then as far as I know the resistance should still be lower and sufficient having less than a foot of added length per wire.

Once I make this decision than I will machine a solid Alum shroud to protect that wire end at the top, seal it from water (also now odds are far less of getting the controller wire end submerged going through a puddle if deeper than anticipated), and it will act as a controller mount on that end. I want to make something similar out of thick Alum on the lower end by the bottom bracket to serve as a bash guard and again as a mounting plate too.

For this lower piece I was thinking about allowing it to pivot like a hinge at the controller than either spring or something like that to dampen the impact if I get a little too ballsy riding over a rock or log or something similar. Then to bridge the span between these two mounts, have a truss like design parallel to the controller's long edge, standing perpendicular to the frame, with thick walled hollow square tubing to chase the wires through and act like a rail guard.

Anyway I want to have impact protection as well for the controller and allow it to get adequate airflow but hold up better than a Raptor's guard if the case is that hasn't been redesigned recently..I haven't looked into it at all lately...I have no idea if you are able to visualize this :| Ha.. but will work on getting a pictorial representation posted in the near future.

ridethelightning said:
btw. what are your plans for waterproofing the hatch cover?

I have some memory like gasket foam tape you pick up at a building supply store I could use, or possibly placing a rubber extrusion on the frame opening and cover too if need be to have the two "mate". I haven't given it much thought but it's the stuff that has sectional profile similar to a "P" or "F" (dozens of profile options for different applications but these are popular) if you are familiar with what I am referring to. I will say NYX did a nice job manufacturing a close tight fit in regards to this and wouldn't be concerned in light rain but without a gasket of some sort water is more prone for my comfort in worst case scenarios.
 
Hey ridethelightning btw, do you have your NYX yet?
Any pics or plans in the works ya got going on yourself?

I'm curious to see your ideas for your build. As far as I know there's myself, Doc, and Morati and each with relatively, significantly different approaches shared so far and would be interesting to see what's in store for your vision and what influenced your project choices!
 
yes iv actually got a couple of nyx frames on the go.

Iv had them a few months now.
i was also considdering making a bashplate, that covered the controller and wires under the bb, from 4mm thickness 40x40alu angle as a mounting bracket then a moulded plastic or fibreglass cover over that.

definately a good point about running into a puddle!
you could have wires pointing up/forward but then make a cover to stop air pushing water into the controller.

because of this, i have recently been toying with the idea of having the controller mounted on a bracket from the seatpost, where it comes out near the shock.
this could then be incorporated into mudgard mount/structure aswell.

this would be better practically, but perhaps loose a few points asthetically(?)
Im still seriously considering it.

+1 to the gasket around the hatch opening.

this project is also one stall after another for me, so much to figure out if you want to do it right first time, and not end up with a swiss cheese nyx :lol:
 
Great update, don't know about other but I read every word of your updates so pls continue. And I read it all depsite the fact that I don't own a NYX myself but a Vector. But your vision for this bike is what my dream Vector would look like, beefy fat tires. Man I look forward to see this build completed.

For the controller the consensus seems to be to have the wires downward so that watersplashes/rain/morning dew or whatever don't travel on the wires and try to enter the controller as it would do if wires was pointing upwards. I guess if you are set on routing the cables in a way that would make more sense with the wires sticking out on top, rather you could mount the controller with wires exiting at the bottom, make half a loop so the lower point of the half loop is lower then the lowest point of controller and route the cable along the side of controller to your favorite place of entering the frame.

Come to think of it, madin88 did a clever thing with the max-e. He got his adaptto in the frame but connected to a heat sink. Then the heatsink itself is mounted outside the frame. No need to worry about water. You could do the same, even use heat pipes for connection. And from the pics it does not appear that madin's solution is eating up much space. This way your controller could be safely tucked away inside the frame, protected from the elements yet still get air cooling. If you use heat pipes for connecting the controller to the heatsink you will get even more cooling - and a closed loop cooling setup for the controller.

Madin88's heatsink.
GRS6R5h.jpg


Close up of heat sink
jaMGfXr.jpg


Not much real estate taken up by the controller as you can see.

HuRGKSH.jpg
 
Back
Top