OpenSource Handheld Controller (E-go similar)

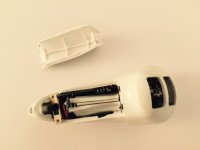
What is the motor used for on the E-go remote?
file.php

Lower left, next to the battery.
 
BadWolf said:
Hey guys,
I've been working on and off with a version 2 of my case. Right now; time and spending money on plastic for prototyping is limiting how soon it will be done.
Some updates that I'm done with are:
- Original screws to hold the case together (only need to supply 2 x 3m screws + nuts for the pcb and pot)
- Using existing powerswitch with a printed extension
- Can accommodate the original included 800mah battery
- Hole for the bind button
- A few mm slimmer then v1 and with lots rounded edged

There's still lots of stuff I want to do, for e.g having the option not to desolder the USB-port..

Here's a screenshot of what the new case looks like as of a few weeks ago:
Screen%2520Shot%25202015-05-10%2520at%252011.20.52%2520AM%20copy.jpg

This looks great!

I still have a makerbot printout of your older one sitting on my desk at home waiting for me to start moving parts into it.

Its worth repeating: if somebody decided to get some of these injection molded i'd buy one or three. Maybe even a lot more down the road if i start selling custom builds.
 
I don't know how they do haptic feedback in phones, but seems odd to add that kind of weight to the controller. That motor is likely an 8mm that they use in micro quadcopters like the Hubsan x4. It almost looks like the motor shaft is still attached. At least, they could cut that part off? Saves them money I guess.
 
sl33py said:
Ditto Torque. Badwolf's looks to be my favorite option currently. Unfortunately the pic he included isn't showing on my computer (regardless of browser). Odd, so unable to see the new v2 "awesomeness"!

Trying another image host service:
Bad_Wolf_v2_proto.jpg
 
that looks fantastic badwolf!

Does this one require you to move the USB still?

I'd totally chip in to help w/ your prototyping/plastic costs! Plan to release to thingverse so we can d/l print it?

Serious skills of folks here always blows me away. Back to drawing with crayons i go...
 
sl33py said:
that looks fantastic badwolf!
Does this one require you to move the USB still?
I'd totally chip in to help w/ your prototyping/plastic costs! Plan to release to thingverse so we can d/l print it?
Serious skills of folks here always blows me away. Back to drawing with crayons i go...
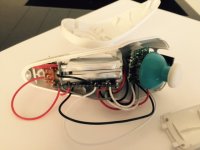
Thanks sl33py!
Plan is to have v2 in two flavors, one for those who can/want to move the usb-port for a "nicer" looking remote and one which will have a not require you to move it.

I've been thinking about selling printed cases for everyone who doesn't have 3d printer (with some post processing for a smoother surface) together with the resistors and screws+nuts+washers.
And if theres interest; already assembled modded transmitters for those who just want to and ride.

It would be very reasonably priced and money would go to finance further development and recoup material cost + broken transmitter from when I first took apart the gt2b. Not trying to make a big businesses or make money on this.

And yes, once I'm done and happy with it the files be available on thingiverse :D
 
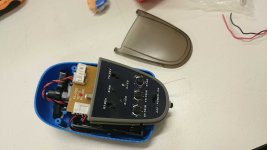
Just got a second GT2B to tear apart to try to model something that uses al stock components, did anyone else have to physically break theirs near the battery connector just to get it to pry apart? Glad I didn't tear into my first one.
 
I like the enclosure and the analog stick of the Nyko Kama nunchuck, but I prefer the controller to be programmable so it can show battery status using LEDs.

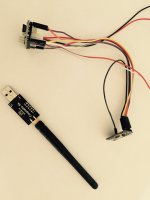
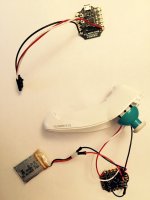
So I removed the internals from the Nyko Kama wireless stick, replaced the 2 AAA batteries by a stripped-down 9V Lithium Ion battery, hooked up an Arduino Nano (without header) to the potentiometers of the stick and added a nRF24L01+ transceiver. This allows for two-way communication.

FullSizeRender_4.jpg
FullSizeRender_2.jpg

I'm very happy with the end result, I might add some buttons and OLED screen later. It took some time to cramp all inside the enclosure. You can see a minor gap for the on-off button.

View attachment 1

On the receiver side, the controller can communicate with the skateboard using another arduino+nRF24L01+ and the controller can also communicate with a PC/Mac/Linux using a USB dongle. This USB dongle is a CrazyRadio PA and I use libusb and some custom C++ to send and receive packets, so one could create a wireless version of the BLDC tool with this transceiver.

FullSizeRender-22.jpg

Of course the nice 3D printed enclosure by Badwolf would work nicely with this setup, together with an analog stick such as the Adafruit 2-axis analog joystick (http://www.adafruit.com/products/512?gclid=COLAqraV6MUCFYqGfgodubUAgA)
 
Has anyone wanted to or experimented with a horn functionality?

I would love to have a button on my nunchuck that lit up a few of those voltage alarm speakers to make some dogs scatter. The speaker could be on the nunchuk so one could point it.

Has anyone integrated a horn into their system?
 
A horn would be easy enough to rig up to a gt2B's third channel. Get a 6v one for an amp or two and you could plug it straight into the 3rd channel on the receiver.
 
Here is my contribution with Arduino Uno scripts:
http://endless-sphere.com/forums/viewtopic.php?f=35&t=70021&p=1056496#p1056496

In short, the Bluno Beetle is a great little Arduino Uno clone with built-in Bluetooth 4.0 BLE, and only costs USD$ 14.90 at DFRobot.
Just use one for transmitter and one for receiver and you are good to go. See more details in above forum post.

FullSizeRender-27.jpg
 
Speaking to okp regarding the controller housing I have done and while he isn't keen on it, a friend of his is enjoying it. I am also finding no problems in my testing. We are both of the opinion that it will work for a bunch of people, so here it is.

Basically, this is a new controller housing for the internals of a GT2E controller from hobbyking. Doesn't use any extra parts and easy to convert. Uses a thumb throttle control, keeps the control panel board unchanged, and is much smaller than stock. Still a little large and heavy due to the 4 AA batteries, so if anyone wants to buy me a GT2B for a similar conversion then that could be cool..

https://grabcad.com/library/gt2e-controller-housing-for-electric-skateboard-1


2015-04-23 16.19.39.jpg
 
hey guys, what's new on the controllers?

I am really thinking of making a mold with clay or any other sculting material; then epoxy the mold... then cut it half ... and use it as an enclosure.

This will allow prototyping without 3D printers and make something that fits my hands almost perfectly ! Plus, I think epoxy/fiber are strong; at least for a basic controller enclosure.
 
Back
Top