Roadster E-Board Build (videos added 15/06/14)

Wow, those smaller wheels seem like the perfect match for a small urban m-board!
And they're more-less same price as regular m-board wheels.

Pneumatic wheels are still superior to urethane wheels of any size when it comes to any surface other than tarmac. Tiles are quite popular in EU cities, not to mention occasional cobblestones...
 
The thread you contributed to on silverfishlongboarding.com is pretty interesting sk8norcal. Plenty of options for wheels it seems.
There are scooter wheels which range up to 140mm - I found these 120mm Scooter wheels for £6.50/ea:


http://www.skates.co.uk/scooter-parts/jd-bug-eco-120mm-88a-wheels-blue.html

I'm not sure whether urethane is the way to go but I could be wrong! The Skike wheels look perfect, but the cost is just too much for me. This build is starting to veer away from my original plan quite heavily. It is turning into a real frankenstein!
 
i mentioned Onda wheels recently also,
wider profile
http://shop.ondamotion.com/mammoth/
http://cdn2.bigcommerce.com/server1300/80f71/products/52/images/309/Mammoth_1__01772.1366224589.1280.1280.JPG

i tried the rolls rolls longboard a long time ago,
their original came with these big skinny wheels,
rolls fast but no side grip,

Reviews_Rolls_top.jpg


http://www.donkboard.com
donk2-620x320.jpg
 
I guess if the rims are strong enough they should be fine. Looks good though!
 
Wow! Dave, I never read your full post. looks like its coming together nicely. I posted a battery/esc box last week that might work out in your application, under the board as you mentioned. I have 2 sets for mine which will be mounted between the bindings on top. What do you think?
 
those Bazooka wheels kinda sucked,
(btw, that's my friend Don, I am watching on the side)
they were prototypes
with only like 3mm of urethane... very slow..
i dont think they ever made it to market, or very limited #

wheels1.jpg


1VGROAKSTR00000-2.jpg


bazooka-wheels_4d98b5a4ba30b.jpg


daverobson08 said:
Now we're getting somewhere! It looks like Ground Industries has died off, am I right? The huge Good Thane wheels look brilliant!
LvUBZpY.jpg
 
@stuntmanmike: That's a neat little enclosure there. I like the quick-release feature, that looks very handy indeed. Is it an open frame? I have changed my design again so I don't know how I will be holding my batteries/ESC. I want to use CF/Fibreglass to make a custom enclosure but I really want to incorporate some form of quick-release system.

@sk8norcal: It's a shame, those Bazooka wheels look amazing! I wish I knew where you kept finding all these goodies (and I wish they were all still in production). I think I will definitely be using 5" pneumatic wheels in one form or another.

I have found a longboard drop deck on eBay US which I will probably fork out on shipping for. This is a quick mock up of how I think the whole thing will look:
5iO0tMi.png

(note: I will be using skate trucks and not channel trucks)

I like the angle of the nose/tail on this deck as is is not parallel to the ground so it should work better with my MTB trucks. The angle isn't quite as steep as on most MTB decks though so I hope it will be enough. Thoughts?
 
daverobson08 said:
I wish I knew where you kept finding all these goodies (and I wish they were all still in production). I think I will definitely be using 5" pneumatic wheels in one form or another.

i find them on my site... :wink:
http://wackyboards.blogspot.com/search/label/~~wacky-rollerskate-off%20road


I like the angle of the nose/tail on this deck as is is not parallel to the ground so it should work better with my MTB trucks. The angle isn't quite as steep as on most MTB decks though so I hope it will be enough. Thoughts?

use wedges?
 
@sk8norcal - Yes I had thought about wedges. I'll just have to see whether the angle is adequate without them first. I didn't realise that was your site, there are some great finds on there!

So today I decided to mock up the motor mount. I doubt that this will be the final piece but it will serve as a good test for strength, sizes, clearances, etc. I printed my design to scale and glued it to a sheet of 3mm aluminium. Unfortunately all I had on hand was a jigsaw, file and drill so the result is pretty ugly!

TsGgvrS.png

sySPYV0.png

UPVPXhI.jpg

Enph3pp.png

0lMdc2K.jpg

aRECah6.jpg

wYjHHE8.jpg

cKx8wi6.jpg


Everything seems fine with this arrangement, the motor sits nicely away from where the floor would be and with the deck I have chosen, I don't think it will foul that either. Perhaps I would have been better with a shorter motor though. The only potential issue is the choice of material; I have my doubts that 3mm aluminium will be strong enough. If not, I am confident that 5mm will be fine.

On another note, the wheels I wanted to use are no longer available on eBay so I am back to the drawing board on that front :/
 
Looks very jigsaw like, LOL. But not bad. Looks a bit thin but that works. I use 1/4" (6.35mm) thick on my aluminum motor mounts. They should hold up fairly well. I tried them today the new motor mounts that I created and they work awesome. If you don't have access to a CNC machine shop, I would shop around. There are some places that can create them and it's fairly inexpensive.
 
I like that shape, the oval is something we haven't seen before. I think it would lend itself very well to a water jet. Maybe you could get it to where you want it, then send it out to a machine shop to be cut .
One question,
How will you mount it to the truck? I think you could go either way welded or bolt on.
 
It's coming along slowly but surely! I had to grind down the wheel rims to fit the bearings I bought which was a bit of a pain but it's done now. Also my deck arrived as did my 8mm aluminium plate for the motor bracket. I'm still not sure how to secure it to the truck - ideally I would like to use the brake screw hole rather than welding like dirkdiggler has done with his motor bracket but it just depends on how much clearance I have. Hopefully I will find out within the next week or two!
 
Just a little news regarding the Toro TS-150A ESC - a couple of days ago I chased up the issue of the mobile app not working with the bluetooth module for programming the ESC and received a response saying the Android app had been updated. I checked on the Google Play store and sure enough it had been; I've tested it and it works. I can't say whether the iOS app has been updated/is working but for Android at least, it is.
 
I mentioned this in another thread, but I am going for a 8" rear razor scooter wheel on my build. The sprocket is already mounted, and you get the rim, the wheel, drum brake the tire and the tube for $20. The only problem is it's a 55t #25 sprocket. I think I like the idea of a belt a little better because of the noise.

Look forward to seeing what you do for a throttle.

200x50-rear-wheel-assembly-for-chain-drive-razor-e200-versions-28-35-5.jpg

http://www.monsterscooterparts.com/
 
Looking for 5 inch wheels? These you can mount sprockets on with m5 bolts but the plastic is very thin. http://der-rollenshop.sportkanzler.de/en/Nordic-Skating/Skike/Skike-Accessories/Skike-Komplettrad-Kids-125mm-SP-KIT-160-S.html
beetbocks will probably sell cnc ones soon. Wait for that:)
 
Okay, so a friend of a friend kindly offered to waterjet cut my motor mount for me. How could I refuse?

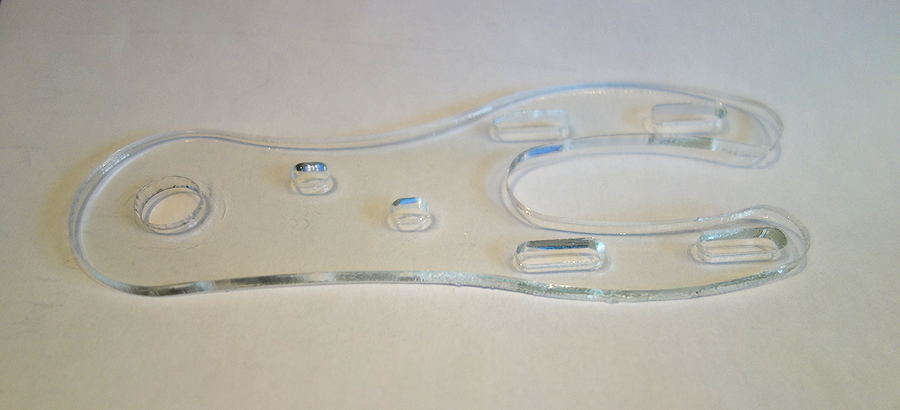
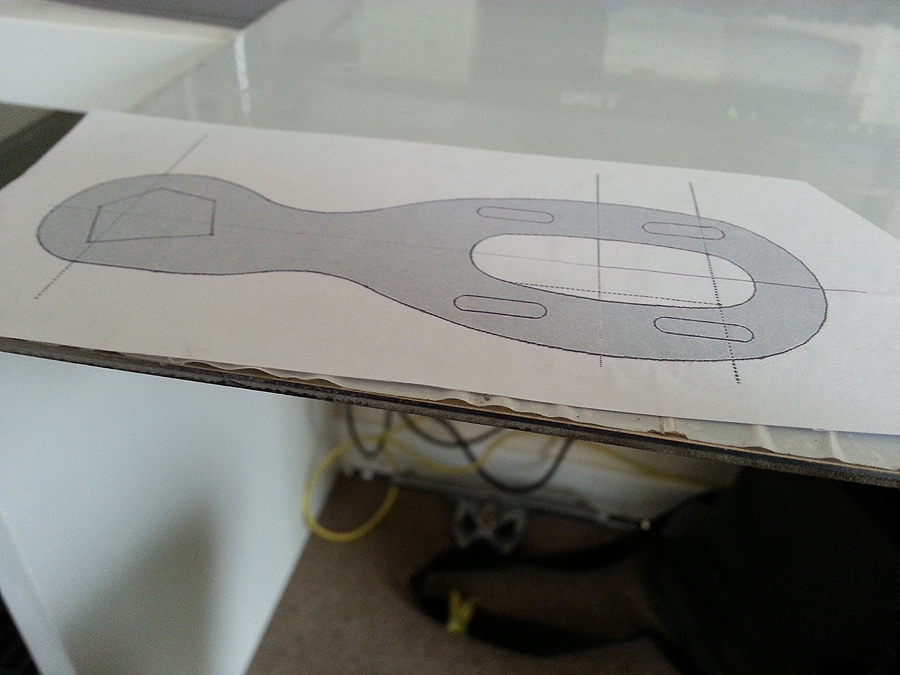
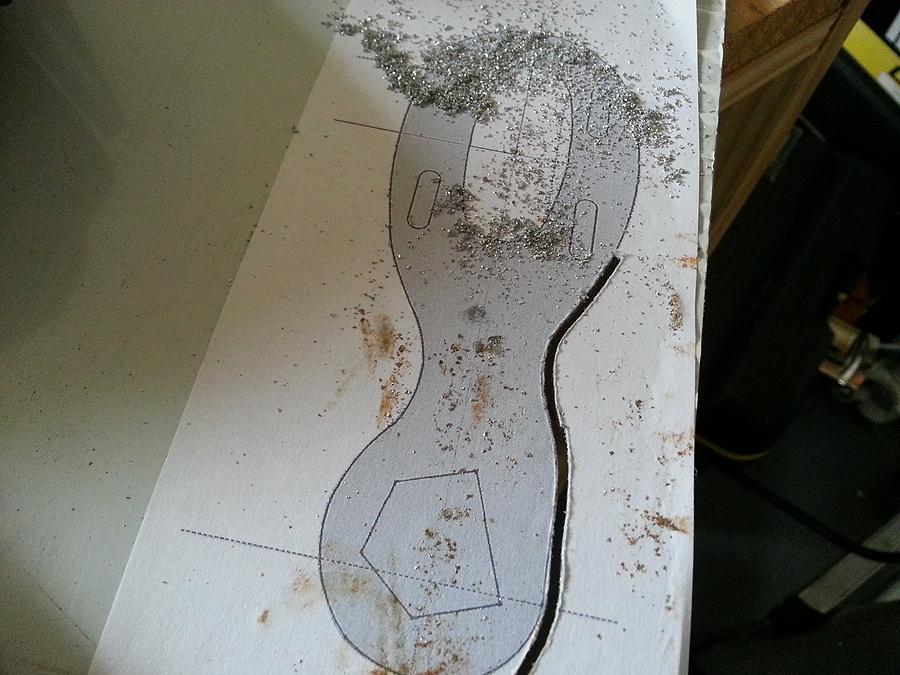
To check that the design fits the truck and motor within tolerances I mocked up the motor mount in acrylic using our laser cutter:

dIldQtf.png


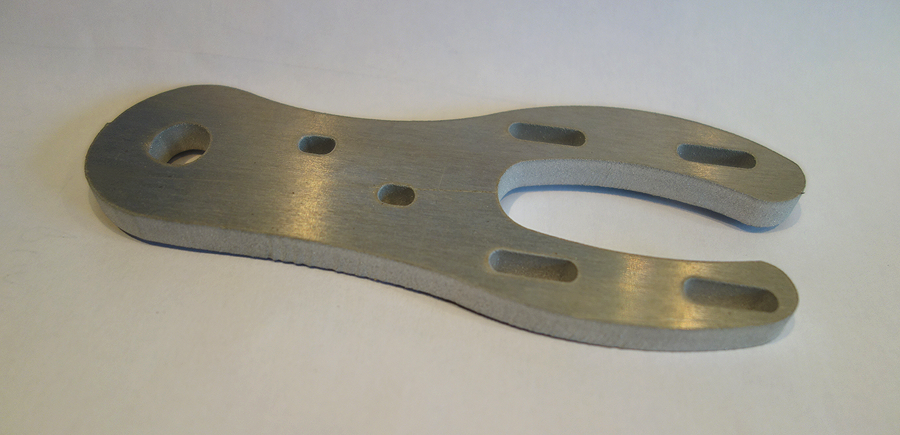
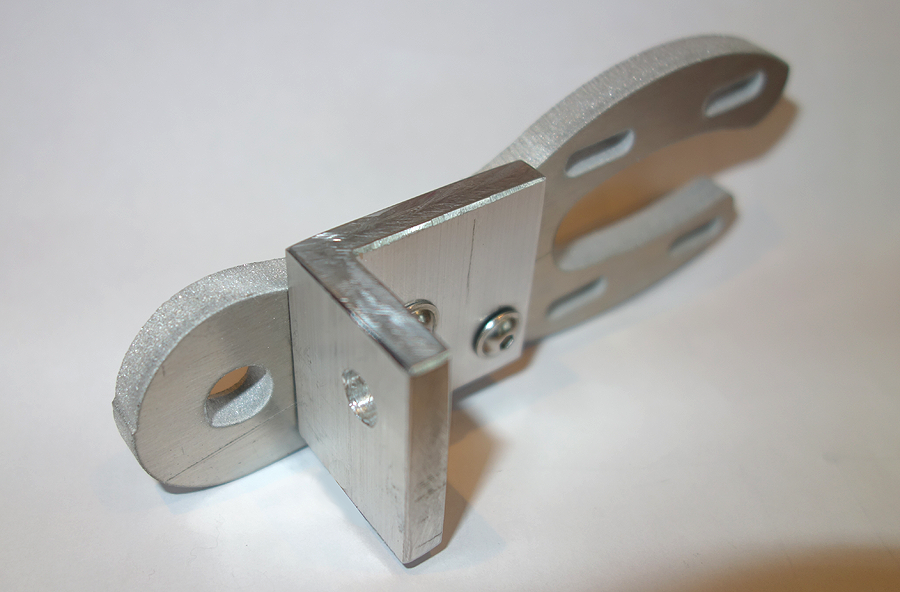
Everything looked fine so I sent over the .dxf file to the waterjet cutter. A couple of days later I had this:

uXRwzrg.png


D0UMALX.png


kVocYif.png


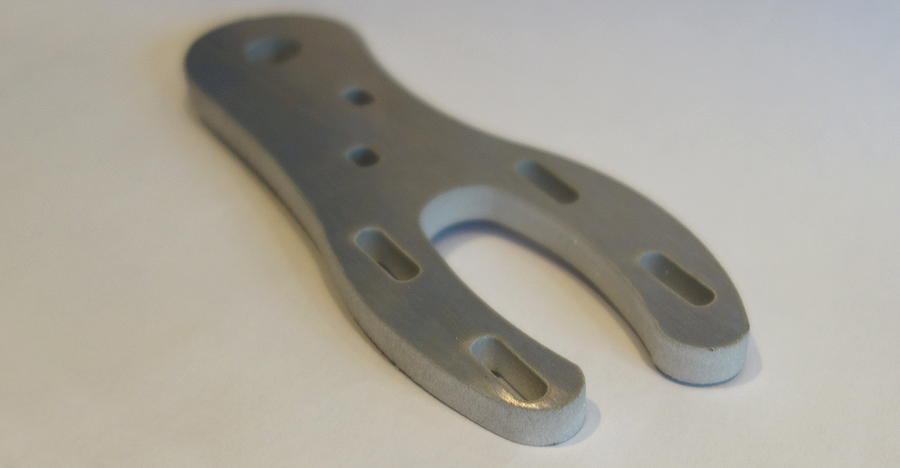
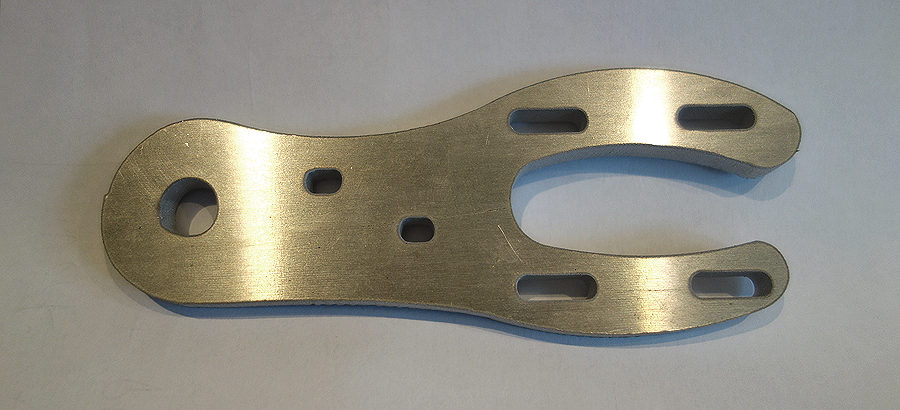
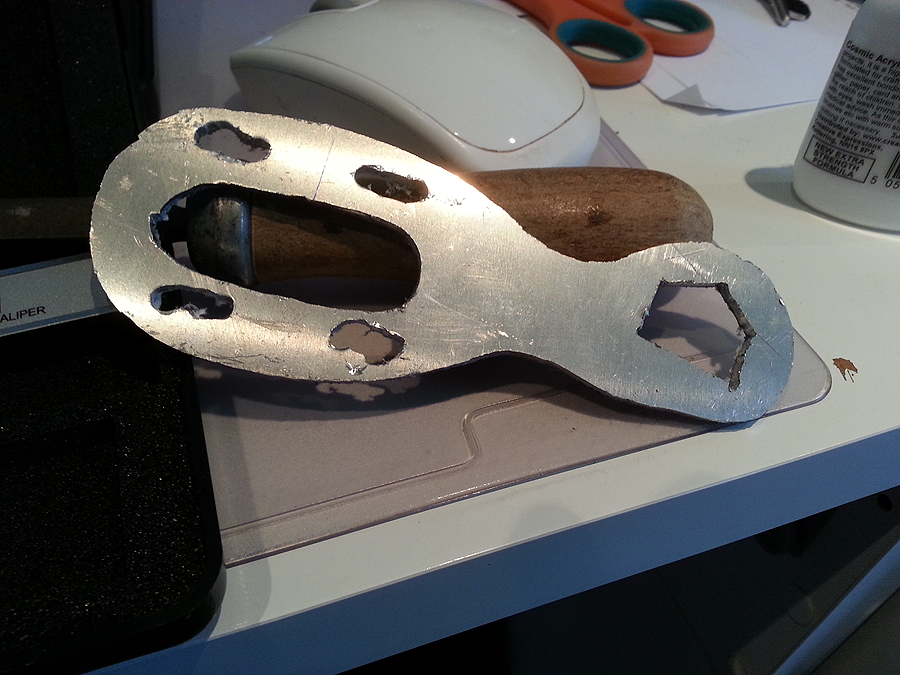
He cut this as a test piece out of ~6.4mm aluminium. The final bracket will be cut from 8mm. The finished edges are a rough texture which I didn't expect. On the final piece either I or he will sand them smooth. More importantly it is very strong and fits perfectly.

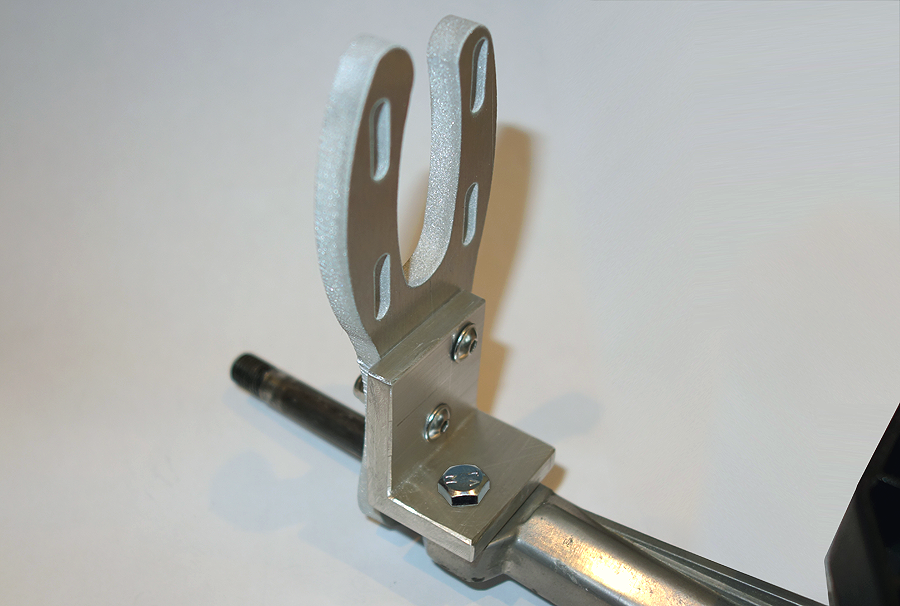
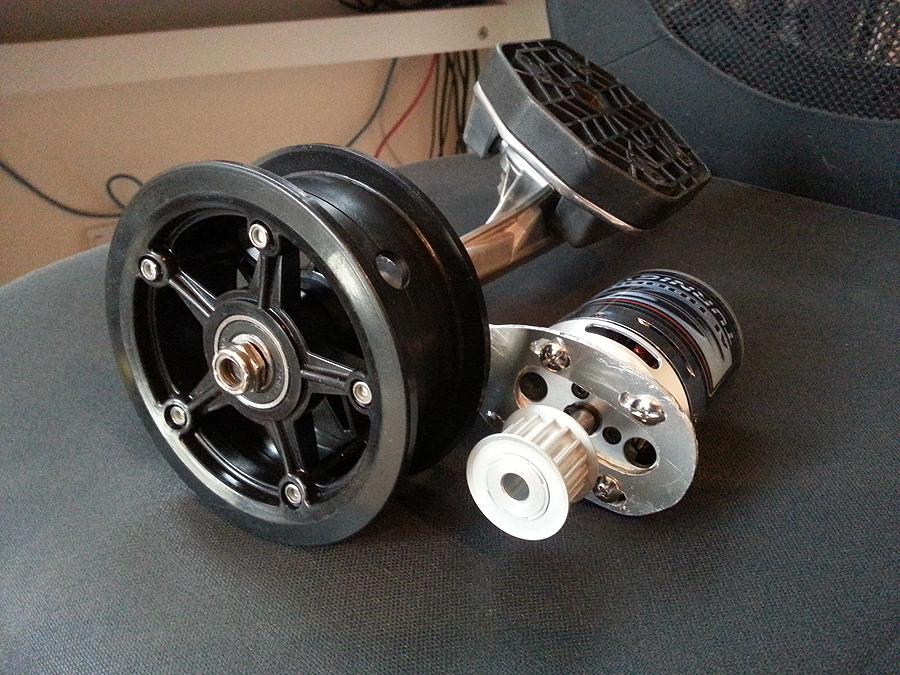
This is the second part of the bracket - Aluminium angle manually cut and drilled to utilise the brake mounting hole on the MBS Vector trucks.

yLqUfdv.png


M4 screws with nylon nuts hold the two pieces together. The slots in the motor mount allow the angled piece to be secured tightly onto the truck.

YiKyI7S.png


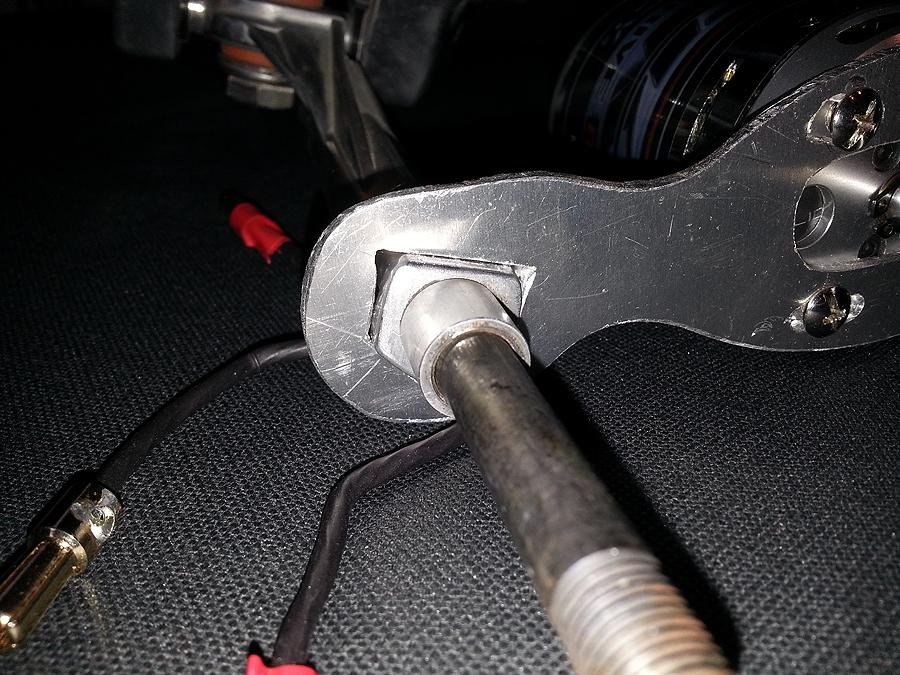
The axle slides freely through the round hole and both pieces are held in place with one M8 screw through the brake mount hole.

YMwX4QF.png


I'm very happy with the result and I'm looking forward to getting the final brackets cut and fitted. If anybody would like the dxf file for the mount then just let me know. It should be noted, this mount could easily be reproduced with hand tools. The only thing which is important is the placement of the holes. It wouldn't be difficult to drill the necessary parts manually. The only reason I have used CAD/CAM techniques is to more easily achieve a nicer overall look. If you are looking to create a simple motor mount without welding then this should do the trick nicely.
 
Back
Top