Lurkin
100 kW
I hope you are rounding off the outside of the holes you are drilling. It was pretty common for DIY auto aftermarket stereo installations to end in shorts, if not flames (where fuses had not been used) due to the rubbing of a cable against a metal edge. Usually a rubber grommet to protect the cable was the trick. But I see space is an issue. Perhaps a section of thick inner tube could be the go?
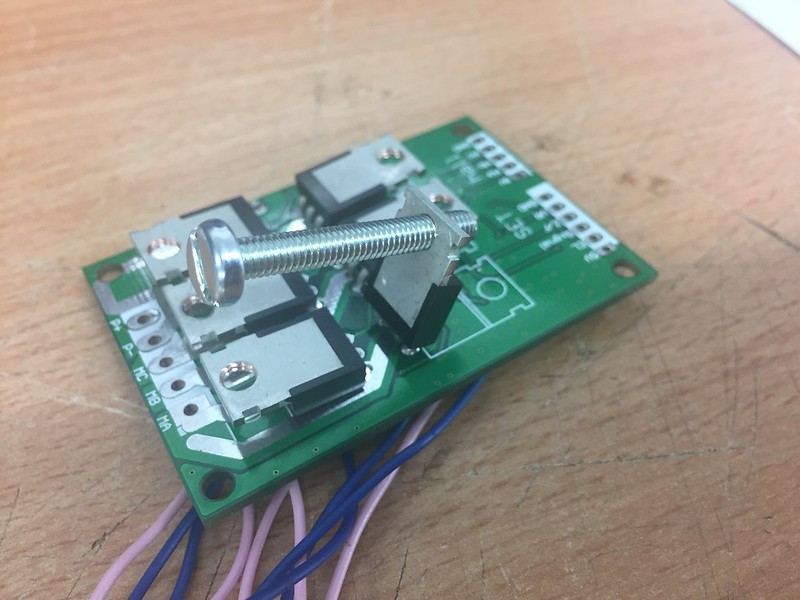
On that, I didn't see much discussion of fusing or breakers being discussed (perhaps I missed it).. but you might consider fusing your packs if you haven't already. Despite all the work you have done to prevent shorts (better scenario), it's a bit of a relief when a fast blowing fuse saves the bacon.
The FEA image you located also suggests the seatpost area is one experiencing high force. A shame it doesn't continue to model the actual seatpost itself as we are drilling holes in it... A seatpost failure could be pretty unpleasant/ damaging to your undercarriage!
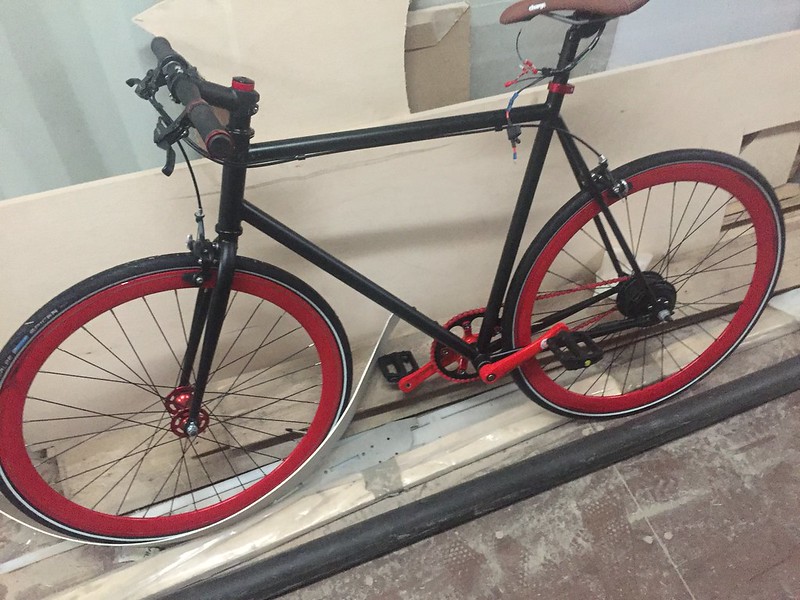
Keeping cables shorter is generally a better idea... if you could get the controller further down on the bike, less cable = less resistance and points of failure. It's really like you need a smaller or at least thinner controller to sneak it along a frame tube... perhaps a drink bottle is the go? Raged did a pretty sweet job of some stealth lipo packs in fake drink bottles... rather than trying to hide it all within the frame, add something people expect to see on a bike. food for thought in any case.
On that, I didn't see much discussion of fusing or breakers being discussed (perhaps I missed it).. but you might consider fusing your packs if you haven't already. Despite all the work you have done to prevent shorts (better scenario), it's a bit of a relief when a fast blowing fuse saves the bacon.
The FEA image you located also suggests the seatpost area is one experiencing high force. A shame it doesn't continue to model the actual seatpost itself as we are drilling holes in it... A seatpost failure could be pretty unpleasant/ damaging to your undercarriage!
Keeping cables shorter is generally a better idea... if you could get the controller further down on the bike, less cable = less resistance and points of failure. It's really like you need a smaller or at least thinner controller to sneak it along a frame tube... perhaps a drink bottle is the go? Raged did a pretty sweet job of some stealth lipo packs in fake drink bottles... rather than trying to hide it all within the frame, add something people expect to see on a bike. food for thought in any case.