Tidal Force : "The Long Ranger"

ambroseliao said:
icecube57 said:
Bought a new bag. http://cgi.ebay.com/ws/eBayISAPI.dll?ViewItemVersion&item=280890584644&view=all&tid=874325666018

The link is dead!

http://www.ebay.com/itm/120944715661?ssPageName=STRK:MEWNX:IT&_trksid=p3984.m1497.l2649
 
.... so looking at the space in my bag... to even things out i decided to go 24s 20AH... i feel ashamed... those damn 4s packs are so cheap tho.....
 
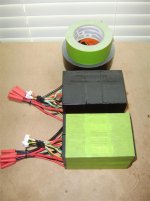
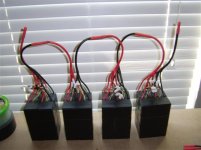
Ok here is what Ive done so far. Gorilla tape is a good tape but after a while the tape residue sticks to whatever its on. To prevent this and make for an easier extraction just incase shit happens to one of the packs I wrapped the packs in Frog Tape which is a painters line tape. Its has similar properties like a post it note. It leaves no residue and peels away clean. So I did my pre wrapping with this tape and i followed up with the gorilla tape. I still have my cycle stickers on the bottom of the pack for reference of which cell is low and the AH it gave upon its first cycle.

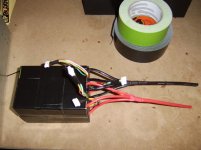
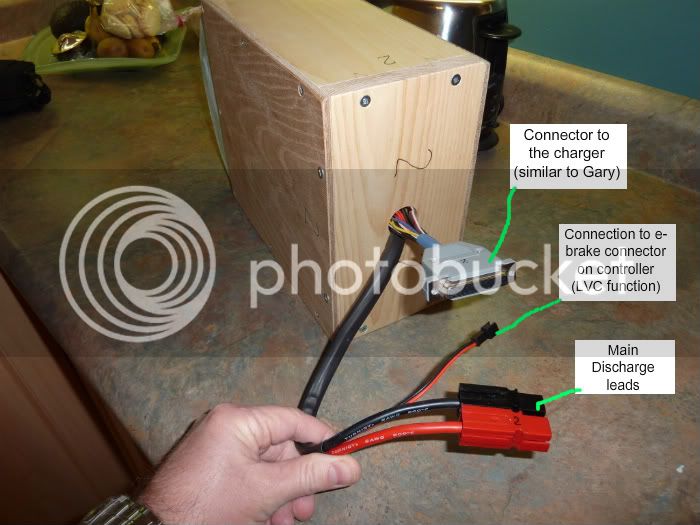
I also just soldered my main leads together. Im going to leave the balance taps intact. After i group the mains on all my packs I will do and inital balance charge on all sub sections. I have a 4 to 1 balance cable for such purposes. After which the packs will be left to fend for themselves... I will balance periodically one group at a time when the need arises. After this I will bulk charge all 6 sub sections with a 6 to 1 balance cable. I soldered the packs together and added a 6 inch tail of 8G wire. This will be terminated with 4mm bullets. Im not doing a high amp setup. Just the ususal 40-60A. So the 4mm bullets should be fine. Ive upgraded my build status to 24s 20AH ... My panniers should hold it easy without breaking a sweat. I plan to probably run 48v 12s on the trail. I can run upto a 44v 40AH pack or 88v 20AH and anything in between. Whatever combination I can make with my 4s 4p packs in series.
 

Attachments

  • STA71049 (Small).JPG
    STA71049 (Small).JPG
    41.6 KB · Views: 13,542
  • STA71052 (Small).JPG
    STA71052 (Small).JPG
    43.2 KB · Views: 13,542
I plugged in a newly made harness today. Actually it used the Turnigy 4mm connectors that you built for me, and a bunch of crimped connections using the hydraulic crimper and the copper crimp rings designed for electrical work. I used a buzzer setting on the meter to verify the wiring right before plugging in the batteries. No excitement at all from the wiring (which is a good thing), but had good fun riding it. Newly renewed ebike grin. :)

Those small front panniers look like the right idea, we just need someone to make some of those sized properly for Lipo and lined with corrugated plastic and/or foam. I want one for six of the 6S 8AH Zippy batteries, three on each side. Icecube, do you have a sewing machine? That would be a really useful business for someone to get into. People would pay good money for ebike battery bags that were made properly and sized right.
 
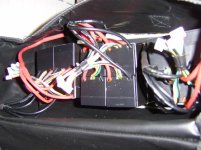
Ok here is an update for the past day or so.... I finally got 4 pack groups done. I clipped off the 4mm bullets and soldered them into one of the copper crimp sleeves and added 8G wire to extend the leads by 6 inches. On my next two packs im going to add 1 foot extension to 1 lead. This is so that when the wire exits the pannier and goes to the other side... it will be long enough to connect to the other pack in the middle some where. The balance taps are still intact. I just grouped them together with some zipties to keep them tidy. All cells are balanced with it 0.002mv of each other... NIIIICCCCEEE! and they are delivering 20.5AH or mor. Im waiting on 6 more packs to complete my last two packs. Three of these should fit nicely in each side of the pannier. I will make the rest of my harness when my pack comes in and the panniers are on the bike so i can cut it to length. This will help my business alot cause im guessing on harness lengths and its either to much or too little. On the charging im going to cheat and buy a premade 6 to 1 cable with 4mm bullets. Since i have 6 pack groups its only right get a matching cable...

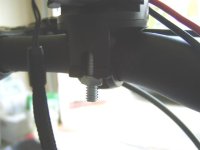
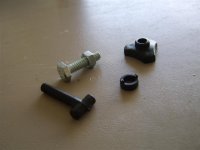
Today i revisited the cheap flashlight mount i got from china. The problem was when I mounted it to the handlebar the cheap plastic screw and nut they used to clamp it down strips when its barely torqued.... I figured out how to take the thing apart. I found some screws that i used to secure my torque arm and they were a perfect fit. I dropped the bolt in and put everything back together and it can really get it tight. The mount doesnt move. It securely holds the flashlight without wobble. I even bounced the front end of the bike about a foot. Its super solid... So some afro ingenuity saved the day.

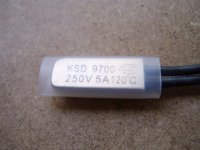
The 120c temp switches for my motor came in. They look cute. JB weld it under the winding loop and if i plan it right it should break the connection on speed 3 which will cause the controller to default to speed 2 which will be programmed some where between 40-60% max speed. Once the temps coold down to 85C +- 12C it will reclose and re enable speed 3.

Another bright idea would be to figure out how to use those 36v led throttles as indicators and use thermal switches similar to this cut the leds off let you know you are in the danger zone.. maybe mthods could figure something out... =P
 

Attachments

  • STA71063 (Small).JPG
    STA71063 (Small).JPG
    20.2 KB · Views: 13,516
  • STA71064 (Small).JPG
    STA71064 (Small).JPG
    41.1 KB · Views: 13,516
  • STA71067 (Small).JPG
    STA71067 (Small).JPG
    41.7 KB · Views: 13,516
  • STA71061 (Small).JPG
    STA71061 (Small).JPG
    44.8 KB · Views: 13,516
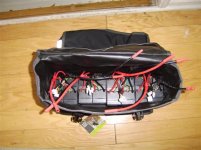
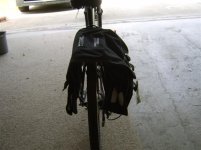
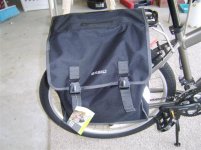
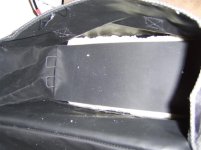
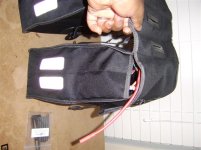
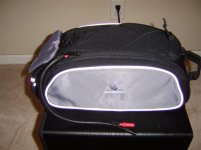
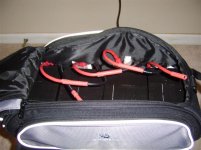
Mail man came today.. sent some stuff off... got some stuff... the usual deal. My panniers came in. Overall Im happy with them. But there is one flaw... there is this aweful sag with them... My first solution was to redo the clips that fasten the lid so it can help support the full weight of the packs .. then looked at the design of the bag. The bag was designed with the though that the panniers would be full of something at any given time so the way the flap closes on top it has like all this excess fabric. My solution is to get some great stuff expanding foam and create a mold thats the size of the pannier and create a .... elevated false bottom to bring the level of the packs up a few inches so that it bag appears and feels full and also when i go to clasp it close the weight of the pack will not only be supported by the back fabric but the closing front also. I also thought about making a very light wooden box to create the elevated false bottom with a storage compartment so i dont waste the space and i could put some tools or something of use in there. This panniers is like the worst case senario when im doing full range for full voltage. I may get a small truck bag this week to carry a 44v 20Ah pack.
 

Attachments

  • STA71068 (Small).JPG
    STA71068 (Small).JPG
    53.9 KB · Views: 3,228
  • STA71069 (Small).JPG
    STA71069 (Small).JPG
    46.7 KB · Views: 3,228
  • STA71070 (Small).JPG
    STA71070 (Small).JPG
    54 KB · Views: 3,228
Damn, had a nice detailed reply and got a 400 error while posting :x

Anyways, I use a light wooden box in each pannier, padded on the inside to keep the packs tight and I glued some pieces of the blue 2 inch thick styrofoam to the bottom that I shaped with a knife and rasp to the exact inside dimensions of the panniers. You can see a bit of the rounded blue foam on that pic:

P1040306.jpg


Everything fits tightly in the panniers, no sagging and nothing trashing around while riding. Only issue is all the weight on the back wheel, that's why I'm looking at a frame mount solution now.
 
I have a Topeak MTX rack bag on the back of my TF S-750 with my 9C and I don't like the extra weight back there either. I'm making a A123 20Ah prismatic pack now and plan on mounting it on the front handlebars. It should be a lot more balanced and hopefully feel smoother.
 
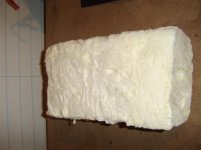
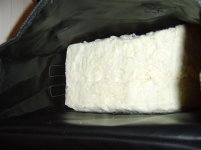
Got some expanding foam. Had a card board box as a mold. I sprayed the foam in the box. Ran water on top of it and let it drain out and then compressed it. It set hard in about 30 minutes.I cut it to size... put it in the bag. Put the batteries in the bag and closed the lid and it filled up just enough space so that bag is falsely full and i can close the bag properly and have it fully support. There is still alittle droop but no where near as much as before. I may just find a company that sale styrofoam blocks. It would look nicer.
 

Attachments

  • STA71071 (Small).JPG
    STA71071 (Small).JPG
    34.1 KB · Views: 3,205
  • STA71072 (Small).JPG
    STA71072 (Small).JPG
    30.7 KB · Views: 3,205
  • STA71073 (Small).JPG
    STA71073 (Small).JPG
    37.6 KB · Views: 3,205
  • STA71074 (Small).JPG
    STA71074 (Small).JPG
    51.7 KB · Views: 3,205
  • STA71075 (Small).JPG
    STA71075 (Small).JPG
    50.2 KB · Views: 3,205
On another note... who hates balancing... Just got two packs to replace my duds I sold.... in order to complete my 5th 16.8v 4s section. 1st pack is fine. Second pack im trying to get it in line but its being an ass. I dont think is a bad cell its just they are unbalance... call me anal but I like 0.005 or Less deviation so im sitting at 4.192 on my lowest and 4.200 on my highest...... The cell is coming up but im having to restart the balance cycle a few times to bump it along.. Need to invest in a single cell charger. Once i get all the packs on the same page... it will be time to tape it up and solder the mains together. I also bought some balance protectors. EP buddy has been out a while I found some ad 3dxhobbies for 30 cents a piece. Not as cheap as epbuddy but they are us based and ive ordered from them before.

Sad thing is i got 4 more packing arriving tommorrow to complete my 6th and last section. Hope there are no duds.... tired of cycling these mofos..
 
icecube57 said:
Call me anal but I like 0.005 or Less deviation so im sitting at 4.192 on my lowest and 4.200 on my highest......
Dude that's not anal, I've seen people institutionalised for lesser OCD than that :p
Seriously that's about as close to perfect as you'll get and unless you want to get the absolute maximum capacity from the pack with a 100% discharge it means nothing anyway. As you would know the cells get out of balance at the bottom end anyway and it's highly likely the first one will hit LVC while the others are still a bit higher. eg most of mine are around 3.4v when the runt hits 3v, but if you unwisely ignore the runt (eg if just using beepers) you'll find the others will cliff dive less than a minute later - which makes zero difference in the real world (other than shortening the life of the pack)

I think the early hysteria about lipo and balancing has made people overly cautious and/or mentalists about the whole thing.
Considering most of us aim for an 80% discharge near enough really is good enough when it comes to balance. If a few cells are at 4.17v while the others are at 4.20v it makes SFA difference to your discharge. Sure those cells at lower voltage are charged to slightly lesser capacity but if you're not using ever last drop anyway then it doesn't matter. I've become particularly aware of the trivialities of precision balancing at the top end recently with my isolated balance chargers. Unlike hobby chargers it chargers each cell individually so you can see how much current each cell is taking. The ones to hit HVC first turn off and allow the other cells to keep charging. On a closely balanced pack (say 4.18-4.20v) The cells that are at 4.18v continue to charge for maybe a minute longer than the ones that have already hit 4.20v and stopped taking charge.
So in use, that extra top up for those cells probably gives 30 seconds of discharge. Or less, and that's under light use (1C or less)

So, assuming you're pulling absolute maximum capacity from your pack, is an extra 30 seconds of riding time worth losing your shit over ? :)

Just sayin... :p
 
I'm certainly not an expert on RC LiPo yet, but even with the mismatched repaired packs I've got here, I haven't seen a problem with the <50% discharges I've put them thru in tests so far, for balance. I dont' charge any higher than abotu 4.15v/cell, and I just bulk charge, checking sometimes with a DMM or a Battery Medic, during charge or at various states of discharge. I see a few hundredths of a volt variation most of the time, if that. Only thing I did at all to them was manually balance the cells to within that variation to start with, since the cells have come from various different packs with different SOC and age and whatnot.

I'm sure once I start discharging them deeply I'll see more variation, but so far, not a problem in my short work commutes and test rides.

Then again, I also carry mine around in lightly-vented ammocans. :lol:

Hyena said:
Wow that's an epic fail on the motor case. It's definately made of CCA! (chinese cheese alloy)
At least it isn't radioactive like some "stainless steel" pet dishes recalled recently. :lol: (though to be fair, these were from India)
 
http://www.amazon.com/M-Wave-122461-Bicycle-Topcase/dp/B003BOEJC2/ref=pd_sim_sbs_sg_1

What do you guys think of the. This actually seems like it would fit my entire pack or atleast 4.
 
What do you want the weight distribution to be on your ebike?

It seems important to avoid too much weight on the rear and distribute some to the front.

A trunk full of batteries tends to make the bike want to lift the front wheel easily, and it tends to make the bike wobble on steering input.

Best weight distribution is high in the front and low in the rear.

See http://en.wikipedia.org/wiki/Bicycle_and_motorcycle_dynamics
 
Ok so a status update. Ive nicknamed my build The Long Ranger" due to my moderately larger than average pack. 125-150 mile range at 15-20mph pedaling along.

Almost all the wiring for my switches and controller and everything is done. I had to order a bottom bracket tool to install my PAS. I got that installed. I gotta hook up the ground to it to make it work. One of my 3 position switches enables and disables the throttle and PAS. The other switch controls speed 1-2-3 I have to wait until my motor gets here so I can install the thermal switch that disables speed 3 and defaults it to speed 2. Controller power switch is wired up. I have my ebrake levers wired. Also I have push button regen on my multi switch also. I had to rewire the switch internally because the common ground would have fubar somethin big in the controller with full pack voltage going to some of the leads. Lyen needs to stop making this info top secret cause if i didnt have common sense to check continuity and mark my wires with my volt meter I would be screwed.

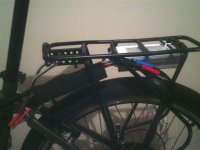
I didnt upgrade the phase or power wires on my controller but I did shrink wrap them from the board to the outside of the controller... Twice on the outside of the controller. Controller is mounted under the rack put on XT150s on the power and the phase wires. I got the wires neatly bundled and streamlined. Looks very clean.

I reinstalled my BB7 brakes on the front. I have Vbrakes with kool stop pads on the rear.

My SA CA should be in the mail somewhere. My motor is in the mail somewhere. I made foam blocks but I ended up order some styrofoam off ebay to fill up the space at the bottom of my bag. I still have to finish my last 4p section... Ive been busy with harnesses... While trying to juggle my build. I havent officially made my harness because Im waiting for my foam to come in for my panniers so I can measure it off correctl.

How many cans of varnish did you people use on one motor when your sprayed.??

I also need a rack bag that can hold 3 of my parallel pack sections 4 would be nice. The packs are 4x4x7ish.... Its slightly rounded up. I cant use topeak beam rack and do not plan to buy one. Their bags are nice but that rack system is proprietary. I dont want to use my panniers all the time only when Im going on extended rides where i need the extra voltage or wh for range.

I ordered a GT Power watt meter as a second reference for charging and discharging. Ill just have it in the bag and compare it with my CA. I need a good meter to spot check cell balance on my packs from time to time. EPBuddy seems to be out of cell logs. I cant justify buying the one that logs .. Anyone know of a source for them.

I aslo ordered go 25 4s jst protector housings. They came in yesterday and I installed them on my balance taps. They definite look better and more professional looking and feel better than the tugging on the bare wires.
 
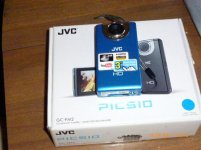
I thought it might be a time to get a new camera. I wish i could afford a go pro but it cant justify it. There is a good alternative. its the JVC Picsion GC-FM2. http://picsio.jvc.com/specifications/index.html I picked up one for 65 bucks on ebay. I found a mount for 12 bucks and bought a 32gb Sd Card for about 120. So everything came in at about 100. The good thing is I have a 5v cell phone charger that Im using for a dc to dc to power my light so All I have to do is splice in a usb cable and I can charge/and capture 5 1/2 hours of video at 1080 1920x1080 resolution. Has time lapse which i will prob use a lot just to keep my long rides short. This means I can get rid of my sorry ass key chain camera.

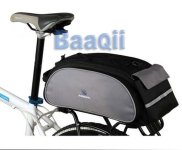
I found a rack bag that should hold 3 if not 4 of my packs.

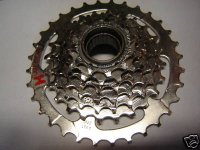
Bought a 7 speed freewheel with an 11 tooth cog.

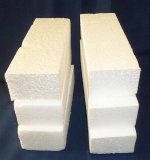
Bought some foam blocks to raise the bottom of my bag so the panniers fill out better. Much better that the expanding foam.

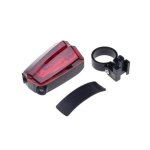
Bought one of those flashing laser bike lane lights. Its novelty but it has a purpose.

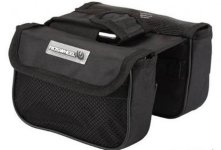
I ended up rebuying the top tube bag. Except its all black instead of yellow and black.
 

Attachments

  • $(KGrHqVHJCUE-gWLFlq4BP3wVs4cg!~~60_3.jpg
    $(KGrHqVHJCUE-gWLFlq4BP3wVs4cg!~~60_3.jpg
    27.3 KB · Views: 3,312
  • !BcvEhewBmk~$(KGrHqQH-EYEquVLEsYUBK1zsCh8S!~~_1.jpg
    !BcvEhewBmk~$(KGrHqQH-EYEquVLEsYUBK1zsCh8S!~~_1.jpg
    21.3 KB · Views: 3,312
  • $(KGrHqR,!jYE650+ky(LBO565YNj,g~~60_57 (Small).jpg
    $(KGrHqR,!jYE650+ky(LBO565YNj,g~~60_57 (Small).jpg
    23 KB · Views: 3,312
  • $(KGrHqF,!jUE-bMwI9c3BPvecfV(M!~~60_3 (Small).jpg
    $(KGrHqF,!jUE-bMwI9c3BPvecfV(M!~~60_3 (Small).jpg
    11.8 KB · Views: 3,312
  • $(KGrHqV,!oEE-2SvHZU1BP38OD8Meg~~60_1 (Small).jpg
    $(KGrHqV,!oEE-2SvHZU1BP38OD8Meg~~60_1 (Small).jpg
    26.1 KB · Views: 3,312
  • $(KGrHqNHJ!0E+PJsrzDsBP8LvqrmO!~~60_12 (Small).jpg
    $(KGrHqNHJ!0E+PJsrzDsBP8LvqrmO!~~60_12 (Small).jpg
    37.1 KB · Views: 3,311
I am long overdue for an update.

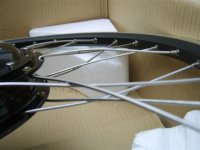
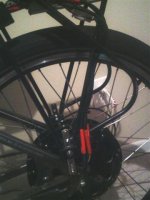
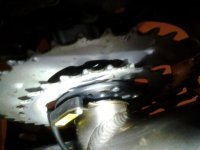
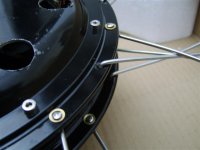
I got the wheel. Rewired the wheel. Put a 120C temp switch in the wheel. Shrink wrapped the phase wires. Shrink wrapped the hall and switch wires. This is just a minor upgrade to the stock teflon wires. Did several coats of Spray On motor varnish on the stator. Let it dry for a day. Drilled (9) 1 holes in both side covers. Spray treated the covers and the magnet ring. Respoked the wheel with a better lace pattern for fat people. Used brass washers and one of John Homes spoke pattersn. 13g steel spokes. Got the wheel tensioned and trued at a LBS. Mounted my 2.35 Big Apples on it. Still trying to get my V-brakes perfect on the ride.

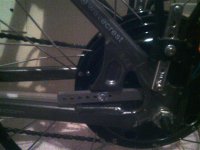
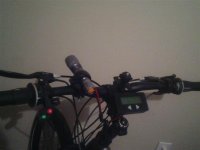
The controller has been wired after many hours of soldering and shrink wrapping and testing with my DVM. My test spin ups at 50.4 and 67.2v were good. Havent tested it at 84 or 100v yet. Throttle works. 3 speed switch works. PAS works. Ebrakes work. SA CA works. I got the hall phase combo working on the first go. I have two of Lyens torque arms in the built in Tidal Force torque arm slot. Had to drill one of the holes in both torque arms to accept a bolt that will secure it to the frame so it won move. I have a Lyen multi switch that im using for the 3 speed switch. Controller on and off button and push button regen. About a week ago I installed a power tap in the SA CA so I can use my DC to DC converter for my light and possibly camera. It pulls a very reasonable amount of current from the pack. Less than .1 A when powering my LED Flash Light. Controller is mounted under my rear rack. I used 4mm bullets on the phase connections of the motor.. xt150s on the controler. I know the motor and controller will have some losses due to the small gauge wire. Hoping these oversized connections will heatsink some of the generated heat into the extension cable. My extension wires is 8G between controller and the motor. I have the thermal switch to interrupt Speed 3 which is 120% when the motors over heats which drops the controller to the default 30% top speed which is speed 2. Speed 1 is programmed to 60% top speed.

Still waiting on my small battery bag from china. Dont wanna run the panniers unless im going on a long ride or im running 100v.

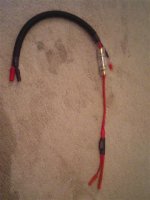
I still have to make myself a harness. Im totally lacking motivation. Planned to uses fuse and precharge. That spark is scary. I dont have to make much i just wanted to get my lengths right. Since I already did the paralleling dirty work on my batteries all i have to do is series my groups. Im essentially making extension leads from the battery to the controller which should be a walk in the park.... like said motivation is the key.

I gotta tweak the Speed 1 speed to match my pedal cadence so PAS functions correctly. PAS is scarey in Speed 2-3. It literally launches off the line. I have PAS on this build cause i want a very mild assist on my bike without using the throttle but i want it to be like 50-100w of assist in the flats to where you can barely feel it but you also know it will come in with the truth on hills. I will have a 1kw pack minimum and a 2kw max. So even if pass is wasting power i should have like a 30-40 mile range carrying a small pack. PAS since it can go full speed if you are in speed 2 or 3 it does promot faux pedaling which increases my stealth from the popo out here on our multi use trails.
 

Attachments

  • STA71096 (Small).JPG
    STA71096 (Small).JPG
    39.1 KB · Views: 3,264
  • STA71097 (Small).JPG
    STA71097 (Small).JPG
    41.6 KB · Views: 3,264
  • PIC_0002 (Small).JPG
    PIC_0002 (Small).JPG
    38.6 KB · Views: 3,263
  • PIC_0004 (Small).JPG
    PIC_0004 (Small).JPG
    36.6 KB · Views: 3,263
  • PIC_0005 (Small).JPG
    PIC_0005 (Small).JPG
    23.5 KB · Views: 3,263
  • PIC_0007 (Small).JPG
    PIC_0007 (Small).JPG
    30.9 KB · Views: 3,263
  • 2012-07-29 04.48.21 (Small).jpg
    2012-07-29 04.48.21 (Small).jpg
    37.1 KB · Views: 3,263
Alan B said:
I would add some kind of interlock so when in speed 2 or 3 the PAS is DISABLED. It ONLY should work in speed 1!!!

Also, are you concerned about too much weight in the rear of the bike? Won't this give it a tendency to lift the front wheel and have poor stability?

Speed 1 and Speed 2 might be ok because we are looking at unloaded speed. In the video. My next plan is to intergrate a switch for pas.

Its torquey but not that torquey although i havent rode a motor like this at 88v to often. Only at 66v with moderate amps With high speed/voltage or with my extended range the panniers will be on the bike and the weight will be low on the rear so the COG should be better. For shorter distances I will have a rack bag that doesnt affect riding to much.

Im going to revisit the area that broke my arm last year and hopefully I will be able to shed some light on the situation.
 
Bag came in today and it perfectly fits 4 of my pack sections in one nice row. It feels solid on the rack. 1.34kwh of power 16 4s hard case packs.

Ive also done my harness a little bit different than I do other peoples. I need to tweak it a little bit but It works for me. Pictures up later today. Im tired as hell.... going back to bed.
 
[youtube]jtQVtytubdQ[/youtube]
 

Attachments

  • PIC_0011 (2) (Small).JPG
    PIC_0011 (2) (Small).JPG
    38.3 KB · Views: 3,050
  • STA71113 (Small).JPG
    STA71113 (Small).JPG
    40.7 KB · Views: 3,050
  • STA71111 (Small).JPG
    STA71111 (Small).JPG
    53 KB · Views: 3,050
Update. Changed the fuse to a MAXI and went up from 50A AGU to 80A MAXI. My DP CA came in from methods. I installed and calibrated it.. The CA was peaking at 65-70A. A little bit agressive. I toned it down to where its doing 55-60A with peaks up to 70. I had a problem where i thought i killed my controller. I consulted with Lyen after a few messaged back and forth and alot of probing it turns out his program adapter dongle interfers with the controller and prevents it from turning on. I felt like a dumb ass. Ive been conducting my tests at 16s and i was going to eventually go up to 24s but it requires me to use panniers. But 20s 84v v20Ah will fit in my rack bag. My previous build I was running 18s and call me chicken.. but I tried 20s for 1-2 miles and 20s puts me at the edge of my seat back where I kinda want to be but i kinda want to back down too but man the power still puts a smile to my face the... EV Grin is back. When I went to 20s my 5th parallel section wouldnt dit in a 2x2 formation so I reconfigured it in a 1x4 format and it fits in the bag perfectly. I couldnt be more pleased. Thats why im not going to 24s cause 20s fits pretty damn good in the bag and the cumbersome pannier isnt worth installing. My heel kinda hits the bag...

I also removed the killer PAS. That was way to twitchy on any speed. Im starting to get a hang of the CA and its limiting features. I got the soldering iron out and shorted CR to ground now so i now have cruise control.
 
Back
Top