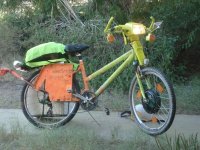
Amberwolf's DayGlo Avenger, MkII

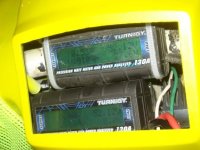
For a test run, I did a ~1 mile trip to the grocery store and the same back; no pedalling, 15-17MPH. The first time I braked with the regen I realized I had forgotten to install TWM2 to monitor the regen current. :( I fixed that after I got back:
dsc03359.jpg
It's just tucked into place, not tied down yet.
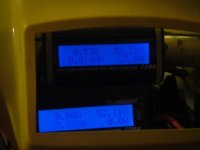
dsc03360.jpg

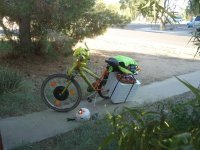
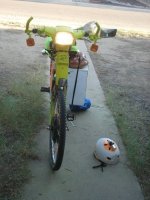
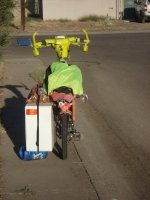
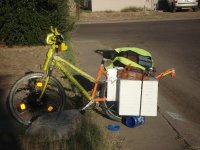
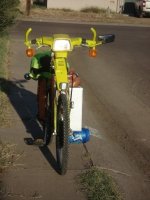
It was around 5:30pm when I got back, and I decided to take some pics of the loaded bike, in various angles to the sun, and in the shade. Note the DayGlo visibility vest wrapped around the backpack on the rack; I wear the other one and keep that one in the backpack with my velcro straps and stuff, so that I can add some visibility when I am less maneuverable. It definitely makes a difference in visibility, although I don't know if anyone actually gives me more space because of it, yet. They definitely do give me more space and/or don't pull out as much since I put that headlight on.

Rear shot, in front of the house, in the shade.
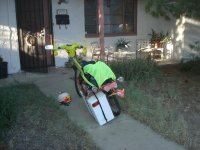
DSC03345.JPG

Right side shot, same place.
DSC03347.JPG

Left side shot, same place.
DSC03348.JPG

Front shot, same place.
DSC03349.JPG

Some pics out in the sunlight. First from the left side with sun to rear.
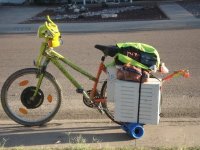
DSC03350.JPG

Rear shot, same place:
DSC03351.JPG

Backlit by the sun, right side:
DSC03352.JPG

Left side, same place:
DSC03353.JPG

Front, same place:
DSC03354.JPG

Front, facing the sun:
DSC03355.JPG

Rear, backlit by sun:


Usage numbers, including the lighting:
To store:
26.1Wh
0.533Ah
51.91Vrest
43.33Vm
21.54Ap
946.6Wp

Home, hauling a 10lb bag of potatoes, a cargo pod full of 30lbs of groceries, and a backpack with another 25lbs:
38Wh
0.815Ah
51.72Vrest
42.75Vm
21.4Ap
930Wp
 
More boring data today, but now including regen braking numbers!

To work (the usual, plus the lights now):
50.81Vr
41.78Vm
74.4Wh
1.653Ah
938Wp
21.74Ap
Regen:
1Wh
0.02Ah
390Wp
7.3Ap

Home (the usual plus the lights now):
49.67Vr
40.97Vm
83.8Wh
1.86Ah
904Wp
21.68Ap
Regen:
1.3Wh
0.027Ah
4.27Ap
242Wp

So I guess I brake more often but from lower speeds, on my way home, based on that data. Interesting, and I never really noticed that.

Charging data once it's done, this time monitored by the WattsUp WU1 since I have TWM1 and 2 in the bike now.
 
Since "sprucing up" DGA with that headlight housing, I've had nearly a dozen people come up to me while I'm parking it at various places to ask me about it, how to get one, etc. That's about ten times as many as I usually get in that time with DGA; and they all seemed a lot more interested in it than most of those that usually ask. More eye-catching than I thought. Might have to see about setting up that bike alarm I'm working on a little faster. ;)

I gave a few of them some cards I'd made that refer to my blog and this forum, as well as my Electricle email address from the blog, in case they decide to pursue further info about converting their bikes. The rest were just curious; perhaps feeling out the costs and ways of doing it. One was very interested in my recycling and repurposing of stuff; in contrast everything he had with him and the bike he was on looked high-end expensively-new. :lol:

It'll be nice if something comes of some of those conversations, but even if not, it was fun talking.


But mostly, another boring data post:

Charging data from last night using WU1:
Pack A (2/3 of the 36V pack):
24.98V start
28.05V finish
2.964A peak charge current
87.6W peak charge power
7.17Ah put back in
200.4Wh put back in

Pack B (1/3 of 36V pack plus 12V pack):
25.28V start
28.19V finish
2.964A peak charge current
87.6W peak charge power
6.944Ah put back in
28.19Wh put back in

Oh, and a bit of possible problem: WU1 has started acting a little wierd--it's been doing that same black row of boxes on the LCD that the other two do, but at least WU1 still responds if I disconnect it from power then reconnect it again (so far). I'd say one in three times it's done this in the past week or so. :(


Usage data from today, usual conditions:
To work:
52.12Vr
43.45Vm
2.055Ah
73.3Wh
986Wp
21.57Ap
Regen:
0.017Ah
0.9Wh
5.37Ap
289Wp

Home:
41.75Vm
50.79Vr
1.965Ah
89.4Wh
21.58Ap
959Wp
Regen:
0.034Ah
1.8Wh
5.58Ap
297Wp

Charging data won't be available tonite; I've gotta get up in the morning early so there isnt' time for me to charge and watch readings before I have to try sleeping, so they will just be charging simultaneously with the WU1 on just one pack.
 
More boring data. ;)

Usage from today, standard work commute plus lighting and regen:
work:
52.18vr
43.3vm
50.4wh
1.722ah
1006wp
21.51ap
regen
0.024ah
1.31wh
353wp
6.5ap

home:
50.50vr
41.4vm
89.9wh
1.993ah
949wp
21.5ap
regen
0.028ah
1.2wh
130wp
5.79ap

no charging data again today, same reason.

between having to be up so early for work and my healing dislocated left pointer finger, I'm not getting anything else done for a little while, probably. My left thumb still hasn't healed form whatever stressed the last (endmost) joint, either; I can't grip anything with it (so shifting on the front is jsut about impossible). Nothing hurts much unless I put any kind of stress on the joints, especially sideways movements or pulling types of stress. Then I see spots. :(
 
work:
51.65vr
42.85vm
87wh
1.916ah
970wp
21.67ap
regen
0.01ah
0.5wh
181wp
3.29ap

home:
50.37vr
41.2vm
86.2wh
1.931ah
937wp
21.68ap
regen
2.2wh
0.044ah
326wp
6.11ap

Another one of those "wish I was videoing the ride" days; two people going wrong way round Metro Parkway this morning, both of them on my side of the road; one of them was honking at every vehicle he passed as they all flashed their lights at him, honked, pointed, etc., the other just kept stopping whenever a car came the *right* way around, waiting for them to pass, then kept going the wrong way. :roll:

A bunch of people at a bus stop were standing waiting for a bus, and one guy kept jumping out just off the curb at traffic, yeling BOO and waving his arms, apparently trying to see if he could cause someone to swerve. They did--nearly onto the sidewalk, maybe trying to hit him or scare him into thinking that; he just stood there with such a shocked expression on his face until someone yanked his arm and pulled him back just as the car passed (back on the road by that time).

Several people turned right from left turn only lanes, or left from right turn only lanes. A couple of people just kept going thru lights that had been red for several seconds, with other cars already going the other way, just barely not hitting each other.

Various stupid stuff like that. Hadn't seen anything dumb for almost a week, then today made up for that. :roll:
 
Oh, I forgot to add this: There's a random squeaky squeal sometimes coming from the hub, usually when it's above my typical speeds of 15-17MPH. Doesnt' matter if it's under power or not, accelerating or coasting or braking. Doesn't matter if I'm perfectly upright or tilted slightly, to see if side-stress made a difference.

I suppose a bearing could be failing, or just need lubrication. I guess I really do need to work harder on getting those side covers off (I'd given up twice before, because I didn't want to damage the covers trying to pry them up enough to get the puller jaws on them, and then when I actually dug out my puller I found it is not large enough anyway).

It went away a mile into the ride home, and hasnt' started up again yet. Hopefully it won't start again at all, but I'm sure it can't be that easy.

If I can get the covers off, then even if the bearings are a problem I have the 9C covers from Icecube57's 9C/GM hybrid, and can swap out bearings or whole covers if need be. It'd also give me a chance to swap tthe stators for a test of it, too. :)

What worries me is if it might be something on the stator rubbing on the covers, or worse, the magnet ring. Something like a wire or whatever being pulled outward by the air moving past it inside the cover as the wheel spins faster and faster, maybe. I can't tell at all until I open it.


I suppose in the meantime it's time to finish sticking the Fusin on The Velcro Eclipse so I have my backup ride in case something does fail; I've been putting that off because of my fingers, and because of trying to get DGA's lighting and paintjob worked out.
 
The squeal hasn't come back yet. I did a 14.2 mile ride today, to test out that and adding the PDA speedo back to the bike (I've had to guesstimate for the last two or three weeks or more).

I'd taken it off to charge it a while back, then between me shuffling things around to find some bits of stuff I wanted to use in the rebuild of DGA and TVE, and my crazy sister's moving things around at random, I lost track of it until a few days ago. Finally had the chance to recharge it, reload the Veloace program on it, and set it back up on DGA.

Since I'd taken all the wiring off DGA during the redo, I had to find the wheelsensor cable I'd made, too, which fortunatley only took about 20 minutes or so (with all the remnants of trimmed cables from the redo), but it took me almost an hour to find the USB-serial converter I have to use to hook it up to the PC to sync the Veloace back on it after recharge (it has no flash for programs, or card slots--it's pretty old).

I forgot to remeasure the tire, but I think this one was 208cm around, so I used that number for today's testing. I have to locate one of my tape measures and verify this (and recalculate the distances/speeds if it is wrong).

Based on that, I have been misestimating my typical speeds for the work commute: underestimating by two or three MPH. So it's likely that I've been doing around 19-20MPH most of the time, with an average speed closer to 15-16MPH. That's what I did on the test trip today. The average that Veloace shows includes a bunch of side-streets where I ended up more like 10-12MPH trying to find an exit from the dead-ends and street-loops I got stuck in both there and the way back :roll: so it thinks it's more like 14.7MPH. If it werent' for at least a couple of miles of that, plus several dozen full-stops required in those areas, I'm sure the average would be significantly higher.

The top speed on the road itself was on the way out there when I was in a little bit of traffic, about 22.3MPH, but I had at least 1/6th of the throttle left to go, maybe more. So the speed is there if I needed it in an emergency or something, I guess. I'll have to test it somewhere off a public road to see what the max speed is, but I am guessing 25-27MPH without pedalling. (I don't think pedallng would increase it either, as I dont' have a high enough gear to help at those speeds).

The trip took about 27 minutes on the way out, for 6.3 miles. On the way back it was 31 minutes for 7.8 miles. I guess I got lost longer in the dark on the way back. :lol: I know I had to stop a lot more, because I couldn't see if there was traffic coming due to the lighting and street layout.

Outbound usage data, no pedalling, light wind against me most of the way:
5.104Vr
42.62Vm
3.146Ah
150Wh (~23Wh/mile)
21.51Ap
985Wp
regen
3.1Wh
0.059Ah
4.71Ap
249Wp

Homebound data, no pedalling, no real wind:
47.74Vr
38.32Vm
5.499Ah
235Wh (~30Wh/mile)
21.71Ap
923Wp
regen
0.068Ah
3.4Wh
313Wp
6Ap

Seems odd that having to stop a lot more often, riding with much less wind, would use up so much more power but get not even the same average regen Wh, much less more (like I expected). Maybe it is because I was generally stopping from much lower speeds?

Anyway, it was certainly interesting to see my speeds again. I think my underestimating comes of not pedalling along, since I know by feel how fast each gear is I could have known from that if I had been pedalling along at the higher speeds rather than only at startups for certain situations.

Also nice to know that even if I am pushing it, speed-wise, up to the limit for assisted bikes here, these old NiMH batteries still work well for quite a distance (14miles minimum). The LED throttle powermeter only went yellow (low) when I really opened up the throttle or during the first few seconds of acceleration, usually, starting sometime on the way home. Didn't do it at all on the way there that I can remember. I dont' know what it's voltage cutoff is (but I can find out with my variable power supply), but it's still nice that even with the heavy sag under load they'll still supply power for a good long trip.

Total was about 8.6Ah (of 13Ah), about 385Wh (of 624Wh @ 48V even, assuming 13Ah).

As a side note, the batteries were VERY warm after the trip each way, which isn't surprising. They don't get noticeably warm on the work trip because it's too short, but this was twice as long and with longer stretches of high speed, plus many more full stops and starts (probably 5 times as many, maybe 6!).

They're cooling off now before I recharge them.
 
Took about 10.8Ah to recharge the packs. I was too tired to be able to monitor for end of charge on one and move to the other, so I just charged both at the same time, with the WU1 on Pack A. But I was still half-asleep when I checked it today, and unplugged it all before I wrote anything down, so all I can remember is the 10.8Ah. :( Keep in mind that it kept trickle charging thru the night for several hours after end-of-charge, which may total up to that 0.8Ah part.
 
Took a quick trip to the store for some stuff for Fred's bites and some on-sale stuff for me, and that noise came back--but now it sounds more like a grinding than a squeal, and I don't like it at all. It happens now just about at the faster end of the usual growly-whine the 9C makes between 15-16MPH, and it happens whether it is under acceleration or deceleration. I have not yet checked if it happens with no power applied and/or the controller not connected to the phase wires on the motor.

I spent a few minutes looking for my paint scrapers and chisels that I could use to pry open the seal on the 9C covers, so I could get at least the left side off to check wiring tie-downs and whatnot (it sort of sounds like it's from the left but it is hard to tell while riding). I had just found them when my crazy sister (who had gotten home from her most recent trip to wherever) got done with whatever she had been doing and then started wandering around being crazy again, off in her own universe, going in and out of every room and in and out the front and back doors, too, moving stuff around (all hers, this time, fortunately). I couldn't handle it so I gave up the idea of diagnosing the 9C for today. Hopefully it won't fall apart or whatever before I get another crack at it (which will be at least 2 days).


Later, after she apparently left for a little while, I got out the box of 10 TS60Ah cells to recheck their voltages, and they're all still at 3.30V + up to 0.02V on some cells. None below 3.30V. I don't yet have the BMS built, but I did decide to see what exactly the results would be if I hooked them up in series and ran the 9C off of them, speed-wise for unloaded RPM (wheel off the ground).

I'd gotten out the wire and some crimp-on ring terminals and stuff, but I'd totally forgotten that they didn't come with any bolts in the terminals on the cells, and I had never gotten around to going after any. A quick check of my bins found nothing that would work except for the bolts that are used on bicycles for the brake arms on rim brakes like side-pull and v-brakes. I don't have enough of those that are short enough, even including the ones already in-use on bikes. Well, actualy, I did find one other bolt, which once held the sprocket to the freewheel on the rear wheel of the ScootNGo, but I long ago lost the other three someplace. :roll: So I'll have to get some bolts before I can do that test.

Since the other test I wanted to try was to hook them up as a series group to the charger (the Sorenson 50V 50A lab supply), and see how it behaved, I coudln't do that either.

I did go ahead and try just one cell, by bolting Anderson Multipole SB50 to it with two of the longer bolts and a stack of washers, and then a mating one to the Sorenson's rear blade connectors. In between I used WU1 with it's mating connectors attached, but I had of course forgotten that it takes about 4-4.5V to fully operate it, and a single cell is only 3.3-3.6V even at charging voltage. :roll:

So I dug out the manual for the WU I'd saved on the computer, and verified which aux pins are + and -, and hooked up a 9V battery thru some cable/pins I'd pulled off a dead TV set to it so I could at least do the test. :)

I set the Sorenson to 3.6V, verified that's 3.65V on a multimeter, and turned the current limit down to just above what was required to let it stay at that voltage with no load attached.

Hooked up the WU to the battery, which read 3.32V (same as the meter reading just before), and to the Sorenson, which then buzzed as expected as it began limiting current on the outgoing 3.65V, which dropped to match the batteries 3.32V.

Turned up the current limit until I got 5A flowing, and it went up to 3.40V. 10A got 3.44V. At 11A the buzzing went away, and the green light came on the Sorenson indicating it wasnt' limiting anymore, evne though I kept turning up the current it never went above 11A. That seemed strange, so I pushed on the terminals of the cell and the Sorenson buzzed and current went up to 17A and the light went red to indicate current limit again. So I hadn't tightened down the terminal bolts well enough. Just out of curiosity, I turned the current limiter way up, and while pushing down it got up to 34A, but dropped back to 11A if I let go!

I turned the terminal bolts with the long end of the allen wrench this time, for more torque (carefully; the terminals themselves are only aluminum) and just a bare 1/8 turn or less and they stopped turning. Interesting that just that little tension difference made such a high contact resistance that it would drop *that* much in resistance.

I turned it back down to 10A, and kept it there until I got 1Ah of power back into the cell. It's final rest voltage after disconnection from the Sorenson was 3.34V now. Up 0.02V; I'll wait overnight and recheck it if I have time, and remember. ;)


Oh, and the discharge data from the ride I'll have to post later, I must've set the notepaper down with that on it somewhere while putting stuff away, as I cant' find it now. :(
 
Yeah I had a similar problem with getting contact to the controller using a boat switch. I used some elastic headbands for a head-light (an LED light that you put on your head) to build a safety cutoff switch tied to the handlebars... and while tightening the switch was trying the motor, the funny thing was that the controller would discharge some of the current from the cement precharge resistor, but would not turn the wheel! I found that the boat switch was not 'tightened' properly and was not closing the switch.
A few minutes with the small m6 wrench and the clamps and it was tightened, i added some nylon to the nuts to make sure they did not undo. Very strange problem to diagnose when you've looked everything over and it's 'supposed' to run, but it just doesn't :)

amberwolf said:
Took a quick trip to the store for some stuff for Fred's bites and some on-sale stuff for me, and that noise came back--but n
I turned it back down to 10A, and kept it there until I got 1Ah of power back into the cell. It's final rest voltage after disconnection from the Sorenson was 3.34V now. Up 0.02V; I'll wait overnight and recheck it if I have time, and remember. ;)
way, as I cant' find it now. :(
 
amberwolf said:
between having to be up so early for work and my healing dislocated left pointer finger, I'm not getting anything else done for a little while, probably. My left thumb still hasn't healed form whatever stressed the last (endmost) joint, either; I can't grip anything with it (so shifting on the front is jsut about impossible). Nothing hurts much unless I put any kind of stress on the joints, especially sideways movements or pulling types of stress. Then I see spots. :(

Codeine FTMFW. ;)
 
liveforphysics said:
Codeine FTMFW. ;)
No argument, but I don't have any left. ;) (I had some tylenol3 w/codeine I'd saved from a broken tooth extraction a few years ago, but ran out of that some months back when I almost broke my right pinky by being sick and dizzy, and falling towards an open doorway, reaching out to catch the jamb but missing with all but the pinky finger, putting my entire falling weight on that outstretched digit. :( That was very very unhappy.

Right now, all my fingers are doing a lot better, although that pinky still aches if I move it wrong (laterally especially) and so does the left thumb. Oddly the dislocated left index does not hurt much, unless I press it backwards fairly hard (lifting something really heavy, for instance), in the same direction the dislocation happened.


novembersierra28 said:
Very strange problem to diagnose when you've looked everything over and it's 'supposed' to run, but it just doesn't :)
Yep. When I first built the 2QD brushed controller, I had a long time diagnosing why it didn't work, because it *almost* did--it acted like the FET was shorted but it wasn't. Turned out to be a hairline whisker solder bridge grounding out the gate signal. :roll: I couldnt' even see it without a magnifier. So since the controller thought the FET was shorted, it was limiting current by cutting the PWM down to almost nothing (like maybe 1% or less), just like it should, even at max throttle. :) The throttle DID affect the PWM, just that it varied from 0 to less than 1%. :lol:
 
Found the sheet with yesterday's info:

To store:
0.995miles
16.1mph avg
23.7mph max (I think this was when I was trying to get into traffic entering Northern, where I have to go for a couple hundred feet to get to the store parking lot entrance)
49.47Vrest
40.4Vm
37.4Wh
0.879Ah
21.58Ap
910Wp
regen
0.9Wh
0.019Ah
8.21Ap
428Wp

Trip back home with about 35lbs of stuff. Mileage/speed is messed up because the cable came partly disconnected from the PDA and I didn't notice until maybe halfway thru the ride. :( Note that the path home is different from the path there, thru a number of twisty back streets, with foot traffic that appears unexpectedly in the middle of the road from between parked cars, so I can't go as fast as usual.
0.63miles
13.7MPH avg
19MPH max
48.65Vr
36.5Vm
36Wh
0.880Ah
872Wp
21.33Ap
regen
0.7Wh
0.015Ah
201Wp
4Ap

That low 49.47V resting voltage is wierd, as I had charged up the packs two nights before; I'm guessing that the long hard use on Saturday plus the sitting for a day after charging caused/allowed them to drop a lot more than usual.


Today's work commute (typical conditions/etc)
(forgot to write down each half of trip separately for PDA data)
5.151miles total
13.316mph avg
22.9mph peak (could be any of four or five places I have to accelerate into or thru traffic to get across lanes to the other side left turn, etc).
To work:
51.92V
43.15V
73.2Wh
1.568Ah
979Wp
21.57Ap
regen
1.1Wh
0.021Ah
359Wp
6.58Ap

Home:
50.78Vr
41.94Vm
78.8Wh
1.718Ah
938Wp
21.6Ap
regen
1.5Wh
0.03Ah
312Wp
5.19Ap
 
I started a troubleshooting thread for the 9C noise problem here:
http://www.endless-sphere.com/forums/viewtopic.php?f=2&t=21826&start=0
as it is becoming worrisomely loud.

Just so the info is attached to this thread, I quoted it below, too (but don't answer here, answer in the other thread).
[url=http://www.endless-sphere.com/forums/viewtopic.php?f=2&t=21826&start=0 said:
Odd 9C Noise Problem/Troubleshooting[/url]"]This may have been discussed before, but in almost 20 minutes of searching and skimming a bunch of threads via google and forum searches, I couldn't find anything quite like this one.

I've always had an odd sort of whine that happens in my 9c 2807 front hub, at any voltage/current/etc., between about 15-16MPH. Below or above that it doesn't do it, and it appears to only do it when it is powered, during either acceleration or deceleration (including coasting down thru that speed range). It happens whether I am pulling battery current or not (as monitored via watt meters), so even when the throttle is at a coasting setting so that it is not really applying power to the motor much but it is not decelerating it either, it still sounds the same.

I haven't been able to generate the noise when only pedalling down to that speed that I can remember. (I haven't tested it with the phase wires disconnected so that I could pedal up to that speed without using power; since the Lyen 6FET controller brakes to keep somewhere around 10-12MPH if no throttle is applied, I can't pedal hard enough to get beyond that speed without engaging the throttle).

I do not think it is controller-related, but I am about to test that with a different one in the next few days, as well as doing the above disconnected-phase wire test.

Now, that particular noise doesn't bother me, but it has started growing worse and different the lat couple of weeks or so.

Now it is a much more growly whine, and quite loud, and I can actually feel vibration thru the bars from it as of today. It does not *always* have the growly part or the vibration, just most of the time now. That part started intermittently and has grown much worse very quickly, after having disappeared completely for a few days or so first.

It appears to be more from the left side than the right, but it is difficult to tell while riding, and I also cannot tell while holding up the handlebars for testing stationary with wheel in air.

During stationary testing, it does not make even the original noise (maybe just a tiny bit, hard to tell for sure) if there is no load on the wheel. But if I engage the brakes a little, and increase throttle a bit to keep it at that 15-16MPH speed, it begins to make the noise. The harder I push the motor load-wise, the louder and more growly the noise becomes.

I will also be opening the hub up once I re-locate my chisels and paint scrapers to get thru the seal on the hub covers, and examining it for loose wiring bundles or perhaps a bearing problem; I'll post lots of pics once I do. This should happen in the next few days; I am supposed to get a week off from work starting this Saturday. I'd rather not start the teardown until that vacation starts. :)

Any ideas what might be the cause? Any specific info I should gather that would help?

I'll make a video of the stationary testing if it'll help, but the camera mic is not very sensitive, so I'll probably have to dig out my regular studio mics and recording equipment to get it across to would-be troubleshooting assistants. :)
 
Received the EVAssemble 36V 600W controller from Yopappamon today, and started a review thread here:
http://www.endless-sphere.com/forums/viewtopic.php?f=4&t=21830&start=0
This will be tested on DGA with the 9C 2807 front hub, powered by TVE's 36V 9Ah NiMH at first, then if I figure out it's safe to use with DGA's 48V 13Ah pack I'll try it with that, too (or modify it if necessary/possible). If I get the Thundersky 10s 60Ah pack built and testable with DGA, I'll try it with that to see what kind of power it will pull (since that can handle 60-120A, about 10x as much current as my NiMH packs).

Since I will have to change connectors on it or make adapters to my existing wiring, which will take some time, first I decided to do some picture reviews and note a few things about it's contruction/etc.
 
Can we see some pictures? I want to see how you set up the wattmeter and where you put the switch :)

amberwolf said:
Received the EVAssemble 36V 600W controller from Yopappamon today,
Since I will have to change connectors on it or make adapters to my existing wiring, which will take some time, first I decided to do some picture reviews and note a few things about it's contruction/etc.
 
There will definitely be pictures, both here and in the review thread linked above.

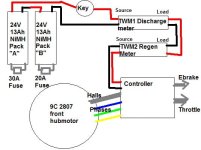
As for the switch and wattmeter, they'll be the same as I have them above for the Lyen controller. I suppose that's not very clear from the pictures, but it is wired like this:
DGA basic wiring diagram 100110.PNG
The fuses are not equal because I havent' run across my salvaged UPS fuses (to make them both 30A) but even though I've been drawing nearly 21A peaks pretty consistently, and just about 19-20A for nearly a minute here and there, the 20A fuse hasn't blown. That should tell people something about how to rate the fuses they are using to protect their packs and other stuff. ;)

The meters are wired so that the discharge meter sources from the pack, and the regen meter sources from the controller.

I did forget one wire--there is a keyswitch wire on the controller that enables or disables the controller, but it doesn't remove power from it. I wired that directly to the switched side of pack positive, because I want to actually cut power off of the pack entirely, not just disable the controller, so I don't have to worry about accidentally leaving it "off" but still slowly draining the pack, or having some wierd failure short something out, or somebody go messing with the wiring and blow something up.

Ideally I'd have the keyswitch (or another one, separate) down on the cargo pod which is lockable, and contains the batteries, so that power is not even exiting the pod if the key is off. I haven't done that mostly for simplicity at the moment. I wanted a power-cutoff keyswitch right at the handlebars to cut power in case of smoke, fire, runaway stuck throttle + brake failure, etc., which although unlikely isn't impossible. :) Also because that's how the Fusin kit worked and I'm used to that.

If I ever got into a high-current setup that the keyswitch can't handle the power of, I'd use the key to switch a relay on and off, putting the relay down at the battery connections. I may eventually do that anyway, just because these keyswitches are not really made all that well and when they break I'll be using a computer-case keyswitch or similar to replace it--they can't carry even the amps needed for this setup, so would require a relay.
 
Thanks, the diagram has helped me figure out how to build my 2nd ebike, it's going to be a 9continents 9 x 7 on the front of a full suspension bike with 14 x 24v NIMH packs in their plastic casing.(bike was free pulled off a skip,motor still hunting)

Runaways are my greatest fear thanks to my BIG error with brushed tech there's just no telling when that capacitor will blow... I read on 4qd about how high currents will inevitably damage the caps causing them to pop...so ever since then I've kept it at low speeds..(is there any way of knowing if a cap is on it's way out?)
What capacitors did you use when you mended your curtis brushed motor controller?
how long did your brushed controllers generally last irrelevant of driving style?
Is it true that, if you place an ammeter, this creates inductance down to the controller causing back EMF which kills the controller?


amberwolf said:
There will definitely be pictures, both here and in the review thread linked above.

Ideally I'd have the keyswitch (or another one, separate) down on the cargo pod which is lockable, and contains the batteries, so that power is not even exiting the pod if the key is off. I haven't done that mostly for simplicity at the moment. I wanted a power-cutoff keyswitch right at the handlebars to cut power in case of smoke, fire, runaway stuck throttle + brake failure, etc., which although unlikely isn't impossible. :) Also because that's how the Fusin kit worked and I'm used to that.
 
novembersierra28 said:
Runaways are my greatest fear thanks to my BIG error with brushed tech there's just no telling when that capacitor will blow...
Error?

I read on 4qd about how high currents will inevitably damage the caps causing them to pop...so ever since then I've kept it at low speeds..(is there any way of knowing if a cap is on it's way out?)
Only way is to test them periodically, which in general will require removal from the device they're in. You can visually check for swelling, but they're typically already toast by the time you can see any sort of failure. The test would be with a capacitance meter, or better yet a, LCR meter that can test them for capacitance and internal resistance (ESR). Off-the-shelf units that do this for large capacitors like a controller will have aren't cheap; the DIY versions could be done a lot cheaper but may require you to be able to program an MCU (not to write the program, but to flash a blank one).

I wouldn't really worry about it--the thing is really not so much the currents in the caps, in the enclosed controller case like the Curtis, but rather the heat from the FETs and having no airflow inside the controller, that adds wear to the caps even faster than the high currents. Keeping the controller case itself cool, with a good heatsink and fans, is the only practical way to deal with that in anything but totally dry weather. In dry weather, you could open both ends of the controller and stick a fan on one end, and that would help way more than just keeping the outside cool.

As for speeds, well, realistically whenever the controller is actively doing PWM (at lower throttle settings) instead of being at full throttle, it's more likely to be having high current flow in the caps. At full throttle the PWM shuts down and it just passes power thru all the time, so the caps aren't having to filter anything, really, and have just about no current flow. This is true of brushed controllers and probably of most brushless, too.

Also, at full throttle, you have less FET heating from switching, although more current in total passes thru the controller, less heat is usually developed within it.
What capacitors did you use when you mended your curtis brushed motor controller?
I didn't have to replace anything in there; it was just a bad solder joint (well, two or three, actually, between the control PCB and the power PCB).

When I fixed the ScootNGo controller, I tried out several caps; the best results were from photoflash caps out of old cameras. :)

With the 2QD controller, I forget what caps I tried in it, but I think one out of a high-wattage power supply from a laserprinter/copier was what I ended up with. Not sure now.

how long did your brushed controllers generally last irrelevant of driving style?
The only one I had major problems with was the ScootNGo controller, which started out quite fried, and I didnt' help it with my further experiments with various drives on this bike and others, leading up to the large FETs and drivers on separate external heatsink, with the v2.0.2 friction drive that worked great till I broke a motor shaft.
Most of the problems I had were me using the wrong kinds of FETs, with bad layouts and insufficient heatsinking.

I even moved the controller over to CrazyBike2 at first, and it worked well enough there until something damaged the op-amp chip at the heart of it, and I figured that replacing that op-amp was going to destroy the PCB since it had already been repaired so many times. :( I never did go back and fix it again.

Thats when I moved to the 2QD, and the only thing that failed on that was after the chain came off, jammed, tacoed the chainrings, pulled the wheel out of the dropouts, twisted and ripped apart some chain links, and then FINALLY the controller couldn't take it anymore and blew two FETs (of four). Given that I had a tiny tiny heatsink on there, I don't really blame them--at 153A, maybe 3500W? it was already taking way more than it was designed for. :lol:
http://electricle.blogspot.com/2009/12/blown-mosfets-due-to-chain-jam-possible.html


Is it true that, if you place an ammeter, this creates inductance down to the controller causing back EMF which kills the controller?
Not that I am aware of, but it would depend on the meter and the wiring. If the meter installation requires adding a long loop of wire (a few feet, perhaps) up to the handlebars, that isn't normally there, then yes, it adds resistance and inductance. How much? Not a lot, but some. Enough to kill a controller? I guess that depends on the conditions. At high currents, a little inductance causes very large voltage spikes. At lower currents it matters less. The more switching that's going on (at lower throttles but higher loads), the worse these spikes will be.

If you have to loop the wire up there, I would recommend a twisted pair of wires (both pos and neg, even if you aren't using both of them for the meter) of equal length, and that will help cancel out some of the problem.
 
I changed it to "and having people question why i haven't gone with brushless tech I just have no real way of telling when it's time to" :oops:

well, let's look on the bright side, I'm now off to build an LCR and possibly read up a ream on how to... so thanks for the advice on that :)

thing was I started reading on the failures of fets, I can think of a lot of consequences, and the consistency of this failure involving rebuilds for the curtis club car, these rebuilds were yearly..but then those controllers were moving over 200kg of car/passengersdaily for at least 2-4hrs of driving.(in comparison i am using theebike 5mins aday) so I figured I'd buy some caps and keep them safe for the day when I'd have to replace the fried curtis
Did your 410 have some spaces for extra mosfets / caps to upgrade it?
thanks :!:


amberwolf said:
novembersierra28 said:
Runaways are my greatest fear thanks to my BIG error with brushed tech there's just no telling when that capacitor will blow...
Error?

If you have to loop the wire up there, I would recommend a twisted pair of wires (both pos and neg, even if you aren't using both of them for the meter) of equal length, and that will help cancel out some of the problem.
 
novembersierra28 said:
I changed it to "and having people question why i haven't gone with brushless tech I just have no real way of telling when it's time to" :oops:
When you find the need for the extra efficiency, and have the extra money for the more expensive motor and controller, is when it's time to change. ;)

well, let's look on the bright side, I'm now off to build an LCR and possibly read up a ream on how to... so thanks for the advice on that :)
If I find the links I once had to some places that do this (some offer kits), I'll forward them to you. Don't hold your breath, though. :p


thing was I started reading on the failures of fets, I can think of a lot of consequences, and the consistency of this failure involving rebuilds for the curtis club car, these rebuilds were yearly..but then those controllers were moving over 200kg of car/passengersdaily for at least 2-4hrs of driving.(in comparison i am using theebike 5mins aday)
I strongly suspect those problems are from not having sufficient cooling, more than anything else. Keep in mind the curtis is laid out inside such that the FETs are mounted to bars of an upside-down L-shaped cross-section, and the FETs are on the vertical leg, with the horizontal leg of the bar bolted to the flat mounting side of the controller case (via those six countersunk bolts). There is a electrical (and thermal) insulator between the FETs and the L-bar, *and* another insulator (two, actually) between the L-bar and the outer case. Then in most installations I've seen pics of there is also another insulator between the case and the external heatsink (for those that actually use a heatsink).

That's a LOT of thermal insulation, so it takes a long time for the FET heat to make it to the outside world and radiate away. While it's still inside the controller, it cooks *everything* inside the case, caps, resistors, other ICs, etc. Even though they're all designed to take the heat, it still degrades their life expectancy significantly, compared to keeping them cooler.

Many controllers are made this same way, for high-power applications; it's just easier to do for assembly reasons, and also presents a bigger safety margin electrically in the case of an electrical short thru one of the insulators, to prevent any possibility of user-electric-shock, or of shorting to a battery wire or similar externally and causing a fire.


so I figured I'd buy some caps and keep them safe for the day when I'd have to replace the fried curtis
Unless you just need to have them, you might be better off waiting to get them till you actually need them. By then, you may not even use that controller. ;)

Did your 410 have some spaces for extra mosfets / caps to upgrade it?
Yeah, I think only about 2/3 of it is populated. In theory it could do higher currents with them in there, but without better heat dissipation that'd still be only a short-term limit increase (a few minutes at most, probably less than that).

Realistically it would require replacing all the FETs at once, with the same batch of whatever you're going to use. It may also require adjusting stuff on the control PCB for the current-limiting auto-shutdown/etc. which I have no idea how to do yet. There is a partial reverse-engineering of a similar model at the Cafe Electric website, by Otmar, which might help.
 
I have been a bad boy and not noted down my usage data or charging data the last few days. :(

A short time ago, along with the new Turnigy Watt Meter, Rumped6 sent me a little bit of tool/parts money for things that would be cheaper to buy locally than ship/etc. So I've been pondering what to spend it on--things I really need but can't generally get used, of which I have a much longer list than this money will buy. :)

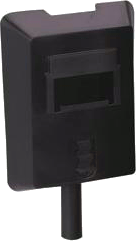
Today Harbor Freight had a "parking lot sale", where I perused everything in the store and finally concluded there were only two things I could really use. The first was an autodarkening welding helmet,
http://www.harborfreight.com/adjustable-shade-auto-darkening-welding-helmet-46092.html
image_1203.gif
at almost half price ($35). I had wanted one to leave my hands free but since I had a working visor I couldn't really justify the $60-$70 for one.

A little while back, I'd cracked the lens on the cheap handheld welding visor that came with the welder,
image_3945.gif
right down the vertical center, essentially. Black tape over the crack kinda makes it wierd to use, and potentially dangerous if the tape came off while I was welding, so I figured I needed to replace it. Since I was doing so, I figured I should upgrade to a much easier-to-use one that would leave my hands free, too.

Now I just need to fix the "sticking" problem I have always had with the welder, but which has gotten bad enough now that it is very frustrating to do any welding--it stops feeding every 1/4" to 1/2" of bead I am trying to do, and I have to get take the end sleeve and electrode off and pull the wire out with needlenose. It also causes the electrodes to burn faster, because the wire sticks and then gets welded to the electrode face a bit sometimes, if I don't stop in time.

The second item is a set of three cheap padlocks
http://www.harborfreight.com/3-piece-1-1-2-half-inch-keyed-alike-padlocks-40604.html
image_805.gif
for $6 to replace the ones on the backyard gates that my crazy sister still has keys to, which she has left unlocked and open several times in the past few months, endangering the dogs. As I can't trust her not to do it again, I'd put a bike lock on one and other locks on the other two, but I need the bike lock (it's the best cable lock I have) and the other two locks were dollar-store junk I'd gotten a long time ago--sufficient to keep her from leaving them open, but not enough to keep anyone even slightly determined from doing it.

Now I can be a lot less stressed out that someone might open them and let the dogs out purposefully or accidentally. (I don't care nearly as much about the stuff back there as I do the dogs' safety, something I can't seem to get across to her).


A few bucks got me some red/white reflective tape stickers
http://www.harborfreight.com/10-piece-reflective-tape-97562.html
image_3895.gif
for the back of the cargo pod and stuff (just like the ones I already had from a friend used on the Kennel Trailer). (These I got on a previous visit.) I wanted to get just plain red but couldn't find any; the stuff I found at auto parts stores and the like cost more for less surface area of red than I got with these strips, and these also have the white half, so I went with them.

They will be used in a diagonal pattern along with some leftover lime-green reflective stuff a friend brought over a while back, which I have been trying to decide how to use. It will resemble a traffic barrier, and hopefully trigger the same "automatic" responses in drivers to avoid it. :)

I am also considering turning the Kennel Trailer's kennel around, so the open end is in front, and putting the same kind of markings on the back of it. I'll need to get more of both the lime and red reflective sticker, as there is only enough of the lime to do the one cargo pod or perhaps two of them, at most.


Now I need to find some inexpensive M5-sized bolts for the TS battery back cells....Lowe's, Home Depot, Ace, etc., all carry them but the cheapest I found would cost almost $20 for 20 bolts! So first I will recheck my salvage-hardware for more of them, before going out to buy any. They're the same ones used as brake-stud mounting bolts for V-brakes and the like, of which I have a few but they are mostly too long, and I'd rather save those for use on actual V-brakes. :)

I can't see spending more than a quarter on each bolt, max, and preferably less than that. If I looked hard, I could probably find 5 junked bikes with those kinds of bolts in them for not much more than $20 total, maybe $30, and then I would have a whole lot of usable stuff for that money, instead of just 20 little bolts. :shock:
 
Ok, so not unexpectedly, the Harbor Freight locks are complete crap:

The tumbler just fell out as I was inserting the key (I had not even turned it yet!) on what *might* have been the 8th or 9th time I unlocked it. :evil: :cry: :(

I'll be taking the set back to them, and I guess I'll just go somewhere else and get Master locks, even if I can't find them in same-keyed sets like this. It'll probably be more like $8-$10 per lock, but I'm not going to waste more time on "security" that isn't even remotely secure. :roll:

In other news, I was working on the EVAssemble controller (see thread linked above) trying to determine the wiring, when my "spare" boxfan suddenly slowed down to about 1/3 speed or less and smelled very hot (it's the one right in front of my bathroom window AC unit, pulling the cold air from the unit into the rest of the bedroom, so it has no reason to be hot at all unless something is *seriously* wrong).

Opened it up and found a very charred spot on a winding, where for whatever reason it burned thru two coils of that part of the winding. Tried to take a pic but it won't focus on it for some reason. :roll: I'm guessing there was a long-standing insulation break there, probably from the factory, and slowly some of our conductive dust built up on it, along with enough moisture to allow it to arc across the windings, eventually burning thru them. Anyway, I can't fix that right now (if at all, without rewinding it), so I dug out the boxfan that died from being outside on the kluged-together window AC unit I had been using before.

As I expected, it has a thermal fuse in it, but unexpectedly it is only for 115F. 115F! For goodness sake, the AIR gets hotter than that here sometimes! :roll: :( The motor is a tiny little induction motor, very much like the one in a burned-up bench grinder someone gave me a while back for parts. Well, since it's going to be in front of the AC unit, then unless IT'S windings burn thru for some reason (which I wouldn't rule out), it shouldn't ever get above about 80F at most, especially now that summer is fading, finally. So I just removed the whole wiring for the thermal fuse and directly connected the wires it separates, fixing it for further use.

If I feel unsafe later, I'll dig the thermal fuse out of the burned-winding fan and stick it in the now-working one. :)

Back to putzing around with controllers....
 
i got taken by a bad lock buy also,was these great looking brass locks at the local hardware china made but heavy lookin and feel.well long story short i couldnt get it open the next day and needed my bicycle so a little fiddling and the whole tumbler came out :shock: .but was still locked?how the heck does that happen,needless to say i have great hacksaw blades and 5 minutes later no more lock.kind of defeats the purpose of a lock.
 
That's true. But even a decent padlock can be cut with a good hacksaw blade fairly quickly, and a cable lock with bolt cutters or shears or wire cutters, depending on thickness, coating, etc.

That said, a lock that falls apart is just totally pointless, unless you're looking for a gag gift. :lol:

I've had all sorts of problems with locks over the years, but almost all of them were wear and tear, and NONE of them ever just...disintegrated after owning them for less than a whole day!
 
Back
Top