New "TSDZ2 Torque Sensor Central Motor"

fi7ippo said:
andrea_104kg said:
I don't know if anyone has tried ... is it possible to put a thin Teflon sheet between the two coils of the torsiometer to limit wear? Teflon is the material with the least friction known ...

Hi Andrea, Yes, I do the same. I've installed two thin (0.2mm) teflon rings between the coils and no more wear happened. Before I've to replace the whole torque sensor two times because the magnets fringed each other destroyed the windings... After the modification I've made at least 4k km and the torque sensor is same as new one, no more wear on magnets. I check the sensor every 1k km and problem is gone. You may loose some range on torque sensor, mine goes from 110-280 to 120-260 but is not a problem for me, sure you have to fine hardware calibrate the sensor
thank you very much, I ordered a 0.30 mm sheet of Teflon, in a while I'll get to work :D :D
 
I was previously reusing the VLCD5 remote but the true is that I hate that remote, because the buttons are small and very easy to click on both at the same time.

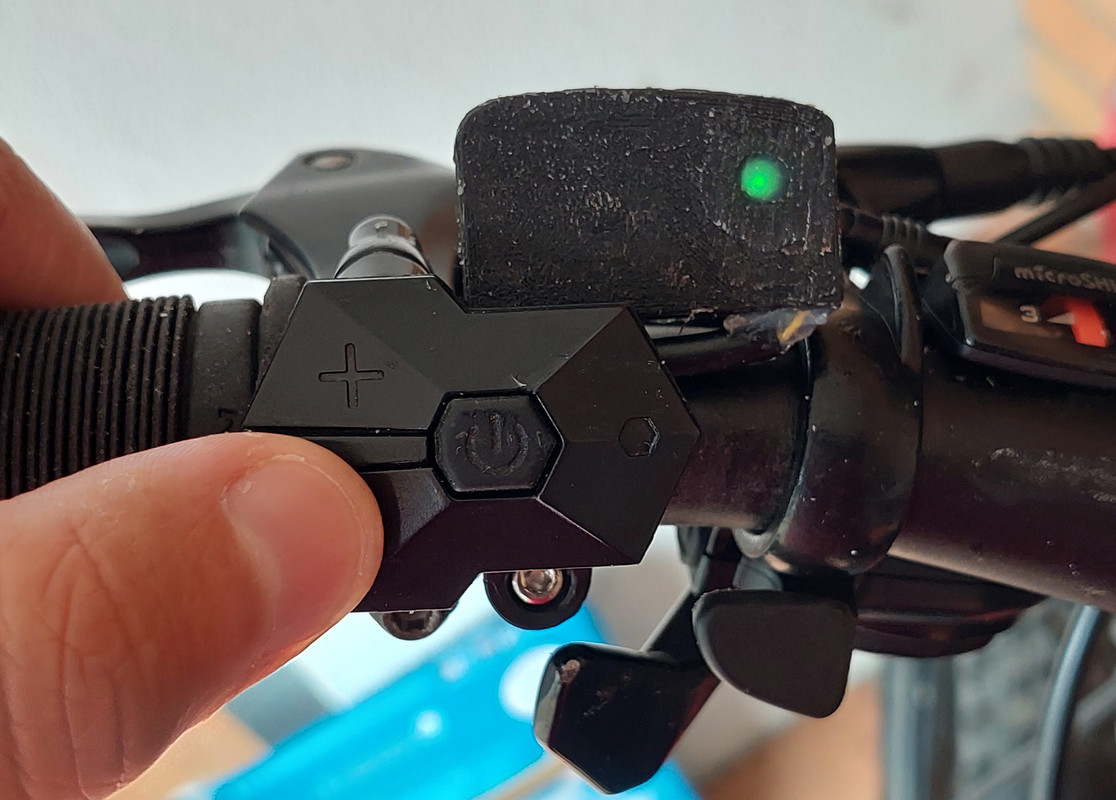
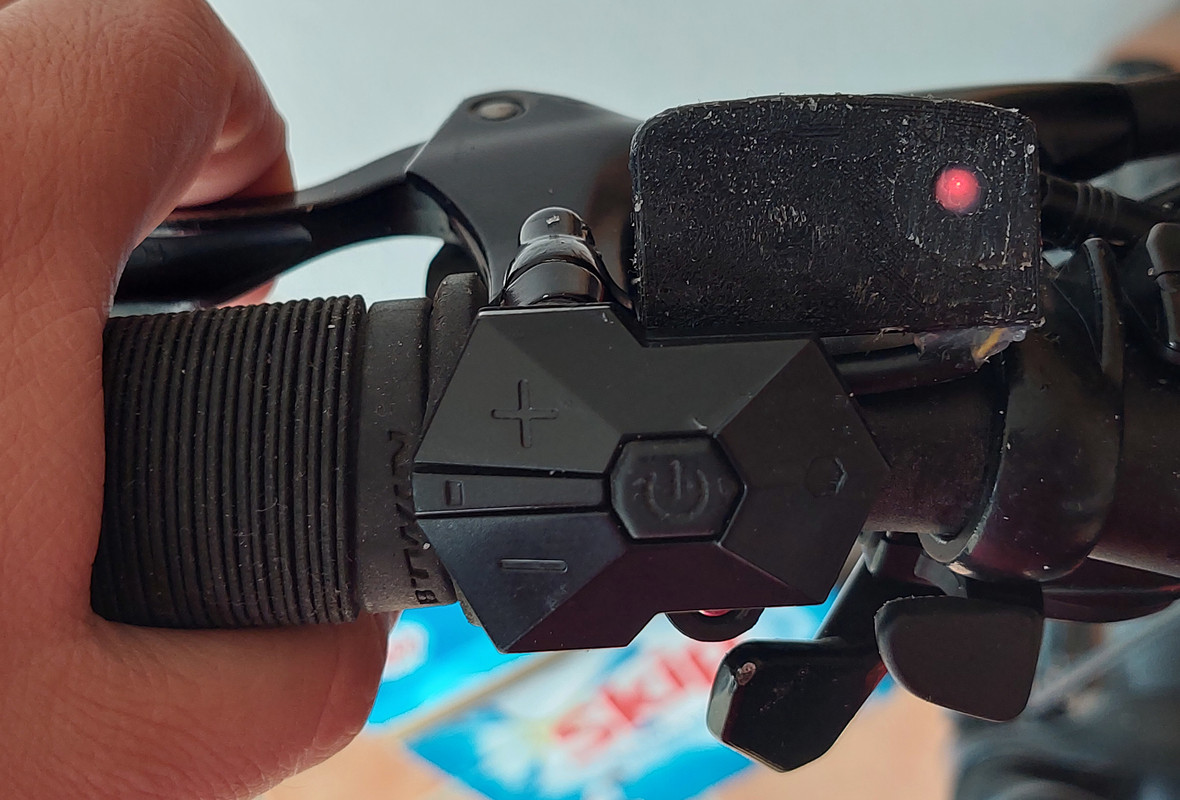
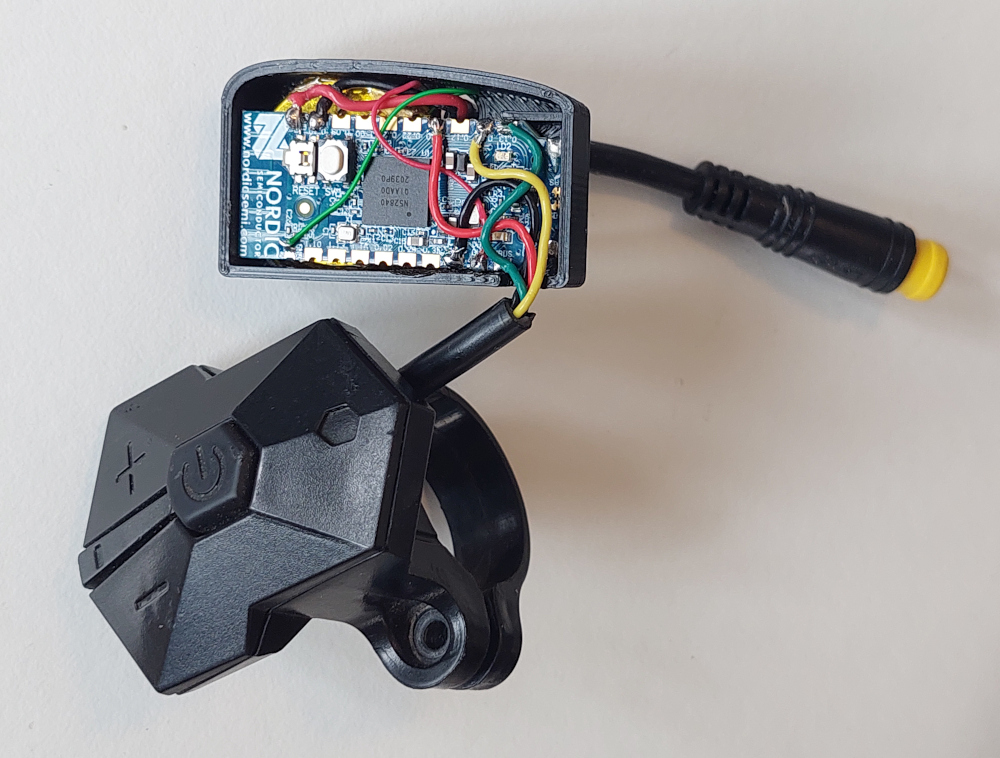
I did a new design for the TSDZ2 EBike wireless remote, reusing the 850C remote (which is easy to buy worldwide on Ebay or Aliexpress). I like this 850C keypad, it is easy to click on each button without error of clicking on any other, has good tactile and audible feedback, as also the right size (not to small and not to big as the 860C remote that seems more for a motorcycle).

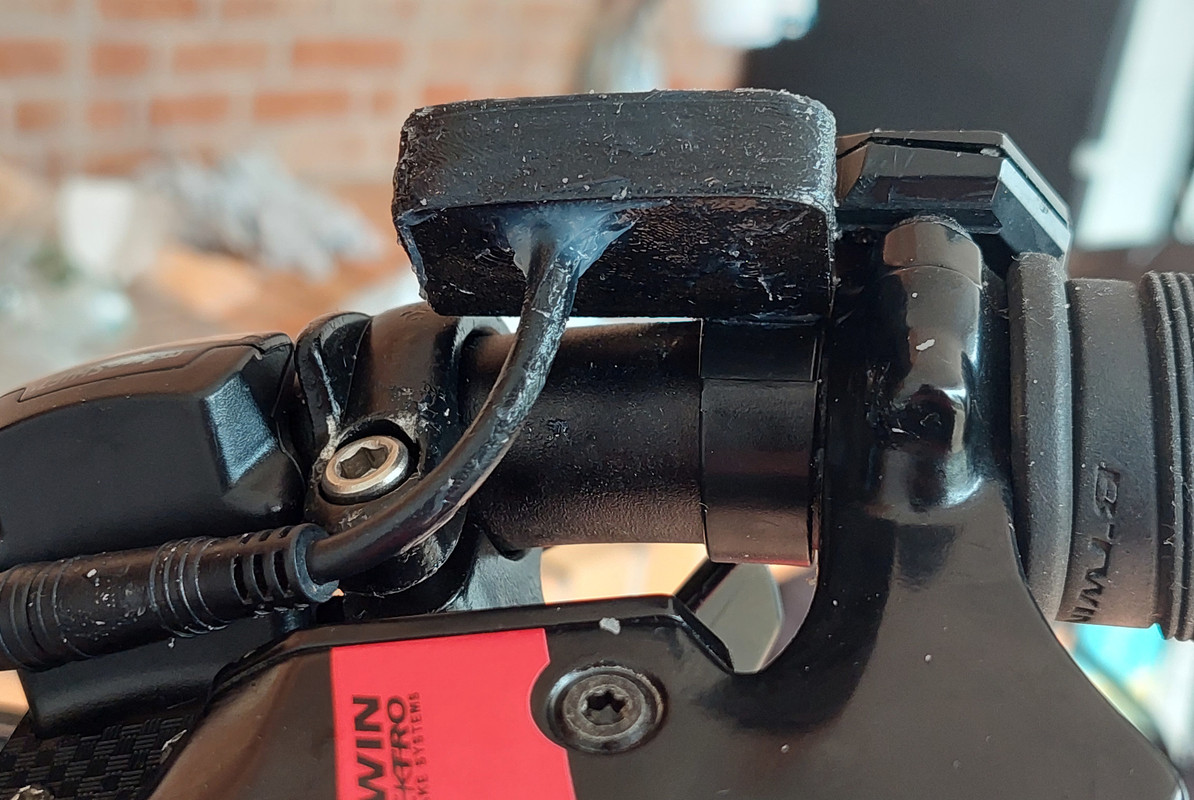
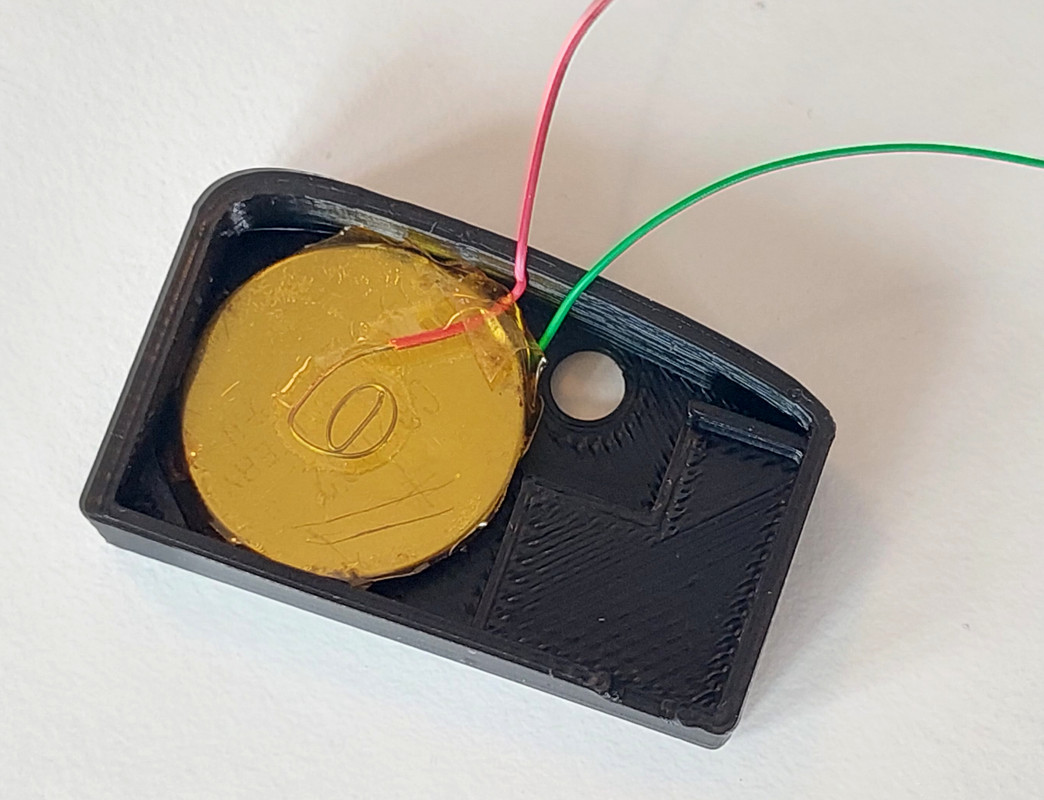
The 3D printed enclosure is glued to the 850C remote and is very solid. I don't think is possible to make it smaller.

Here is the final result:


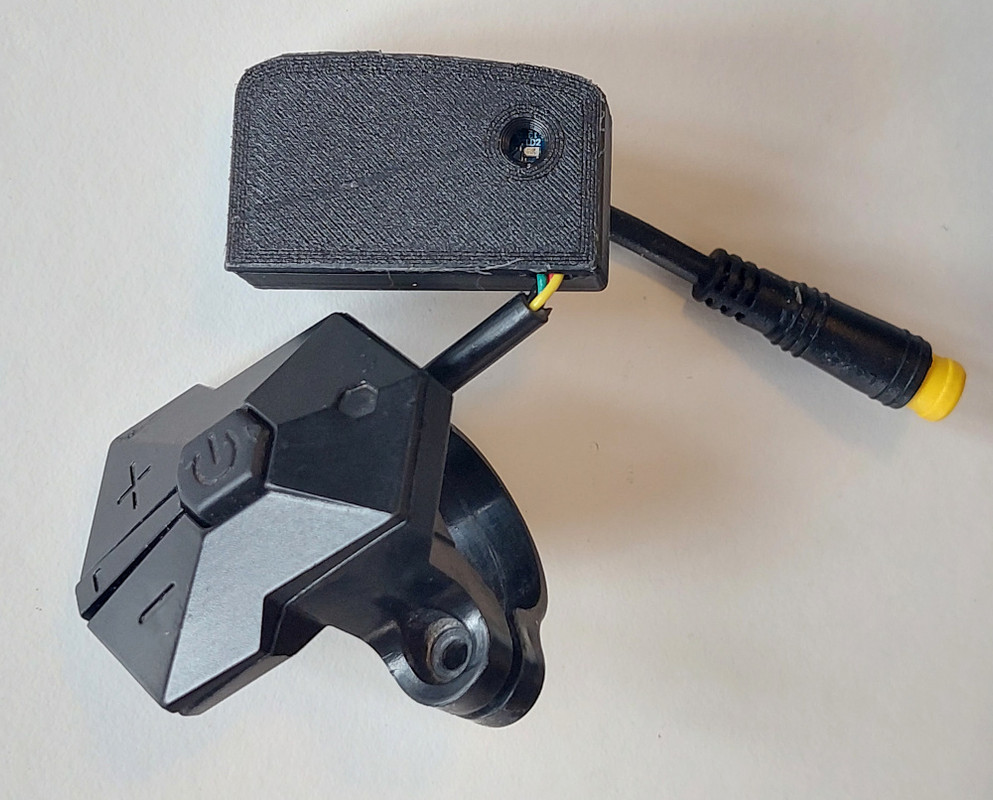
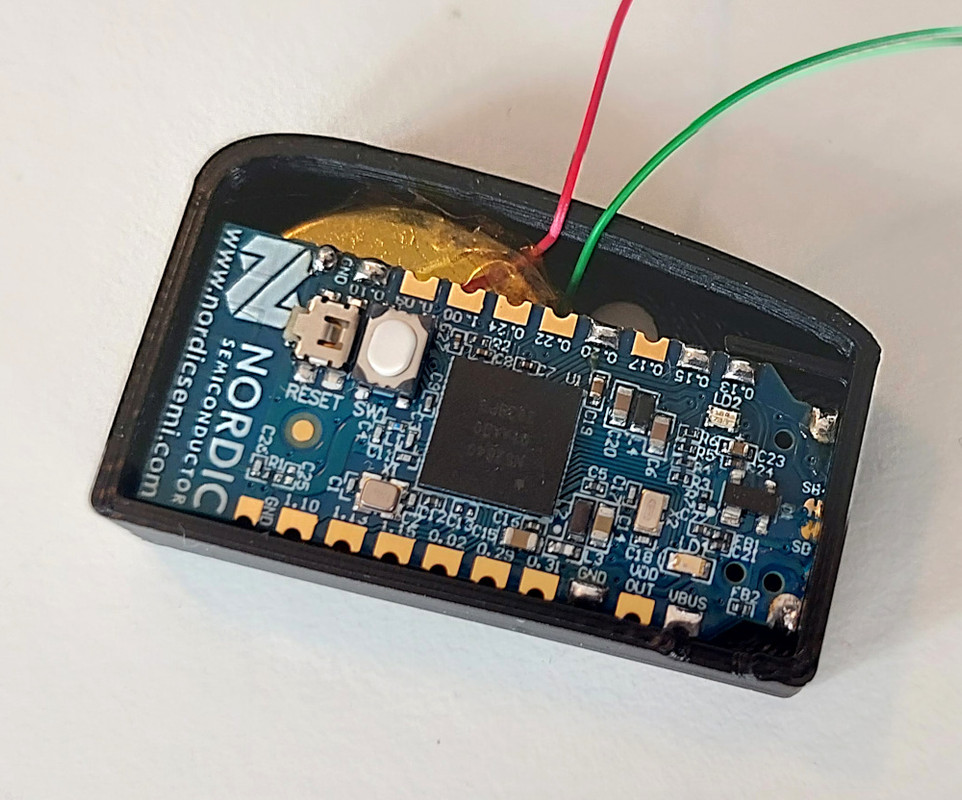
Before applying the white silicone, to make the box water prof:


And all the wiring done: 2 wires for battery; 2 wires for the brake sensor; 4 wires for the 850C remote:


And note that the white button is still clickable under the black box, as the box was designed to be thin under the button:


casainho said:
I did a new design for the TSDZ2 EBike wireless remote, reusing the 850C remote
Hello casainho,
Can I ask you for a test? I'd like to know if the TSDZ2 EBike wireless controller is compatible with my Android app.
You may know I'm developing an Android app for a patched original firmware. I use HC-05 built into the house and connected directly to the controller.
The patched original firmware is here: https://github.com/wptm/voamca
The Android app is here: http://www.wptm.hu/ebmdisplay/ebmdisplay_v21.apk
 
feketehegyi said:
casainho said:
I did a new design for the TSDZ2 EBike wireless remote, reusing the 850C remote
Hello casainho,
Can I ask you for a test? I'd like to know if the TSDZ2 EBike wireless controller is compatible with my Android app.
You may know I'm developing an Android app for a patched original firmware. I use HC-05 built into the house and connected directly to the controller.
The patched original firmware is here: https://github.com/wptm/voamca
The Android app is here: http://www.wptm.hu/ebmdisplay/ebmdisplay_v21.apk
As for the mobile app, I reused the one developed by https://github.com/TSDZ2-ESP32. As I am not professional on Android development, I removed some features of original app that I could not implement, so the final app is kind of basic but is good to setup all the configurations and see on main screen every variable.

The TSDZ2 wireless is fully developed from scratch, we do not use any original firmware. We have much more freedom and so we could develop more advanced features, like on the wireless remote, it can simultaneous control the TSDZ2 and control a Garmin GPS display. Still, in terms of hardware, we keep it as simple possible to be DIY and cheap

So, nothing is compatible with your current hardware / firmware / software.

And I wish to have more time to put of the development of firmware to TSDZ2 motor controller V2, which is better than the old motor controller.
 
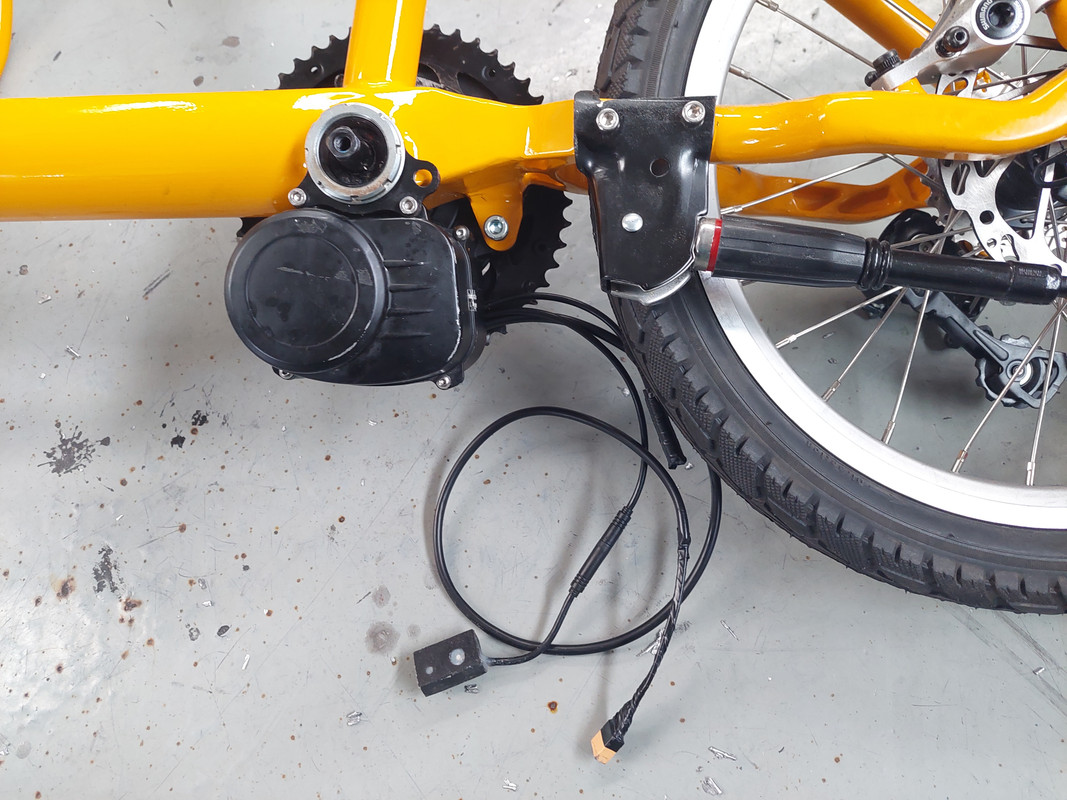
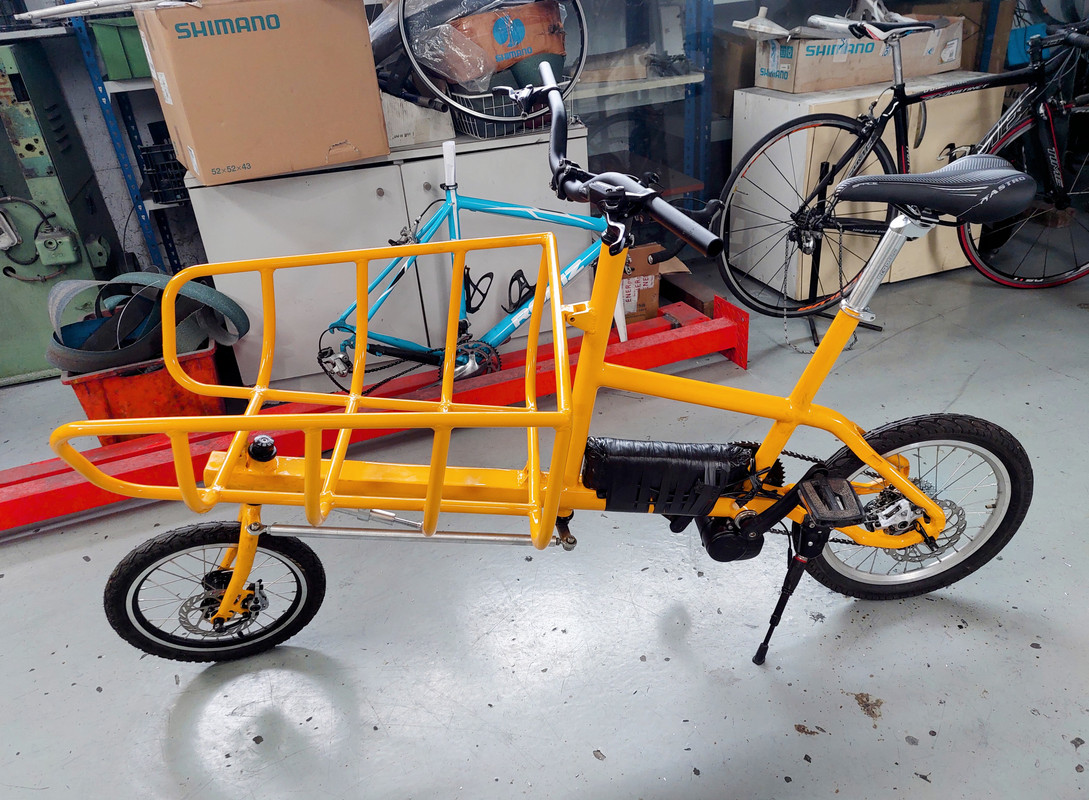
My new mini cargo bike is mostly ready, with a perfect fit for TSDZ2 :)


Hi guys I finally got around to installing the temperature sensor and thermal mod to this motor after completely frying the stator (it turned to charcoal LOL).

PROBLEM: The temperature sensor works fine when the bike is not in use. It shows the correct room temperature. However, when I press the "walk" button for testing, the temperature on the display goes up to like 180 degrees and of course this cuts out the motor. It is not really getting hot obviously. It works fine again when I turn off this feature.

I cannot see any problems with my splicing, but I traced it again to make sure, and double checked it 5x. I am only using the wires from the display (not the other grounds).
The display is the SW102 and I'm still on version 1.0.0 of the software.

xPZq0Ni.jpg

i5Wyxmy.jpg


Note: That goop is just liquid electrical tape
Edit: Note 2: It may look like the "red" wire is in the wrong place on that connector but it's correct on the end with the actual sensor (it goes to the ground not the middle)
 
Aquakitty said:
PROBLEM: The temperature sensor works fine when the bike is not in use. It shows the correct room temperature. However, when I press the "walk" button for testing, the temperature on the display goes up to like 180 degrees and of course this cuts out the motor. It is not really getting hot obviously. It works fine again when I turn off this feature.
Strange issue. I would test again the wiring, maybe GND wire connection of the sensor is lost.
 
so weird, its been a couple months since i opened up my motor but i dont recall my controller being potted like the one posted above. if so, that sucks cause i was going to cut and resolder all the wiring so nothing was bunched up in zip ties
 
Manbeer said:
so weird, its been a couple months since i opened up my motor but i dont recall my controller being potted like the one posted above. if so, that sucks cause i was going to cut and resolder all the wiring so nothing was bunched up in zip ties

I'm not entirely sure what you mean or why you'd want that soldering nightmare on your hands, but it'd be pretty easy to remove the cables from the potting (the ones with connectors). The potting is like jello basically.
 
Aquakitty said:
Manbeer said:
so weird, its been a couple months since i opened up my motor but i dont recall my controller being potted like the one posted above. if so, that sucks cause i was going to cut and resolder all the wiring so nothing was bunched up in zip ties

I'm not entirely sure what you mean or why you'd want that soldering nightmare on your hands, but it'd be pretty easy to remove the cables from the potting (the ones with connectors). The potting is like jello basically.

Cool, hopefully mine was without but as long as its not solid it shouldn't be a big deal. As far as why, I'm obsessed with cleanliness and when i actually settle on a setup i like, I always try to eliminate any excess cabling to make things factory like. The bike in question already had internal cable routing and was ideal bc it had a blank spot with no front derailleur. I was actually happy enough with this set up to drill holes to the frame and seatpost to run the wiring. Battery tucked into seat pouch, Wired through post and comes out down by bottom bracket, So any extra wiring I can do away with I will
 
I know that if I searched hard enough I would find the answer, but you know, to me, Google search sucks nowadays.

Anyhow at the risk of being (rightfully) flamed ;) does anyone have or can provide the location to a diagram of the TSDZ2 controller board showing all the wires that come out of it, including phases and torque sensor. A schematic is ideal and a photograph would be great. (I don't need to diagram showing where they go to the display brakes throttle etc, just labelled coming out of controller board itself.

A circuit diagram of the controller board would be the icing on my cake :D

Gordon
 
casainho said:
Aquakitty said:
PROBLEM: The temperature sensor works fine when the bike is not in use. It shows the correct room temperature. However, when I press the "walk" button for testing, the temperature on the display goes up to like 180 degrees and of course this cuts out the motor. It is not really getting hot obviously. It works fine again when I turn off this feature.
Strange issue. I would test again the wiring, maybe GND wire connection of the sensor is lost.
Maybe when motor is engaged the 5v for LM35 drops.
 
Finally my mini cargo bike is ready and I had to ride it 50 kms from the shop to my house, and I had to carry that electric scooter which was a good test.

The Sir is the man that did this mini cargo bike, a great shop for custom bicycles!!

And my son, 50 kgs, it was a quick test. The plan is to walk our 2 months old new baby, we do not expect to carry a big child there.

TSDZ2 works perfectly well and I am being very happy with it. See, for this small bicycle, a small and powerful enough motor!! I think this was the last bicycle I will use TSDZ2 as I do not expect to have a new bicycle in the next months / years (??).


Just went to install one of these for a customer and the throttle was defective. Thank god i went to zip tie up the wiring while it was on as it went into runaway full throttle when i wiggled the plug and i caught it. Other than that, no problems on any of them knock on wood
 
Well reading through this thread now around page 224!!! someone suggested that you should regularly check motor and crank for tightness. I'm glad I did, It was fairly loose, in a number of places! I'd just finished a 35k ride as well. All tightened up now - add new item to general checklist.

However, to tighten the TSDZ2 bottom bracket nut I had to remove the crank which was annoying. I remember, but did not note someone suggesting an open ended TSDZ2 bottom bracket nut tightener. Well, it probably wasn't designed for TSDZ2, but they said it worked.

Any suggestions?

edit: oh and while I'm at it ... what strength loctite? Who knew that there was so much to choose from ;)
 
gfmoore said:
Well reading through this thread now around page 224!!! someone suggested that you should regularly check motor and crank for tightness. I'm glad I did, It was fairly loose, in a number of places! I'd just finished a 35k ride as well. All tightened up now - add new item to general checklist.

However, to tighten the TSDZ2 bottom bracket nut I had to remove the crank which was annoying. I remember, but did not note someone suggesting an open ended TSDZ2 bottom bracket nut tightener. Well, it probably wasn't designed for TSDZ2, but they said it worked.

Any suggestions?

edit: oh and while I'm at it ... what strength loctite? Who knew that there was so much to choose from ;)
I had that issue at begin but once I fixed well the motor to the frame, I never had that issua again, on the 4 Ebikes with TSDZ2 I have.
 
gfmoore said:
However, to tighten the TSDZ2 bottom bracket nut I had to remove the crank which was annoying. I remember, but did not note someone suggesting an open ended TSDZ2 bottom bracket nut tightener. Well, it probably wasn't designed for TSDZ2, but they said it worked.

Any suggestions?

Remove the pedal and I think you can slip the spanner along the crank to get to the nut. Good reminder for me to check tightness on mine.
 
I suppose I could buy a normal TSDZ2 crank spanner and remove part of the ring to allow it to slip in, but I don't know if it would then have any strength! Thoughts?
 
gfmoore said:
edit: oh and while I'm at it ... what strength loctite? Who knew that there was so much to choose from ;)

And the answer seems to be ... loctite blue
https://www.loctiteproducts.com/en/know-how/build-things/threadlocker-red-or-blue-which-ones-right-for-you.html

I don't fancy heating my bottom bracket to 500C to remove it - do you think that might affect the performance of my motor? :shock:
 
gfmoore said:
I suppose I could buy a normal TSDZ2 crank spanner and remove part of the ring to allow it to slip in, but I don't know if it would then have any strength! Thoughts?

Can't find one anyway!!!
 
I keep repeating so many times, simply get a centre punch out and put a series of small centre punch dots on the inner side of the small bracket which locates the motor on the non chain wheel side, in a line around where the bracket touches the bottom bracket ( this is standard on the Bafang BB series brackets ). Tighten the main bottom bracket nut moderately and then shim properly the distance between the bracket and the bottom bracket ( if you don't shim this properly or your chain wheel guard touches the frame on the chain wheel side then yes you will get the motor moving ).

Now fit the two bolts through the bracket to the motor inclusive of the shims, tighten the main nut ( if necessary hit the spanner in the right direction with a mallet if you are a bit wee :D ) tighten the two bolts and no your motor will not move nor need a retainer bar as some seem to think is needed ( on full suspension its almost impossible to mount one anyway ).

You wont need loctite and yes you will need to ride the bike and check the pedal to crank bolts torque as we always have done on any bike with tapered cranks after the first ride.
https://www.ebay.co.uk/itm/222996634963?chn=ps&norover=1&mkevt=1&mkrid=710-134428-41853-0&mkcid=2&itemid=222996634963&targetid=1279486914453&device=c&mktype=pla&googleloc=1006920&poi=&campaignid=9445986619&mkgroupid=123611893918&rlsatarget=pla-1279486914453&abcId=578896&merchantid=6995734&gclid=CjwKCAjw9aiIBhA1EiwAJ_GTSpkRwmXaLV4RbMjpHN8HHjEq1OMyyW1MP-CgKbc6FAmZCzZ1lJATghoCrzEQAvD_BwE
 
Sorry you have to keep repeating yourself mate! :? I've only got upto page 252 on the big thread and I've forgotten what I'm reading, something to do with blue gears I think. :lol: oh and thinking how many motors did Casainho destroy to achieve nirvana :D

Thanks.
 
Back
Top