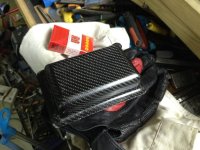
Hello to those who follow my thread

A few updates of the work made on the motorbike during those past few months:
Basically 4 projects:
-I've re-built all the wiring harness
-I've upgraded a few components
-I've built some new endcaps for the handles
-I'm building a new battery box
So let's start with the first one, the wiring harness.
The old harness was working fine, nothing major to complain about, but it was still the old wiring harness of the petrol bike. So I had a lot of useless wires, some of them were still "hot" with either 12 or 72V, and I thought it was quite a risk to keep them. Also, none of the plugs were waterproof which sometimes led me to a few small issues during heavy rain (unresponsive throttle mainly, but also unreliable lights).
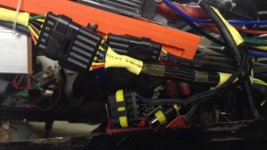
So I've bought some automotive grade plugs, as well as suitable wires. All of them are properly crimped, insulated with rubber gaskets and heat shrink, and covered with nylon sleeves to protect them from abrasion.
I've also installed a more powerfull DC/DC converter, the new one can deliver 20Amps @ 12V, which will be useful later for my new battery box.
Some pics of the work done:
The new plugs:
The motor harness (halls and phases):
View attachment 21
Most of the wiring plugged into the controller:
View attachment 20
The BMS box (3D printed):
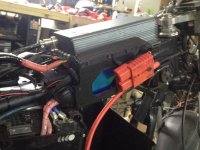
This new wiring seems to work very well so far, nothing to complain. It does look much cleaner than the mess I had and I feel much more confident about it now.
Next project was to upgrade a few components, mainly the brake system and the rear shock.
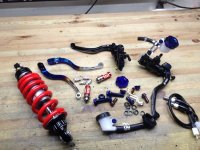
There was nothing really wrong with the original brake levers or master cylinders, but I had different ones on both sides and I couldn't adjust the lever position much. So I switched to some radial master cylinders, which, so far, are very nice.
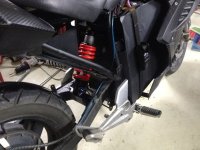
The original rear shock was a real brick, and it did not allow for any adjustments. I bought a gas shock instead, which makes an incredible difference comfort wise. I still need to adjust it to make it a bit stiffer though, I found the spring is a bit too soft, maybe it was intended for a lighter bike, I don't know.
Anyways, some pics:
All the new hardware:
The new shock installed:
The new brake lines installed, it was a real pain to bleed the front but I managed to do it eventually. The levers are now rock hard:
View attachment 16
The levers are supposed to be titanium, no idea if this is true but I think they look pretty nice on the bike:
View attachment 15


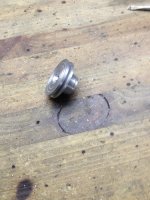
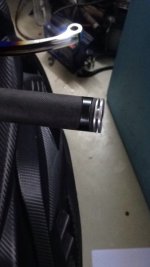
Next project was the handle endcaps. I've lost mine a long time ago while riding, and didn't want to purchase new ones since all the ones I could find were big and bulky, for no reason. I don't want to add an useless 3cm each side on my handles since it wouldn't bring anything but inconveniences. So I decided to just create my own using my mini lathe.
I'm not very good at using a lathe, this is actually one of my first projects with it, so forgive me if the result is not up to professional standards, but anyway in the end they fulfill their task and I'm pretty pleased with them
Some pics:
Before:
View attachment 9
Lathe work:
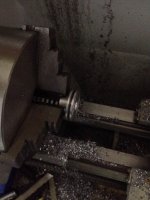
Final product:
Installed on the bike:
 View attachment 12
Last but not least is the battery box, which is still an ongoing project.
Right now, my battery box is just a big steel tub, which weights around 5.5kg and doesn't protect the battery from rain, cold, heat, dust or anything.
My plan is to create an insulated, air conditioned carbon fiber box.
The goal will be to keep the battery at the best possible operating temperature at all times. To do this, I will use some Peltier modules, which can provide both cooling and heating, depending on which way you supply them with voltage.
The battery will be insulated inside the box, using aerogel blankets, thanks to the advice of someone here in the forum (sorry I forgot your name

).
The Peltier modules will be controlled by an arduino nano and relays, which will take decisions based on temperature sensors, main power plug sensor, maybe a time and date module who would know my usual work schedule and some switches.
I'm just at the first stages of the code right now and I quite suck at it, but I have a good idea of how this should work. Basically, the main idea will be to do most of the hard work while the charging plug is connected, and try to rely as much as possible on insulation and thermal mass while unconnected. I'll explain more about the control strategy when the thing will actually be operational.
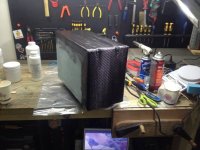
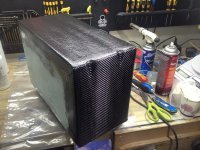
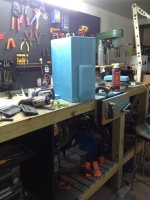
The device looks like that right now:
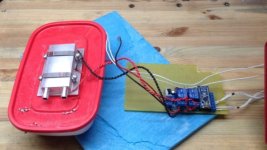
It has 2 Pletier modules and draws around 6 Amps @ 12V at full power, which is reasonable. The Peltier module will be watercooled in order to make it as efficient as possible. This will add a little to the overall weight, but I will also watercool the controller so that won't make much of a difference in the end.
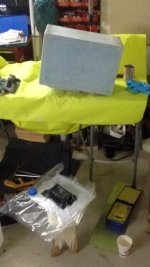
Next step is to create the battery box, and this is quite the hardest step. First I've removed the battery case temporarily, in order to create a foam mockup:
View attachment 7

The mockup is slightly bigger than the battery to accomodate for the insulation. I hope this will be enough because space was a bit limited and I can't do much more without having to cut the chassis:
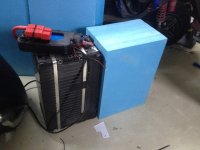
Then a bit of squaring, sanding, and I added this little box on the front which will house the cooling system:
View attachment 3
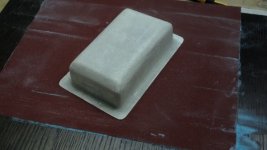
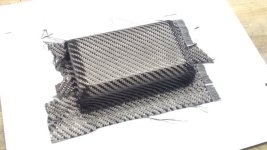
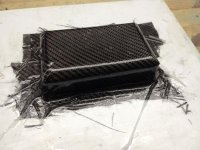
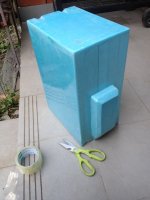
I'm using what is called the "lost foam method" to build my final box. Basically, you create the shape out of polystyrene foam, wrap it in packing tape. Then I'll put a few layers of epoxy coated fiberglass in order to make it a bit more rigid. I'll do a test fitting to make sure everything is okay, then cover by a few layers of carbon fiber, place it under vacuum (I think I'm going to use some vacuum bags for clothes and a vacuum cleaner), and let it cure.
Once cured, I'll create the openings, and dissolve the foam with acetone.
So, the first step was to put the tape all over:
And right now I'm laminating the glassfiber layers:
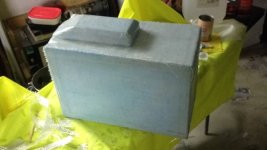
It's a bit of a mess to work with, epoxy takes too long to cure so it doesn't stick very well in the corners. I'll do a bit of sanding before the carbon layers. Not really sure if this will work fine, I'm quite experienced with glassfiber and polyester, but glassfiber and epoxy is a quite different story. I've never done vacuum bagging either so I hope I won't mess up since carbon cloth is quite expensive.
Anyway, I'll keep you guys updated on the progress!


