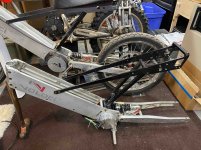
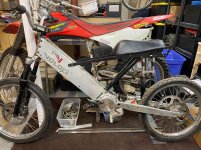
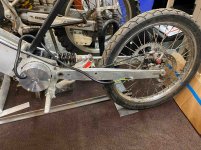
Nova Cruz Voloci Scooter/Bike Info

I had another Voloci controller failure completely my fault since water got into the controller area and i powered the system on letting out the magic smoke…tried to repair the board and it sparked out a second time…making me think water got into the motor windings also possibly? Oh well it was just an old Voloci we let the kids ride around for a few seasons.

Either way i decided to do a make-over to one of the Voloci’s i have left and try to bring it to life with some modern components and maybe a slightly higher voltage, nothing too crazy likely 13s

I ordered a set of new rockshox and a stem and headset to give the bike a facelift and to keep it looking more bikeish for street riding

I have a bunch of 10s 18650 packs i just have to assemble one into 13s and see how good i can fit it into the stock Voloci battery housing

I want to buy a phaserunner and ca v3 but they seem to be sold out right now, i technically only need a baserunner for this setup power wise

I will be finding some much better brakes, hydraulic most likely dual piston. The stock Voloci brakes are Rst cable pull garbage, not sure how they were dot approved
 
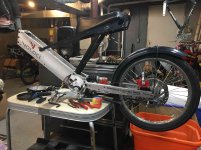
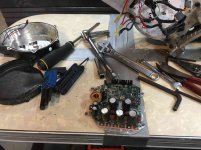
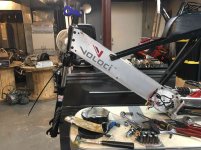
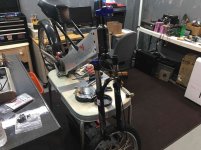
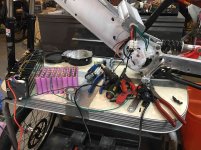
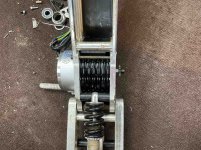
So I got the bike stripped down to essentials and removed the blown controller
IMG_6274.jpg

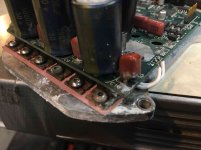
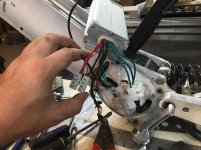
Here is some of the corrosion on the bottom of the board with a few components fried
IMG_6275.jpg
IMG_6276.jpg

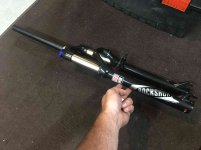
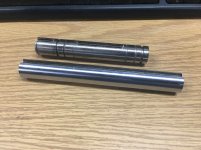
new...old forks lol
IMG_6277.jpg
IMG_6278.jpg

Have not cut down the steerer tube yet until I find a comfortable set of handlebars i and thinking maybe a 6" rise BMX bar?
IMG_6279.jpg
IMG_6281.jpg

Then I did a quick test with a 48v self pairing controller and found out the motor is still working fine luckily, used two 10cell packs, had to use 10cells from one pack and 3s from another pack since this contoller will not operate on 36v

So I will be building a 13s pack for this bike now
IMG_6285.jpg
IMG_6286.jpg
 
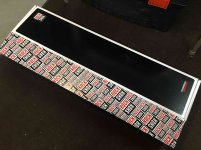
I forgot to take about a weeks worth of pictures, but I built the 13s battery taped it up with Trex Duct tape and got it installed into the frame, Cut the Voloci side cover and put it back on the side so I could cover the wiring mess and go for a test ride.

My BMX bars have not came in the mail yet so I threw a old set of Voloci bars on and a brake lever so I could get the thing out for a test ride.

Just like last time with the 72v Kelly controller, this 48v 30a controller does not seem to work with the Voloci motors...there is something weird going on with the timing or frequency and it does not match up

-The motor has bad startup torque, sounds like the phases are incorrect, but this controller automatically selects them so not much else I can do
-the motor has no hill climbing ability, but it will get up to 30mph on flats
-the motor got very hot to where I could smell the lamination cooking after only a 2.5 mile ride with almost no hills

Now I know what your thinking, the Voloci has adjustable halls so maybe you can adjust them, but this does very little...Also on the last motor I dropped a magnet in at 72v with Kelly Controller, it was a new in box Kollmorgen motor from India and the halls on the new Voloci motors are glued in place so they cannot get adjusted

Im pretty much at a loss for how I can make these motors spin without the stock controllers. The motor also sounds much much louder with any chinese infineon controller ive used 3 now, or with a Kelly controller

If you hook the same motor to a stock controller they are near silent and torquey....wtf??

The only controller I have not tried but I would like to try is the phaserunner, but I do not want to spend $400 with shipping and find out it does the same exact thing?

Any thoughts from the pro's?
 
It sounds like a hall timing issue, but there are plenty of other things that it could be.

One test is to measure the no-load, full speed current and compare to the stock controller. If the timing is correct, the no load current should be very close.

There is a way to check statically the timing. Disconnect the phase wires and feed in a small, constant current to a random pair of phase wires, and the rotor will line up with the stator. You need enough current so the rotor position is consistent (my guess around 2-5 amps). Once the rotor locks up, measure each of the hall signals while jiggling the rotor position. For each combination of phase wires, there should be one hall (and only one) that is just on the trigger point where it locks up. Jiggling the rotor should make the output toggle. If none of the halls are right at the trigger point, you found your problem.

I don't remember what the Voloci hall look like. On another Kollmorgen motor, they used surface mounted ones on a board that rests next to the stator. At high currents, the magnetic field can shift enough to throw the timing off if the halls aren't actually in the slots.
 
Well my brain was smoking again and I came up with an idea to replace the Voloci motor all together...the weakest link in this tiny city commuter

Hint: I ordered a 17mm keyed shaft to match the 6203 bearings of the Kollmorgen motor

Give me a few weeks to get this madness together!
 
Motors have improved quite a bit since those were made. I'll be interested to see what you come up with. See if you can fit one like your avatar :twisted:
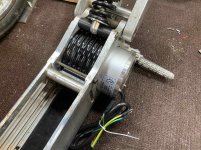
A hub motor would be worth considering too, but I like the mid-drive setup.
 
So I had a little bit of time to mess around with the fleet of Voloci's I have kicking around (5 at my work, 3 at home)

I adjusted the hall sensor board on the Voloci frame with the 48v 30a china smart controller and the 13s6p pack I threw together that has no BMS right now and got the motor sounding much happier, it now works ok and starts much better from a stall and on flats...but it still seems to have less performance that a 20 year old proto-type Voloci I own with only 36v powering it. I am not positive, but I think this proto-type bike has a brushed motor since it is fairly loud and this bike has a larger rear sprocket

The proto-type bike I just moved the handlebars up and the seat back to its normal position since I had this bike setup for my younger daughter who is now growing so fast! But we temporarily retired this bike because the motor stopped working which I assumed were bad brushed since its 20 years old and she rode 10ah of battery everyday for a few years straight. But after making the adjustments, I plugged the 36v hoverboard batteries in just for kicks, and the bike actually worked again. We decided to try taking it for a trip to the school only 2 miles away with my big butt on the bike, and it made the trip, but at times the motor would shudder or skip on certain bumpy areas or turns, my crazy daughter now rides the 72v 3000w dirt bike from ebay and goes full throttle everywhere! (my new Voloci needs to keep up)

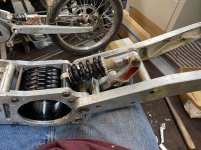
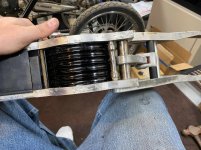
I then got some more parts on order for the new Voloci build/madness. I am going to be using the frame I took apart after I dropped another magnet in the brand new Kollmorgen motor with the Kelly KBS72121X controller on the first ride. This is Nate Ulrich's Off-road Voloci which had antique downhill forks and hydraulic disc brakes with the kickstand taken off! I figured it would be fitting to turn this pile of parts into a Powerful Franken-bike. The only part I will realistically have to take off another build will be a Voloci seat since I use so many of them on other bikes I build that are not Voloci's

a few parts already ordered
-10t 415 3/4 bore sprocket
-17mm x 135mm keyed shaft to match the 6203 Voloci bearings
-LR small block IPM with 3/4 bore adaptor
-Kelly KBS72121X controller
 
After a horrible first test ride with the 48v 30a China controller and the Voloci, I pulled the side cover back off and adjusted the hall sensors as far as it would let me until the motor sounded much happier, I then used the Cycle Satiator to bulk charge my new 13s6p 18650 pack I threw together and took it for its first maiden voyage across town to the kids school. We also managed to bring out the old Voloci Proto-type bike that is running on its last leg and it may need a new motor soon. I made the mistake of letting my daughter ride my new bike and she refused to give it back to me on the ride home :(

 
Last edited:
A special part has arrived, I need to do a little lathe work which will slow things down since I do not own one :)


but it let me start digging into the project much deeper which was nice!
IMG_6356.jpg

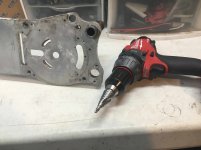
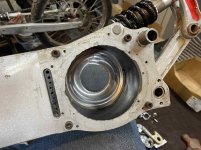
I used a Vari-bit to widen the frame shaft opening on the controller side of the Voloci, Hmm I wonder what I am trying to do?
IMG_6357.jpg

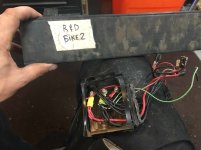
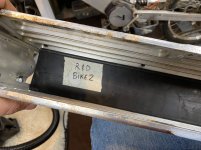
Holding a piece of EV history in my hand, yet still wanting to incorporate it into my new built! This piece of tape written on by Nathan Ulrich will stay intact
IMG_6360.jpg
 
Does anyone still have a copy of Voloci wire harness saved that they can forward me?
I just got my bike up and running after regluing all the black painted magnets.
I initially glued the one magnet that dislodged and after a 5 minute ride I thought it became unglued, but turns out it was a different magnet so I pulled the other black magnets and glued them back. So far still holding fingers crossed.
 
PaPaRocks said:
Does anyone still have a copy of Voloci wire harness saved that they can forward me?
I just got my bike up and running after regluing all the black painted magnets.
I initially glued the one magnet that dislodged and after a 5 minute ride I thought it became unglued, but turns out it was a different magnet so I pulled the other black magnets and glued them back. So far still holding fingers crossed.

Good to hear re-glue works, I have the motor I dropped a magnet at 72v sitting in my office as I type this begging for attention...

the 48v 30a Chinese controller Voloci is still performing well with no magnets flying off so far, that battery is only 13s6p but I bet if I tried to climb a huge hill with my 240lbs it would be hurting bad

What is shorting in your harness?
 
I'm not sure if it's a short or if something is wired incorrectly. When ever I use any of the 12v accessories the fuse blows, like horn or brake light.. another strange thing is that I think the high low power switch might be reversed.
The re-glued magnets are holding up fine, I'm getting 30mph with a tail wind and 25mph in the opposite direction.
The original NIMH battery only last about 2 minutes of riding so I'm looking for a replacement at the moment.
 
PaPaRocks said:
:x threw another magnet... time to let it go to another home :(

Oh man that is such a bummer! These bikes are really a ton of fun until this happens...

Do yourself a favor and hide the bike up the attic for 10 years, because I regret every single Ebike I sell eventually, and you can always do a major overhaul in the future!

My 48v 30a chinese controller Voloci is still holding up strong, but the battery is very weak. I finally put a volt meter on the handlebars and it sags down to 47v full throttle fresh off the charge 53.9v so the cells are pretty weak which is a really good thing for the Voloci motor so there is less power to potentially cause a magnet to go
 
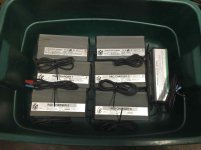
A box of chargers owned by Nathan Ulrich himself! Not much Value in NIMH chargers but a cool piece of EV history nonetheless
IMG_6410.jpg
 
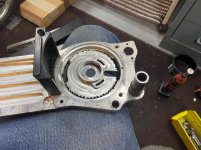
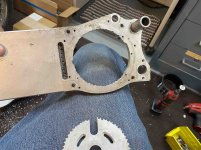
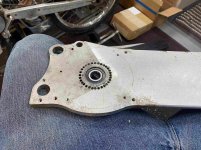
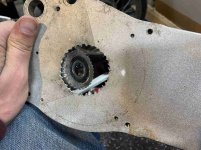
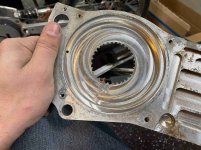
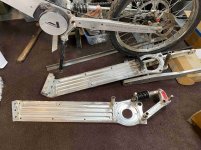
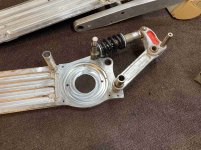
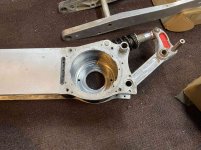
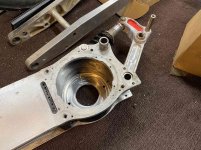
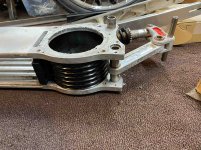
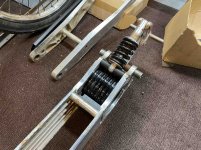
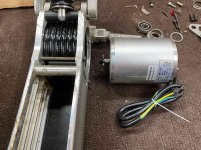
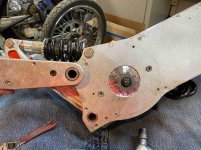
Nathan please do not get upset with me but I decided to raid my Voloci parts bin and sacrifice a set of frame rails to try and revive a new and improved Voloci that my daughter can again ride daily. My plan is to use the old motor housing as a sleeve for mounting external motors with ease and being able to drop in a replacement without tons of labor...
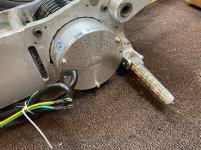
The downside to this project is that I am not sure how strong the frame will be after this(but since I already know) I think it will be just fine. Everything is bolted together strong as it was from the factory
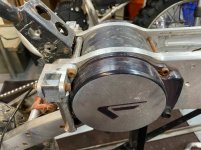
One thing I will have to do is try to extend the left footpeg since the motor will stick out the left side quite a bit, this is the only real disadvantage to this project so far, we will see just how bad it is once we mount the motor in place.
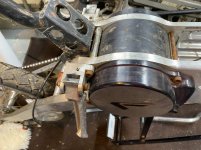
I'm not sure where this idea came from, but I jumped on it this weekend and these are the results. I did have plans to use a LR small block and a jackshaft thru the frame but decided against it for now due to complexity and chain drive noise. We may do that with another Voloci since I own them all :)

Feel free to comment on my hack work and bad ideas if needed

IMG_7081.jpg
IMG_7082.jpg
IMG_7083.jpg
IMG_7084.jpg
IMG_7085.jpg
IMG_7087.jpg
IMG_7088.jpg
IMG_7089.jpg
IMG_7090.jpg
IMG_7091.jpg
IMG_7092.jpg
IMG_7093.jpg
IMG_7094.jpg
IMG_7095.jpg
IMG_7096.jpg
 
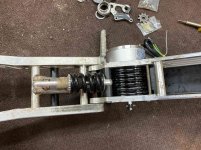
The motor fits like a glove! Pics coming tomorrow! The foot peg is also not obstructed either so this is looking like an easy winning conversion!
 
fechter said:
What motor are you using? It will be interesting to compare to the stock motor.

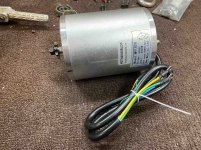
This is the motor I am using for this conversion, I just purchased it from Electricscooterparts.com! A long time running OG website
IMG_7106.jpg
 
This is just a test fit, I have plans to add some sort of grommet/rubber around the motor casing to protect against vibrations just where it passed thru the left of the frame

I just threw a footpeg on real quick since that was my biggest worry and there seems to be plenty of clearance!
IMG_7107.jpg
IMG_7108.jpg
IMG_7109.jpg
IMG_7110.jpg
IMG_7111.jpg
IMG_7113.jpg
 
Nice! Hopefully the chain lines up with the sprocket. I think you can push that motor pretty hard without frying it.
 
Ok so just to clarify I have a few Proto-type bikes in my fleet. Total I think there is three, but I wanted to go into more detail just incase since I just noticed another difference in one of them yesterday

1. The Xootr Scooter proto-type that has similar lines to a Voloci but does not look anything like one

2. The Brushed Voloci proto-type That looks identical to a Voloci except for a few minor details being
- has a motor that in unidentified but was loud and sounded brushed(failed after a few years of use)
- has a larger rear sprocket due to different motor KV likely
- has the 4 main bolts bolting the side covers directly to the frame rails making it impossible to see the controller without complete disassembly
- has a steel flat motor housing sleeve between the frame rails instead of finned aluminum
- has only two bolts bolting the sub frame to the main frame rails
- has a completely different frame angle below the motor and foot peg are different along with the mounting (they must have changed this right after this bike was built)

3. This was Nathan Ulrichs own specialty custom Voloci that I have not touched or ridden once, leaving it pristine


I noticed this while attempting to steal parts off this proto-type bike to complete my new build. The Foot pegs are completely different! And the frame near the foot pegs is completely different
IMG_7118.jpg
IMG_7119.jpg
 
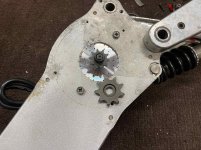
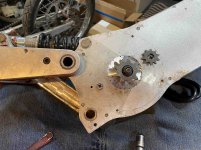
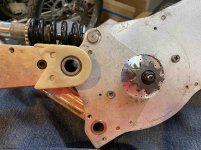
So I took off the tiny stock sprocket from the motor and replaced it with the new 9t #40
IMG_7114.jpg
IMG_7115.jpg
IMG_7116.jpg
Started putting the rest of the bike together, sub frame
IMG_7117.jpg
Wheels, brakes, suspension taken from Proto-type #2
IMG_7120.jpg
Starting to look like a bike, and you are also getting a sneak peak into my 2003 Honda CRF230F build...that I am taking 2 years on since I have too many projects(have not made a thread on this yet)
IMG_7121.jpg
 
Back
Top