
recumpence
1 GW
Gotcha.Warren said:other Matt,
"So, are you kidding around, or is this truly a comment meant to be as rude as you are coming across?"
Needed a smiley face I guess.
Warren
Just checking. :wink:
Carry on........
Matt
Gotcha.Warren said:other Matt,
"So, are you kidding around, or is this truly a comment meant to be as rude as you are coming across?"
Needed a smiley face I guess.
Warren
")
Holocene said:You may wish to get the free BikeCad programs. There are several variants, and just the Pro version costs money...
I'd recommend making a pilgrimage out to Bentley Cycle & Trading Post, just West of Gull Lake (North of Red Deer).
recumbents.com said:Matt, if you are building your own recumbent, here are tried and true plans to make a long wheelbase recumbent from scrap bikes:
Recumbents.com said:how about this one?
Maybe, you're saying that I'll be gearing the motor way down to turn the big crank slow enough, which then turns the back wheel at a higher rpm than the crank?
As long as the sprockets and the pivot share the center point, there's no chain growth, and no tensioner needed.
Drill out the spoke holes and attach a big sprocket.
I think he means to use a separate rear hub as a jackshaft, so that you have the freewheeling sprockets on one side and a fixed sprocket on the spoke flange.
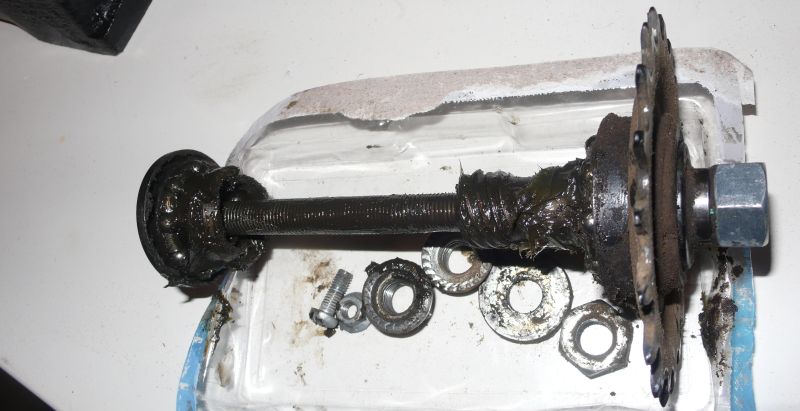
The lower picture appears to be parts from a single speed, coaster brake hub. No "freewheel" ratchet and pawl stuff in one of those.
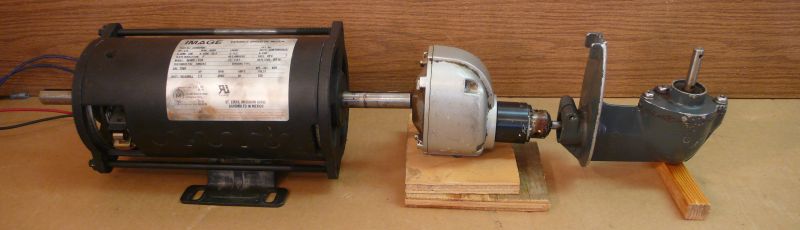
Post some pics, we might be able to help. Most come apart pretty easy, but also some of the cheap ones have so much lash (gear slop/wiggle) that if you really put a lot of power thru them you may well rip teeth off the gears with power from a bike motor. Also, they don't always use bearings in them, but sometimes just bushings, and those tend to be very worn in old grinders, and end up causing lash or other slop that wears gears quickly. I've got a harbor freight one that is trashed like that, becuase the bushings wore too much. Motor works great but gearbox is junked.MattsAwesomeStuff said:- Took apart an old almost-junk grinder after I realized they must have 90 degree gearboxes in them, (it does, 3:1) and considered using it instead of the propeller gearbox (2:1) if I never add another geardown stage. But I couldn't figure out how to take the damned thing apart any further than the back casing.
Many bike shops will take them off for you, but they usually charge for each set to be removed. Around here the going rate varies from $5 to $30, when I asked around before I just said screw it, and bought my own tool, because the tool can often be had for less than $10, which I think is about what I paid for mine.- Couldn't figure out how to get the cranks off their posts. Tried prybars and such. Bought a $10 gear pullet, but couldn't get the teeth in. Returned it and bought a $6 bearing puller that uses rectangular jaws rather than round ones. It just flexed and bent. Apparently there's a "Bottom Bracket Tool" for this. Some of my cranks are on shafts with a female (nut) thread, some have a male (bolt) thread. I hate buying 1-purpose tools, so maybe I could get a local bike shop to lend me one overnight. Stuck there.
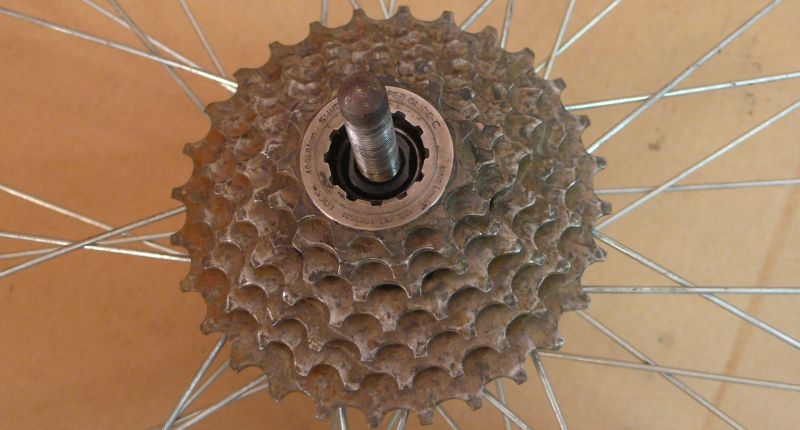
- Tried to pull off the rear cassette like in Warren's linked tutorial, but they won't budge. I'm stumped, cone nuts are off, I can see clear through the other side.
I just said screw it, and bought my own tool, because the tool can often be had for less than $10, which I think is about what I paid for mine.
then thread in the tool to those big threads.
First question: are you trying to get the sprockets off, so you can use them or the wheel hub (and it's built-in freewheel) separately, or are you wanting to use the whole freewheel mechanism on something other than the wheel hub?
Have you removed the locking sprocket(s) on the outside? Usually one or two of the smallest sprockets unscrews, or a separate lockring just outboard of all the sprockets.
I'll have to come bakc to try to help with the gearing--my brain isn't up to doing math right now.
When I first saw the tool itself, "Duh!" was exactly what went off in my head, because I had not figured out how it would work until that moment.MattsAwesomeStuff said:Ahhhhh... the BIG threads. That makes more sense. I was thinking "Do I have to buy 2 different tools now, for the different small threads?". Duh. Great, thanks.
On the two cassettes I have here right now, both can be disassembled using the same splined removal tool that is used to take regular Shimano-type freewheel clusters off of thread-on hubs. I forget if I had to use a chain whip (chain screwed to the benchtop in my case) or not, on these, but on others I have.It has spline teeth but they're only 1/8" deep. So chain whip (chain-in-a-vice for me, since I don't own a whip), and I'll make a spline tool from a bolt. I noticed when I turn them backwards it freewheels and presumed that must not be how they come off. Duh, gotta hold it with a whip.
So was I when I started my quest almost 5 years ago...Sheldon Brown's site was the most helpful place for me learning the bike stuff.Thanks again. Total bike noob I am.
Ah. Noise is one reason to keep pulleys big. The smaller they are, the tighter the angles between chain links, so the more they clatter on things they're going around. Also can cause more wear.My question is related to... I see people saying things like, for power-side chain-redirector pulleys never go smaller than 3". I'm wondering about torque or tooth wear or anything like that. Like, any reason I couldn't use a very small sprocket, that wouldn't be obvious to me right away.
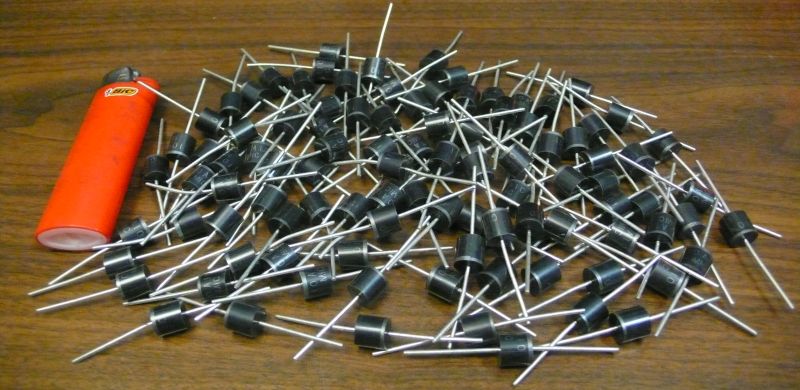
amberwolf said:You might check stores that collect batteries for recycling, including toolpack batteries at hardware stores, places like Sears, Home Depot and Lowe's, etc, as you might be able to make a deal to take those away so they dont' have to deal with recycling them.
Computer stores and repair centers also often end up with dead or old batteries, and may be willing to let you have those, too. When I worked at CompUSA and Computer City before that, we would have given them to anyone that wanted them, as long as the manufacturers didn't require a return of them for warranty purposes.