Spot welding fuses to individual 18650 cells?

>>>I wasn't trying to imply that both cases were equally good, just that both configurations can work if the copper is adequately sized.

I was thinking from a design point of view. Clearly the 4S10P battery pack (referring to the pack pic I posted in my first comment on this thread) with parallel busbars will work just fine. How ever it is my understanding, and I'm at the mercy of what I read and I lack a good foundational understanding of building battery packs and I have basically no experience, that the 4S10P battery with parallel busbars is a "poor" design and that design shouldn't be used. In fact I wasn't even aware that anyone in the know held a different opinion than in wire fusing your busbar serial connections not the parallel connections.

>>>At the ends of the pack, you have to gather all the current into a single wire in both cases. Doing this for each series group is no different

Ya I'm not against single wires. It's the gauge of the single serial wires that I'm complaining about.

>>>but will require quite a bit more copper to keep the resistance low.

Yes I was thinking about that issue also. Smaller gauge wires are higher resistance, but I have less understanding in that area. I need to go read some more.

I don't have the understanding to calculate if the fuse wires when used to attach cells to a parallel busbars introduce more resistance into the battery pack then if the design was changed and the same fuse wires are connected to serial busbars. In both cases the fuse wires are in the battery pack circuit. Does the battery design of having the fuse wires doing parallel connections vs of doing serial connections make any different in the battery packs circuit resistance?

>>>Distributed serial connections are better and that's how I build my packs but if you don't mind using a lot of copper,

I am presuming here you are referring to a design that doesn't have cell fuses? And a design like the picture I have included in this comment? The strips connect every parallel cell to each other and then there are strips crossing over to the next parallel leg at every cell. Yes clearly this is the most common design.

I like the idea of the fuse wires because you can have a cell short and it shouldn't take your pack down and it would have a way less chance of starting a fire in your garage (where your storing the bike) if a cell shorts.

>>>the other way can work too.

the other way is properly designed (how every that is) wire fused packs?
 

Attachments

  • good-design.jpg
    good-design.jpg
    58.2 KB · Views: 1,894
bobmutch said:
>>>In fact I wasn't even aware that anyone in the know held a different opinion than in wire fusing you busbar serial connections not parallel.

Fair question. Does Tesla do it? I believe they use very long parallel packs.


>>>Does the battery design of having the fuse wires doing parallel connections vs of doing serial connections make any different in the battery packs circuit resistance?

Very good question. Hopefully some ES experts will chime in.
 
A quick note:

1) My "lego cell holders" came in from Amazon... They are GREAT!

My Accountant ordered them as a surprise for me
They were DIRT CHEAP
They hold together well
They grasp the cells well
They are the only way to go IMHO - as they keep an air gap between the cells

(Please new folks - never pack cells side by side unless you Kapton them - as the heat shrink on them will melt in a second (easy to prove) and when they are stacked series this can result in short circuit runaway)

For mine - I will be linking them with the tiniest fuse wires I can get away with.
I will run the setups side by side and measure/calculate/prove the power loss at the connections is neglegable

...

As a reference design...

The primary difference between a "pack done right" (read Tesla) and a pack dont incorrectly (read Zero) is as follows:
1) On a Tesla, the 60V modules (which are series linked) each have an array of these small fuse wires
2) All the fuse wires run to a Buss
3) The Internal BMS is on this buss

1) On a Zero, the individual packs are wired SERIES... then parallel... and the BMS watches this parallel combination

The failure mode is the mode of operation to evaluate

1) ON a Tesla should an individual cell lose its connection - that cell falls out of parallel with its friends. This culminates as a simple "lower sum capacity" for that little chunk... so that module as a whole just presents as having a lower overall capacity. The BMS successfully detects cell level LVC and HVC - and the repair can be executed. There is no chance of over charge or over discharge

2) On a Zero... should any single tap wire break... there is no way to see it. Bulk charging still drives the problem cell up and down, up and down - with no feedback to the BMS. Yes... this "may work for a while" - especially for new cells... but it is a classic undetectable failure mode which presents a risk that is un-nessesary

The KEY -
Is Series then Parallle
vs
Parallel then Series

The difference is one design is Safe and the other design is Lucky
We dont do lucky.....

so

... We at all times are thinking about our failure modes...
Failure of insulators
Failure of interconnects
Delayed failure
Failure due to tainted, damaged, or worn out cells

Where we are thinking in "accelerated aging" worst case
Where we design for the worst and hope for the best
(we NEVER design for the best and hope the worst does not happen)

... I passed this on to the best guy I know at Zero ...

The idea that instead of building their packs in 28S 1P, then paralleling them...
That they need to build in 60V Chunks of 2P14S
Where reliability is and safety is inherent
Where 120V handling is removed (over 60V is considered dangerous)
Where stacking modules Series is better in every way conceivable than stacking parallel
Where the BMS is broken into modules - and a 60V module gets a BMS detector
Where a Monolith would have 4 modules in it, so 4 detectors, and a single master

This is the only design that will past muster over the long haul... and I brought it up publicly since they are now (presumably) spreading their design flaws to other companies.

...

The Zero Module Design was RAD... (did they not phase that out?)
The Zero Monolith Design was an afterthought - poorly executed

Any savings they grabbed by not re-designing the BMS (a Job I applied for as far back as 2012) - has been eclipsed by field issues and loss of valuable validation time.

Sigh
Oh well.

SO - Back on Topic -

Love the cell Lego Connectors
They are great

... The reason Tesla uses individual cans instead of pouches is simple long term reliability and conformance with testing and automated assembly. SURE - maybe a little less energy dense... a little more heavy... but over the long haul a better design. Safer, more reliable, easier to up-cycle.

-methods
 
Example:

Yea - I was bound by NDA, and before that bound by threat of death - (I took part in the original Validation while working with a clearance ... at a place so serious that we were not even allowed to LOOK at the internet without risking an infraction) - but the information is freely accessible to all on the internet now so -


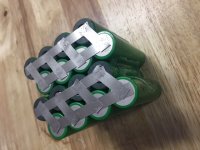
Its super easy to visualize how the internal monitors pick up the signal from "the common bus" where any individual cell fuse falling out can not cause a failure mode (undetectable situation where current can go thru a cell without monitoring its state)

So - my language above is incorrect - but the philosophy is correct.
Module, block, whatever - at the lowest level - we go Parallel then Series ALWAYS
NEVER Series and then parallel

...

The only time I have ever gone Series then Parallel was to leverage COTS design. Sadly the COTS design we leverage around here is targeted at the RC industry - so ... usually maxing out at 6S or 8S (traditionally). This drove a Series then Parallel build pattern for easy of use. Flawed... but for personal use... and never a production intent.

...

And to qualify another statement...
If one builds Parallel then Series you do not even need the heat shrink housings on the cans. They can just stack up against each other, so long as the transitions to Series are isolated.

...

SO
With my lego connectors (which sit on the bench in front of me but I am too lazy to take a pic)...

I have packed in 4 different 18650's
Yellow, Blue, Green, Brown

Yellow is the tightest fit
Brown is the loosest fit
Presumably differences (thousandths of an inch) in the insulator selection and not in the actual can dimension

...

Getting back to this thread...

We dont really need a #0000 buss bar in there.... Just look at the bars used in something like a Tesla Pack that can dump 1000A!!!

We are running more like 30A or 40A constant
Maybe at absolute most bursts to 80A

Good design dictates the following:

Assume a 1kwh pack (because that is a big ass ebike pack)
Assume 14S - as that is "about 50V"
1KWH/50V = 20AH

So - for a 1kw pack in 50V we will need 20Ah of cells
Conservatively assume 2Ah per cell (after degradation)
Thats a clean 10P

So a 10P14S pack (not a 14S10P!)

In this case we will see the following:

Average current of 40A continuous
Spread across 10 cells
4A per cell (Quite reasonable)

Assume 100% margin on fusing current
Peak currents of 8A during WOT for short periods
So... 16A fusing

A 26AWG exposed wire will fuse after 10 seconds
Adding margin
Reviewing amapcity charts

Even the most conservative ampacity chart
For enclosed wire
With 100% margin, on top of 100% margin (to avoid heating cells)
24AWG per cell would be considered hugely conservative

... in this case ...
The bus

... 40A continuous, 80A burst, enclosed
10AWG to 6AWG is a ballpark range
...

From my own testing in representative systems with a 40Aish current limit
10AWG does not get warm
12AWG does get warm

So adding a bit of margin - 8AWG would suffice for any of this business

The cross sectional area of "1/2 inch copper pipe"
5/8" OD (0.625)
Variable ID .528 to .569
Grabbing a conservative nominal of ID = .545 we get

0.625 - 0.545 = .080 thickness
Divide that by 2 to get a single wall, so 40 thousandths

Use calculus to calculate cross-sectional area:
https://www.engineeringcalculator.net/cross_section_properties.html

t = 0.040
r = 0.3125
A=2⋅π⋅r⋅t = 0.07854 in2

To check that for sanity...
50.6708664mm square

Going back to the charts we see this equates to between 1AWG and #0
(errr... sounds too big)

Using an independent measure for order of magnitude sanity (weight)

.344lbs per foot for 1/2" copper pipe
1AWG is about 258lbs/1kf, so .285lbs per foot
#0 is about 326lbs/kf, so .326

Confirmation thru two party verification that a half inch copper pipe is equivalent to something between 1AWG and #0
... moving on...

Ampacity on a 1AWG (to round down) is as follows:
super conservative... something like 130 to 150A

Since current is a squared problem... we roll back...
8AWG can carry 40A continuous - so - say 3 of those in parallel...
Meh - carry the two...
Looks like we have a margin of 2X to 3X

SO
Copper pipe is a bit of overkill

...

Going back to my suggestion of using a solder pot, I have the following real life personal experience

1) Grab some cheap ground wire from HomeDepot in 6AWG
2) Pull it straight and then run it thru the solder pot - coat the whole bastard
3) How you get your "solder dots" onto your cells is your business... top is easy... bottom is sketch
4) I am going to use 26AWG for my little fuse wires - they will tin easy - and I will tin them in the same way - as a roll

(so tin first then cut... as tinning the ends of a thousand short cuts will... lol... not work out)

5) Now assuming we have solder dots on the cells and a tinned buss bar... using tweezers... I will lay in my fuse connections

Thats my plan

The best way I can think of to "tin" an 18650 is to "tack" on tabs then tin those tabs (where we are just learning here...)
Tack welder goes real fast, is easy to make at home now, and the nickle tabs will be fine for tinning a little dot to

... Where the tabs rip off easily later
Where we dont have to solder directly to (sink heat into) our cell bottoms
Maybe... er... we go ahead and tack directly to the top... but we tab the bottoms...

...

Where we converge on the idea that we could then just tack longer tabs and solder those directly :)

... Anyway ...

I guess part of my point is all the fuss around load sharing and super heavy interconnects is pure bullshit. Dynamically it wont matter. Statically all of it will come into equilibrium. We are not running enough current or power to care and the bursts we are running are only 2X...

So... Dont sweat silly little details like exactly how long the little fuse wires are... or tapping "both ends" of the 6AWG (or in this case 1AWG) buss... it all works out and matters not. Ohms Law settles that... and the only time it is untrue would be in a short-circuit dump test.

Remember fusing

-methods
 
So looking at these Lego cell combiners (thank you to OP... you are RAD for sharing this)

Mine have channels built in for strips right out of the box
My caliper says they are 0.300 inches across

Obviously this was the original intent
Run strips across the parallel tracks
Go over the top of that (or grab at ends) to do series

So lets calculate the cross sectional needed to meet our basic needs

Nickle Strip
0.300" across (7.62mm)
Going to Amazon.... 0.15x6x50mm
https://www.amazon.com/0-15x6x50mm-Soldering-Capacity-U-S-Solid/dp/B07811NCH3/ref=sr_1_2_sspa?ie=UTF8&qid=1535211409&sr=8-2-spons&keywords=nickel+battery+strip&psc=1

Pure nickle
0.15mm thick
6mm wide
50mm long

Ok... cross sectional area of .9mm
about 35thou

69.3 nΩ·m (at 20 °C)
https://en.wikipedia.org/wiki/Nickel

16.78 nΩ·m (at 20 °C)
https://en.wikipedia.org/wiki/Copper

Looks like there is a ratio of about 4:1
69.3/16.78 = 4

So... copper AWG requires about 4X Nickle AWG... using that rule of thumb...
Dividing the cross section of the nickle by 4 - I get 0.225mm^2
Call it 24AWG?
https://en.wikipedia.org/wiki/American_wire_gauge

So... We calculated that we need about 24AWG for each cell
The strips are good for about 24AWG
This would mean they are certainly no good for bussing (we all knew that - but I calculated why)

...

hrm.... yea... I see why you guys fuss over this so much now...
Details details :mrgreen:

...

Where the copper strip was always intended for a low current application - like 4S1P..... which sounds about right... as it is fit to carry the current from "about a cell" (Where these rules of thumb are drummed up)

...

So assuming I run the cells 10 long
Intending to put all of those in parallel
Then have a 10 long "next door", folding back and forth

OR

Assuming I group the parallel cells in 3x3 or 4x4 or something like that

...

We want a rectangular pack
I want packs made up of 10P4S or there abouts...

... hmmm... how would I do it "RIGHT NOW"

...

Eh...
Like the original poster I suppose
Only I would back off the copper pipe to an equivalent of more like 6-8AWG, maybe as low as 10AWG

One idea is as follows:

1) Align 10 cells in a row, all tops up
2) Tack a tab on every single one, all exiting on the same side, or rotate after tacking (if it tools up better)
3) Lay a pre-tinned 10AWG wire along the top
4) Tin all of the nickle tabs
5) Lay the nickle tabs over the 10awg buss and reflow (NOT SOLDER)

... no... that aint it... I got it...

1) Align 10 cells in a row, all tops up
2) Tack a tab on every single one, all exiting on the same side, or rotate after tacking (if it tools up better)
3) Run a COPPER buss bar along the top
4) Fold the tabs onto the buss bar
5) Tack weld them

YEP
That is how I would do it
If I had a tack welder and time

1) make a tab length cutting jig... knock out a bunch of them (after dialing it in of course)
2) Make a jig to tack them to cells so they are consistent
3) Tack up all my cells
4) Lay up the cells and line everything up in the lego holder
5) Lay in long copper strip that is of 10AWG equi or better (so a fairly thick strip)
6) Fold over and tack those bad-boys again

That is the fastest and easiest I can think of that will result in a pack which can be re-built
It will be a BITCH to rebuild...
So if you dont want life to suck...
Consider machining a SPRING LOADED SOLUTION

-methods
 
So back to the OP

Back on topic

Using the legos provided (I have mine)
I wish to build a pack which can be serviced and rebuilt

I believe the best method to do this is to spring-load
We know from our proofs above that should a single spring fail it will not fail our pack
(Proof, we build P then S, presented above)

Any spring failure will manifest as an overall lower pack capacity - so it can be serviced

Said spring shall be long (10P)
or Square (9P or 12P in a 3x3 or 4x4)
Said spring must carry the sum of 4A * 10 and burst to 8A * 10
The spring material must be 24awg copper equi or better
The buss for the springs must be 10awg (or 8 really) or better

Choices for the spring are:
1) Springs (NO)
2) Foam wrapped in copper
3) points - where the entire bar is sprung, instead of each cell being sprung!
4) Pogopins ($1 each)

https://shop.ect-cpg.com/product/bip-1/

BIP-1.jpg

ECT (Everet Charles Technology) is a supplier or replacement pogo pins
They have a pin rated just for this application - battery pins
They are rated for 5A each - continuous
They are gold plated with very good spring action
Yes... just touching these to your battery... will make a good enough contact to pass 4A all day

The pins are intended to be press-fit into blocks

In our case we lay out a SPECIAL PCB BOARD
(I have done this - so this is not speculation)

... we make PCB boards in Squares, Long strips, rectangles... any size or shape
We populate the PCB boards with these specialized pins (shorter than normal pogo pins)
PCB boards are well known to be able to handle the full pack current....

ON THIS PCB BOARD WE GO AHEAD AND INCLUDE
1) The per cell monitoring
2) The mosfet charge and discharge control

OR

We add headers so as to allow users to buy just the PCB board (populated with pogo pins), to buy a kit and solder themselves, or to buy accessories (like BMS) to daughter card on

...

Thats how you win

...

The way you solder the pogo pins is as follows:

1) Spec a board house that does not solder-plate. Go for gold as it is more consistent
2) Spin a test board to figure out their drill sizes... just put 100 holes successively smaller
3) Find the 3 or so holes that will PRESS FIT (remember this is a function of their drill size and plating, not of hole you lay out!)
4) Leave the ass end of the board with no solder mask - just a big copper plane - choose 2oz copper option
5) Push in all the pins and flux the ass of each one
6) Run across the solder pot... wave it back and forth... reflow the entire PCB

Not so much as it warps!!!

Now this PCB has mounting holes in good spots
Some quick 3D printing or cutting up of nylon allows you to "sandwich" your "lego connectors" with these PCB's top and bottom.

Yea - they are about $1/cell... so for a 50V 1kwh pack that is 10*14=$140
times 2... for top and bottom... so $280 solution to a $28 dollar problem

But what does it buy you?

Eh he.... easy access to your batteries
You can use them and never solder to tack to them ever
They will be in perfect new condition

... so its to be thought of as a "battery carrier" and not part of the cost of your battery pack*

Food for thought
This is how we become more sustainable... and quit trying to save 10% by wrecking shit

... The way Zero builds their packs... they are total waste once one cell gives up
I hate this

... The way Tesla builds their packs... they are pretty hard to get apart

We need to start thinking about the upstream cycle of all these frocking cells
Recycling them is retarded
At end of life they have to go into stationary storage until every last drop of their goodness is drained

OVER N OUT

-methods
 
Sorry - one last bit

Where you may replace the pogo pins with standard nickle springs @ 1/10th cost or buy pogo pins in quantity 100,000
Where BMS ends up in pack for free*
Where you supply LabView program to characterize pack in 3 steps to assess first bank to LVC and highest bank
- Program tells you which two banks to split and swap
- Thereby allowing you to mix brand new cells with old cells to get a compromise solution
- Where you no longer need to individually bin cells*

Where I project the final cost of a 1kwh module to be on the order of $0.20/cell
For the top and bottom PCB's along with built in BMS and software license
With some jigging to keep them all together and flat and held tight
With no glue, no soldering, no tacking, no special tools, with BMS built in, in any shape or size
With no requirement to bin cells - so suited to upcycled cells from the internet in bulk

Where I will never develop that Idea - but guys like Niel from Zero have a patent on it

... Good College Team project - EE's, ME's, SW ...

OK - Very sorry for steering a bit off topic...
BUT SOME TIMES
It is Right on Topic to Steer off Topic

Because sometimes we get stuck in the "allegory of the cave" in attempting to zoom in and solve these problems
Because we assume constants which are untrue
IF - we have full access to all solutions and seed money
SO - that just means time

Its just a matter of time before someone "does it right" and pays for a run so as to make your lives less complicated
(wont be me lol - I am bankrupt - but good luck in your ventures!)

BACK ON TOPIC
Smashing 1/2" pipes with hammer and soldering to cells :mrgreen:

-methods
 
[youtube]9Pxq4Au5iuc[/youtube]

Kit for 30 cells = $1 a cell
So - 10*14 = $140

For that.... You could build a kit which is sound (in an engineering sense) and safe.

-methods
 
Yes yes but I want a 80amp pack 120peak like a 20s8p of Samsung 25r. But what buss bar systen can supply that and fit on a bike. Keep your fuses.
 
Soooo much information. Thanks for posting. Let me read through this and I may have some questions. In the mean time, thanks for sharing all this knowledge.
 
999zip999 said:
Yes yes but I want a 80amp pack 120peak like a 20s8p of Samsung 25r. But what buss bar systen can supply that and fit on a bike. Keep your fuses.

Hey Zip
Its ok...

I want a 100A/200A peak :p

For my ebikes I still run pouch cells
Their roots are in RC flight and that aligns perfectly with ebikes.

I am interested in these 18650 only because I am moving over to a Tesla platform soon.
Just... immersing myself in the 18650 ethos

Building stationary storage over here - intended for worn out 18650's

-methods
 
garolittle said:
Soooo much information. Thanks for posting. Let me read through this and I may have some questions. In the mean time, thanks for sharing all this knowledge.

Dont bother reading most of it - it is drivel
I was high on coffee and cigarettes :lol:

sigh... its all a man can do while he spools up for the big time....
Just jack it and wait
Jack it and wait

:mrgreen:

-methods
 
Lol. You crack me up. So I recently received my Kweld unit and lipo battery. It was easy to assemble and I ran a few experiments this weekend. Although I am more interested in using individual cell fuses, I wanted to try out the Kweld spot welder on nickel plated .15 MM copper strips. The welds below were achieved using between 60-80 joules and the results were good. As you can see from the video clip, the weld strength would need to increase for a go kart application but I was intentionally running it with fewer joules to see what would happen. These are the .15 mm copper strips that I recently “nickel plated” using an electroplating technique. Very sorry for the low quality of the YouTube video. I will try to post a higher quality video soon. Very pleased with the Kweld results so far. :D

https://youtu.be/AnvxYo2d9P0


0AF68BC0-EB29-4B6D-B0FD-3D048C8D3D94.jpeg49D174D3-866C-459C-902B-66694C4E1A17.jpeg
 
Ok so I really like this Kweld unit. I ran a few more experiments tonight using cell-level fusing with 24 AWG tinned copper wire. I am still using the lowest possible Joules (25 - 30) just to be extra safe. I am very pleased with the results. The weld-strength is decent but I am sure it will improve as I increase the Joules to the 30 - 45 range. Also pictured is my really cool Lipo power source for the Kweld unit. Keep in mind that this is "tinned" pure copper wire which is 4x as conductive as pure nickle of the same size. So far so good. More to come.

IMG_3777.jpgView attachment 2IMG_3780.jpg

The Kweld is very easy to use and I am please with the results so far.
 
999zip999 said:
What ? You are building a ebike battery fuse a 8 or 10p pack why? Buy high-quality cells and run them. Fuse these.

The current plan is to use the following for my electric go kart:

Brand new Samsung INR18650-25R cells (20Amps maximum continuous discharge)
Battery packs: Using the Samsung cells, I plan to have two separate 10P/14S packs connected in parallel which would result in a "20P" pack.
Since my max current would be about 250 amps, the maximum "amps-per-cell" would not exceed 12.5 amps. I would prefer cell-level fuses to "pop" at about 14-15 amps even though the Samsung INR's are rated for 20 amps continuous. I try to stay far away from max amps per cell to improve battery life.
 
So here is a “hybrid plan”. The 24 awg fuse wire is soldered directly onto .15 mm pure nickel strip (EDIT: previously stated .15mm copper by mistake). The .15 mm nickle strip is then spot welded onto the cell. The nickel strip has yet to be spot welded in the first picture. The second photo shows the actual spot welded nickel. As you can see from the last picture, the Kweld unit is producing excellent welds. I was having trouble getting a consistent weld when attempting to spot weld the tinned copper wire directly to the cell. That gave me the idea of this hybrid approach.

I need each cell fuse to “pop” consistently at the 14-15 “amp level” since I am trying to stay far away from the maximum of 20 amps continuous” per cell.

This is just “version one” of the idea. Any comments, criticisms or suggestions?

View attachment 285B6C76C-08DB-4C17-8032-20B873EFA6C0.jpeg
 
i like your fusing attempts and think that every clever battery design should have fuses (though my own 15s10p 30Q pack has none - i hope that those genuine high quality cells, driven well below their limit will not go crazy).
BUT fusing the batteries has ONE single goal: to safe the BIG PACK from blowing up because of one cell going nuts. if this one single cell breaks because of whatever reason and becomes a heater or even worse turns into a (near) zero resistance cell, then it needs to be disconnected from the pack immediately. as some have mentioned before. THAT'S what fuses are for.
as far as i understood: you want to baby your cells and save them from current spikes or too heavy load. this is purely done by sizing the controller and bms correctly, and setting the right limits in the software. that's all you need.
you don't want one big spike to blow all of your fuse wires, because this is what will happen. if you ever pull more than the fuse's limit, the first fuse will blow, putting more stress on the other fuses, and pop pop pop, ALL of them will blow.
you may rethink your approach or tell me i didn't understand your intentions. :wink:
 
izeman said:
...if you ever pull more than the fuse's limit, the first fuse will blow, putting more stress on the other fuses, and pop pop pop, ALL of them will blow.
you may rethink your approach or tell me i didn't understand your intentions. :wink:

8) You make some excellent points. I will certainly program the controller and BMS to the correct “max amps” settings. Having said that, I guess the real goal is to prevent an “internal short” from cascading into thermal runaway as the rest of the cells in a parallel group see the internal short as a “copper bar” into which a dead short current from each cell would immediately rush into the shorted. The current plan for max amps of about 260 amps that would be “spread over 20 cells” resulting from the parallel connection. This would be 13 amps max per cell on Samsung INR25 capable of 20 amps continuous. Translation.... neither the cells or the fuse wire should get hot. Since I want to avoid resistance, I may use fuse wire designed to “pop” at 25-30 amps per cell which would be well above the “per cell” amps of using 260 amps. Your thoughts?
 
fine with that :) choose fuses as big as you can to reduce resistance, but small enough that a broken cell will be able to blow it easily.
the max amp rating of any cell is what it can do constant. but we're talking about a short circuit and in that case much much higher current is possible for a fraction of a second.
 
I finally found a pic (thanks PaulD!) of the buses that have an extended slot, to allow the spot-welder to work as well as is possible. The longer the slot, the more current will pass through the contact points between the bus-strip and ane cell-end.

When you spot-weld with no slot, most of the current passes from one probe to the other through the bus-strip, and very little passes through the cell-end (path of least resistance). By including a slot, the current is forced to pass through the cell-end, and as a result, you can get very good results with the absolute lowest energy level, and the lowest amount of heat...If you are forced to use high heat and a longer pulse to get a satisfactory connection, then you are risking the very thing that you are hoping to avoid by using spot-welding as a method (instead of soldering).


SpotWeldTab1.png
 
Garolittle I must bring this up you're using 25r cells capable of 20 amp and because it's been talked about here. I had envisioned a modified bus bar for ? Me 8p so you have a cooper buss bar that covers both neg and pos termanils drill a hole over top of pos and neg cell big enough for spot welder probes now solder to the bottim your split finger nickle buss . Being avail to access the nickle under the copper bus and copper being low Resistancethe heat will go to the weld .. yes sir I know it's off topic But it includes your Samsung 25r cells for max cooling and discharge. Now I'm only saying but what if haha
Because when I come knocking on your door for that ride I want to turn it up
 
999zip999 said:
so you have a cooper buss bar that covers both neg and pos termanils drill a hole over top of pos and neg cell big enough for spot welder probes now solder to the bottim your split finger nickle buss . Being avail to access the nickle under the copper bus and copper being high low Resistancethe heat will go to the weld ..
OK I’m always up for a good idea. Can you send a picture that shows an example of this idea? By the way anyone who gives me free advice gets a free ride on my cool go kart. :)
 
Back
Top