Stealth Bomber goes Adaptto at 12kW

Another upgrade has been done.
Domino throttle ...... a linear throttle
20151118_231739_1.jpg


This was the stinky half throttle I had before:
20150502_205917.jpg


This is Domino:
20151119_115631_1.jpg


The wiring is the following:
Domino_thr_diagram.jpg


I didn't use the micro-switch for the e-brake and to connect it to the Adaptto controller I placed the white to the ground, the black to the throttle signal and the light blue connected to +5V.
In the throttle limits it seems that Adaptto do not like an upper limit (full throttle) > 4V but I have set it there and I have a very smooth operation.

Here is how it looks on the Bomber:
20151119_120905_1.jpg


Now is the time for some wheelies :mrgreen:
 
The new throttle puts your brake far away to the left from your fingers, making it harder to grip the front brake, how do you feel about that?
 
Allex said:
The new throttle puts your brake far away to the left from your fingers, making it harder to grip the front brake, how do you feel about that?

Yes, It is slightly farther away but I can brake in the same way as before.
 
nice!
i have once had my max-e re set its throttle linear on me, all by itself.
i noticed when it was surging, checked and the output signal was gone crazy again. re-did the linear funtion and has been all good since.
 
I also have the domino throttle together with a shimano saint which has about the same lever length as this hope has. yes it could be longer, but it doesn't feel uncofortable.

for my next bike think i will thake the Magura MT5e. It has a longer 4-finger lever and integrated e-brake switch. Additionally it has a ball at the end of the lever that is something you want to have if you plan to make the bike registered.
 
madin88 said:
I also have the domino throttle together with a shimano saint which has about the same lever length as this hope has. yes it could be longer, but it doesn't feel uncofortable.

for my next bike think i will thake the Magura MT5e. It has a longer 4-finger lever and integrated e-brake switch. Additionally it has a ball at the end of the lever that is something you want to have if you plan to make the bike registered.

does it have a little fluid level inspection window on the levers?
this is a requirement here in Aus for registration.

the only mtb ones iv seen so far with that are tektro
 
MOTOR UPGRADE .....
This is my motor upgrade from stock 5403 to QS 205.
I chose the extra/V3 type with winding 30X4T 11.39kV hoping it will deliver a good amount of torque without overheating.
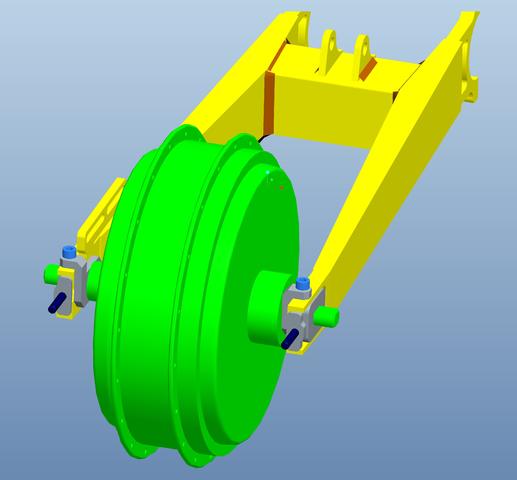
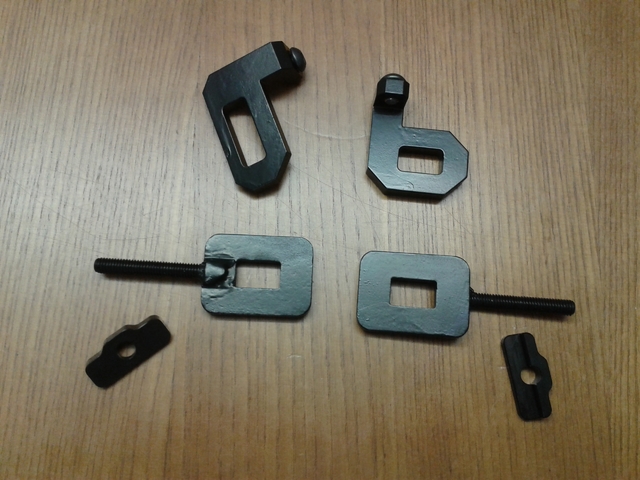
To center the motor in the swingarm I need a spacer of 5.5mm on the left side and one of 7.2mm on the right.
My idea was to prolong that plates on the swingarm so they will work as torque plates when the light blue bolts are tightened.

20160126_154542_1.jpg

assy_w_qs205.jpg


I will need to build also two new plates on the outer side of the swingarm because the QS205 motor shaft has a M16 thread.

This is the tightening procedure that I designed:
First of all I need to adjust the position of the motor for the correct chain tension, then tighten the two light blue bolts (at this point the shaft of the motor is blocked in the swingarm and can not rotate backward) the last thing is tightening the nuts on the motor shaft.
Once the shaft is locked in a regenerative braking position when regenerative brake is applied the reaction torque is provided by the swingarm.

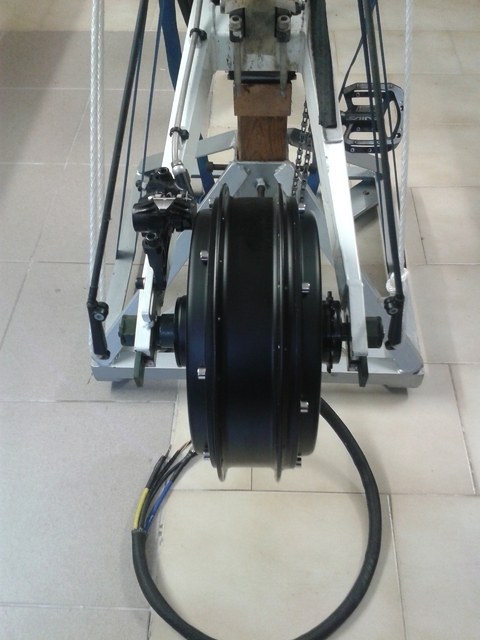
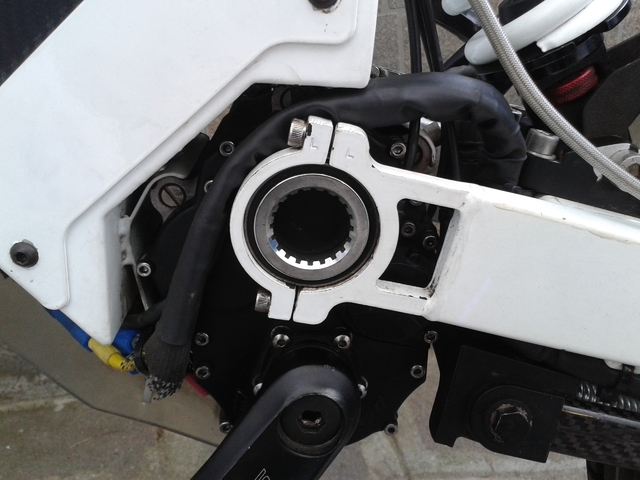
Mounting QS205 motor ...
I'm pleased with how it turned out motor assembly in the swingarm.
The torque plates works as expected and the motor is centered better than the stock 5403.
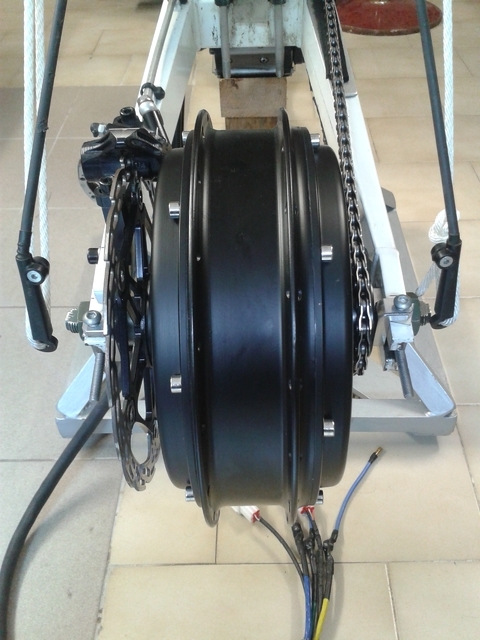
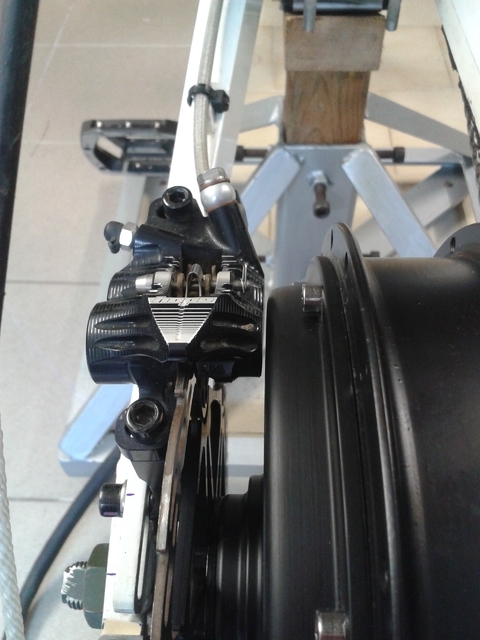
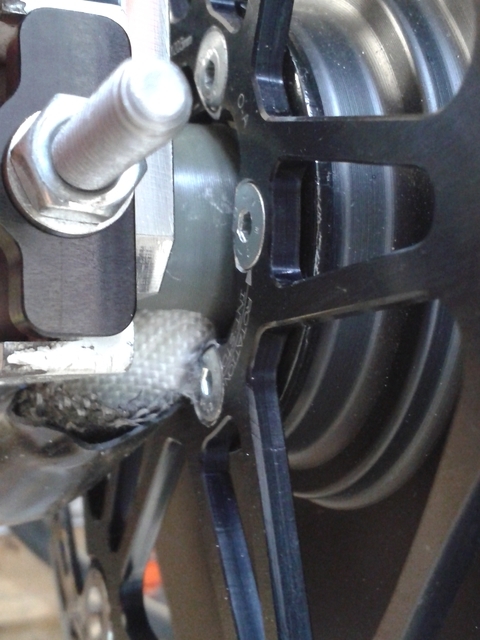
There are two potential problems that bother me, the first is that the brake disc bolts may rub on the large bunch of wires coming out from the shaft and the second is the little distance that there is between the brake caliper and the left side of the motor. The gap is about 1mm.
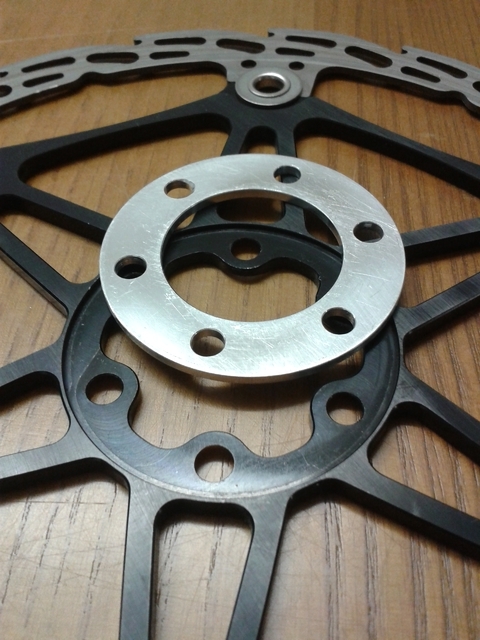
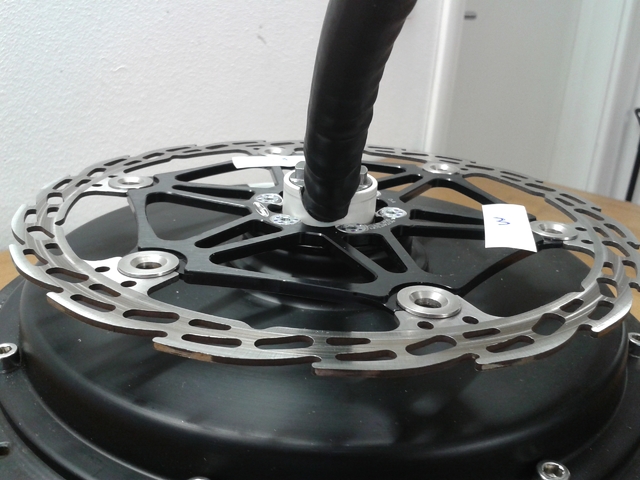
For the brake disc bolts I thought to countersink the holes in the brake disk to house the flat-head screws.
20160206_155947_1.jpg

20160209_142855_1.jpg

20160209_142912_1.jpg


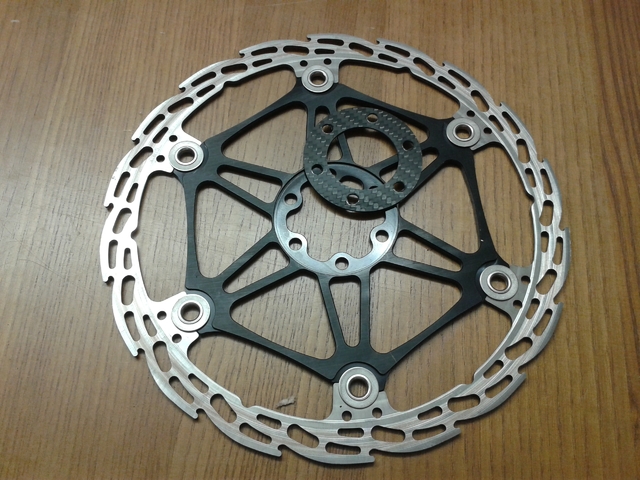
The brake disc will be mounted with a carbon disc of 1mm thickness that flush the recess of 1mm in the center of the brake disc and I will use the brake disc spacer provided with the motor.
20160207_202252_1.jpg

20160207_202309_1.jpg


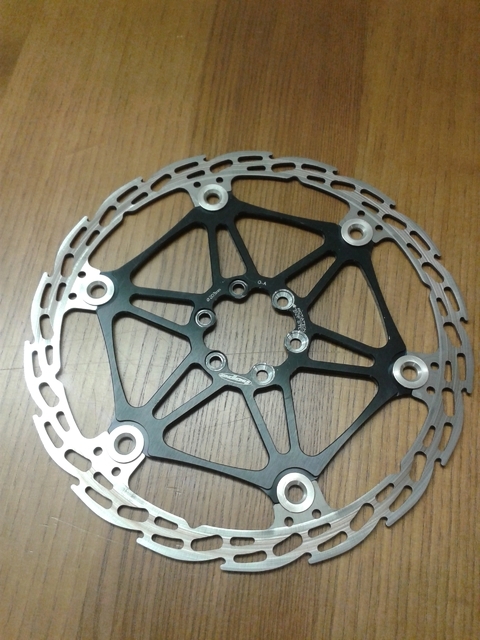
Countersink the disc brake holes:
20160213_182334_1.jpg


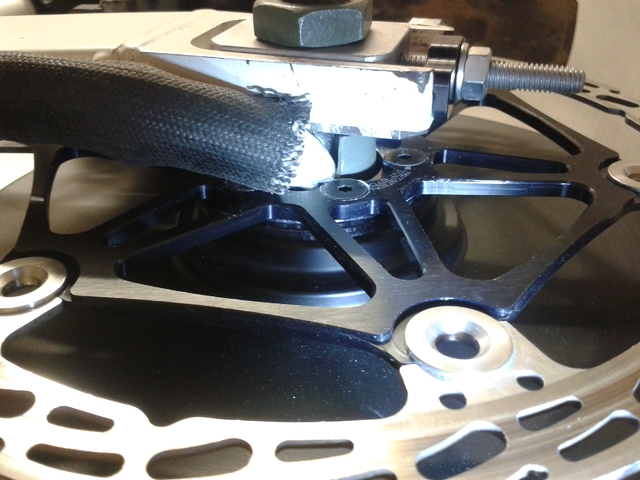
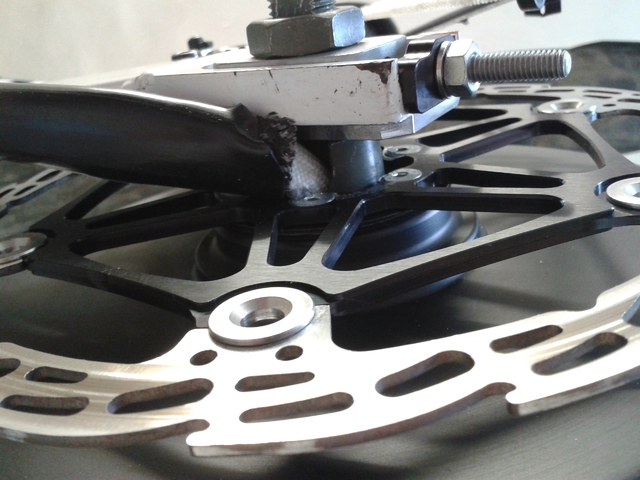
Tried to mount this 2.3mm thick disc spacer :
20160214_003250_1.jpg


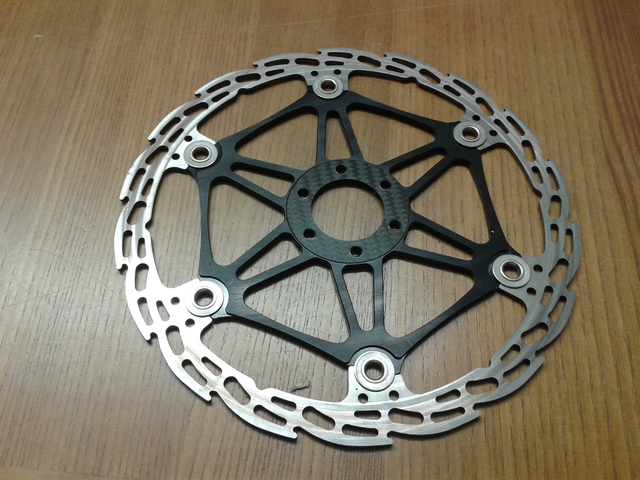
But reducing the clearance between swingarm and disc is not a good idea.
20160213_204253_1.jpg


So I went back to the first 1mm thick disc spacer and also I filed the edge of the screws in the center near the shaft.
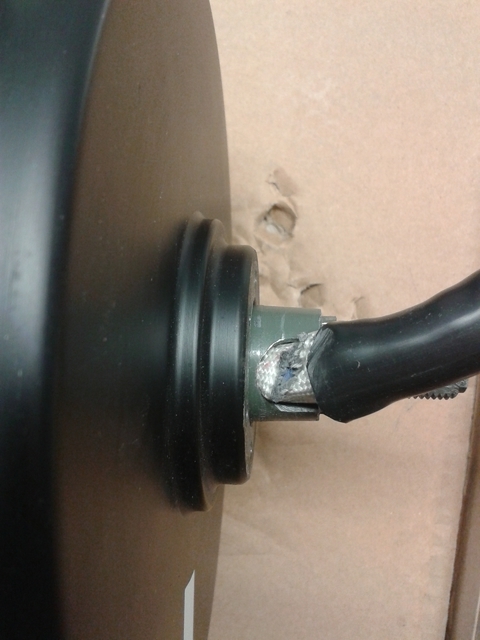
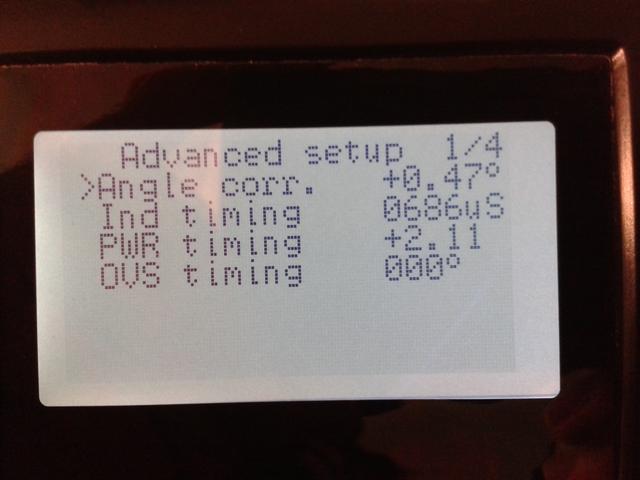
This is what I'm going to use to do Adaptto autodetect then I will open the motor and will remove the spare set of halls/thermo wires provided with the motor.
20160215_122413_1.jpg

20160214_141221_1.jpg


After motor autodetect done for both the main and spare halls sets all went in the correct way and now I will open the motor to remove the spare set of halls wires to see if is possible to use the motor on the Bomber swingarm without wrecking halls and phase wires.
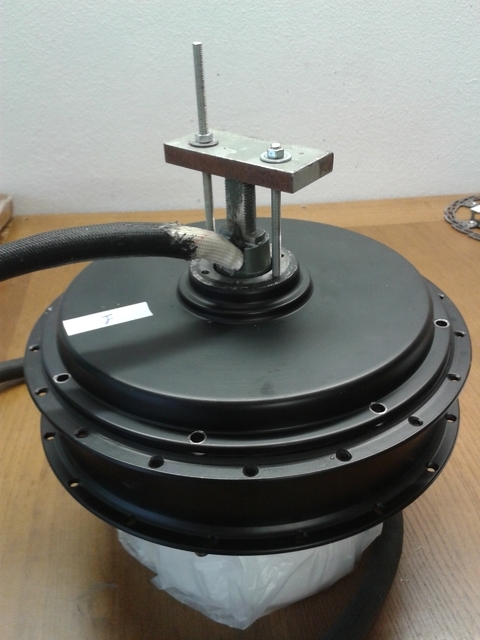
This is what I have just after the first autodetect:
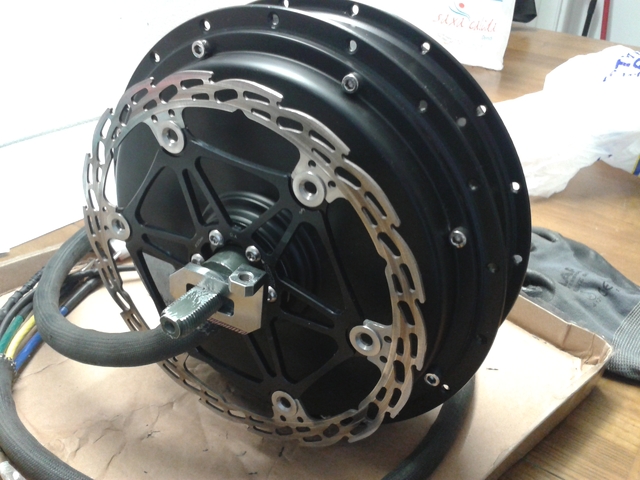
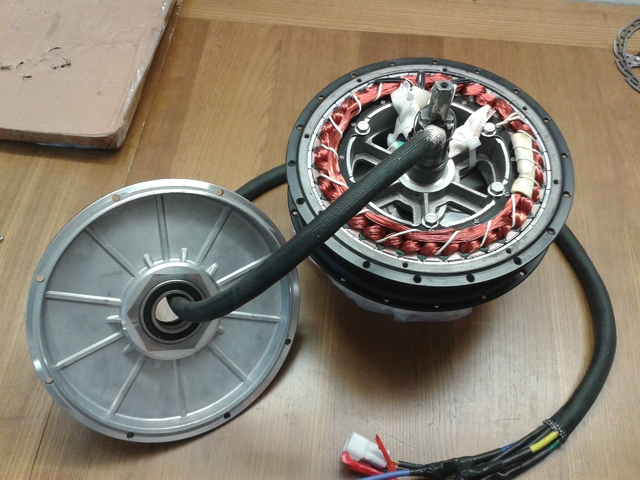
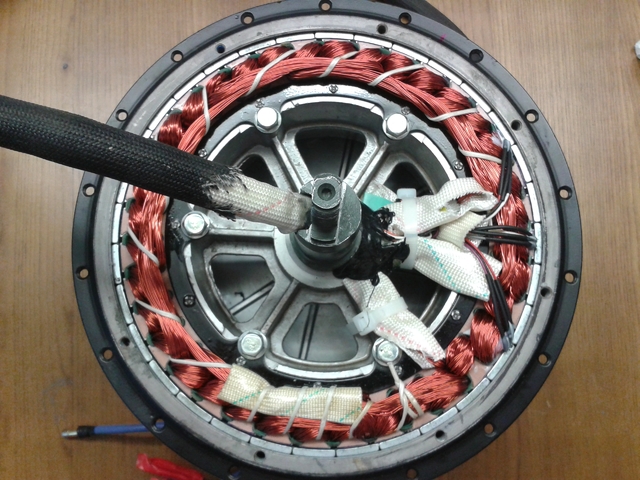
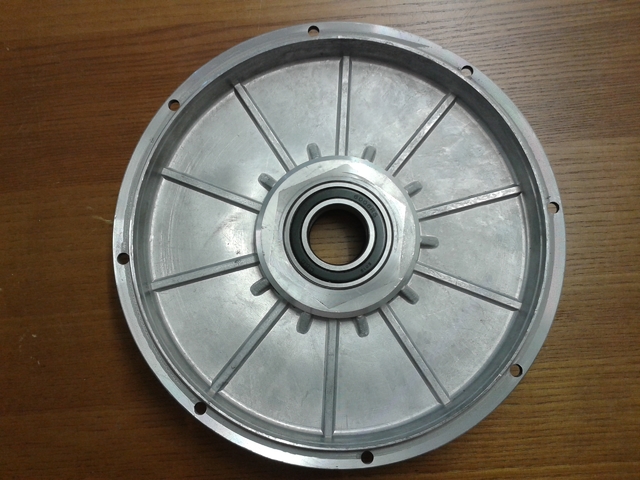
20160224_131850_1.jpg


Motor opened:
20160226_130423_1.jpg

20160226_131145_1.jpg

20160226_132225_1.jpg


Bearings look good:
20160226_133220_1.jpg


Here are all the parts finished.
This is what I have built to protect the phase and halls wires from rubbing on the brake disc bolts:
20160306_134950_1.jpg


It seems to me that I can try to ride this way:
20160306_141732_1.jpg


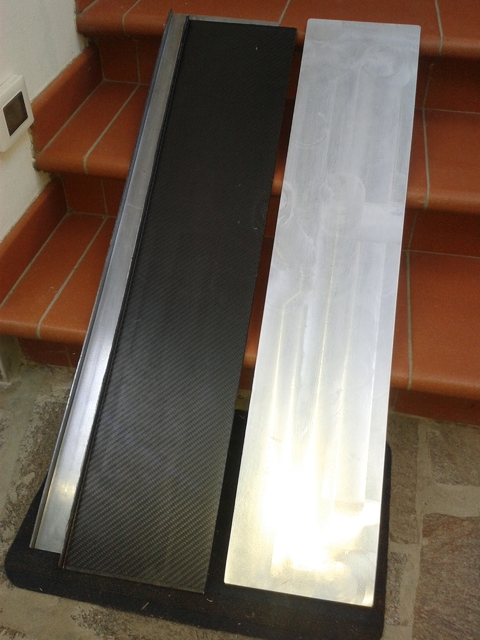
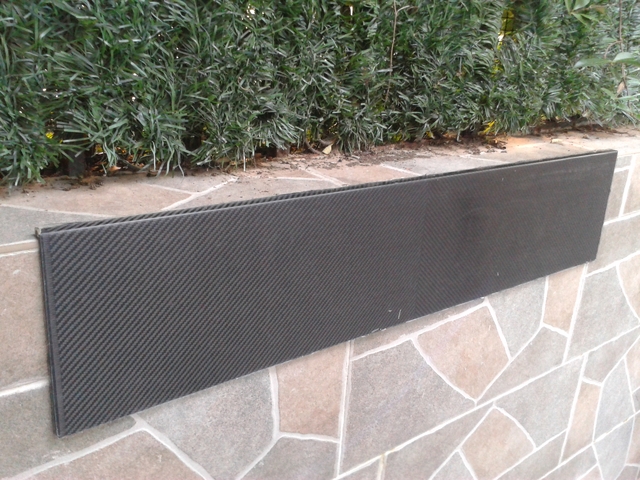
These are the torque arms painted:
20160309_224830_1.jpg


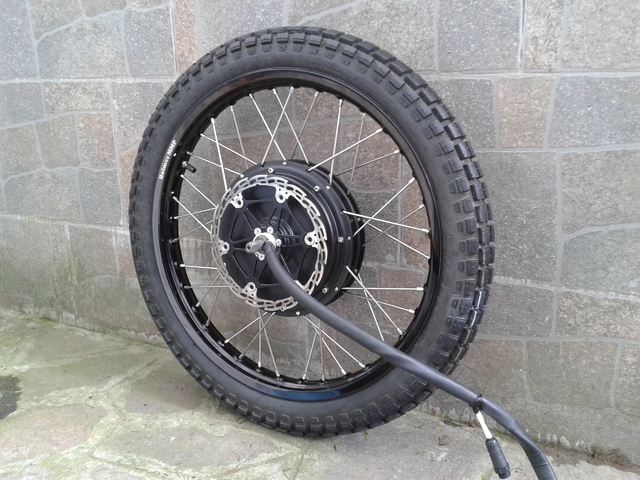
Wheel finished with trial tyre Vee Rubber VRM021:
Weight of the entire wheel 17,7Kg
Diameter 624mm
20160309_102334_1.jpg


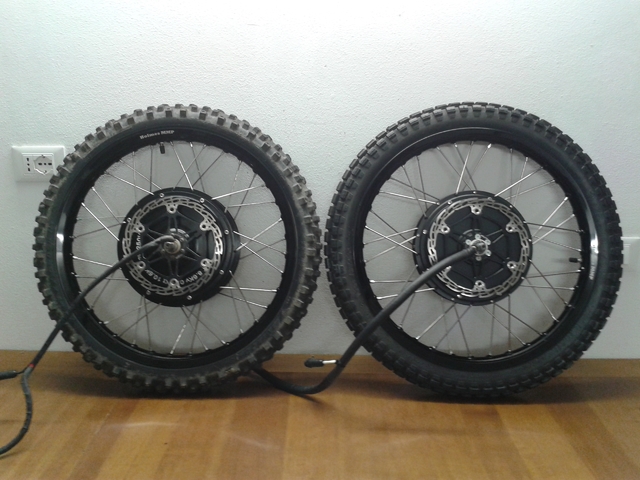
A comparison between 5403 with motocross tyre and QS205 with trial tyre both with 19" rim:
20160308_232015_1.jpg


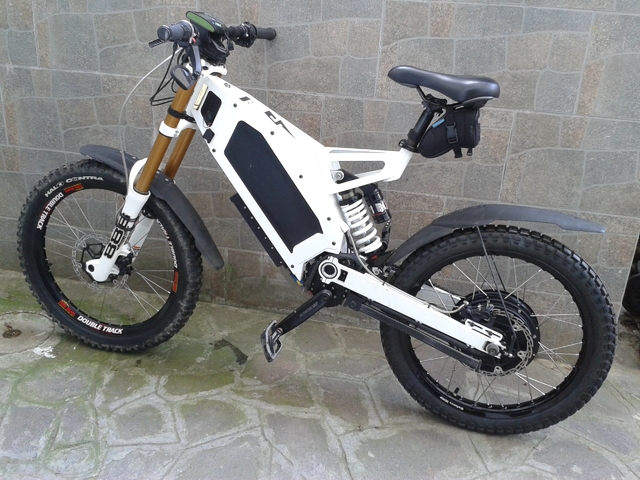
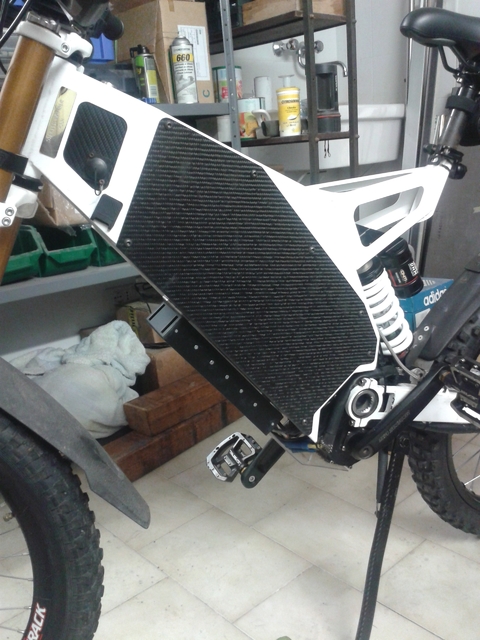
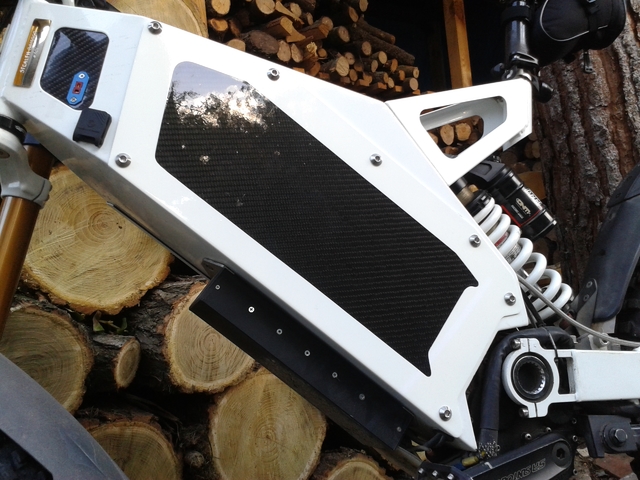
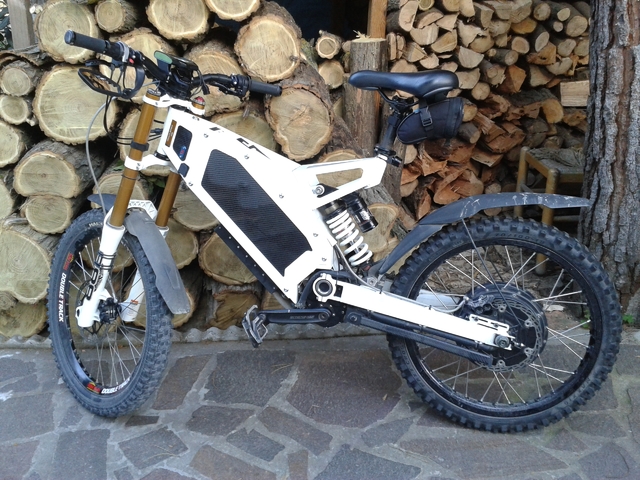
This is what the Bomber looks like with QS 205:
20160311_124143_1.jpg


And this is how I managed to route the phase wires to avoid rubbing on V-boxx gear selector sheath
20160311_154356_1.jpg
 
Who .... ho!!!!! :shock: :shock:
This motor has some impressive torque :D :D .... The front wheel want to pull off the ground every time I smash the throttle :mrgreen:
Definitively more torque than stock 5403!

With the following setup

20160312_181617_1.jpg


And a conservative BOOST profile setup @ 140 Bat Amps and 280 Phase Amps I reached 91Km/h
20160312_181543_1.jpg


Then today I rode a little off road and on the beach and I was doing wheelie all the time :D Also at the exit from a curve, I found myself with the front wheel on air :mrgreen:

The max motor temp I saw was 84°C and I have to tell I'm quite happy because for now I have the impression that just do what I expected .... more torque and less heating

Increasing OVS @ 2° gave a little more top speed (the battery was at 50%):
20160313_182625_1.jpg


I guess I need more phase amps to see the difference.
 
Hi BB. Looking sharp with that Vee rubber tire.
Can you explain a little in details what you did to avoid the wires rubbing?

20160306_134950_1.jpg
 
+1
i like the plastic pipe solution to the wires rubbing.
did you have to machine the pipe to get it to fit or was it just a stock size?
i think ill try the same setup.
 
ridethelightning said:
+1
i like the plastic pipe solution to the wires rubbing.
did you have to machine the pipe to get it to fit or was it just a stock size?
i think ill try the same setup.
I have designed the white plastic pipe to fit tight on the shaft and it was machined by a tool shop. I think it would be the definitive solution for my problems .... So far so good after 200Km

macribs said:
Hi BB. Looking sharp with that Vee rubber tire.
Can you explain a little in details what you did to avoid the wires rubbing?
I made the withe plastic pipe that holds the wires away from the disc brake.
 
i found the nylon insert from a 75mm doorstopper is exactly the right size for the job,~30mm id,
http://www.romak.com.au/round-cushion-door-stop-plastic-75mm-ivory-12480

its the nylon part inside that screws to the wall, that the doorstop slides over. you can see the end of it at the back of the doorstop.

i just cut the end off,cut it to length and cut a notch in it with a craft knife. seems to do the job nicely.
 
I'm now ready with my next upgrade to this wonderful e-bike :D
:mrgreen: Real carbon fiber side covers :mrgreen:
I've been working at these covers from 5 months and it took very long because of the little free time I have in this period.
These covers are made with pre-preg carbon fiber polymerized in autoclave as always when I decide to make something new with this nice material 8) ... there isn't much to say apart the fact that I also decided to replace the screws with titanium ones ... only for the bling factor.
This is the molded "L" just out of the molds:
20161115_161551_1.jpg


20161115_161852_1.jpg


Here is the cut panels:
20161120_211648_1.jpg


20161119_213603_1.jpg


Side covers ready:
20170314_115837_1.jpg


They weight only 510 gr:
20170314_120107_1.jpg


557gr with foam pads and the stock are ....
20170314_123313_1.jpg


And finally on the bike....
20170326_183702_1.jpg


20170326_183619_1.jpg


20170326_183455_1.jpg
 
Allex said:
OMG what did you do with my Speakon plug? Why do I see this horrible Deans up front? :mrgreen:

Speakon melted a couple of months ago and this is what I had available .... I have to say that it stay a little cooler than Speakon at 30 A, I can hold my fingers on it and I can't before.

My only concern is with the water. Is there an alternative plug good for 30 A that can be covered?
 
30A... did you change the battery? I would not charge faster than 0.5C.
Perhaps this one:
https://ru.aliexpress.com/store/product/M21-IP68-4pin-Dustproof-Aviation-Connector-Plug-In-30A-waterproof-IP68-Cable-Connector-Rear-mount-Plug/103536_1212541882.html
 
Speakon makes a 4 pole plug, not sure if you were using the 2 pole which is more common. I switched mine over to the 4 pole speakon to double the amp rating.
 
ridethelightning said:
i found the quality of solder joint at the back of the neutrik plugs is also a critical factor :wink:

I use the screw type then plus adding solder on top, seems very solid.
 
Allex said:
30A... did you change the battery? I would not charge faster than 0.5C.
Perhaps this one:
https://ru.aliexpress.com/store/product/M21-IP68-4pin-Dustproof-Aviation-Connector-Plug-In-30A-waterproof-IP68-Cable-Connector-Rear-mount-Plug/103536_1212541882.html

The battery is still the same you sent with the Bomber and the charge setup is still what you set. I was wrong about the current flowing through the charge connector; it's a bit lower at 26A yesterday I checked and this is what I have during charge:

IMG_3210.jpg
 
The A rating of the Speakon connectors is overstated.
There are ones with brass contacts which are rated for 30A RMS, and ones with copper contacts rated for 40A per contact.
I usually use the 4-pole speakon with brass, so 60A in total, and the wires coming from the coil/PSU have 5mm².

If i now take the full current from my EATON (about 1730W, 33A), and charging an empty battery for an hour or longer, i almost burn my fingers on the connector and the wire also gets quite hot.

For real continuos load you need to divide the numbers by half.
 
Back
Top