Vespa PX125 (Large Frame) Electric Conversion.

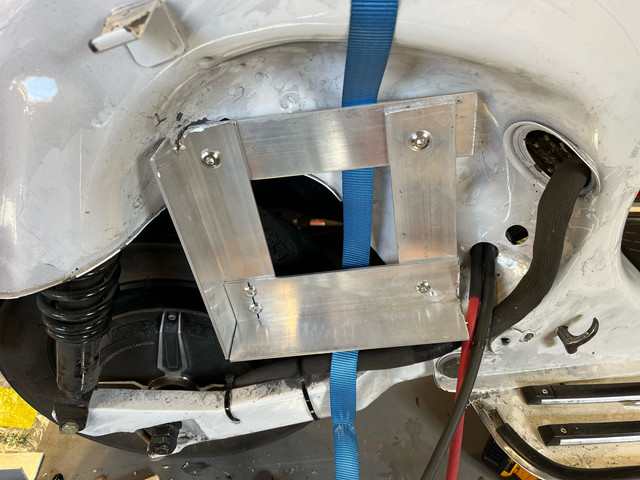
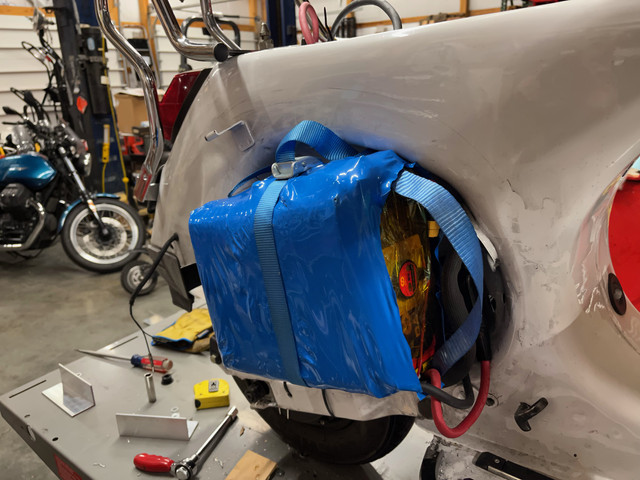
Very cool! I'm still at the final assembly stage of my battery. It's a slow trip....

A couple questions on using two batteries: So are the leads from the two batteries just doubled up on the controller connection?

If one battery has a lower Ah than the other, I guess the BMS would shut it down upon draining it to a set point and the controller would simply draw all the power from the other one, increasing your amp draw from that one?

When charging, will you charge simultaneously using one charger? If not, how do you be sure that they receive the same charge?
 
Batteries connected in parallel balance each other during charge and discharge. The simple answer is that uneven capacity packs will maintain the same voltage while connected to each other. They will charge together and find the bottom of their discharge together.

That’s why it’s important to have two batteries at the same voltage when they are connected, because they will find their middle ground VERY quickly— lots of current rushing around, potentially risking cables, connectors, or cells.

Similarly, that’s why packs connected in parallel should be the same series and chemistry — so they’ll have roughly the same nominal voltage and roughly the same end-discharge points. This way, they’ll play nicely together.
 
Each pack has its own BMS, which will handle balancing within each pack.
As other stated, the packs must be at the same overall voltage when connected together.
Once connected together, the overall voltage will remain the same, as current is drawn from them, the higher amp-hour pack will contribute a little more current than the lower amp-hour pack in order to remain at the same voltage, though, I would think at high amps, the lower amp hour pack that has higher current capability may provide more current, resulting in a temporary imbalance that would be corrected by cross flow of current between the batteries. I'm not really sure of the dynamic there. I certainly chose poorly in this regard, and should've gotten cells more evenly matched. I hope it works well, but, it may not be as efficient as it would be with the same cells more similar cells.
 
Ahhh that makes sense! (feeling dense :oops: )

The connection at the controller is where this constant balancing happens? So you then only need to plug in one charger cord for both?
Yes— the two batteries are electrically united as they “Y” into the controller.

As long as both batteries have common port BMS’s, you could in theory charge one battery and let the first pack bring up the second pack.

Rather, I would just run a Y charge cable, one to each battery, from the charge port, so they both are directly getting current from the charger. At the end, does it make a difference? Maybe not.

If you a have dual-port BMS involved, both batteries will need to have a charge lead, as described in my “preferred” solution. They will either not charge through the discharge port or the charge will be unmonitored and unprotected.
 
As long as both batteries have common port BMS’s, you could in theory charge one battery and let the first pack bring up the second pack.

Rather, I would just run a Y charge cable, one to each battery, from the charge port, so they both are directly getting current from the charger. At the end, does it make a difference? Maybe not.
If they are common-port BMSes, and the packs are already Y-connected on the bike/scooter/etc, then any connection you make to one battery for either charge or discharge is automatically connected to the other at the same time because of the Y connection, which makes both of them electrically the same point.

So no separate charging Y-connection is required if there is already one connecting the common-port-BMS packs together.
 
The second battery is now installed!

It is a very tight fit.
Test fitting the "battery analog":
IMG-4462-D.jpg


I lack welding skills and equipment, so, this is a bit crude, but, functional.
IMG-4500.jpg


IMG-4464-D.jpg
 
I was concerned about the swing arm contacting the battery and bracket. I took it for a ride with just the box in the bracket, and purposely hit some dips that I think fully compress the suspension. There was no signs of contact.

Also concerning was the change of lateral balance, hanging 30# on the side like that. When I take it off the side stand, it definitely wants to lean right, but, it does not seem to affect the handling or steering. It still tracks straight when I remove my hands from the handlebars.
I took it for a short ride yesterday. As predicted, voltage sag is about half what it was with a single battery. T-rise was much lower than it would have been with a single battery.

It was about 48 degrees outside when I was riding it. The batteries started the ride at about 8C. With a single one, the battery temp would've easily reached 37C on the short, ride with a lot of full throttle. The batteries reached 22C and 24C respectrively.

Tomorrow is supposed to be nice weather. I'll put a full charge in them and do some range testing.
 
If you look up my old Dayglo Avenger bike thread, you'll see that it has only a cargo pod on the left side (the derailer was in the way on the right, and I never got around to dealing with that before building a whole new bike instead, the CrazyBike2 dedicated cargo bike). But it dind't have any handling issues with the lopsided weight, once I got used to balancing that weight with my own, even with heavy cargo in there, and even with a big wiggly dog in there. .

1677381031785.png

hachi-in-dga-pod2-jpg.39636
 
I have made a 3D cad file for the arm but built in 3 parts to save money in the tooling process, the cost in Aluminium is around 700€
 

Attachments

  • Bras oscillant vespa 50.zip
    205.3 KB · Views: 12
  • 2.jpg
    2.jpg
    671 KB · Views: 19
  • 3.jpg
    3.jpg
    834.2 KB · Views: 19
  • 4.jpg
    4.jpg
    1,006.1 KB · Views: 19
  • 6.jpg
    6.jpg
    962.3 KB · Views: 17
Awesome swing arm design!
A bit expensive compared with steel tube welded 😅 
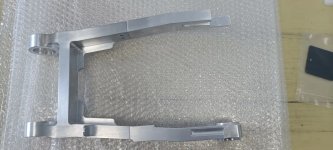
but 100% better in terms of weight and design.

Can you share more photos of the entire conversion?

I will start a LML Star conversion very soon.
 
im going to have a few machined.
i compared all the drawings on here i found, the web and measured my bike. thoughts?
 

Attachments

  • vespa swingarm.jpg
    vespa swingarm.jpg
    195.5 KB · Views: 6
:shock: That is a very bad battery builder!
Don't be surprised if your battery pack will turn into a very big fire after some time where vibration from riding will have the nickel strip short on the can. As the "pack" is "thrown" together with some electrical tape, no cell holders, no separation rings on the + side and bad welding...
From his own ad on FB:

View attachment 286104
i was wondering why they did not use the cell holders also...and klapton tape..
 
At this point I would be better off paying a pro to build this to my spec. I have at least 15 hours in fab, and another 10 in design.

Nonetheless, I am pretty happy with it, and learned a lot. My welding is steadily improving. It is STOUT!

The addition of the shock mount was problematic. Angle and clearance. I will have to mod the new shock when I receive it. Yes, single sided.


Then the brake mount messed with me. I ended up with the caliper upside down. Not ideal. I will be looking at it more tomorrow. Note the bolt threaded through both sides of the swingarm, and into a bushing on the caliper mount.


Lastly I made a small error in building the swingarm and did not leave enough meterial for the pinch bolts, so I added it.


Also my paint came in, Green and off white. That will, maybe, be next weekend.


Tomorrow I start working on the hydraulic brake mount and positioning of the components.
nice swing arm build...
 
Back
Top