new eZip motor

Status
Not open for further replies.
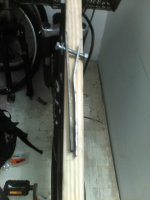
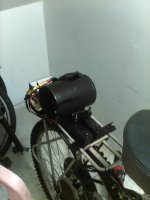
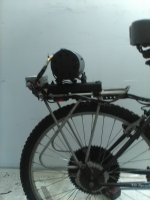
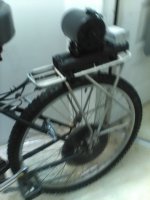
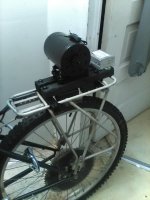
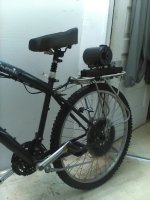
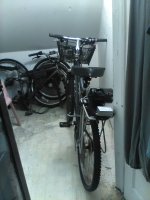
IMG_0283.jpgIMG_0284.jpgIMG_0285.jpg

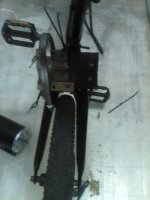
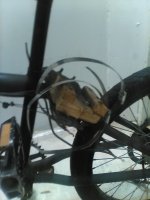
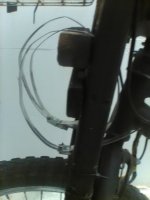
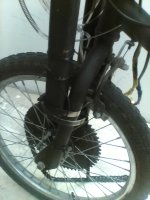
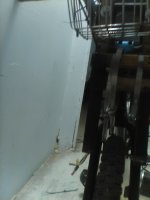
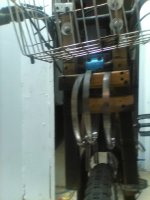
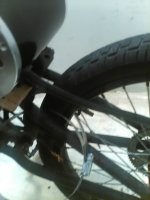
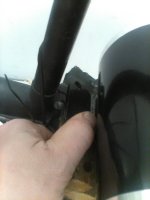
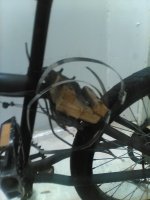
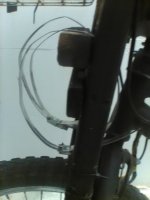
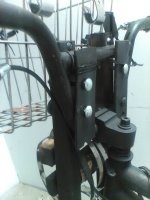
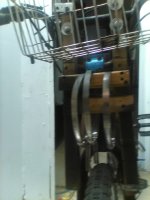
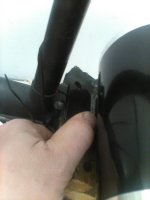
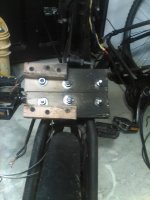
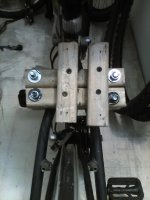
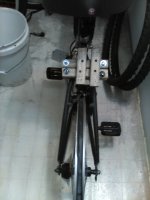
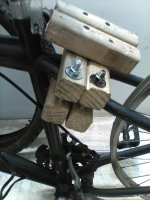
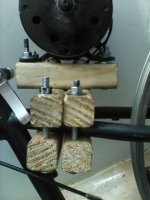
Unfortunately there was not enough room underneath for the pressure treated 2 by 2 which is 1-1/2 by 1 -1/2. I had to use some steel which of course bent. :lol: . It would take a really thick piece of steel to be stronger than that type of wood. They make decks out of that. It is easy to drill thru and would probably need 3/4 " or more thick steel to equel the strength of that stuff.

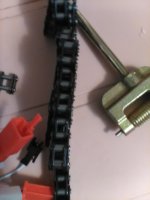
My 20" dual motor e bike used that stuff. The Currie used two pieces of pressure treated 2 by 6 and I have used 2 by 4 but that 2 by 2 deck railing is my favorite. It is late so had to stop drilling. I will finish it tomorrow. I got lucky and the guy down stairs builds gas bikes and has a #40 chain breaker. I will need to add a couple links. It is too short now.

Check out the video.

https://www.youtube.com/watch?v=LRxZhYvldvY


Thanks.

LC. out.
 
"Unfortunately there was not enough room underneath for the pressure treated............ I had to use some steel which of course bent. :lol: . It would take a really thick piece of steel to be stronger than that type of wood. They make decks out of that. It is easy to drill thru and would probably need 3/4 " or more thick steel to equel the strength of that stuff."

*********************

Use thicker steel and you wont have space issues neither. Plus its a cleaner look then bulky wood. Wood would make it look hobo'ish, like the people who use grocery store milk crates on their bicycles.

What type of wood are you talking about that is stronger then steel?

They make decks out of many different types of materials.

Steel is easy to drill through but not as quick as wood, you just need to have a sharp bit. Its a real pain in the butt trying to drill a hole through steel with a dull drill bit.

Wood is great for mockup, great to get angles right but I'd be concerned that it might crack.
 
What type of wood are you talking about that is stronger then steel?

Pressure treated. It wont crack.

The thicker the steel the greater the weight. Home depot don't even have thick enough steel to even come close to the strength of that stuff. Pressure treated 1-1/2 by 1- 1/2 is very strong and lighter than a 3/4" thick piece of steel which would need a cutting torch just to make a hole for a bolt. I was at home depot and had a 3/8" 4 foot piece of flat steel which was about 9 bucks and a 5/16" cobalt drill bit also 9 bucks. I thought about it a minute and put them back and got longer bolts. The deck railing was about half what the steel was and got an 8 foot piece so plenty left over.

I rest my case.

Thanks.

LC. out.

PS. I also got cheap 1 by 3s I think to build more triangle brackets for mounting batteries on the top of the frame like the other three I did. The Giant Roam , The 20" Turbo and the 26" dual suspension. I also plan on painting any wood I use for mounting motors , controllers and batteries flat black so not as noticeable. Also The only milk crate I am using now is on the front of the Currie. I got rid of the rest.

Thanks.

LC. out.
 
That luggage rack will crack before the wood does, I'm guessing. That's not an endorsement of the wood.

Maybe you should do a little math and figure out what your chain tension is at maximum motor torque, and compare it against the load rating of the rack.
 
latecurtis said:
file.php


Unfortunately there was not enough room underneath for the pressure treated 2 by 2 which is 1-1/2 by 1 -1/2. I had to use some steel which of course bent. :lol: . It would take a really thick piece of steel to be stronger than that type of wood. They make decks out of that. It is easy to drill thru and would probably need 3/4 " or more thick steel to equel the strength of that stuff.
Yeah, 1/8" steel bends easier than 1 1/2" PT wood.
That is why they invented angle steel. Even 1/16" thick angle steel might be much preferable.
 
Yeah, 1/8" steel bends easier than 1 1/2" PT wood.
That is why they invented angle steel. Even 1/16" thick angle steel might be much preferable.

Very good point. I was wondering about square aluminium pieces Like 3/4" or 1" square tubes instead of wood. I would try something like that but like to stay away from steel due to the weight. I would also be interested in aluminum sprockets instead of steel. That 60T spoke sprocket must weigh about 3 or 4 pounds.

I took material science technology back in community college in 2006. I studied carbon fiber nano tubes and did a presentation on it for the final grade and got a B in the class. Why nano-tubes have not been fully developed is due to the massive cost of production.They were going to build an elevator into space so rocket fuel would not be required to reach orbit but cost of production is the reason we have not seen one up there today. They have the technology but are unable to make it affordable at this time.

The same dilemma occurs with cutting edge battery technology. We have the science but have a ways to go before mass production would be economically viable. It is similar to me in a way when I post. It takes extra time to finalize what I am contemplating and I edit a lot. I have a decent vocabulary however have to google all those fancy words in order to spell them. :lol:

Thanks.

LC. out.
 
As the Hub Motor Turns and the LiPo Fire Burns. I probably will never have an e bike shop.

Basically I have done all that I can do. I was not happy Friday when I test drove the bike with the metal brackets. I thought the chain was on right and it looked like it would work when I took it down stairs but it was not lined up right and the longer I worked on it the worse it got and finally fell off. I was working on it outside and it got too dark to keep going.

That was two days ago. Yesterday I went to Home Depot and got the wood for the brackets and 5/16" nuts , bolts and washers. I worked on it until about 3 in the morning but had to be quiet after about 11 PM as there are neighbors downstairs. I could not drill. I shot the video showing how the sprockets appear to line up correctly but speaking from experience looks can be deceiving.

I stopped working on it about 3:30 AM and watched an episode of Game of Thrones and drank one 25 OZ. beer and was so tired I slept from about 5 AM to 5 PM. I finished the mount as had to drill a hole for the last bolt and just finished painting it and cleaning everything up as my 400 square foot apartment is my workshop.

I do not think the guy down stairs is home and his girl friend is there for the week end so I failed in getting the bike running. I do not have a #40 chain breaker. The guy down stairs does. Tomorrow is another day but have to go to Motor vehicles and get the Title of the van turned over to me and I have to sign the title of the Cadillac over to John. I am not sure if the chain will get hooked up and the rear brake needs to be hooked up also.

So basically I feel like a failure and that all that effort was in vain. I am not good with brakes , gears and chains. I am good with wiring. Triangle racks and mounting motors with wood and painting them black. :lol: If I were to ever get serious about taking e bike building to the next level I will need a partner. Someone who is good with chains , sprockets , brakes and gears.

I have to take the motors off the 20" dual motor bike also as John has a three wheeler he needs a motor or motors for. I also have to clean the house and do grocery shopping tonight. The landlord will be here this week to hook up the furnace. I need a break from working on e bikes at least for a few days anyway.

Thanks.

LC. out.
 

Attachments

  • IMG_0286.jpg
    IMG_0286.jpg
    195.3 KB · Views: 724
  • IMG_0287.jpg
    IMG_0287.jpg
    194.2 KB · Views: 724
  • IMG_0288.jpg
    IMG_0288.jpg
    245.8 KB · Views: 724
  • IMG_0289.jpg
    IMG_0289.jpg
    196.2 KB · Views: 724
  • IMG_0290.jpg
    IMG_0290.jpg
    232.4 KB · Views: 724
  • IMG_0291.jpg
    IMG_0291.jpg
    239.6 KB · Views: 724
  • IMG_0292.jpg
    IMG_0292.jpg
    233.3 KB · Views: 724
IMG_0293.jpgIMG_0294.jpgIMG_0295.jpgIMG_0296.jpgIMG_0297.jpgIMG_0298.jpgIMG_0299.jpgIMG_0300.jpgIMG_0301.jpgIMG_0302.jpgIMG_0303.jpg
 
As the hub motor turns and the LiPo Fire Burns. Dual1,800W Brushless motors ?????????

Perhaps but maybe not. That bike had two different motors. A 36V 800W motor on the front and 24V 500W motor on the back. The difference in gearing was less than 2 mph so the bike ran great and was an animal up hills. It went way beyond trial runs and did many videos and even let another person ride it and was told it kept up with traffic at 36V. I am giving the motors that were on it to John for his 3 wheeler. Wheels and sprockets also.

I could probably use a light weight brushless RC motor up front if I wanted to or the 72 buck 2,000W 60V motor now on e bay. Either way I will go 45 mph on that bike. I will gear the motors so there will only be a slight difference like before but will try to use one thumb throttle for both motors.

First I will install the 1,800W brushless motor on the back. Then later add a front motor. I will then gear both motors for 45 mph at 36V and 2, 850W Total. The 1,800W brushless motor pulls 1,350@36V and the 60V - 2,000W motor pulls 1,500@36V.

I am not using the same brackets but using the same design. Just using brand new wood. Nuts and bolts. No drywall screws this time. :lol: The new brackets will be even stronger than the old. There wont be any chains coming off at high speed.

Thanks.

LC. out.
 

Attachments

  • IMG_0295.jpg
    IMG_0295.jpg
    197.2 KB · Views: 711
  • IMG_0297.jpg
    IMG_0297.jpg
    184.6 KB · Views: 711
  • IMG_0296.jpg
    IMG_0296.jpg
    239.8 KB · Views: 711
  • IMG_0298.jpg
    IMG_0298.jpg
    273.3 KB · Views: 711
  • IMG_0300.jpg
    IMG_0300.jpg
    213.8 KB · Views: 711
  • IMG_0302.jpg
    IMG_0302.jpg
    195 KB · Views: 711
  • IMG_0303.jpg
    IMG_0303.jpg
    206.8 KB · Views: 711
  • IMG_0304.jpg
    IMG_0304.jpg
    209.3 KB · Views: 711
As the Hub Motor Turns and the LiPo Fire Burns. Test drive successful.

The guy downstairs with the chain breaker hooked up the chain and after a slight adjustment did a test run. It is not perfect but will work. It could work better if the wheel were trued on a stand at a bike shop. I have a spoke tool but just had no luck in the past doing it.

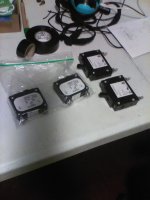
I am taking a break for a few days. I am not sure if I am putting the 1,800W brush less motor on the 20" bike or the Haro V3. I will decide after I finish working on my hub motor bikes. I also need to order a 20 Ah 36V Lithium ion pack as well as 4 or 5 DC breakers and a four wire thumb throttle for the 1,000W hub motor kit SUNDER sent back in 2014. The throttle got broke when moving I think.

I also have to get that hub motor to a bike shop and on a truing stand. The rim is bent. Once I have that together and the Giant Roam finished with the dual 500W e bikeling motors I will be ready to build a bike with the 1,800W brushless motor.

Thanks.

LC. out.
 
Hi LC, goos to see your projects advancing. I've been out of action on work projects for a bit, so haven't contributed. Bit of reading to catch up, but it seems like you are having some successes, even if you are also having some frustrations.

Good luck with the projects. I should be here a bit more often over the next few weeks.
 
Interesting project - thanks for all the photos,

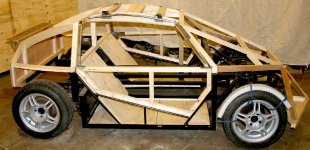
I've been thinking about you using wood for motor mountings

Some people still make wooden car frames, so why not a bike
https://www.autoweek.com/car-life/classic-cars/a31118918/are-morgan-cars-still-made-from-wood/

I found an electic car made from wood using modern but simple design and really simple build techniques
Ecostar 50KW wooden electric car.JPG
https://www.bluebird-electric.net/blueplanet_ecostar/ecostar_coachwork_timber_framed_diy_wooden_car.htm

At the opposite end of the scale this is a wooden car really pushing the boundaries of what's possible
https://www.youtube.com/watch?v=keAkjqjnFt0

This guy does some fun stuff https://www.youtube.com/watch?v=WAZAz5m_HLc

Robots building timber frames - there is a future for wood in construction https://youtu.be/jA9lJDZuYNk

There are somd good reasons for using steel and aluminium etc, however, if using wood with sleel, strengthening where they join might be worth thinking about

Fibreglass works well with wood, it sticks well to clean dry wood, keeps the water off and is stronger. If you find any of the wooden bits are moving around then some fibreglass might do the trick next to the bolts.
If you want to be able to get the bolts out, put a light smear of grease on them first. This also works for things like motors & brackets.

In the UK we have Isopon P40 and I think the "bodyfiller for holes" in the US is the same stuff but I'm not sure. I have a patch that fixed a hole in my motorbike exhaust (muffler?) 15 years ago and is still there

The type of wood will make a difference. Decking might be hardwood or softwood. Hardwood is probably better but if you use softwood, it will crush fairly easily where you have bolts and clamps so I'd Spread the load with bigger washers or plates as well as maybe fibreglass

A brace and bit might avoid annoying the neighbours with late night drilling and is fine for wood. People don't want them any more because battery drills are so common so they're in flea markets and yard sales for next to nothing.

Plywood - ideally marine ply might be better than decking to avoid splitting. You can build up thicker bits by gluing layers together - (sometimes called engineering composite) A nice thing about wood is you can easily make it thicker if you need more strength

Making things in complicated shapes is difficult for steel. Aluminium welding is harder still though machining it is easier. Carving wood to shape is relatively easy and a splodge of fibreglass is even faster and easier

I don't think wooden parts are going to be a great selling point for a bike shop unless you make it look nice which is difficult, it takes automation or a lot of hard work, but as a relatively quick way of mounting somethign with limited tools? yeah, why not,

Aluminium is somewhere between steel and wood in that is is softer and lighter than steel but heavier and stronger than wood depending on the shape.
Sprockets tend to wear pretty quickly if made of aluminium so they tend to be steel with holes in them. Titanium is as light as aluminium and stronger but expensive. Large steel sprockets tend to have holes in them to reduce the weight but calculating how much to take off is tricky.

So thanks for the inspiration, best of luck and don't get your fingers caught in those huge sprockets
 
It was a total disaster. :oops: The next day the chain came off when showing the bike to the person I built it for. :cry: It was a complete failure. I failed miserably. The wheel was bent with a wicked wobble and the #40 chain had a couple loose links. The chain was basically defective. It was a complete embarrassment.

The bent rim was put in a dumpster and I removed the rack and started from scratch after a few days off. The drywall screws are temporary to hold the brackets in place to mark the holes for the motor bolts.

I have a couple really straight rims but need the cassette taken off so may as well have the wheel trued that I will use to get as perfect as possible. Working with a bent rim and loose links in a chain are recipe's for disaster. What sucks worse than struggling with inferior mechanical skills is dealing with defective piss poor parts at the same time. :roll:

The design is simple and plenty of room for the #25 chain and adjustable over 1/2 inch and will allow for chain alignment as well as adjustment in 2 dimensions. I will replace the screws with counter sunk 5/16" bolts in the picture and to mount for the motor. I will need to go back to Home Depot for nuts and bolts. I have plenty of washers.

I found plenty of #25 chain and the bike will have the original 24 mph gearing the first Currie upgrade had at the start of this post. I decided to go with the more simple approach after removing the rear rack. I found a couple mater links but no chain breaker. I still have to order stuff from e bay. I will order an 8 mm chain breaker also and a 8mm chain and sprocket for the 1,800W motor. I read up on 25H chain which is good for up to 1,350W but for 1,800W or 2 killowatt I will go with 8mm chain.

750W @ 24 mph gearing is about perfect as will climb hills and is efficient on the flat. 500W is really only good for 18 mph gearing and 1,000W is great at about 30 mph. Therefore 24 mph @ 36V is a sweet spot and when finished should be great for a long time.

The #25 - 80T sprocket for a 26" wheel is way better than a 60T with heavy #40 roller chain. 32 mph gearing @ 750W basically sucks the big one up any hills and wont keep up to 750W with 24 mph gearing on the flat. I learned that here.

I was going to switch the rack with the Haro V3 for the original Currie rack and attempt to duplicate the original Currie Ezip upgrade but decided NOT to go with all those steel brackets and drilling for a more simple proven approach with wood.

I did the same design several times with great success. I failed more than once mounting a motor to a rack instead of the frame. I just got lucky with the Currie. It was beginners luck. This will work and will be very reliable.

Thanks.

LC. out.
 

Attachments

  • IMG_0305.jpg
    IMG_0305.jpg
    204.9 KB · Views: 612
  • IMG_0306.jpg
    IMG_0306.jpg
    176.9 KB · Views: 612
  • IMG_0307.jpg
    IMG_0307.jpg
    247 KB · Views: 612
  • IMG_0314.jpg
    IMG_0314.jpg
    225.8 KB · Views: 578
https://www.youtube.com/watch?v=EiO1HeeWETo

I own a gas powered vehicle. A 2006 Chrysler town and country. I just watched this video and would like to share with everyone here on ES.

Many years ago right here on this post I was given as a gift the FX-75-5 motor. It is 45 kilowatts I think and around 60 HP.

My original intention was to use it for an east coast version of the world famous death bike and still have that original goal in mind but how cool would it be to use it to convert my minivan to a hybrid first and perhaps also use it to propel a motorboat and have the versatility to also build a death bike. I would have to be able to install and uninstall motor and controller for all three vehicles and be able to accomplish that in less than two hours. All three vehicles can have mounts welded and drivetrain intact. It would boil down to the chain or belt , bolting the motor in and wiring connections. Then moving and hooking up the batteries. :mrgreen:

Please watch it and let me know what you all think. Not sure what is possible. My minivan probably weighs in at somewhere between 3 and 4 thousand pounds. Should work for city driving between 30 and 35 mph right ????. I could live with 30 to 35 mph but would not want to do any hills that amount to anything.

As long as the gas motor is running it would never be an issue. City driving as well an emergency situations like internal combustion motor and transmission failure would not result in a large tow bill as alternative means of propulsion are possible besides manual pushing. Except for most hills. I know that would be a big issue. :lol:


Please let me know. Thanks.


LC. out.

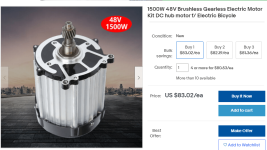
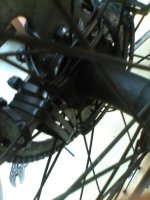
The bottom pic proves why a non hub motor for e bikes are less than half the price of hub motors with same performance but lord only knows how a motor sprocket could hook to that. That is the shit I need help with.

First off it don't even resemble any hub motor I ever saw. I am flabbergasted.

Please let me know.

Thanks.

LC. out.

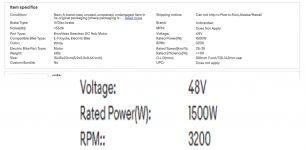
OMG. My point was mute. I was posting a hub motor which I thought was a chain or belt drive cause how it looks
. but is listed as a hub motor. Man am I baffled

https://www.ebay.com/itm/1500W-48V-DC-Brushless-Gearless-Electric-Motor-Kit-DC-hub-motor-f-Electric-Bike/324062945520?_trkparms=ispr%3D1&hash=item4b73a820f0:g:lYEAAOSww4ldd1ko&amdata=enc%3AAQAFAAACcBaobrjLl8XobRIiIML1V4Imu%252Fn%252BzU5L90Z278x5ickk5v8gVt3hEWLVg%252F253w6XCbgPU7kPpOxAIrdfYmvgb%252BLDhQH1KcXOyHyshPmCYMa%252B4dWUjitcqQqx6aWXRYvOVd7OLN0mP2BTdRkoijAC4H7wJ5r8w42iWO8PFfmqNEmquKlmBPn6xN13E%252BTj8unNXdcEIkQCdYiblKyPUEaXajH3N4UoZLbsc0WVkLSfrC8zn8ZQjUFX4spnqZx7fytmM3g3yUMXteej%252FhruqbJisaFeZeyEM1T3bI4g67Zdv7LBFSNgUVKp6ls2QxL6JSS1WqzU9QDcr32qKCpIGkEvh5RybMti0o0LMC8yFMJw%252FeEO01fWyfJUnUJusIMQy1%252BmBlGYbmzJ%252Bf5MzwUoCi58QNQR4QZKZMHIHrUVb%252Foqj6nMQDITqy5wamVySPs9uK9491op6cDD%252FIjUWRahtUdwCzSxg9D2sogP94DsF4xvjN5xzl1iwEDkjRNXT6ZCLDLm5cB6Txt2nTPaHIt8K6%252BaAt59isp1QLzdEZ%252FbYMzvSVCWAwR5D9oPmnD4KKtXmG87WfAjKy1rYc0spFnn7DtsOt61APYuh2gPmTT2%252FoM84Q6j6K6dIHeqS%252B8i5mMW%252FaS9naqrgzyDbUSD5aMpzBUSOZ1E%252FU8mY3%252FOHfMhyzqB8LVGTmM5wkzO2kz0D87RNfPcXScxiH8rFZnwIg8%252FYXNfc%252F7VESLyK2RxhOrVtgLlglo51RLnwnEIXY7n2RUrcEK2yjGYDgcflccEBB3OUgMmhQ4Ybp8KC7eK%252FC%252Be%252BES%252FSLs2NDFeawT9hcdBssxOm%252B1dfw%253D%253D%7Ccksum%3A324062945520cde925852ff648c1adfa41c976a96dfc%7Campid%3APL_CLK%7Cclp%3A2334524
 

Attachments

  • download (3).png
    download (3).png
    123.4 KB · Views: 553
  • download (2).png
    download (2).png
    344.9 KB · Views: 549
As the Hub Motor Turns and the LiPo Fire Burns. The 1,000W hub motor SUNDER sent has a cracked rim. :cry:


I know when it happened and was quite awhile back on this post but was unable to find the page. I remember I was in Schenectady NY and was returning to my apartment from Home Depot and hit a broken section of road. It was night and did not see it. There was like 4 or 5 inches of road just gone and I flipped the bike and landed on the handle bars. This was at least 3 years maybe 4 years ago.

I have not used the hub motor much since that time. I think I ran it after replacing a broken spoke as I think Dan sent me spokes in the mail. I found the spokes and today was the first time actually riding my van as I got the insurance Monday or Tuesday and slept all day Wednesday.

I stopped running the hub motor as it made the whole bike shake and could not find anyone in NY who would work on it as e bikes are not legal in NY. I have the spokes but need to order a new rim I think. It has to be for hub motors the guy at the shop said. His truing stand is not large enough to do that size hub motor. I am not sure what to do but he said the crack is on both sides and the wheel is unsafe.

I remember when I hit that broken part of the road I got banged up as my ribs were sore for about 6 weeks. I fractured them. I spent a good hour trying to find the post. It could have been 2014 , 2015 or 2016. It is not clear when it happened but does not matter. What matters is what I can do about putting that motor on a new rim.

I was at the bike shop and got the cassette removed from a 26" rear wheel and the 80T #25 sprocket put on the 26" rim. The #25 chain breaker will be here Monday and the rim was pretty straight but he trued it so the Clear Creek Schwinn should be working next week for John.

I am not happy though about the 1,000W hub motor as I wanted to put that on the back of the 26" dual suspension. Since I have to get a new rim is it possible to make it a rear hub motor ? Please let me know and where I can order a rim.

Thanks.

LC. out.
 
latecurtis said:
I am not happy though about the 1,000W hub motor as I wanted to put that on the back of the 26" dual suspension.

It is not straightforward to convert a front hub motor to rear. At the least, you have to replace the right side cover and the axle. By that point you might as well buy a new rear motor.
 
Either way the rim is cracked. I was jut going to run it on the rear anyway as the police here in Ohio don't seem to care if anyone pedals or not. People are running gas powered bikes as well as minibikes down the street.

I Have the spokes I just need the wheel part. The price for threading a new wheel is 60 to 80 bucks.I will need to order the rim with no spokes as I have the spokes. I was thinking about running a dual wheel set up but don't think front hub motors are worth it as if you hit a pot hole or something the hub wheel takes the brunt of the blow where if you have a regular bike wheel on the front it is much easier to fix or replace.

Most bike shops wont work on any hub motor they do not sell and the place I went today will true it but it wont fit on their truing stand. Pete's electric bikes may be my only hope but not sure how much it will cost.

Please let me know. I am not looking on spending a lot.

Thanks.

LC. out.
 
If that's the way you want to go, make sure to get a rim with the same effective rim diameter (ERD) as the old one.
 
LC, just buy a new hub motor, If you buy a new rim you will need different spokes unless you find the same ERD rim. Which will be hard to find. Odds are thet the rim has no listing of thrr specs on it. By the time you get a new rim, spokes and someone to tru it you could buy a new motor.

Yes, I remember the crash a few years ago. Late at night drunk and riding with no lights in the dark. You said you were going to cut back on the beer but we know better.

Good luck with your projects.

I won't be around for a week or so. Having triple bypass Wednesday.

Dan
 
Late at night drunk and riding with no lights in the dark. You said you were going to cut back on the beer but we know better.

Good luck with your projects.

I won't be around for a week or so. Having triple bypass Wednesday.

Dan

That is not correct. It was why I spent about an hour looking for that post. I was not drinking. I was coming home from Home Depot probably with hardware to work on a different e bike. I have not drank during the day for many years. since around 2013 I think. I usually have my first beer around midnight. If I went downtown like once a week to see my friend then I would start about 7 or 8 PM but not every day.

Good luck with your surgery.

I know that they don't make many hub motors for 27.5" rims and I have a Diamondback that has those rims and they are perfect and straight. I do not see why throwing out a perfectly running motor should be an option. Maybe if I was rich or only had one e bike to deal with and did not enjoy working on e bikes and was only interested in a daily commuter.

When I was searching for that post I came across the post where I had a brushed Unite motor apart and actually repaired it and used it many times after the fact. I am very interested in learning as much as possible so would love some help in rebuilding my 1,000W hub motor and even switching out the axle and building a 27.5" rear wheel.

You are right I can and probably will order a 26" rear hub motor for the Dual suspension at some point in time. I decided to keep the 27.5" Diamond Back and I am paying the guy down stairs to build it for Mike : a dual suspension like the one I have I was going to put the motor on so I am keeping the 27.5" Diamond Back and it would be perfect for a rear hub motor.

I called the local electric bike shop which is the closest but about 45 minutes away I think. My van is running and on the road though. When I told him about the hub motor and 27" bike he told me a mid drive was the way to go but I said it is beyond my skill level and wanted to convert the front hub to rear. He said that he could work on that part during the winter when he is not busy and that he has the same truing stand as the regular bike shop but said he can true any hub wheel.

I need to find the right spokes and build the 27.5" wheel. Pete said I need a double wall rim for a hub motor. Not sure what is on the Diamond Back now but it is in the van and can take pictures. I want to order the spokes and try and build the wheel then drop it off at Pete's to do the rear conversion. I will need a right cover for the hub motor ? I just need a good link for hub motor parts like that and the spokes.

so please let me know. I will order the spokes and do the measurements as well as take apart the motor and try and build the wheel.

Please let me know whoever is watching this post.

Thanks.

LC. out.
 
If you can use a wrench, you can installl a mid drive.
Luna has a video on installing, I dont mean to be rude but even a retard can install a mid drive.

Spokes - https://ebikes.ca/shop/electric-bicycle-parts/spokes.html

Hub motors can be laced into whatever wheel you want, they arent made for size of rim, they are made with 36H as the only criteria. Its not like a mxus dd 45H motor is made for a 27.5 yet another mxus 45H dd motor is made for 26. The key to lacing is using good quality rims, spokes and washers. De-stressing the rim while your building it. Taking your time.

Edit - Here is Luna's video on installing Cyclone 3kw.
https://www.youtube.com/watch?v=G99tNdeZa0g&pbjreload=101
 
thank you.

I will try to build a new wheel for that motor.

I will also look into a mid drive. I thought it would be difficult but from what you say I am wrong. I have been wrong before so am willing to take a second look.

Thanks for posting and good to hear from you. I know you have been following this post for awhile.

LC. out.
 
As the Hub Motor Turns and the LiPo Fire Burns. The next build.

https://www.youtube.com/watch?v=z8Am0H25pv8


IMG_0326.jpgIMG_0327.jpgIMG_0325.jpg

Yes. Your eyes are not playing tricks on you. I really did install the motor and wheel sprocket on the left side. I sat there and did that with a right thread standard freewheel. :oops:

I did not want to do the whole thing over a third time so used 16 zip ties to secure the #25 - 80 tooth freewheel sprocket to the spokes. :lol:

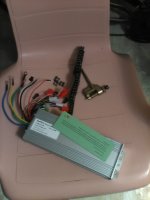
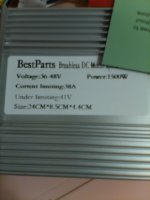
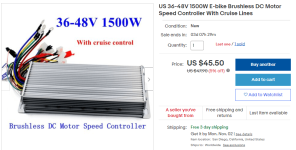
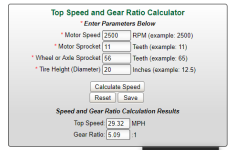
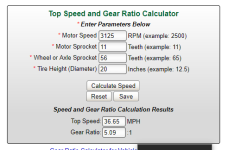
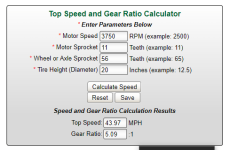
I am ready for the 1,800W brushless motor. I ordered a 36 - 48V - 1,500 watt brushless controller. It is supposed to be here on the 31st of this month. I am going to try to use the 20" wheel with the 56T - #40 chain sprocket that was on the front of the 20" bike.

I am going to calculate gearing at 40V - 50V and 60V. using the same 56T - #40 sprocket.

1,800 / 48 = 37.5 * 40 = 1,500W.

50V = 1,875 watts

60V = 2,250 watts

I was going to use 8mm chain and sprockets but already have the 56T on a 20" wheel.

I did order 8mm chain with a breaker. It is at the post office now. I will pick it up tomorrow if I roll out of bed in time. I can use it on a future build if the 56T wheel and sprocket will work.

Thanks.

LC. out.
 

Attachments

  • download (1).png
    download (1).png
    82.9 KB · Views: 439
  • download (2).png
    download (2).png
    11.5 KB · Views: 437
  • download (3).png
    download (3).png
    11.7 KB · Views: 437
  • download (4).png
    download (4).png
    11.7 KB · Views: 437
As the Hub Motor Turns and the LiPo Fire Burns. 40 mph. - Maybe - 35 mph - most likely.

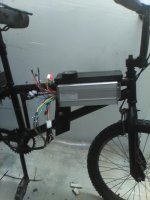
I just got back from the post office. The old 20" former dual chain drive e bike got a brush-less motor upgrade. The 1,800W brush-less motor to be exact.

The 26" Schwinn I built for John that I used zip ties to make the wheel spin as it is a right thread freewheel on the left side is ready to be test driven. The chain appears to be a little loose but need to drive it to know for sure. That part is my least favorite part of building e bikes. It requires a hammer or mallet, vice grips and the right size open end wrenches. It is the main reason why hub motors are better than chain drives. I am not worried about the zip ties snapping as I plan on upgrading to four steel hose / muffler clamps.

Lining up the motor and wheel sprocket and getting the chain Not too loose or too tight requires a certain amount of mechanical skills. I am not doing it today. My weight bench is in the hall way and do not feel like moving it. I need to do at least 4 sets of preacher curls sometime tonight, I think John may have given up on the Schwinn as it has dragged on for about 4 months now. The first attempt with #40 sprocket and chain failed miserably and I had to wait about 2 weeks for the #25 chain breaker. :eek: It is why I probably will never be building e bikes for people. I may sell bikes already built that are test proven but I am not ready for custom builds and deadlines.

I plan on doing my favorite parts of e bike building tonight. Building a triangle rack and hooking up the electronics and doing a test video of the wheel spinning. :lol:
IMG_0329.jpgIMG_0330.jpgIMG_0332.jpgIMG_0334.jpgIMG_0335.jpgIMG_0336.jpg


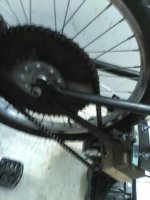
I was happy with the 8mm chain even though I do not have a sprocket for it as I decided to hook up the #40 - 56 tooth spoke sprocket for now. I do like the thickness and actually looks stronger than standard bicycle chain. Without a doubt any future chain drive builds or upgrades will be with 8mm chain and sprockets.

I was thinking while walking back from the post office that with a 1,500W controller I might be limited to 35 mph. However I notice that the amp rating is 38. I believe DA said something about 40 amps for peak performance. 38 amps is very close to 40. 38 amps * 48V = 1,824 watts.

Like I said it may not reach 40 mph on flat ground but should get about 35 mph with the old LiPos Dan sent as long as they charge up to around 48V. 4.0V * 12 = 48. I doubt they can hold much over 4.0V per cell due to their age.
With voltage sag it should be around 46 or 47V. I will go with 46 as they are not even close to being new.

1,800W / 48 * 46 = 1,725 watts.

I was going to order a 60V - 3 kilowatt controller and four - 4S hard shell LiPo packs later on this winter for 40+ mph but may not run the 20" bike at 60V. I might order a hub motor to do that. I am not sure.

The 26" hub motor will be getting fixed as the bike shop said 50 bucks at the most to thread it to a new rim and if I stay with a 26" rim the spokes will fit that Dan sent. I also found a front dual wall 26" rim to use. I have three 700c rims that are dual wall but already have the spokes for the 26" rim.

I want to build a dual hub motor bike so will be ordering a second 26" hub motor and am looking for the same specs. but for a rear hub motor kit.

I doubt I can achieve 40 mph though with 60V. I believe gearing at 48V to be 28 mph with that 26" hub motor. Not sure what motor I will use for 40+ mph.

The dual 26" hub motors are for the 26" dual suspension I rode exclusively for over a year when I moved to Ohio. It will be for steep hills and long distance trips.

For 40 mph I have Easy street - the 700c hybrid , the 27.5" silver Diamondback and the Haro V3 to put a motor / motors on. A 48V - 1,500W rear hub motor should do 40 mph @ 60V. So will Hubzilla , The Cro - motor if we ever get the second stimilus relief checks. :twisted: :lol:

Thanks.

LC. out.

PS.

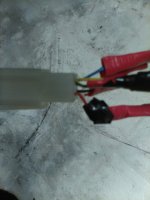
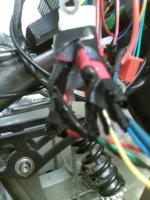
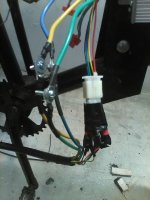
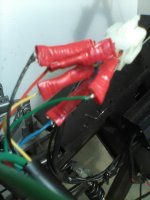
When mounting the brush less motor last night there was a screw up. The hall sensor wires got caught in the axle I think. It was a clean cut. All 5 wires but there was just enough wire coming from the plug to use my smallest crimp on connectors. I spoke with Mike briefly on the phone and he told me that I should break out the soldering iron. I already knew that but like I told him I really hate the smell of solder and there is not much light at all by the window. I would have to find a light source and hook a fan up and hope my soldering skills are good enough to accomplish it. Or I can break out the electrical tape to reinforce those connections. :lol:
IMG_0337.jpgIMG_0338.jpg

IMG_0339.jpgIMG_0340.jpg

cutting electrical tape as skinny as possible is tedious. I am looking at the plug side of the connector. As long as there is a small piece covering any tiny strands of wire sticking out I may be able to use silicone. It would also waterproof the connector. I will have to wait until tomorrow for it to dry. I still need to paint the motor brackets and build the triangle rack anyway. I can also silicone the hole where the motor wires go inside the other motor on the Schwinn. Hot glue would work even better if I can find it.


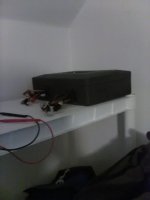
Yea. Fat chance of that. It sucks because I know I saw it a few weeks or months ago. Anyway the silicone will work. I wrapped a piece of electrical tape around it. It should do the trick but wont be able to hook the controller up for about 24 hours. I secured the controller to the battery rack on the dual suspension with a small zip tie and is plugged in and out of the way so I can start working on the battery rack and controller bracket on the triangle frame.

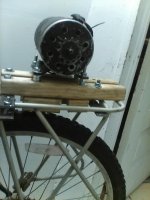
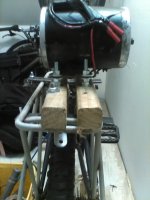
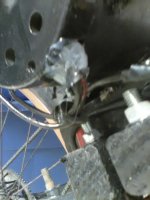
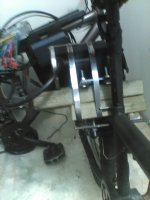
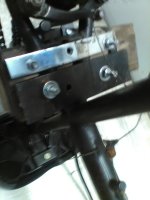
The 3/16" steel brackets were used on the bottom so that there is room for a V brake which worked and will work again once the rusted out line is replaced at a bike shop. Yes this bike will have both brakes that work. I used two pieces of two by four. The bottom is attached by four carriage bolts counter sunk in the wood to the steel brackets on the bottom. Two 5/16" and two 1/4" all very tight. The top piece of 2 by 4 is screwed to the bottom with four long dry wall screws and the steel motor brackets bolted to the motor are screwed in to the top piece of 2 by 4 with 5 drywall screws. Note the two long steel muffler clamps. They were used when the bike was a dual motor set up. That is what will reinforce the 5 drywall screws as well as the four drywall screws attaching the two pieces of 2 by 4 together. That is what makes this motor mount super sturdy.

I am taking a break and will break out the paint and brushes after that.

E bike workshop 101. :D

Thanks.

LC. out.
 

Attachments

  • IMG_0341.jpg
    IMG_0341.jpg
    267.6 KB · Views: 387
  • IMG_0342.jpg
    IMG_0342.jpg
    315.9 KB · Views: 387
  • IMG_0343.jpg
    IMG_0343.jpg
    212.6 KB · Views: 387
  • IMG_0347.jpg
    IMG_0347.jpg
    185.8 KB · Views: 386
  • IMG_0348.jpg
    IMG_0348.jpg
    211.3 KB · Views: 386
As the Hub Motor Turns and the LiPo Fire Burns. 10/31/2020/8:21 PM.


IMG_0349.jpgIMG_0350.jpg

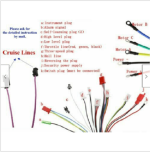
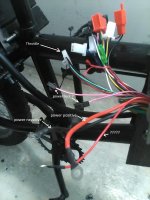
I found some machine screws to attach the motor wires. I do not see an on and off switch. It is my first chain drive brushless controller. The hub motor controllers have a switch. I will need to look at the wiring diagram.

10/31/2020/11:04 PM.

I am looking at the wiring diagram and Houston has a problem. The wiring diagram they show with the controller is slightly different. I eliminated what I know I don't need to hook up. I know with brush controllers the power lock must be connected and I usually cut off the plug and twist the wires together and wrap a piece of electrical tape around it. The diagram they show says switch. (K). Not power lock and they only show one wire and plug. Not two wires and plugs. I also have no clue why there is a second power wire ?????

Please let me know if anyone is still posting.

Thanks.

LC. out.
 

Attachments

  • download.png
    download.png
    159.8 KB · Views: 358
  • IMG_0351.jpg
    IMG_0351.jpg
    243.9 KB · Views: 358
Status
Not open for further replies.
Back
Top