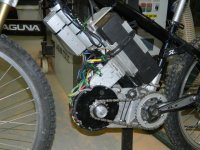
--Wayne's Mac Giant DH to mid drive--

Wayne,

I went through exactly the same issues with my little 350 MAC mid-drive. I put up with the intermittent problem for many hundreds of road miles. It finally failed on the stationary trainer so I could test the halls as you did. One was not shutting off, just as yours is. As crossbreak suggested, I finally bought a sensorless controller. It works fine as basically a pedelec, which is OK for the long distance road riding I do. If I was doing a lot of start/stop riding in town, or off-road riding, it would not do, as it acts just like a failed hall much of the time, if you try to start the motor without pedaling. I have a thousand miles on the sensorless controller now, and will never have to worry about halls again. I just wish someone would devise an external position sensor for these motors.
 
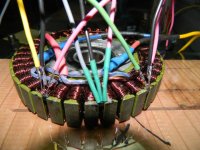
Thanks crossbreak. I have pulled the mag bowl free from the stator so I can now get at the hall sensor for replacement. The only way I can see to get the new hall sensor in place is to lift the green printed circuit board up and out of the way. So I have two issues here to do this the way I see it.

1. I need to remove all the epoxy holding the PCB in place and I am not sure how to do that without wrecking things. I know boiling water will break down epoxy but is this a good idea to pour boiling water on this pcb and the windings and the halls to free the pcb and halls from the motor windings and the the stator? If not what is the best way to get all the epoxy out of there with out wrecking the solder joints from power and ground leads etc?

2.I am thinking after all the epoxy is removed I can simply slide the pcb and the halls up and free from the stator. Unsolder the bad hall after all the halls are free from the stator and re solder the new one in place to the underside of the board and then slide the PCB with all the hall sensors all at once back into the stator. Then re epoxy. Does this sound like the route to go?

I think I can sort out the answer to the second question above on my own with trial and error but the first question about removing the epoxy I don't want to mess with unless I know I am doing it right in case I wreck something........thanks in advance.
 
hall.jpghall epoxy prep.jpgScreen Shot 2013-09-16 at 2.46.14 PM.jpg

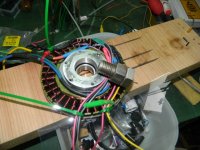
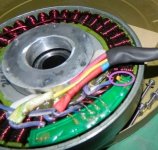
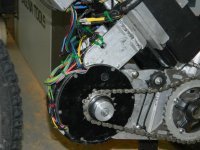
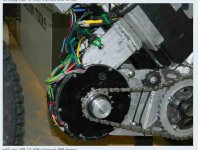
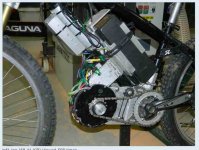
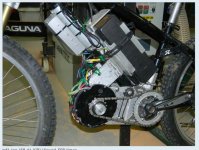
Chipping away at the hall sensor replacement. I have bypassed the printed circuit board so things look a bit cluttered. Traffic Jam for sure in there. Good thing this is a mid drive so lots of room to exit my wires out of the hub shell. Zip ties and weights are just for temporaraly holding wires down for my epoxy to hold things to the stator. I still have a question regarding the little yelo cap shown in the purple oval. I hope to bypass this little cap and not use it. Does anyone know if it is important to the working of the motor to have this thing wired in. As far as I can tell from the way the printed circuit board looks the cap is only going to one of the hall sensors anyways but I really dont get what this cap actually is doing for the running of the motor?
 
Warren said:
As crossbreak suggested, I finally bought a sensorless controller. It works fine as basically a pedelec [...] it would not do, as it acts just like a failed hall much of the time, if you try to start the motor without pedaling. ...

which model do you use?
 
tsf1.jpgtsf2.jpg
Looks like I am back in biz. Hall sensors were the problem. One of the halls was bad but I replaced all three while I was at it and now things are working well. I by passed the Printed Circuit Board which made for some extra wires coming out of the hub shell and they were already bulky as I went for thicker hall sensor wires. I actually needed an extra port hole you can see towards the bottom of the motor shell. I did not reconnect the little yelo cap that was wired into the original PCB and everything seems to be just fine. I have been told the little yelo cap is like a filter to help smooth out hall duties at higher revolutions but I am not sure about this. Regardless it is back working well. I will look into and think about some sealing around the openings in the side covers for my wires. The holes right now will let in too much moisture the way they are. I may use some of that liquid electrical tape or silicone or something.

Thanks for the trouble shooting input while I was trying to sort things out everyone.............wayne
 
Good work, Wayne. I now wish I had used solid plates as the mounts for the motor like your build. The right side of the motor has the derailleur to take up the chain-slack, and I am committed to using external sprockets on the rear (since they are proven to take more power than an IGH). Also, if a sprocket/chain breaks from a power spike, both are easy and cheap to replace.

For halfway between those two options: It would have also been 1/2-way easier and cheaper to have a top pivot and two sliding bolts on the bottom to adjust the chain slack.

The left side chain and freewheel only take the power of my old legs. Having a slight bend in the chain from an idler-wheel would not be any kind of a problem.
 
ATM your wire seem to be not well protected, anyway it is a good idea to keep hall and phase wires seperated to keep noise down on the sensor wires. Have no idea if this is really needed, but ATM I have some problems with electrical noise from the motor in my Arduino project, killed two electronic adapters already, it must be the noise from the phases that are close to the electronic wires. If you have the option to connect an ocilloscope to the hall wire, it is worth a try to look what noise level is on them. The existence of this little yellow capacitor must have a reason.

as the motor becomes hot, it will always blow out some air, since it expanded and sucks in some when it cools down. Same problem on all motors, even DD hubs that get rusty from the water/steam that enters the motor when air is sucked in when cooling down. There is no real solution for that problem. Coating the bare steel parts with lubricant is the only way to make them "water proof", so grease your gears well. Even if you seal the wire hole, the air/steam will enter through the bearings. Sealed mine with bathroom silicone which works fine yet, good choice IMO, since it survives high temp.

The idler setup was something i used as well when I made my first mount. works ok if easily adjustable, i like the cable ties. Maybe I will use it again in my next built, since the mount gets more simple this way. great stuff here, keep us up!
 
Screen Shot 2013-09-19 at 6.04.15 PM.jpgGood points crossbreak. The rats nest of wires is really not as bad as it looks in the photos as far as getting caught on anything while riding. As long as the mag bowl does not rub on the wires as they exit the hub shell I am happy. I most likely will not let this bike see much wet weather and I also keep it stored in a heated shop so I think I should be OK with moisture etc.

Interesting point about the hall wires and phase wires in regards to there location to each other. I did not know that. Regarding the little yelo cap, so far I can tell no difference at all in performance with it not being used. It pulls strong off the line and hums along real nice at top rpm's with out this cap but I only have 6 miles on it since the new hall sensor install so a bit early to say for sure.

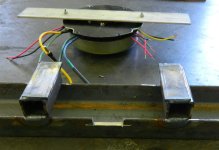
The photo attached shows a unit I made up for pulling the stator free from the mag bowl. It works pretty good and makes putting the stator back into the mag bowl easy and safe. I slide the motor assembly into the jig and then yank up on the aluminum flat bar attached to the motor side plate and stator. The jig holds the mag bowl in place so the stator came come free. Of course you clamp the jig to a work surface first. The reverse for putting things back together. Super quick and easy.
 
crossbreak said:
as the motor becomes hot, it will always blow out some air, since it expanded and sucks in some when it cools down. Same problem on all motors, even DD hubs that get rusty from the water/steam that enters the motor when air is sucked in when cooling down. There is no real solution for that problem. Coating the bare steel parts with lubricant is the only way to make them "water proof", so grease your gears well. Even if you seal the wire hole, the air/steam will enter through the bearings. Sealed mine with bathroom silicone which works fine yet, good choice IMO, since it survives high temp.


I'm reading that Rustoleum NeverWet will handle high temperatures (>450F). Sounds like a perfect solution for controllers, wiring, and hub motor internals.

I have a can of it and will treat this MAC I'm working on converting.
 
trip 05.jpgtrip 01.jpgtrip 03.jpgtrip 04.jpg

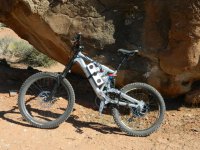
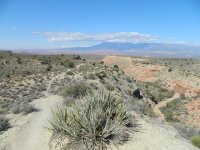
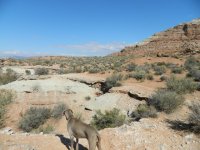
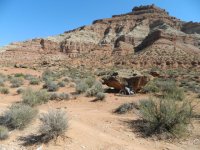
A few pictures from the road trip my wife and dog are on. Today is Hurricane Utah. The photos here are taken on the JEM trail just outside of Hurricane. Buffed single track with some very nice views. The trails here seem to go for ever. Very nice and I think the best is still yet to come as we are headed for Sedona in the next few days. I have rode the trails there before on my MC dual sport and also a cross country pedal bike so really looking forward to e-bike now some of the trails that I am familiar with. Nice red soil twisty single track in Sedona.

Both bikes are working good. Kathy is riding the mid drive as its 20lbs lighter. I have re set the max amps to 20 on the mid drive so it is not so jumpy for her on the trail and see is liking it.

I would recommend the trails out of Hurricane and the local bike shop is awesome. Really nice trail maps and helpful advise for what to ride. The LBS is called "Over the edge sports" and it also has good coffee. The mechanic can fix your bike or make you an expresso. Super high end bikes for rent as well.

Any e-riders out there in the Sedona Arizona area that want to ride this weekend shoot me a PM.
 
I've never heard of that trail in Hurricane. I will have to check it out next time I am heading to St. George. There are some good trail down there also.

I don't see the motor at all in your first pic, unless its a small hub on the rear. Is that your mid drive?
 
I used to live in St George for 6 years a while back. Beautiful winters, horribly hot summers (near Las Vegas). If anyone is passing through that area, I highly recommend talking the 20 minute drive through Snow Canyon, very beautiful. Bryce Canyon Park is about an hour north (pleasant summers there, higher altitude), gorgeous of course, very famous, but it takes a full day to drive through. Check Google-Images to see samples of Snow Canyon (top pic) and Bryce Canyon (bottom pic).

IMG_0688.JPG


Bryce_Canyon1.jpg
 
Yes Dirkdigger the motor is a little mac hub motor in the wheel for the Giant at present. The mid drive is on the smaller bike my wife is ridding. The title of this thread is a bit confusing as the two bikes are kind of works in progress. I am still not sure if I will convert the Giant to a mid drive at this point as it is so nice to have the simplicity and the quiet of the hub but I keep changing my mind on this. Its a lot of work to do a mid drive and I think if I was to do another I would want to encase the battery and the motor into a sub structure that is welded right to the frame and becomes part of the frame like many others have done and that is a chop the frame project that I would most likely choose a different frame for.
 
Wayne, glad you're up and running again! I'm about to start building on my Walmart fat bike that will be quite the climber as well when done! I'm planning on doing it just like you did here so it should go well! I'm using a 6t Mac though to hopefully get a bit more torque once its geared down. We shall see! I'm waiting on Paul to send the replacement gears/clutch since I'm using an older silver Mac that I previously broke the clutch on.
 
The fat bike sounds like a nice project Whiplash. I have yet to ride one of these bikes but the idea of having the big tires and being able to run them soft sounds appealing for slow putzing around the trails. They look real cool and if you are working with a rigid frame it sure simplifies the build and the maintenance issues down the road. Good luck with that project and I look forward to following your progress on it. Its winter time here and wet so my bikes are sitting in the garage, but I continue to enjoy the thought of the next ride.....or build.
 
Yeah its even a bit cold here in the desert for riding without wearing heavy gloves etc. Not my cup of tea!
 
2.jpg1.jpgScreen Shot 2014-04-08 at 10.32.44 AM.jpgView attachment 3Screen Shot 2014-04-08 at 10.31.38 AM.jpgIts been a while since I have posted in this thread. During the road trip described above both my bikes got wet from the campsite sprinkler system in the night. Bummer, first the Giants battery died and early death a few weeks later and then months later the mid drive battery also packed it it. The last ride I took on it with the new hall sensors I installed everything was working really well. Like a say both the batterys are toast and have been recycled. I bought one new replacement battery for the Giant but cant afford to replace the mid drives battery right now.

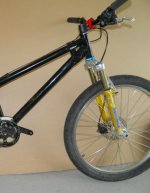
Long story short the "Deep Cove Stiffee Mid Drive " is for sale. I will want to keep the controller and CA to have a spare and maybe put on a different bike one day when I can afford a new battery. This bike has a cool set of Bomber forks that had a limited run of only 100 made I was told( not sure if this is good or bad). I bought the bike originally from a friend of Thomas Vanderham and these forks were on one of Thomas's play bikes for a while. Only 4" of travel but very skookem. The Frame is a Deep Cove Stiffee and I have had 3 of these frames over the years and are very well made. It is a small size but longish top tube so fits most folks with an appropriate stem and seat tube. Hayes hydros but small rotors 6". I use the crossbreak style left side motor assist to the switched around crank assembly.

What the bike will not come with is ....

no battery
no controller
no CA
no back wheel as I am using the rear wheel on a second non electric bike.


Even though the title of this thread is a bit misleading as I never did convert the Giant to a midrive and I have posted some updated photo's of the Giant as it has evolved the building and details of this mid drive are clearly spelled out on this thread if anyone is interested in the purchase of this bike. The motor is mounted well and has impressed me for a low power mid drive. As many know a mid drive is not for people who don't like to tinker and adjust things.

I thought I would post this here first as I am not sure what to ask for it. I will post it in the for sale section after a bit. What do you folks think I should ask for it. I was thinking around $700 Canadian but not sure?

-EDIT.....FOR SALE PRICE $600.00 Canadian-

A few shots showing the bike just before its battery demise are attached along with an earlier picture of its front forks.
 
sorry not for sale after all.I will get a replacement battery for it soon I hope
 
Screen Shot 2014-08-30 at 6.31.54 PM.jpgScreen Shot 2014-08-30 at 6.31.39 PM.jpgA few things have happened in the last while that may actually make the title of this thread come to fruition. The hard tail mac to mid drive has been sold to Luc in Montreal so the stiffee is gone and I may just convert the DH to a mid drive after all later this winter.

Just the Stiffee frame and its motor c/w its mounting and BB & crank assembly was sold in the transaction. I look forward to Luc's build thread he will start up when he gets the cash and time to restore this bike to motion.

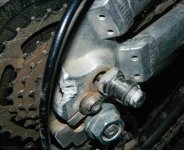
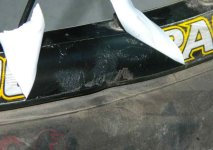
I had a bit of a wipe out on the trail last week on the Giant DH and I have done some damage, so its a good time to take things apart and take stock on what to do next. It was an awesome ride at Whistler BC covering the trails ....Rockwork Orange, and the Green Monster. Great trails but had a nasty fall and broke my collar bone and beat up the bike a bit. Flat front tire, broken fender and wrecked the rear rim. It was a long walk out, and it was good my son was there to carry my 85lb tank out of the trial while I pushed his non electric out. Pictures of some of the damage attached. The bent up BOB nuts for my trailer mounts show the impact of the crash. It was a cart wheeling time for the bike fore sure. Good thing the trailer was not in tow.
I have ordered a new battery pack from cell man to replace the hard luck from the water damage done earlier this year. Looking forward to this new INR18650-20R NCA type cell, 10C rated & will be a 50v system with a 9.5ah. This pack is ear marked for the Giant DH and I figure it will make a nice package with the LR mid drive kit I hope to order over the winter . As I will have two battery packs when my new one arrives and also the old Mac 10t from the Giant DH and I plan to put this Mac 10t into a new rim and then place it into my wife's Giant AC1 xc bike. I have all the old parts from the stiffee mid drive project so controller and CA are all in the spare parts pile for this cross country bike project.

At this point I will be stripping down the DH for its repair and future mid drive plans and then tinker with the Mac 10t into a lighter cross country bike the AC1. This will give me some time to save some money for the LR kit and get the spare parts up and running on a lighter bike to see how my wife and I like it. Its an old school frame for sure but its a pretty nice little bike that has caused me little grief over the years so why not.
 
hope you get well soon again... nice to hear about your plans.

How about a left side only drive this time? iceman made a new shaft for his MAC and i finally got hands on this motor as well, i'm surprised how low no load consumption of the upgrade version is..making up-speeding even more attractive. Many problems we had in the first days of hubmotor to middrive conversion are solved now...so what about

a) a left side only drive
b) a custom shaft for a more compact dual freewheel sprocket
c) an additional bearing between stator and shaft to suppress any rubbing noises/misalignment at the root
d) a mount that fastens on both sides of the BB using 83mm Hollowtech2 cranks
e) a mount that includes the controller to get rid of cable spaghetti

this time? Any plans into that direction?

But first...get well soon!
 
All good ideas there crossbreak but I think for the Giant I will go with the LR kit. I will then be able to mount my stock 26" rear wheel back on this bike which will be better I think. According to the specs on the new battery pack that I am ordering it is slightly shorter in length than the 14.3ah pack I have now. If this is the case I may modify the aluminum battery pack holder to fit the pack better and also relocate the controller up on to the front forks. First order of business is moving some of the old parts over to my Giant XC bike and get that up and running.

Yes I have been following Izeman's efforts and his bike is looking good.
 
Back
Top